Note
Access to this page requires authorization. You can try signing in or changing directories.
Access to this page requires authorization. You can try changing directories.
APPLIES TO: All API Management tiers
In API Management, you can add a GraphQL API in one of two models: pass-through to an existing GraphQL endpoint, or import a GraphQL schema and create a synthetic GraphQL API with custom field resolvers. For more information, see the GraphQL overview.
In this article, you'll:
- Import a GraphQL schema to your Azure API Management instance.
- Set up a resolver for a GraphQL query using an existing HTTP endpoint.
- Test your GraphQL API.
If you want to expose an existing GraphQL endpoint as an API, see Import a GraphQL API.
Prerequisites
- An existing API Management instance. Create one if you haven't already.
- A valid GraphQL schema file with the
.graphqlextension. - A backend GraphQL endpoint is optional for this scenario.
Go to your API Management instance
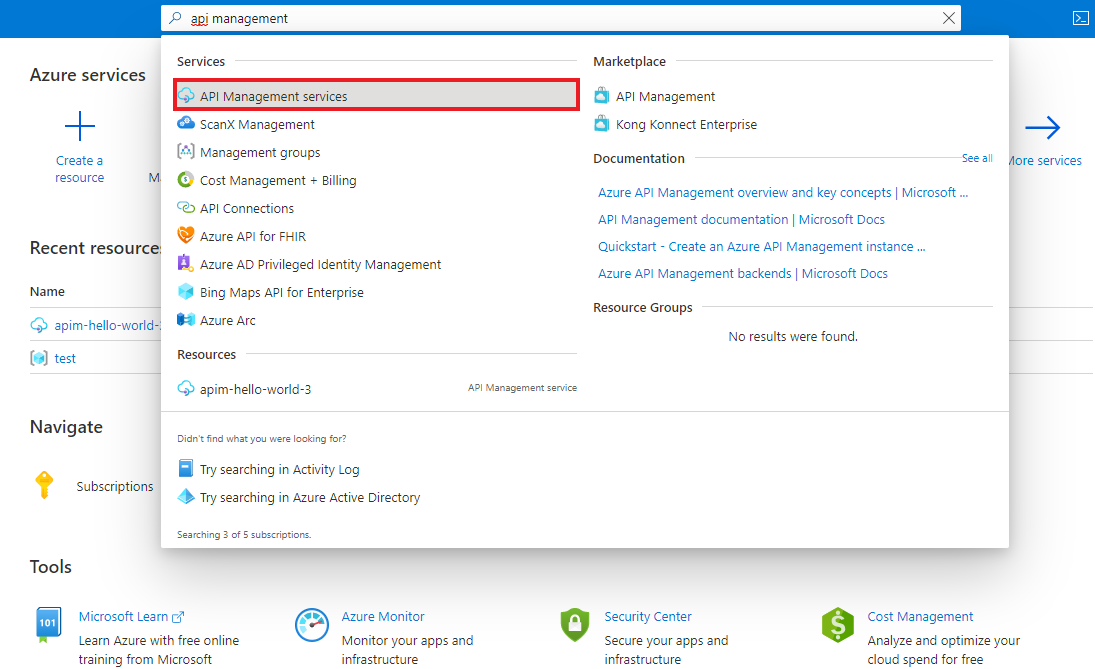
In the Azure portal, search for and select API Management services:
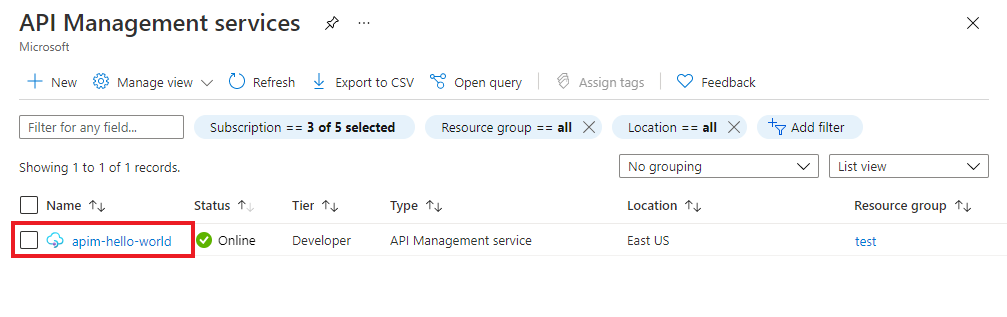
On the API Management services page, select your API Management instance:


Add a GraphQL schema
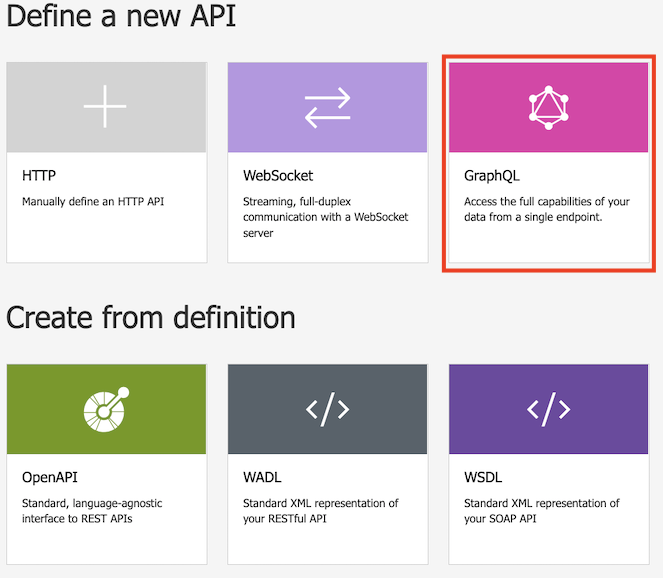
In the left pane, under APIs, select APIs.
Under Define a new API, select the GraphQL tile.
In the dialog box, select Full, and then enter values in the required fields, as described in the following table.
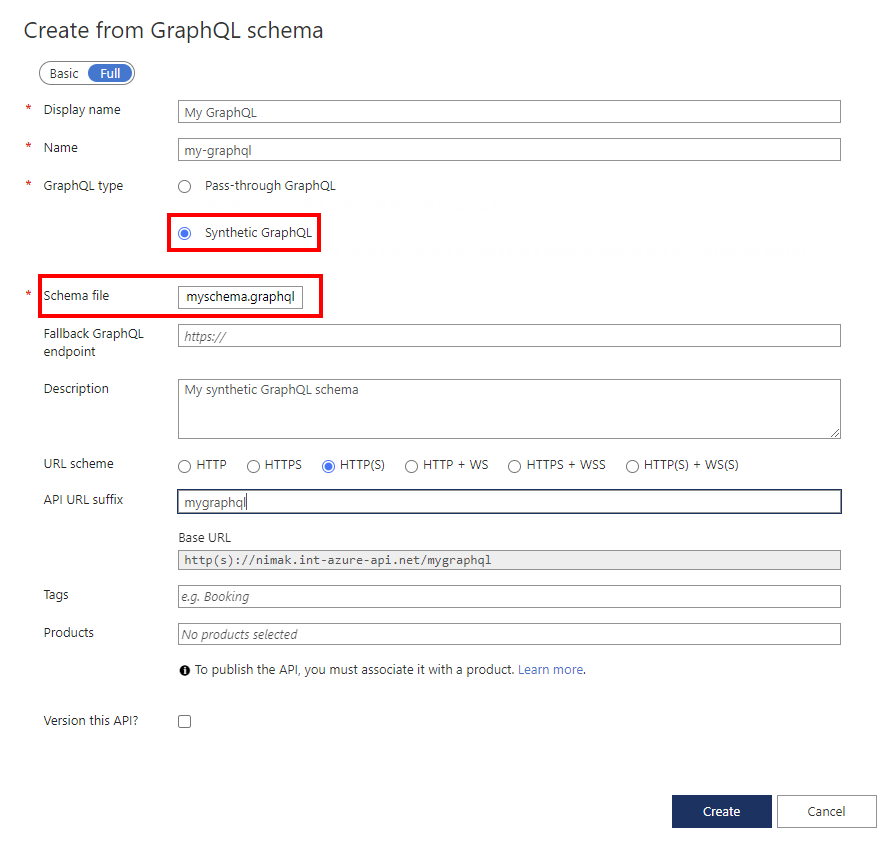
Value Description Display name The name by which your GraphQL API will be displayed. Name The raw name of the GraphQL API. Automatically populates as you type the display name. GraphQL type Select Synthetic GraphQL to import from a GraphQL schema file. Fallback GraphQL endpoint Optionally enter a URL with a GraphQL API endpoint name. API Management passes GraphQL queries to this endpoint when a custom resolver isn't set for a field. Description Add a description of your API. URL scheme Select a scheme based on your GraphQL endpoint. Select one of the options that includes a WebSocket scheme (WS or WSS) if your GraphQL API includes the subscription type. The default selection is HTTP(S). API URL suffix Add a URL suffix to identify the specific API in the API Management instance. Must be unique in the API Management instance. Base URL Uneditable field displaying your API base URL. Tags Optionally associate your GraphQL API with new or existing tags. Products Associate your GraphQL API with a product to publish it. Version this API? Select the checkbox to apply a versioning scheme to your GraphQL API. Select Create.
After the API is created, review or modify the schema on the Schema tab.

Configure a resolver
Configure a resolver to map a field in the schema to an existing HTTP endpoint. High-level steps are provided here. For details, see Configure a GraphQL resolver.
Suppose you imported the following basic GraphQL schema and want to set up a resolver for the users query.
type Query {
    users: [User]
}

type User {
    id: String!
    name: String!
}
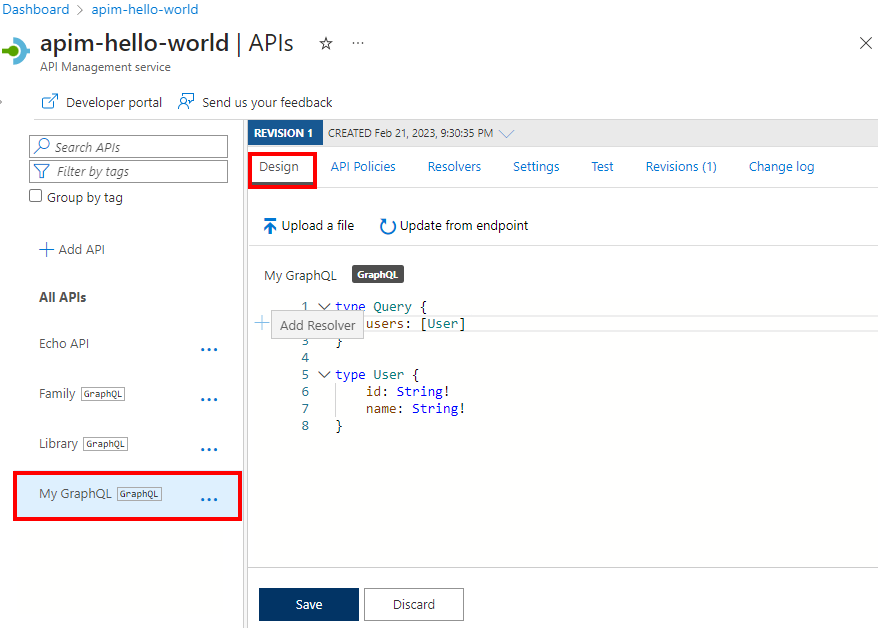
In the left pane, under APIs, select APIs.
Select your GraphQL API.
On the Schema tab, review the schema for a field in an object type in which you want to configure a resolver.
Select a field, and then hover the pointer in the left margin.
Select Add resolver.
In the Create resolver pane:
- Update the Name property if you want to, optionally enter a Description, and confirm or update the Type and Field selections.
- In Data source, select HTTP API.
In the Resolver policy editor, update the
<http-data-source>element with child elements for your scenario. For example, the following resolver retrieves theusersfield by making aGETcall to an existing HTTP data source.<http-data-source> <http-request> <set-method>GET</set-method> <set-url>https://myapi.contoso.com/users</set-url> </http-request> </http-data-source>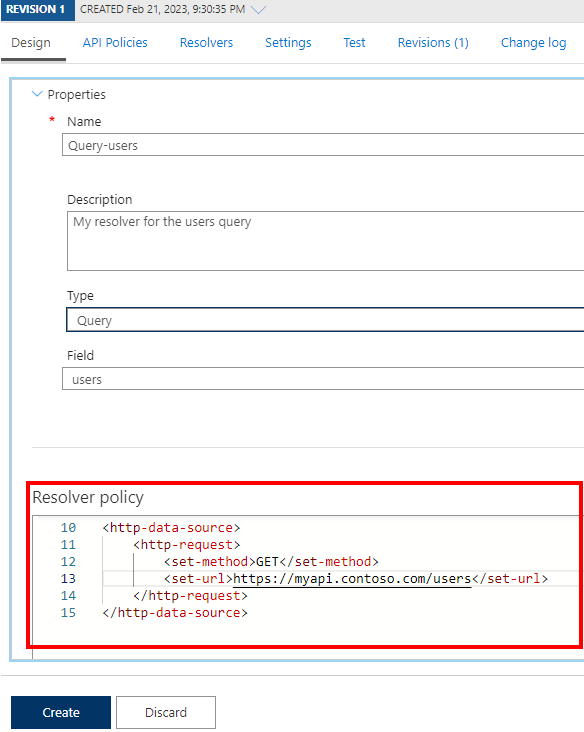
Select Create.
To resolve data for another field in the schema, repeat the preceding steps to create another resolver.


Tip
As you edit a resolver policy, select Run Test to check the output from the data source, which you can validate against the schema. If errors occur, the response includes troubleshooting information.
Test your GraphQL API
Go to your API Management instance.
In the left pane, in the APIs section, select APIs.
Under All APIs, select your GraphQL API.
Select the Test tab to access the test console.
Under Headers:
- Select the header from the Name menu.
- Enter the value in the Value box.
- Add more headers by selecting Add header.
- Delete headers by using the recycle bin button.
If you've added a product to your GraphQL API, add a product scope under Apply product scope.
In Query editor, do one of the following:
Select at least one field or subfield from the list in the menu to the left of the editor. The fields and subfields you select appear in the query editor.
Start typing in the query editor to compose a query.
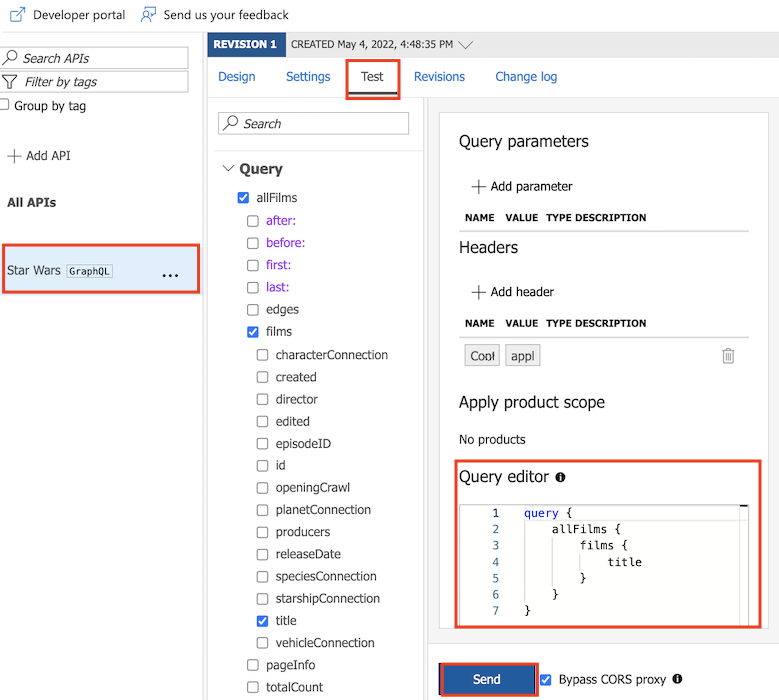
Under Query variables, add variables to reuse the same query or mutation and pass different values.
Select Send.
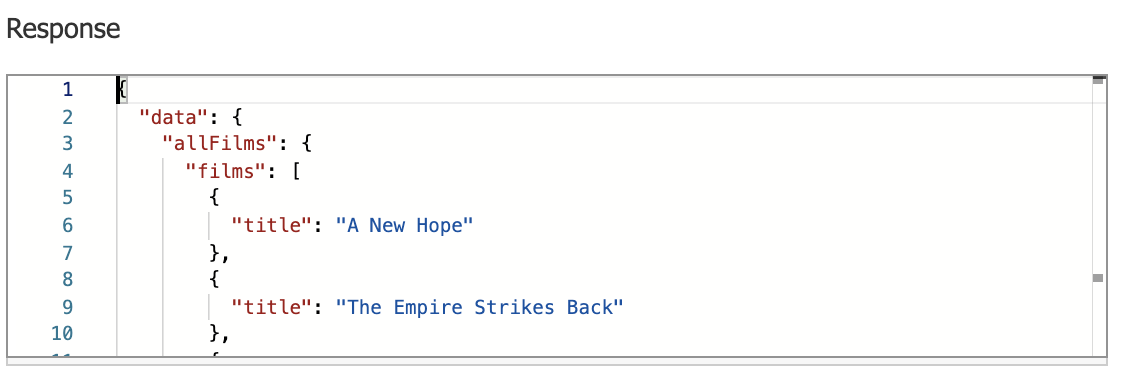
View the Response.
Repeat the preceding steps to test different payloads.
When you're done testing, exit the test console.

Secure your GraphQL API
Secure your GraphQL API by applying both existing authentication and authorization policies and a GraphQL validation policy to protect against GraphQL-specific attacks.
Related content
- API import limitations
- Import an OpenAPI specification
- Import a SOAP API
- Import a SOAP API and convert it to REST
- Import an App Service API
- Import a WebSocket API
- Import a GraphQL API
- Import a function app API
- Import a logic app API
- Import a Service Fabric service
- Import SAP OData metadata
- Edit an API