Note
Access to this page requires authorization. You can try signing in or changing directories.
Access to this page requires authorization. You can try changing directories.
Azure Functions 允许在 Linux 上托管默认 Azure 应用服务容器中的函数。 本文介绍如何使用 Azure 门户 创建在 应用服务计划中运行的 Linux 托管的函数应用。 还可以 自带自定义容器。
注释
仅 JavaScript、PowerShell 和 C# 脚本函数支持门户内编辑。 只有在消耗计划中运行时,才支持 Python 门户内编辑。 若要创建支持门户内编辑的 C# 脚本应用,必须选择支持进程内模型的运行时版本。
如果可能,应在本地开发函数。
若要详细了解在 Azure 门户中编辑函数代码的限制,请参阅 Azure 门户中的开发限制。
如果没有 Azure 订阅,可在开始前创建一个试用帐户。
登录到 Azure
使用 Azure 帐户登录到 Azure 门户。
创建函数应用
必须有一个函数应用才能在 Linux 上托管函数的执行。 函数应用提供用于执行函数代码的环境。 它允许将函数分组为逻辑单元,以便更轻松地管理、部署、缩放和共享资源。 本文介绍如何在创建函数应用时创建应用服务计划。
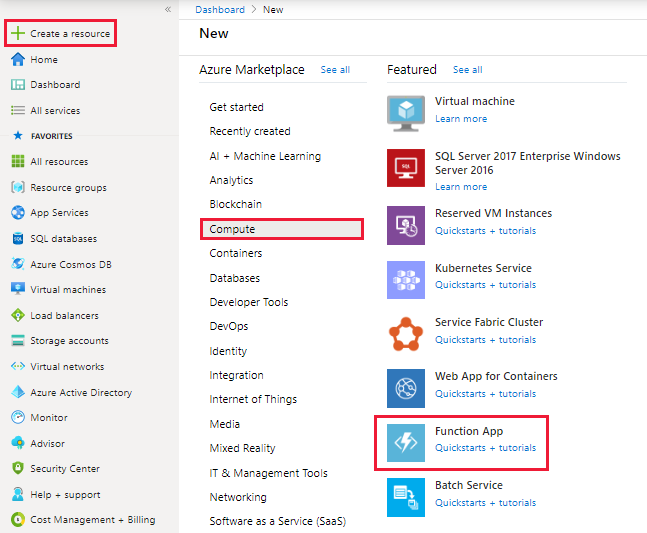
在 Azure 门户菜单上或在门户主页中,选择“创建资源”。
在“新建”页面上,选择“计算”“函数应用”>。
在 “基本信息 ”页上,使用下表中指定的函数应用设置。
设置 建议值 Description Subscription 你的订阅 要在其下创建此新函数应用的订阅。 资源组 myResourceGroup 要在其中创建函数应用的新资源组的名称。 函数应用名称 全局唯一名称 用于标识您的新函数应用程序的名称。 有效字符为 a-z(不区分大小写)、0-9和-。发布 代码 (默认值) 用于发布代码文件或 Docker 容器的选项。 运行时堆栈 首选语言 选择支持你喜欢的函数编程语言的运行时。 为 C# 和 F# 函数选择 .NET Core 。 版本 版本号 选择已安装的运行时的版本。 Region 首选区域 选择离你近或离函数访问的其他服务近的区域。 
选择“下一步: 托管”。 在 “托管 ”页上,输入以下设置。
设置 建议值 Description 存储帐户 全局唯一名称 创建函数应用使用的存储帐户。 存储帐户名称必须为 3 到 24 个字符,并且只能包含数字和小写字母。 也可使用现有帐户,但该帐户必须符合存储帐户要求。 操作系统 Linux 系统会根据你的运行时堆栈选择为你预先选择一个操作系统,但你可以根据需要更改该设置。 计划 消耗(无服务器) 定义如何将资源分配给函数应用的托管计划。 在默认的消耗计划中,根据函数需求动态添加资源。 在此无服务器托管中,只需为函数运行时间付费。 按应用服务计划运行时,必须管理函数应用的扩展。 
选择 “下一步:监视”。 在“监视”页上,输入以下设置。
设置 建议值 Description Application Insights 是 (默认值) 在最近的受支持的区域中,创建一个具有相同应用名称的 Application Insights 资源。 通过展开此设置或选择 “新建”,可以更改 Application Insights 名称,或选择要在其中存储数据的 Azure 地理位置 中的其他区域。 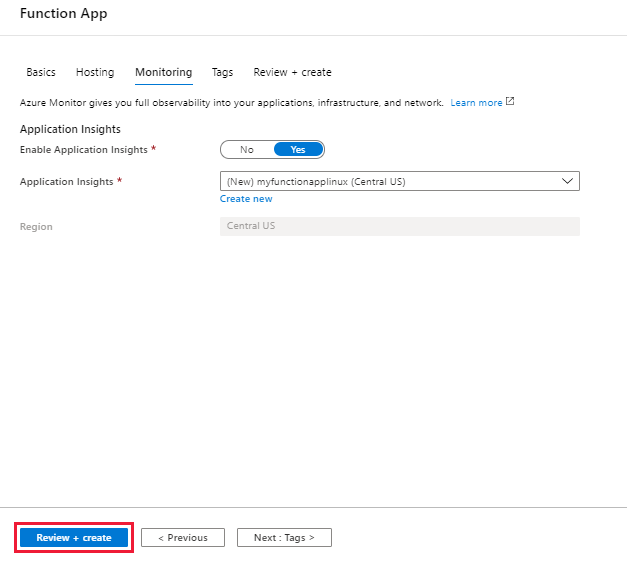
选择“查看 + 创建”,以便查看应用配置选择。
在“查看 + 创建”页上查看设置,然后选择“创建”来预配并部署函数应用 。
选择门户右上角的“通知”图标,留意是否显示了“部署成功”消息。
选择转到资源以查看您的新函数应用程序。 还可选择“固定到仪表板”。 固定可以更轻松地从仪表板返回此函数应用资源。
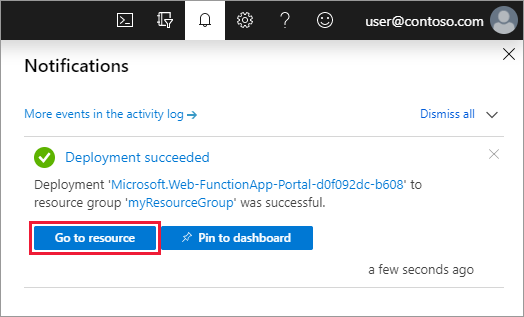 部署通知
部署通知即使在函数应用可用后,也可能需要几分钟才能完全初始化。
接下来,在新的 Function App 中创建一个函数。
创建 HTTP 触发器函数
本部分介绍如何在门户中的新函数应用中创建函数。
注释
门户开发体验可用于试用 Azure Functions。 对于大多数方案,请考虑在本地开发函数,并使用 Visual Studio Code 或 Azure Functions Core Tools 将项目发布到函数应用。
从“Functions”窗口的左侧菜单中选择“Functions”,然后从顶部菜单中选择“添加”。
在“ 新建函数 ”窗口中,选择 “Http 触发器”。
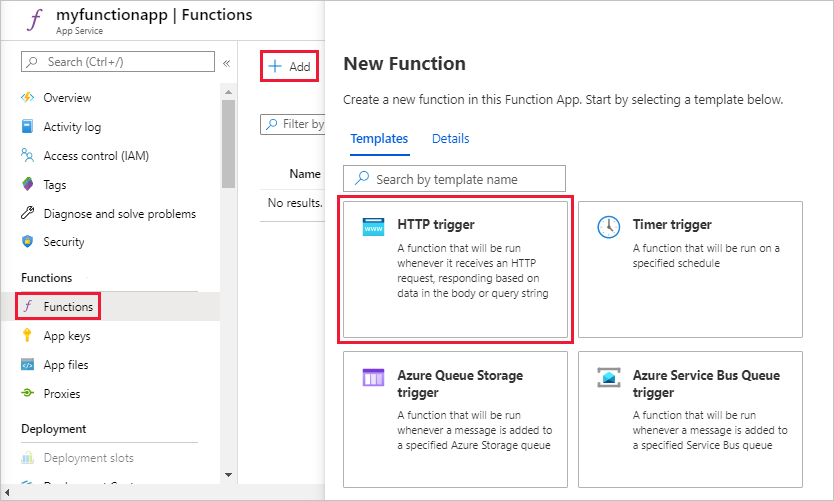
在 “新建函数 ”窗口中,接受 新函数的默认名称,或输入新名称。
从“授权”级别下拉列表中选择“匿名”,然后选择“创建函数”。
Azure 会创建该 HTTP 触发器函数。 现在,可以通过发送 HTTP 请求来运行新函数了。
测试函数
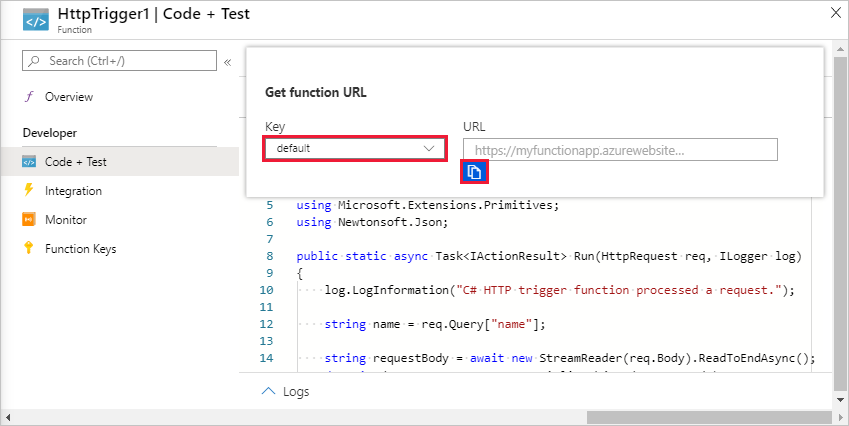
在新的 HTTP 触发器函数中,从左侧菜单中选择 “代码 + 测试 ”,然后从顶部菜单中选择“ 获取函数 URL ”。

在“ 获取函数 URL ”对话框中,从下拉列表中选择 默认值 ,然后选择“ 复制到剪贴板 ”图标。
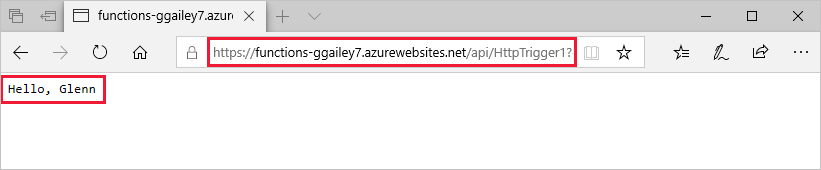
将函数 URL 粘贴到浏览器的地址栏中。 将查询字符串值
?name=<your_name>添加到此 URL 的末尾,然后按 Enter 运行请求。以下示例演示浏览器中的响应:
请求 URL 包含一个密钥,默认情况下,需要通过 HTTP 访问函数。
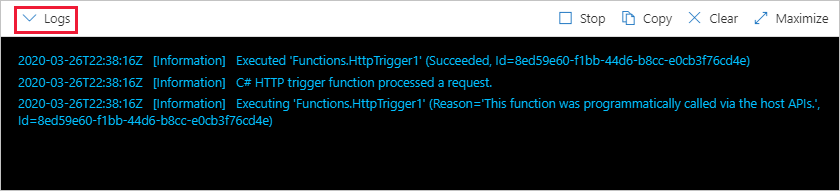
运行函数时,会在日志中写入跟踪信息。 若要查看跟踪输出,请返回到门户中的“代码 + 测试”页,并展开页面底部的“日志”箭头。
清理资源
本教程系列中的其他快速入门教程是在本文的基础上制作的。 如果您计划使用接下来的快速入门、教程或您在本快速入门中创建的任何服务,请不要清理这些资源。
Azure 中的资源是指函数应用、函数、存储帐户等。 这些资源可以组合到资源组中,删除该组即可删除组中的所有内容。
你已创建完成这些快速入门所需的资源。 这些资源可能需要付费,具体取决于帐户状态和服务定价。 如果不再需要这些资源,请参阅下面介绍的资源删除方法:
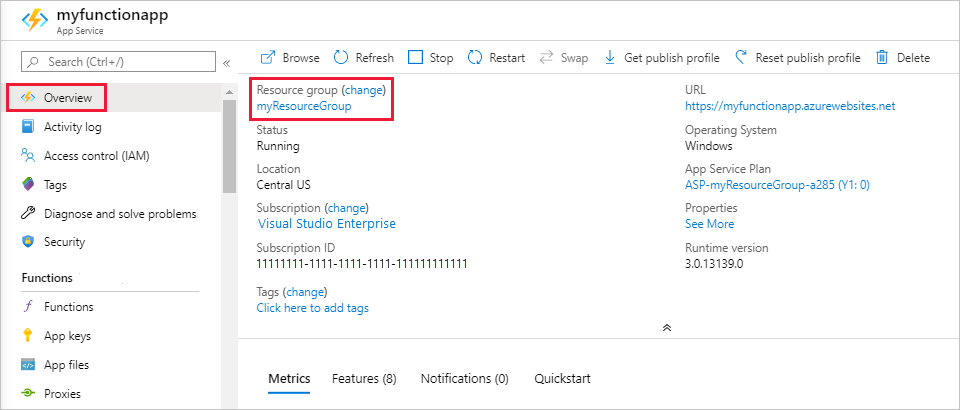
在 Azure 门户中转到“资源组”页。
若要从函数应用页转到该页,请选择“概览”选项卡,然后选择“资源组”下的链接。
若要从仪表板转到该页,请选择“资源组”,然后选择用于本文的资源组。
在“资源组”页中查看所包括的资源的列表,然后验证这些资源是否是要删除的。
选择“删除资源组”,然后按说明操作。
删除操作可能需要几分钟。 完成后会显示一个通知,持续数秒。 也可以选择页面顶部的钟形图标来查看通知。
后续步骤
你已使用简单的 HTTP 触发器函数创建了函数应用。
现在,你已创建了第一个函数,让我们向该函数添加输出绑定,以便将消息写入存储队列。
有关详细信息,请参阅 Azure Functions HTTP 绑定。