Note
Access to this page requires authorization. You can try signing in or changing directories.
Access to this page requires authorization. You can try changing directories.
Work item integration lets you create issues, bugs, or tasks in GitHub directly from Application Insights experiences. Templates embed Kusto Query Language (KQL) queries and workbook content so new work items include relevant telemetry.
Work item templates are Azure Monitor Workbooks saved as the Microsoft.Insights/workbooks resource type. Author and automate these workbooks like any other workbook.
Work item integration includes the following features:
- Indicate whether a template targets GitHub by using repository icons.
- Support multiple configurations for any number of repositories or work items.
- Deploy by using Azure Resource Manager (ARM) templates.
- Include prebuilt and customizable Kusto Query Language (KQL) queries that add Application Insights data to work items.
- Provide customizable workbook templates.
Permissions
To create or edit a work item template, use an Azure role with Microsoft.Insights/workbooks/write, such as Workbook Contributor or Monitoring Contributor.
To create the work item itself, you need sufficient permission in the target system (GitHub). The item is created in that system after the portal opens a new tab.
Create and configure a work item template
- Open your Application Insights resource. Under Configure, open Work Items, and then select Create a new template.
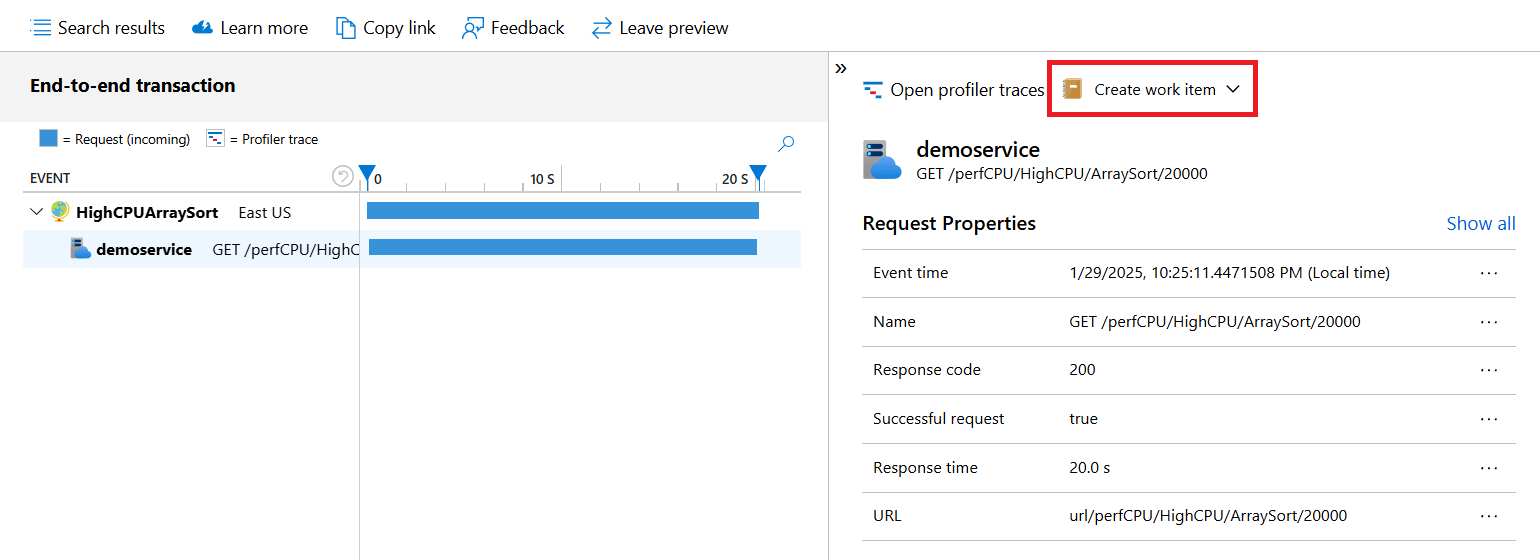
- Or, start from End-to-end transaction details when no template exists. Select an event, select Create a work item, and then select Start with a workbook template.
- After you select Create a new template, choose your tracking system, name the workbook, link to your tracking system, and choose a region for template storage. Enter the default repository URL, such as
https://github.com/myusername/reponameorhttps://dev.azure.com/{org}/{project}. The selected region is the Azure location of the saved workbook resource. It doesn't change where Application Insights data is stored or queried. - Set default work item properties in the template. Properties include assignee, iteration path, and projects. Available properties depend on your tracking system.
Create work items
Use a template from End-to-end transaction details, which is available from Performance, Failures, Availability, and other tabs.
- Open End-to-end transaction details, select an event, and then choose Create work item.
- Pick a template. If no template exists, select Start with a workbook template to create one.
- Complete the New Work Item pane. Application Insights prepopulates contextual data from the selected event, for example exception details, operation name, and a link back to the transaction. Add any extra information you need, then save.
- A new browser tab opens in your tracking system. In GitHub, create an issue in your repository. The work item includes the context from Application Insights.
Edit a template
- Open Work Items under Configure, and then select the pencil icon next to the workbook to update.
- Select Edit in the top toolbar.
- To standardize workbook deployment across environments, use Azure Resource Manager (ARM) templates. Create multiple configurations for different scenarios.
Troubleshooting
See the dedicated troubleshooting article.
