Note
Access to this page requires authorization. You can try signing in or changing directories.
Access to this page requires authorization. You can try changing directories.
You can use Visual Studio Code with the Bicep extension to deploy a Bicep file. The Bicep extension provides two options for deploying Bicep files in Visual Studio Code - the Deployment Pane and the Deploy Command. The fast feedback, validate, and what-if capabilities of the Deployment Pane are useful for quick iteration while authoring, whereas the Deploy Command is useful for a fire-and-forget deployment experience.
Deployment Pane
The deployment pane provides an interactive UI in VS Code that can access your Azure account to perform validate, deploy, and what-if operations, providing instant feedback without leaving the editor.
To use the deployment pane:
Open a
.bicepor.bicepparamfile in VS Code.There are two ways to open the deployment pane:
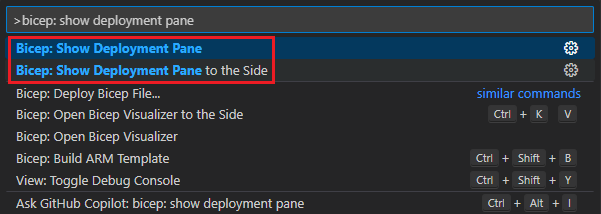
Select the show deployment pane button on the upper right corner as shown in the following screenshot:

By default, VS Code opens the deployment pane on the side. To open it in a new tab, hold Alt while selecting the button.
Another way to open the deployment pane is through the command palette. Press Ctrl+Shift+P, then select either Show Deployment Pane or Show Deployment Pane to the Side.
The deployment pane appears as shown in the following screenshot:

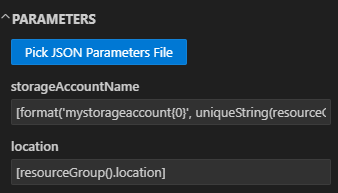
Select Pick Scope to define the deployment scope. After authentication, you're able to select the subscription and the resource group of your desired deployment.
If the deployment pane was opened for a .bicep file, fill out your desired parameter values, or select Pick JSON Parameters File to select a JSON parameter file.
Select your desired action - Deploy, Validate, or What-if.
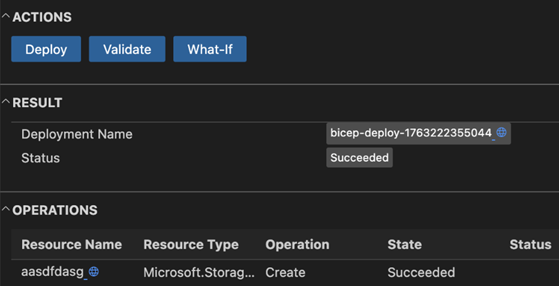
Deploy: deploys to Azure, and the result including the defined output are shown in the deployment pane.
The following screenshot shows a successful deployment. You can select the blue globe icon to view the deployment or individual resources in the Azure portal.
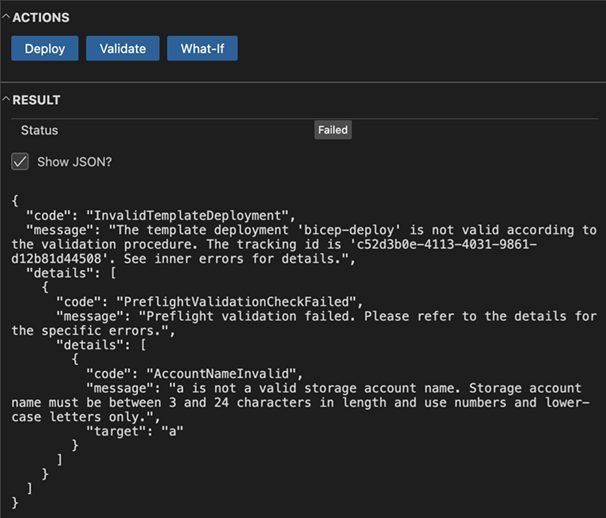
Validate: performs a runtime validation of the Bicep file against Azure, ensuring that the resources, parameters, and policies are correct in the actual deployment environment. Unlike a linter, which only performs offline validation, this validation interacts with Azure to detect potential deployment issues.
The following screenshot shows an example of a validation failure.
What-if: executes a What-If analysis directly from the deployment pane. The pane displays the results, showing any planned changes. This performs the same function as the what-if command in Azure PowerShell and Azure CLI. For more information, see Bicep deployment what-if operation
You can keep the deployment pane open while you iterate on changes to your .bicep or .bicepparam files. If you save and rerun one of the above actions, the actions run against your updated files.
Deploy Command
You can deploy to any scope. This article shows how to deploy to a resource group.
There are three ways you can find the command from an open Bicep file in Visual Studio Code:
Right-click the Bicep file name from the Explorer pane instead of the one under OPEN EDITORS:
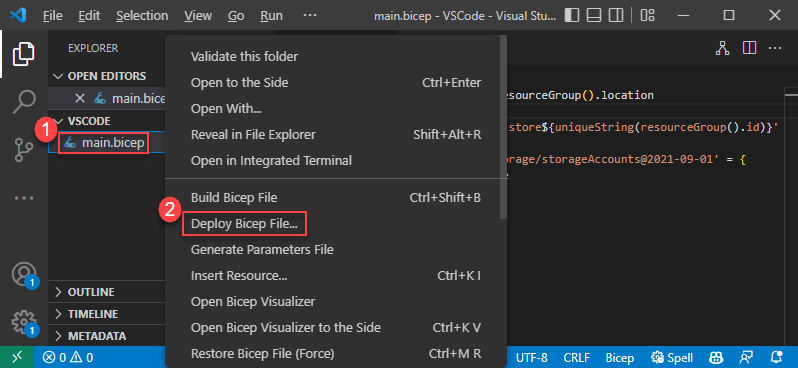
Right-click anywhere inside a Bicep file, and then select Deploy Bicep File.
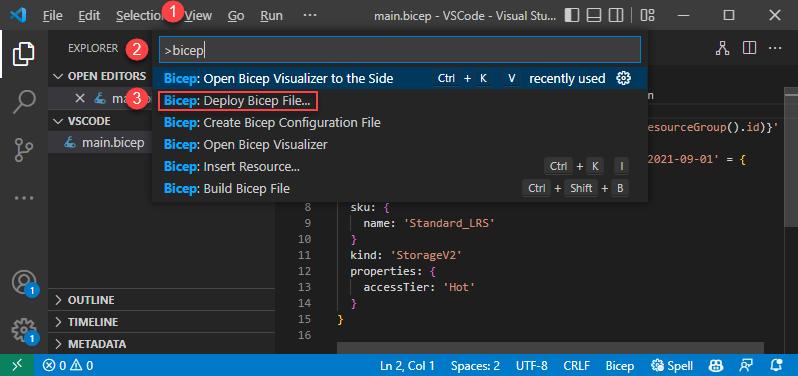
Select Command Palette from the View menu, and then select Bicep: Deploy Bicep File.
After you select the command, follow the wizard to enter the values:
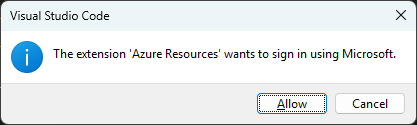
If you're not signed in, follow the instructions provided in the prompt to complete the sign-in process.
Note
The Bicep deploy command in Visual Studio Code uses the new built-in authentication API for managing authentication. It doesn't use cloud profiles from bicepconfig.json. To sign in to a custom cloud, select Manage > Settings > Extension > Microsoft accounts > Microsoft Sovereign Cloud. At this time, multiple signed-in accounts aren't supported.
Select or create a resource group.
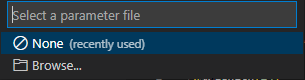
Select a parameters file or None to enter values for parameters:
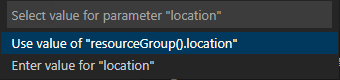
If you choose None, enter the values for parameters:
After you enter the values, you have the option to create a parameters file from values used in this deployment:
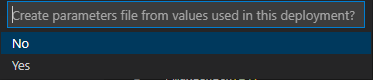
If you select Yes, a parameters file named <Bicep-file-name>.parameters.json is created in the same folder.
See Create Bicep files with Visual Studio Code for more information about Visual Studio Code commands and how to use Visual Studio Code to create Bicep files.
Next steps
- For more information about deployment commands, see Deploy Bicep files with the Azure CLI and Azure PowerShell.
- To preview changes before deploying a Bicep file, see Bicep deployment what-if operation.