Manage Azure Stack HCI gateway connections
Applies to: Azure Stack HCI, versions 22H2; Windows Server 2022, Windows Server 2019, Windows Server 2016
This article describes how to create, delete, and update gateway connections using Windows Admin Center after you deploy Software Defined Networking (SDN). Gateways are used for routing network traffic between a virtual network and another network, either local or remote. There are three types of gateway connections – Internet Protocol Security (IPsec), Generic Routing Encapsulation (GRE), and Layer 3 (L3).
Note
You need to deploy SDN gateways before you can create a gateway connection. Additionally, you need to deploy Software Load Balancers (SLBs) before you can create an IPsec connection.
For more information on gateways for SDN, see What is RAS Gateway for SDN. For more information on SDN deployment, see Deploy an SDN infrastructure using SDN Express.
Create a new IPsec gateway connection
IPsec gateway connections are used to provide secure site-to-site encrypted connections between SDN virtual networks and external customer networks over the internet.
- In Windows Admin Center, under All Connections, select the cluster you want to create the gateway connection on.
- Under Tools, scroll down to Networking, and select Gateway Connections.
- Under Gateway Connections, select the Inventory tab, then select New.
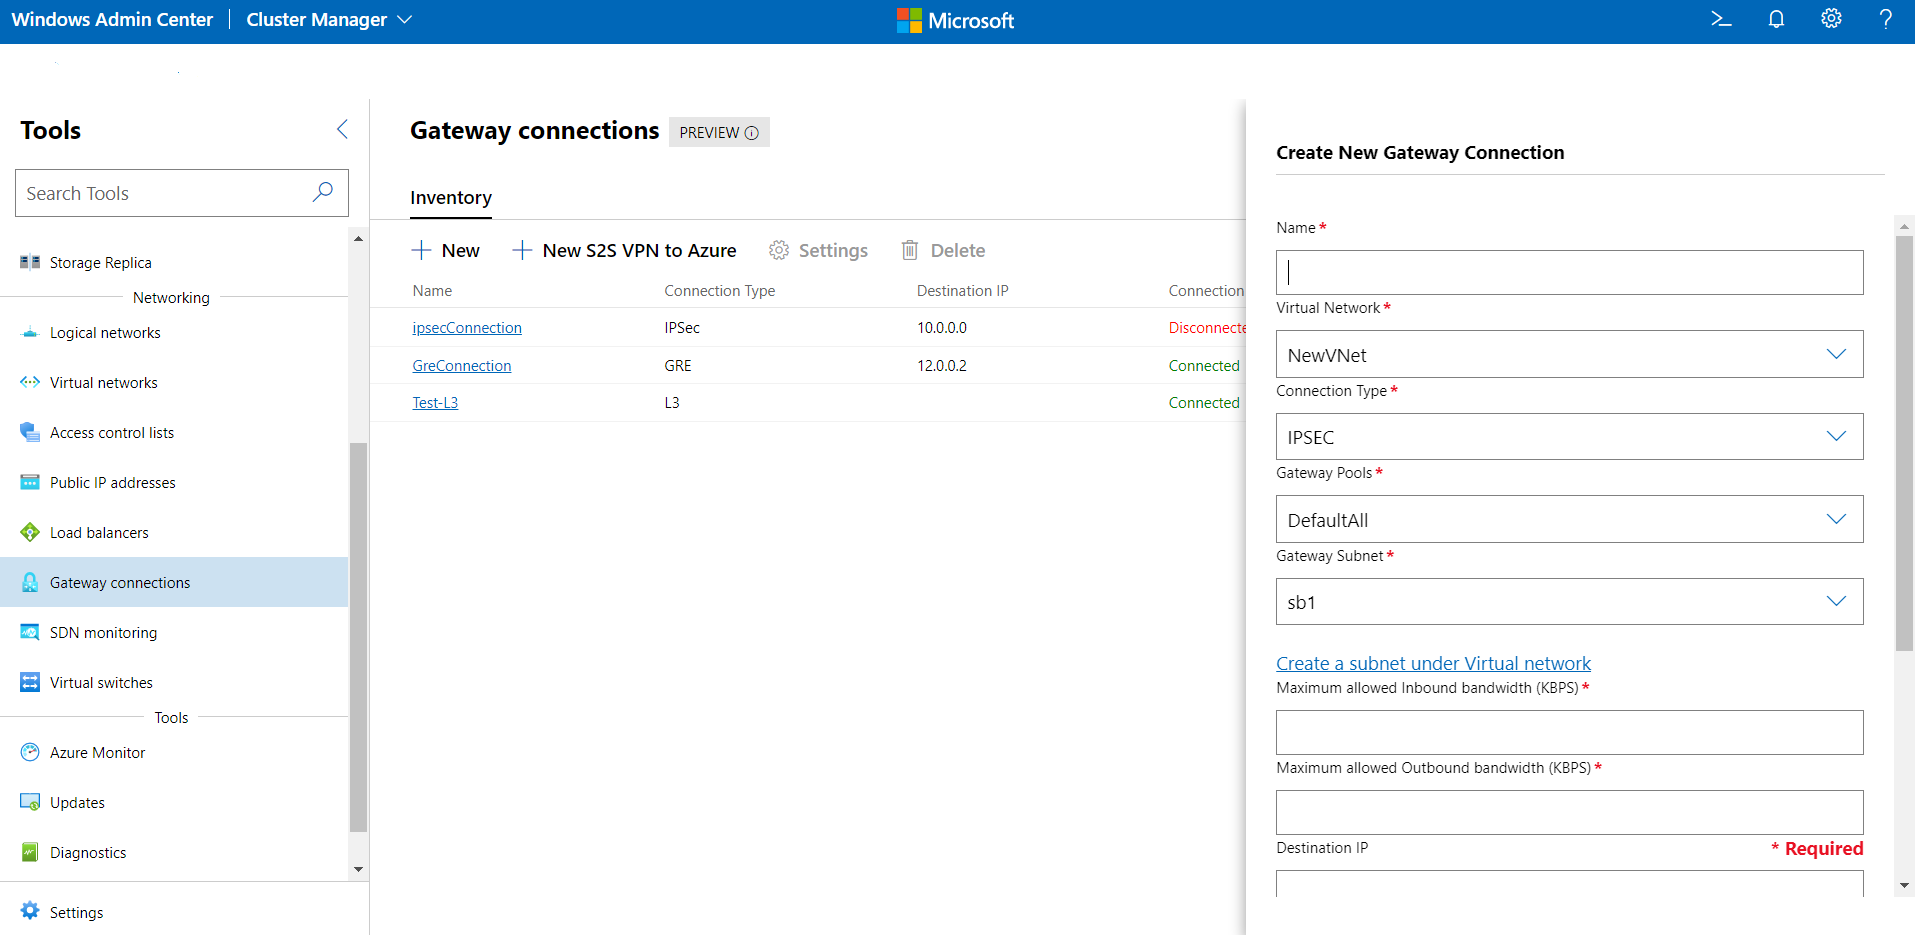
- Under Create a new Gateway Connection, enter a name for the connection
- Select a Virtual Network for which the gateway connection will be set up.
- Set the Connection Type as IPSEC.
- Select a gateway pool for the connection. By default, a gateway pool called "DefaultAll" is created. You can choose this or create a new gateway pool.
You can create a new gateway pool using the
New-NetworkControllerGatewayPoolPowerShell cmdlet. This cmdlet can be run directly on the Network Controller VMs or it can be run remotely with credentials. - Select a Gateway Subnet. This is a subnet in your virtual network that is used specifically for gateway connections. IP addresses from this subnet will be provisioned on the gateway VMs. If you don't have a gateway subnet configured, add it to the virtual network and then create the gateway connection. This subnet can be small, for example, with a /30, /29 or /28 prefix.
- Provide a value for Maximum Allowed Inbound bandwidth (KBPS) and Maximum Allowed Outbound bandwidth (KBPS). Ensure that you provide a value that is commensurate to the total capacity of the gateway. Total capacity is provided by you as part of the gateway deployment. To learn more about gateway capacity and how the IPsec connection bandwidth affects it, see Gateway capacity calculation.
- Provide a Destination IP for the connection. This is the public IP address of your remote gateway.
- Add Routes for your connection. Each route must have a route metric and a destination subnet prefix. Any packets destined to these subnet prefixes will go over the gateway connection.
- Provide an IPsec shared secret for the connection. This must match the authentication type (preshared key) and shared secret configured on the remote gateway.
- Provide IPsec advanced settings if needed.
- Click Create to configure the connection.
- In the Gateway Connections list, verify the configuration state of the connection is Success.
Create a new GRE gateway connection
GRE-based tunnels enable connectivity between tenant virtual networks and external networks. Because the GRE protocol is lightweight and support for GRE is available on most network devices, it is an ideal choice for tunneling where encryption of data is not required.
- In Windows Admin Center, under All Connections, select the cluster you want to create the gateway connection on.
- Under Tools, scroll down to Networking, and select Gateway Connections.
- Under Gateway Connections, select the Inventory tab, then select New.
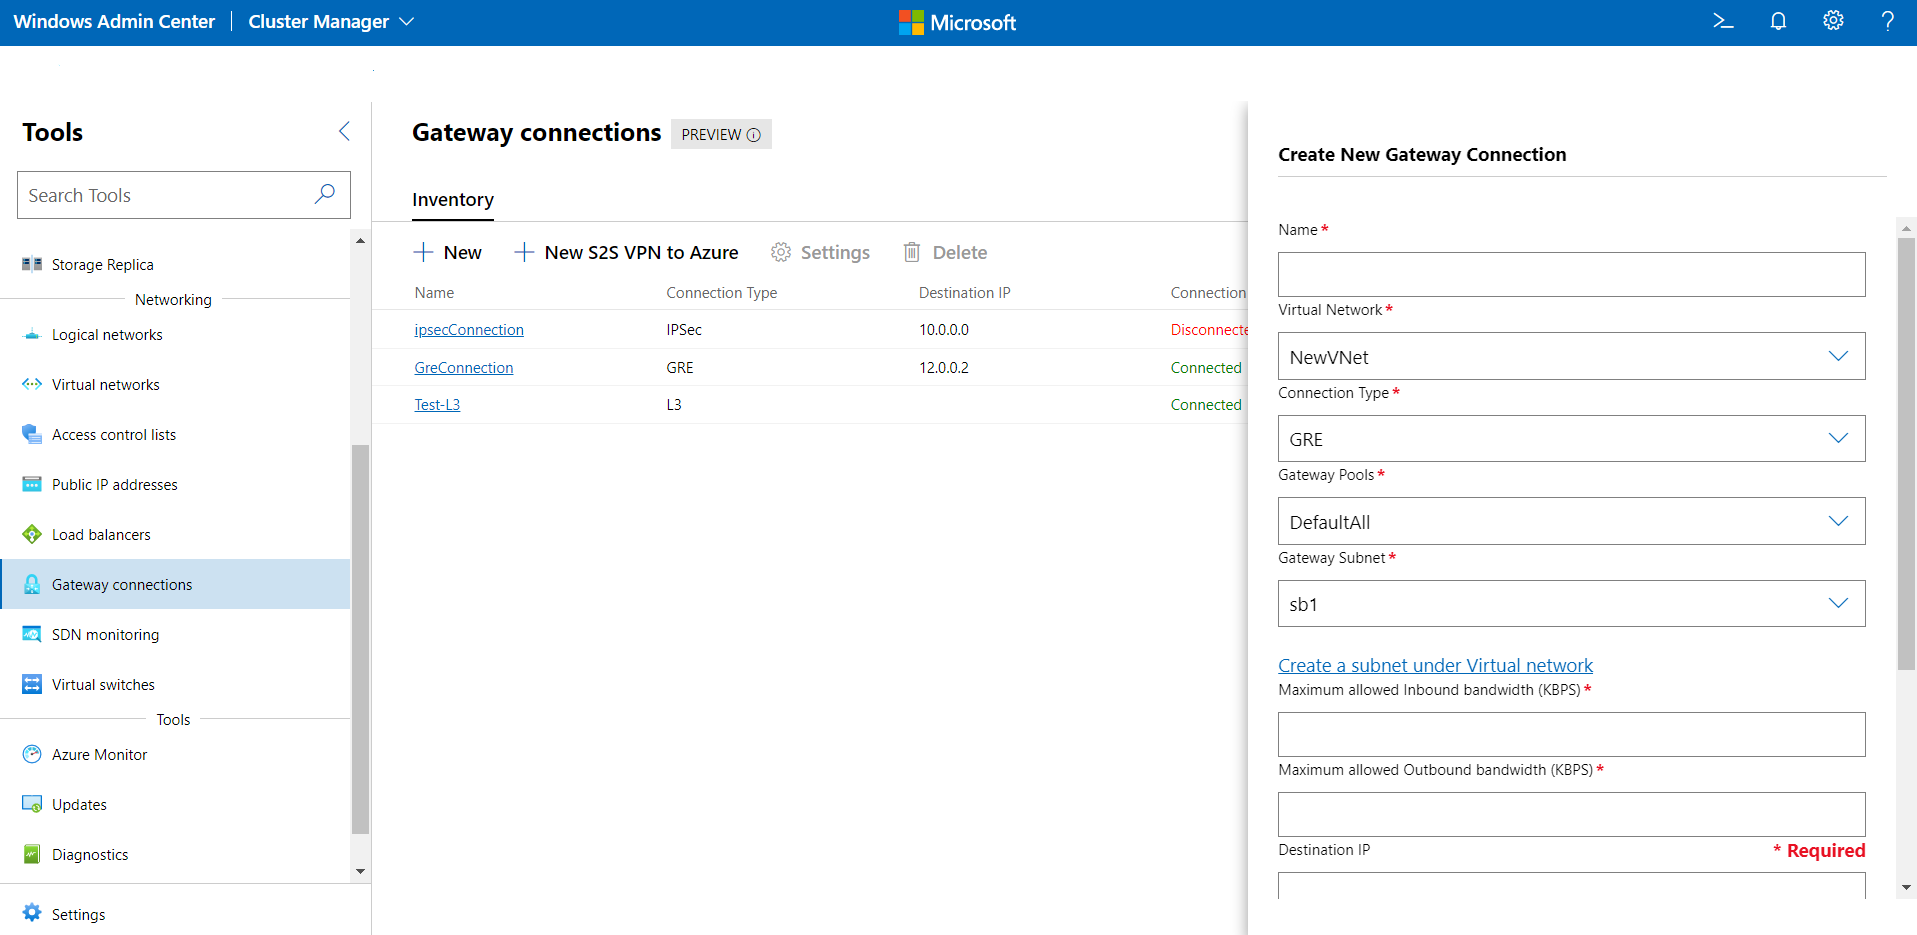
- Under Create a new Gateway Connection, enter a name for the connection.
- Select a Virtual Network for which the gateway connection will be set up.
- Set the Connection Type as GRE.
- Select a gateway pool for the connection. By default, a gateway pool called "DefaultAll" is created. You can choose this or create a new gateway pool.
You can create a new gateway pool using the
New-NetworkControllerGatewayPoolPowerShell cmdlet. This cmdlet can be run directly on the Network Controller VMs or it can be run remotely with credentials. - Select a Gateway Subnet. This is a subnet in your virtual network that is used specifically for gateway connections. IP addresses from this subnet will be provisioned on the gateway VMs. If you don't have a gateway subnet configured, add it to the virtual network and then create the gateway connection. This subnet can be small, for example, with a /30, /29 or /28 prefix.
- Provide a value for Maximum Allowed Inbound bandwidth (KBPS) and Maximum Allowed Outbound bandwidth (KBPS). Ensure that you provide a value that is commensurate to the total capacity of the gateway. Total capacity is provided by you as part of the gateway deployment. To learn more about gateway capacity and how does GRE connection bandwidth affect it, see Gateway capacity calculation.
- Provide a Destination IP for the connection. This is the public IP address of your remote gateway.
- Add Routes for your connection. Each route must have a route metric and a destination subnet prefix. Any packets destined to these subnet prefixes will go over the gateway connection.
- Provide a GRE key for the connection. This must match the GRE key configured on the remote gateway.
- Click Create to configure the connection.
- In the Gateway Connections list, verify the Configuration State of the connection is Success.
Create an L3 connection
L3 forwarding enables connectivity between the physical infrastructure in the data center and the SDN virtual networks. With an L3 forwarding connection, tenant network VMs can connect to a physical network through the SDN gateway. In this case, the SDN gateway acts as a router between the SDN virtual network and the physical network.
In Windows Admin Center, under All Connections, select the cluster you want to create the gateway connection on.
Under Tools, scroll down to Networking, and select Gateway Connections.
Under Gateway Connections, select the Inventory tab, then select New.
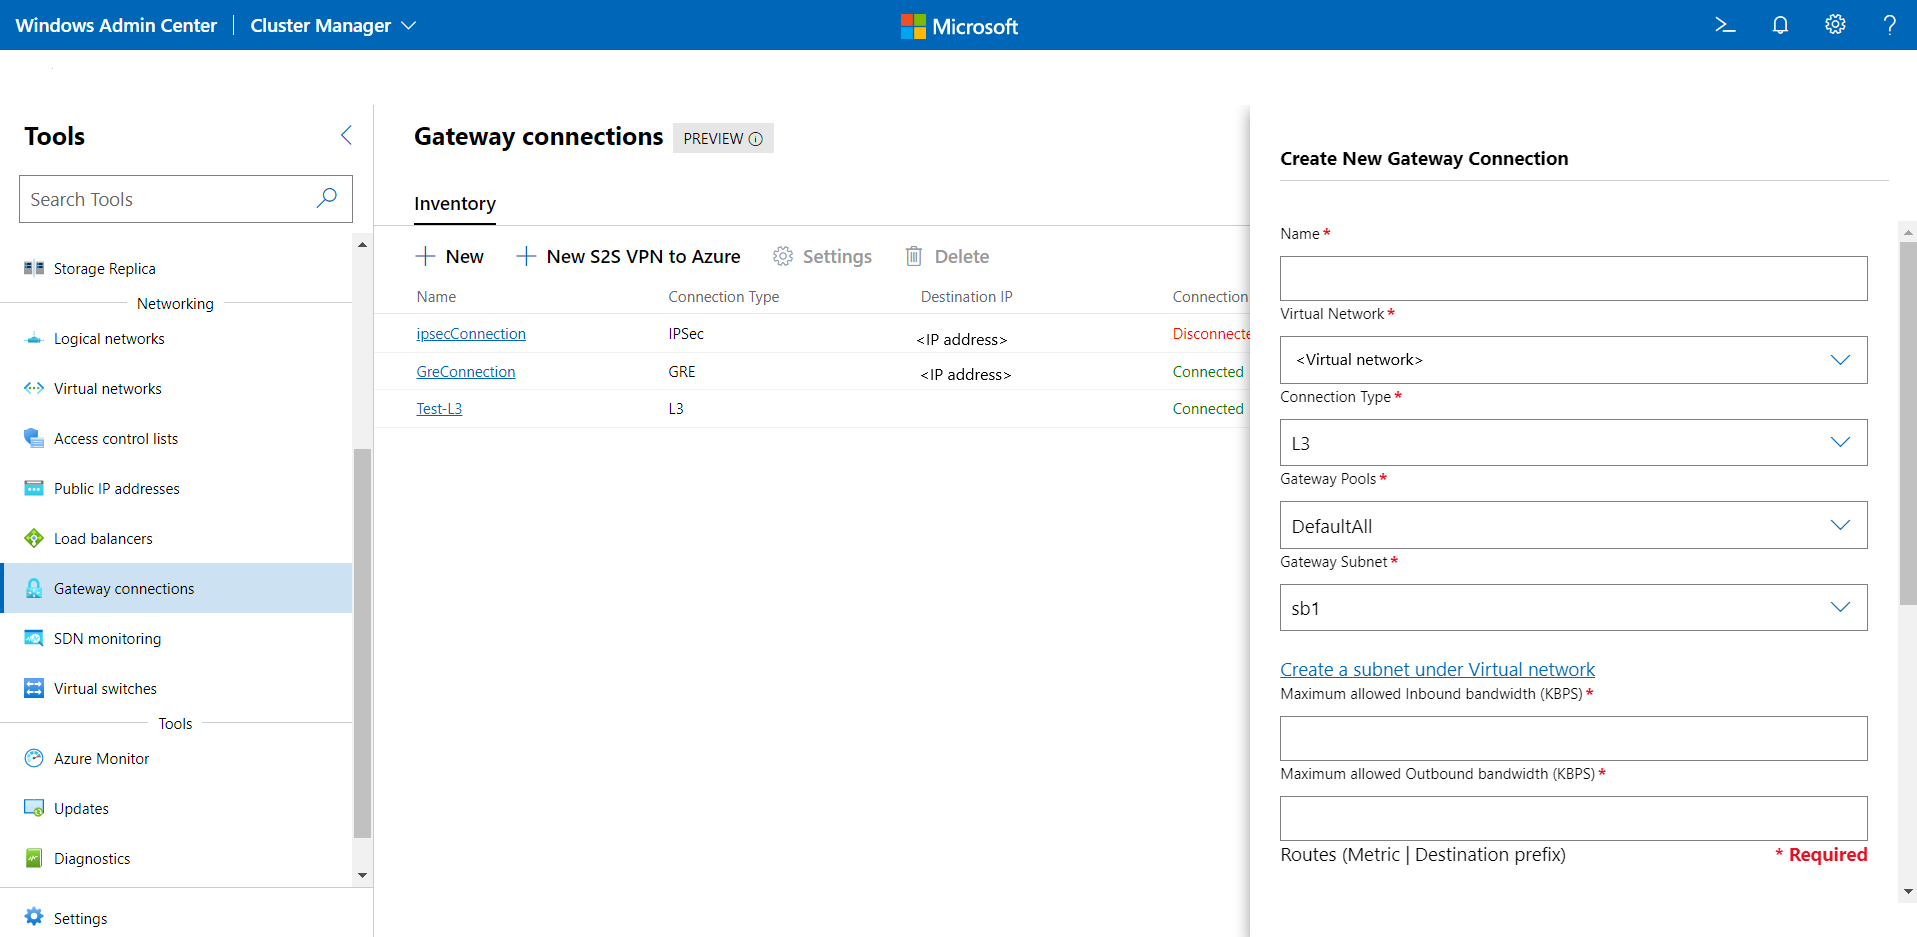
Under Create a new Gateway Connection, enter a name for the connection.
Select a Virtual Network for which the gateway connection will be set up.
Set the Connection Type as L3.
Select a gateway pool for the connection. By default, a gateway pool called "DefaultAll" is created. You can choose this or create a new gateway pool. You can also create a gateway pool using
New-NetworkControllerGatewayPoolPowerShell cmdlet. This cmdlet can be run directly on the Network Controller VMs or it can be run remotely with credentials.Select a Gateway Subnet. This is a subnet in your virtual network that is used specifically for gateway connections. IP addresses from this subnet will be provisioned on the gateway VMs. If you don't have a gateway subnet configured, add it to the virtual network and then create the gateway connection. This subnet can be small, for example, with a /30, /29 or /28 prefix.
Provide a value for Maximum Allowed Inbound bandwidth (KBPS) and Maximum Allowed Outbound bandwidth (KBPS). Ensure that you provide a value that is commensurate to the total capacity of the gateway. Total capacity is provided by you as part of the gateway deployment. To learn more about gateway capacity and how does L3 connection bandwidth affect it, see Gateway capacity calculation.
Note
For L3 connections, maximum inbound and outbound bandwidth is not enforced. But the provided values are still used to reduce the available gateway capacity so that the gateway is not over or under provisioned.
Add Routes for your connection. Each route must have a route metric and a destination subnet prefix. Any packets destined to these subnet prefixes will go over the gateway connection.
Select a network for the L3 Logical Network. This represents the physical network that wants to communicate with the virtual network. You must configure this network as an SDN logical network.
Select L3 Logical Subnet from the L3 Logical Network. Ensure that the subnet has a VLAN configured.
Provide an IP address for L3 IP Address/Subnet Mask. This must belong to the L3 Logical Subnet that you provided above. This IP address is configured on the SDN gateway interface. The IP address must be provided in Classless Inter-Domain Routing (CIDR) format.
Provide an L3 Peer IP address. This must belong to the L3 Logical Subnet that you provided above. This IP will serve as the next hop, once the traffic destined to the physical network from the virtual network reaches the SDN gateway.
Click Create to configure the connection.
In the Gateway Connections list, verify the Configuration State of the connection is Success.
Note
If you plan to deploy L3 Gateway connections with BGP routing, ensure that you’ve configured the Top of Rack (ToR) switch BGP settings with the following:
- update-source: This specifies the source address for BGP updates, that is L3 VLAN. For example, VLAN 250.
- ebgp multihop: This specifies additional hops required since the BGP neighbor is more than one hop away.
View all gateway connections
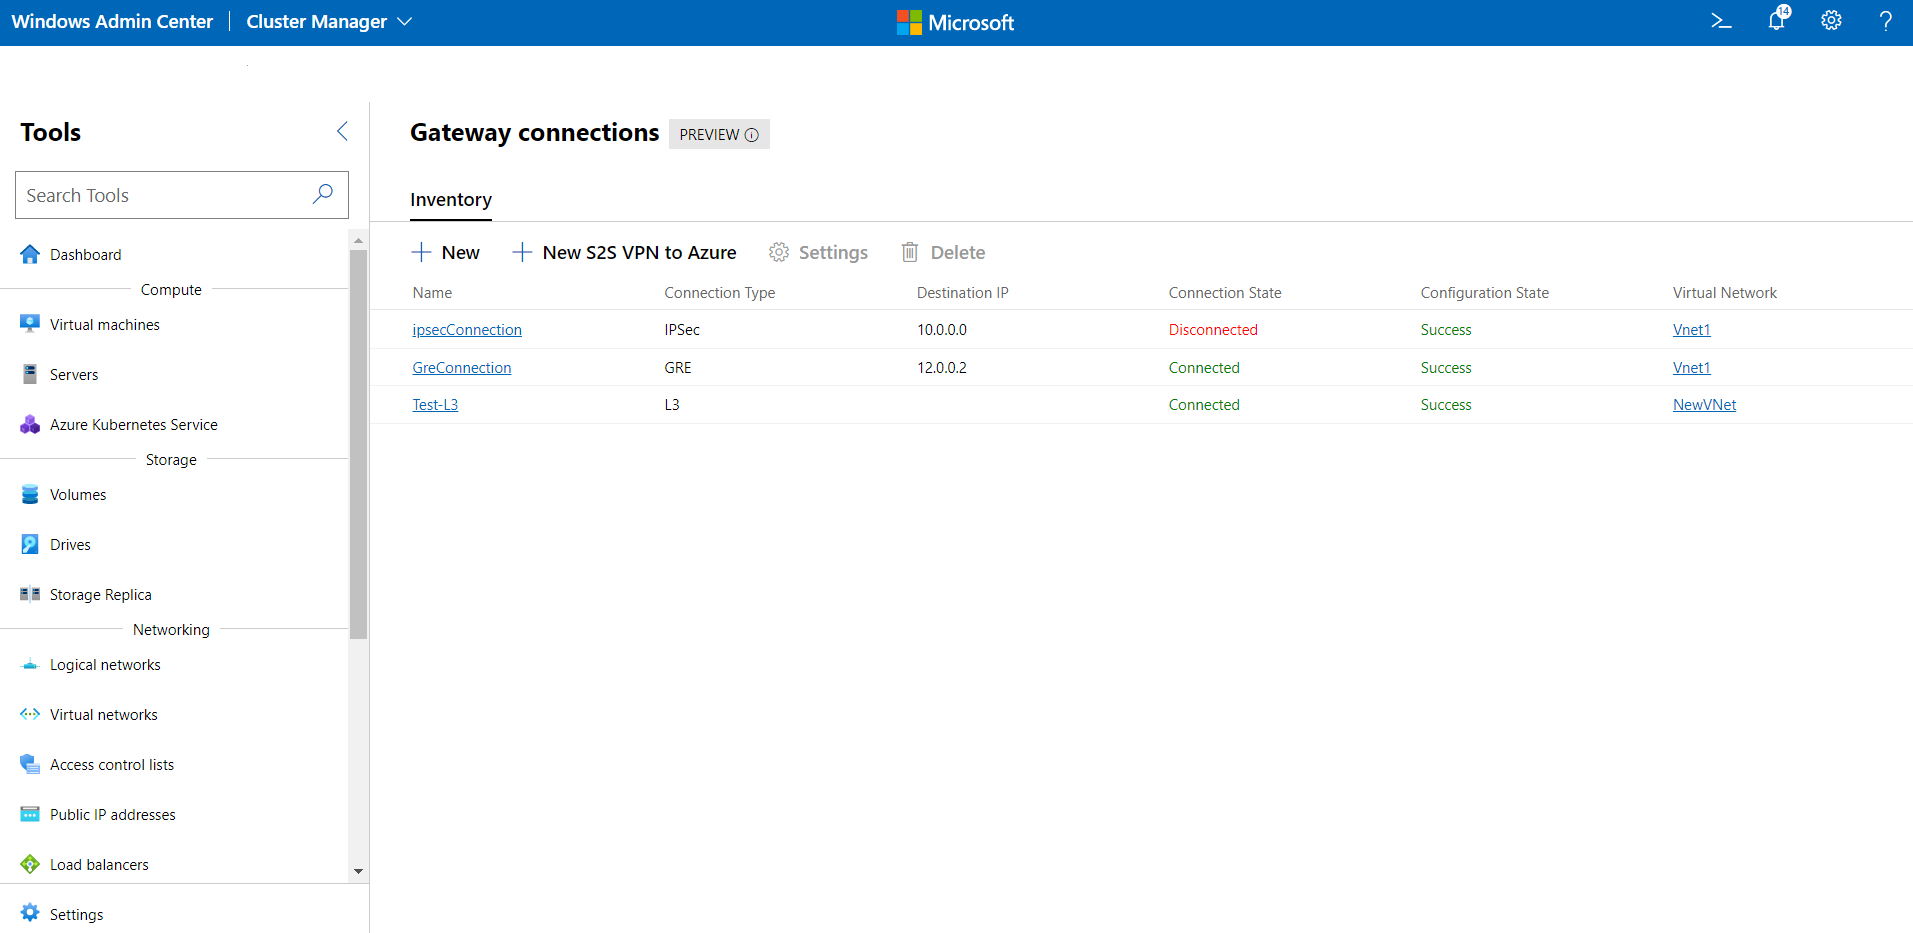
You can easily see all the gateway connections in your cluster.
In Windows Admin Center, under All Connections, select the cluster for which you want to view the gateway connections.
Under Tools, scroll down to Networking, and select Gateway Connections.
The Inventory tab on the right lists the available gateway connections and provides commands to manage individual gateway connections. You can:
- View the list of gateway connections.
- Change settings for a gateway connection.
- Delete a gateway connection.
View gateway connection details
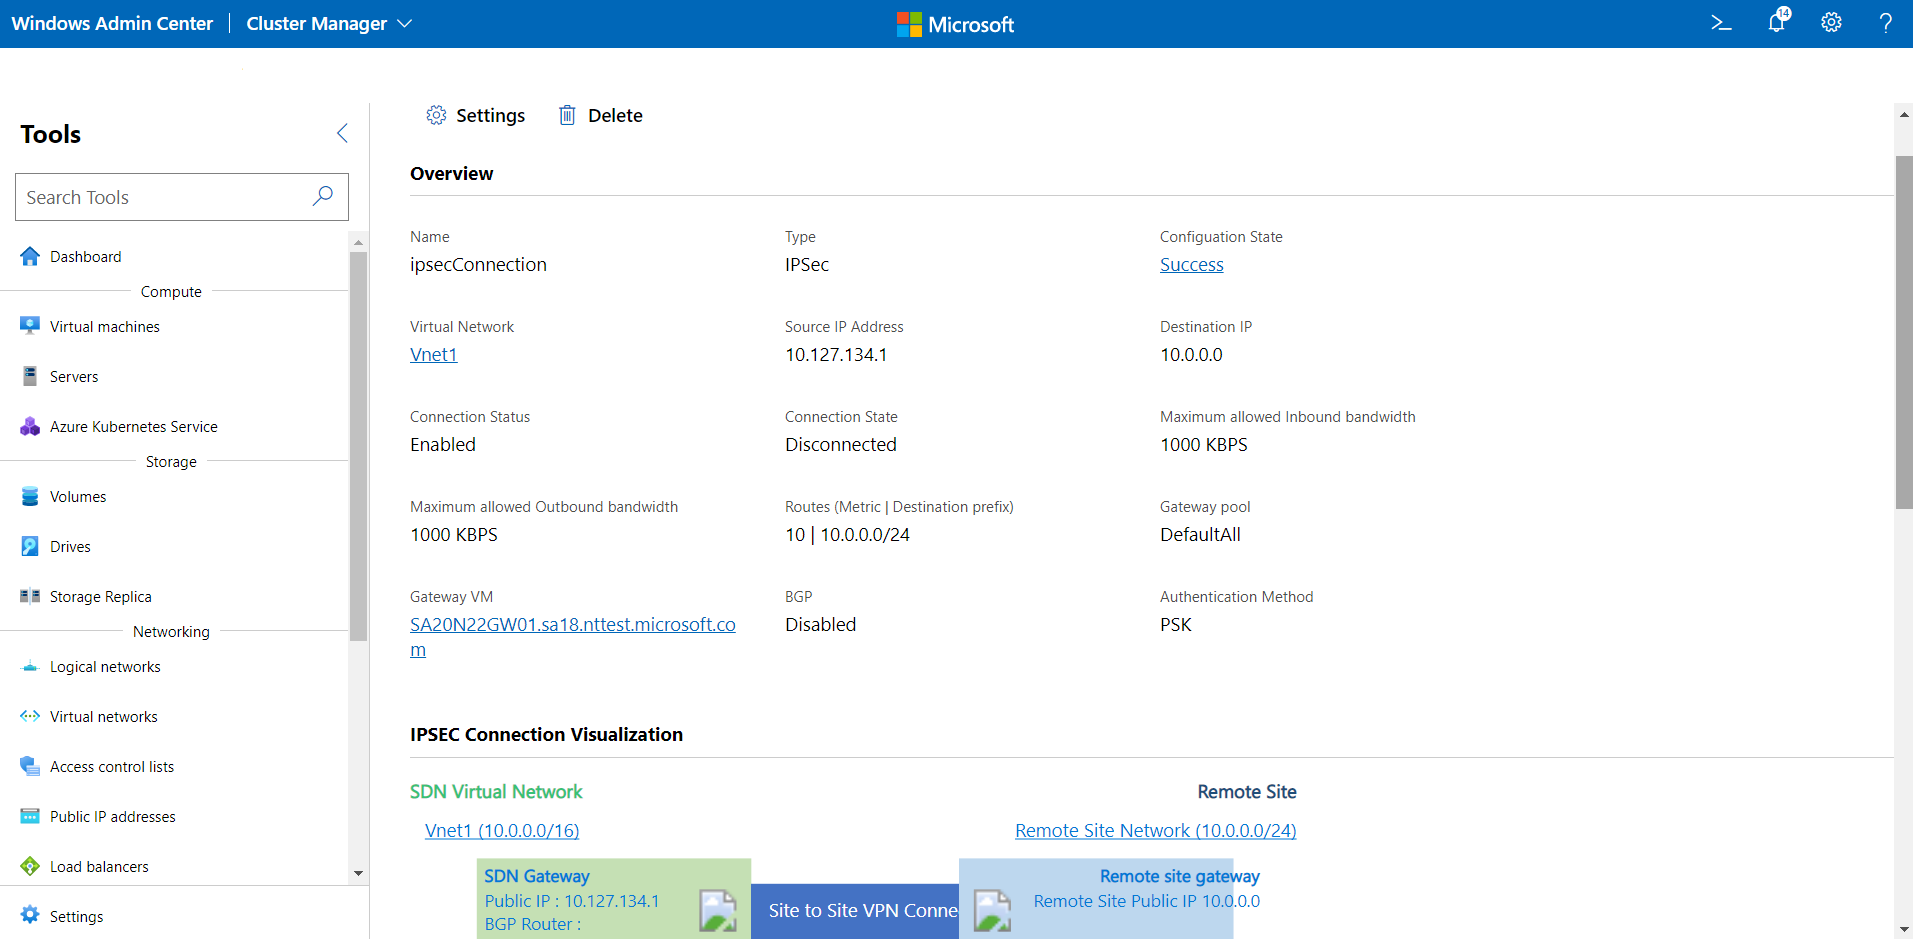
You can view detailed information for a specific gateway connection from its dedicated page.
Under Tools, scroll down and select Gateway Connections.
Click the Inventory tab on the right, then select the gateway connection. On the subsequent page, you can do the following:
- View the details of the connection (type, associated virtual network, properties, or connection state).
- Gateway on which the connection is hosted.
- Visual representation of the connection with remote entity.
- View the connection statistics (Inbound/Outbound Bytes, Data transfer rate, or Dropped packets).
- Change settings of the connection.
Change gateway connection settings
You can change connection settings for IPsec, GRE, and L3 connections.
Under Tools, scroll down and select Gateway Connections.
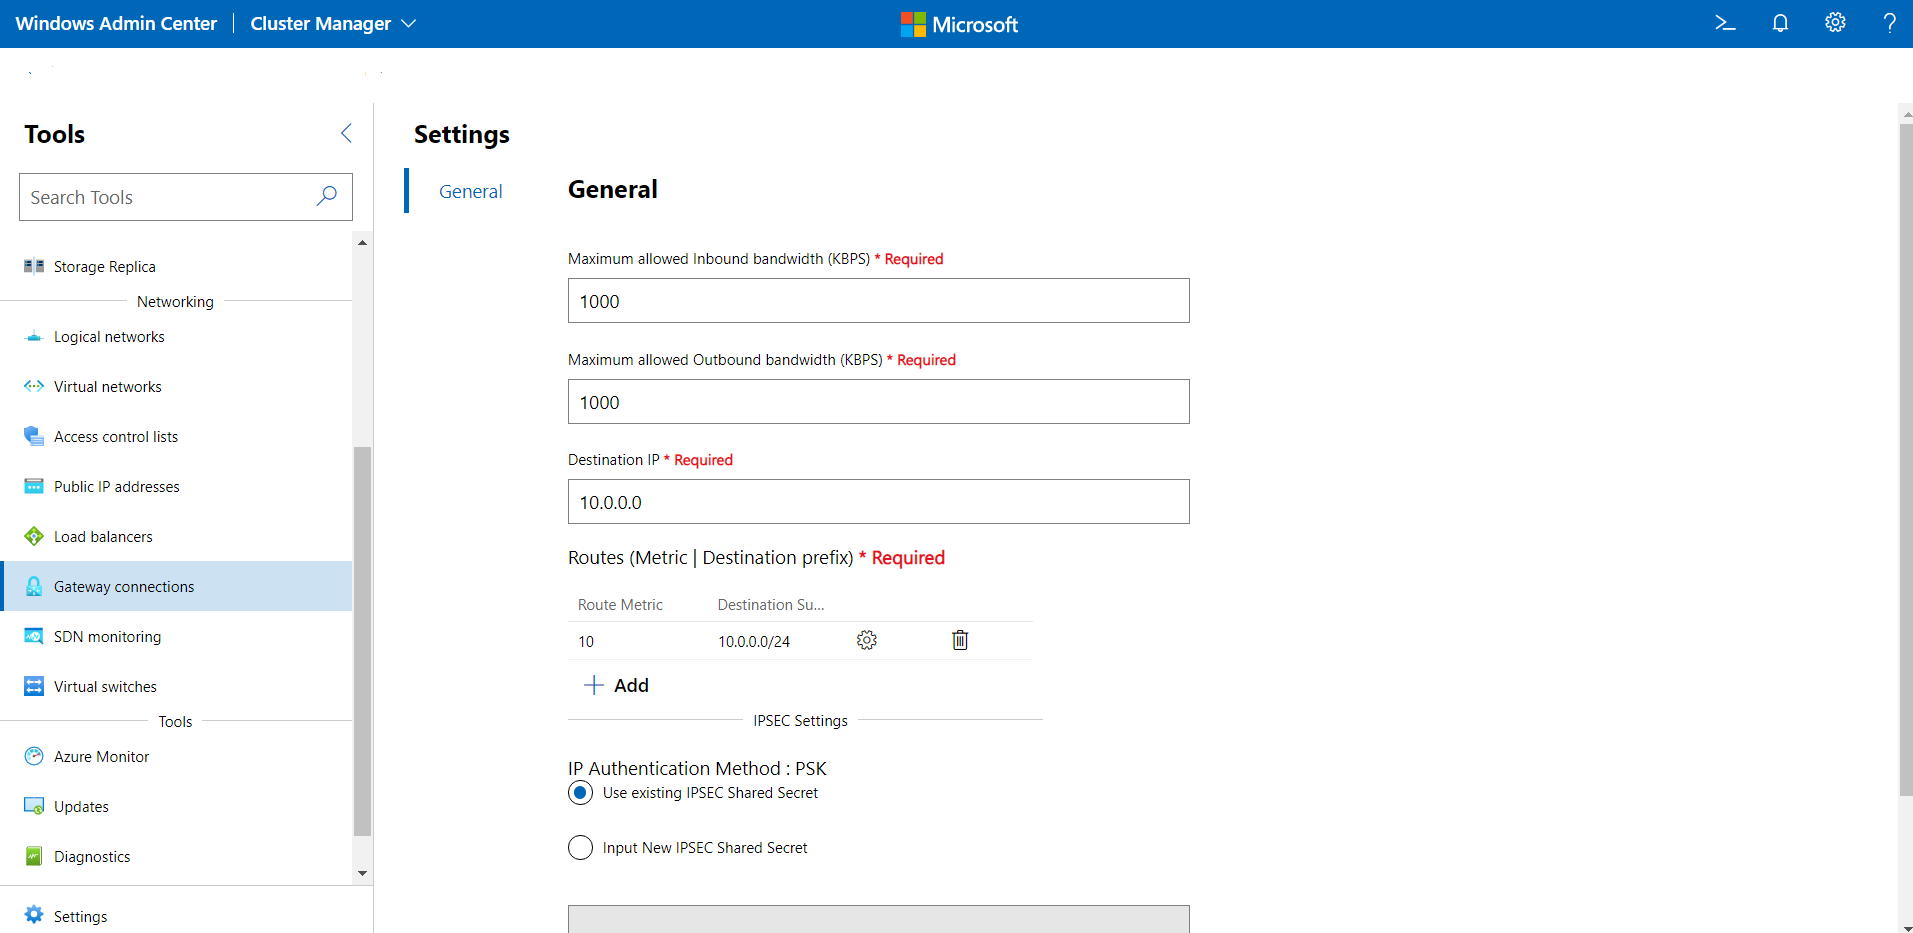
Click the Inventory tab on the right, select a gateway connection, then select Settings.
For IPsec connections:
- On the General tab, you can change the maximum allowed inbound bandwidth, the maximum allowed outbound bandwidth, the destination IP of the connection, add/change/remove routes, and change the IPsec preshared key.
- Click on IPsec Advanced Settings to change the advanced settings.
For GRE connections: On the General tab, you can change the maximum allowed inbound bandwidth, the maximum allowed outbound bandwidth, the destination IP of the connection, add/change/remove routes, and change the GRE key.
For L3 connections: On the General tab, you can change the maximum allowed inbound bandwidth, the maximum allowed outbound bandwidth, add/change/remove routes, change the L3 Logical Network, L3 Logical Subnet, L3 IP Address, and the L3 Peer IP.
Delete a gateway connection
You can delete a gateway connection if you no longer need it.
- Under Tools, scroll down and select Gateway connections.
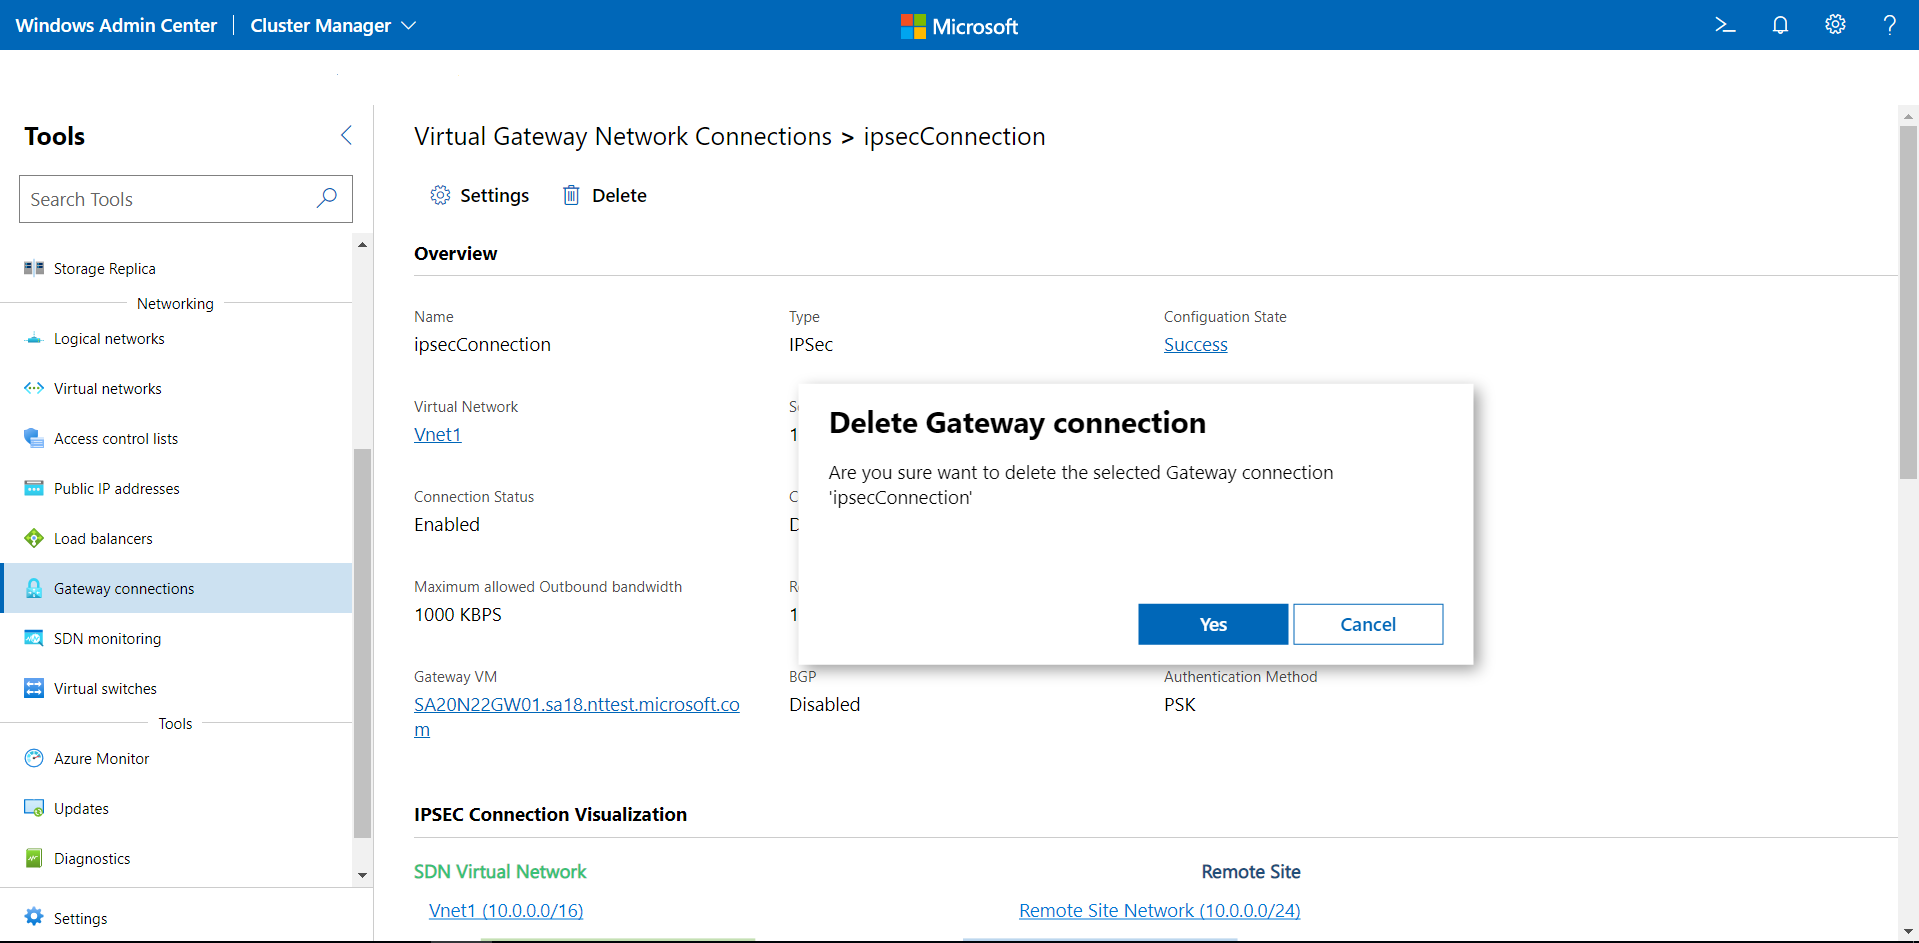
- Click the Inventory tab on the right, then select a gateway connection. Click Delete.
- On the confirmation dialog, click Yes. Click Refresh to check that the gateway connection has been deleted.
