Note
Access to this page requires authorization. You can try signing in or changing directories.
Access to this page requires authorization. You can try changing directories.
Important
Azure Data Box now supports access tier assignment at the blob level. The steps contained within this tutorial reflect the updated data copy process and are specific to block blobs.
For help with determining the appropriate access tier for your block blob data, refer to the Determine appropriate access tiers for block blobs section. Follow the steps contained within the Copy data to Data Box section to copy your data to the appropriate access tier.
The information contained within this section applies to orders placed after April 1, 2024.
This tutorial describes how to connect to and copy data from your host computer using the local web UI.
In this tutorial, you learn how to:
- Prerequisites
- Connect to Data Box
- Copy data to Data Box
Prerequisites
Before you begin, make sure that:
- You've completed the Tutorial: Set up Azure Data Box.
- You've received your Data Box and the order status in the portal is Delivered.
- You have a host computer that has the data that you want to copy over to Data Box. Your host computer must:
- Run a Supported operating system.
- Be connected to a high-speed network. We strongly recommend that you have at least one 10-GbE connection. If a 10-GbE connection isn't available, use a 1-GbE data link but the copy speeds are impacted.
Connect to Data Box
Based on the storage account selected, Data Box creates up to:
- Three shares for each associated storage account for GPv1 and GPv2.
- One share for premium storage.
- One share for a blob storage account, containing one folder for each of the four access tiers.
The following table identifies the names of the Data Box shares to which you can connect, and the type of data uploaded to your target storage account. It also identifies the hierarchy of shares and directories into which you copy your source data.
| Storage type | Share name | First-level entity | Second-level entity | Third-level entity |
|---|---|---|---|---|
| Block blob | <storageAccountName>_BlockBlob | <\accessTier> | <\containerName> | <\blockBlob> |
| Page blob | <\storageAccountName>_PageBlob | <\containerName> | <\pageBlob> | |
| File storage | <\storageAccountName>_AzFile | <\fileShareName> | <\file> |
You can't copy files directly to the root folder of any Data Box share. Instead, create folders within the Data Box share depending on your use case.
Block blobs support the assignment of access tiers at the file level. Before you copy files to the block blob share, the recommended best-practice is to add new subfolders within the appropriate access tier. Then, after creating new subfolders, continue adding files to each subfolder as appropriate.
A new container is created for any folder residing at the root of the block blob share. Any file within the folder is copied to the storage account's default access tier as a block blob.
For more information about blob access tiers, see Access tiers for blob data. For more detailed information about access tier best practices, see Best practices for using blob access tiers.
The following table shows the UNC path to the shares on your Data Box and the corresponding Azure Storage path URL to which data is uploaded. The final Azure Storage path URL can be derived from the UNC share path.
| Azure Storage types | Data Box shares |
|---|---|
| Azure Block blobs | \\<DeviceIPAddress>\<storageaccountname_BlockBlob>\<accessTier>\<ContainerName>\myBlob.txthttps://<storageaccountname>.blob.core.chinacloudapi.cn/<ContainerName>/myBlob.txt |
| Azure Page blobs | \\<DeviceIPAddress>\<storageaccountname_PageBlob>\<ContainerName>\myBlob.vhdhttps://<storageaccountname>.blob.core.chinacloudapi.cn/<ContainerName>/myBlob.vhd |
| Azure Files | \\<DeviceIPAddress>\<storageaccountname_AzFile>\<ShareName>\myFile.txthttps://<storageaccountname>.file.core.chinacloudapi.cn/<ShareName>/myFile.txt |
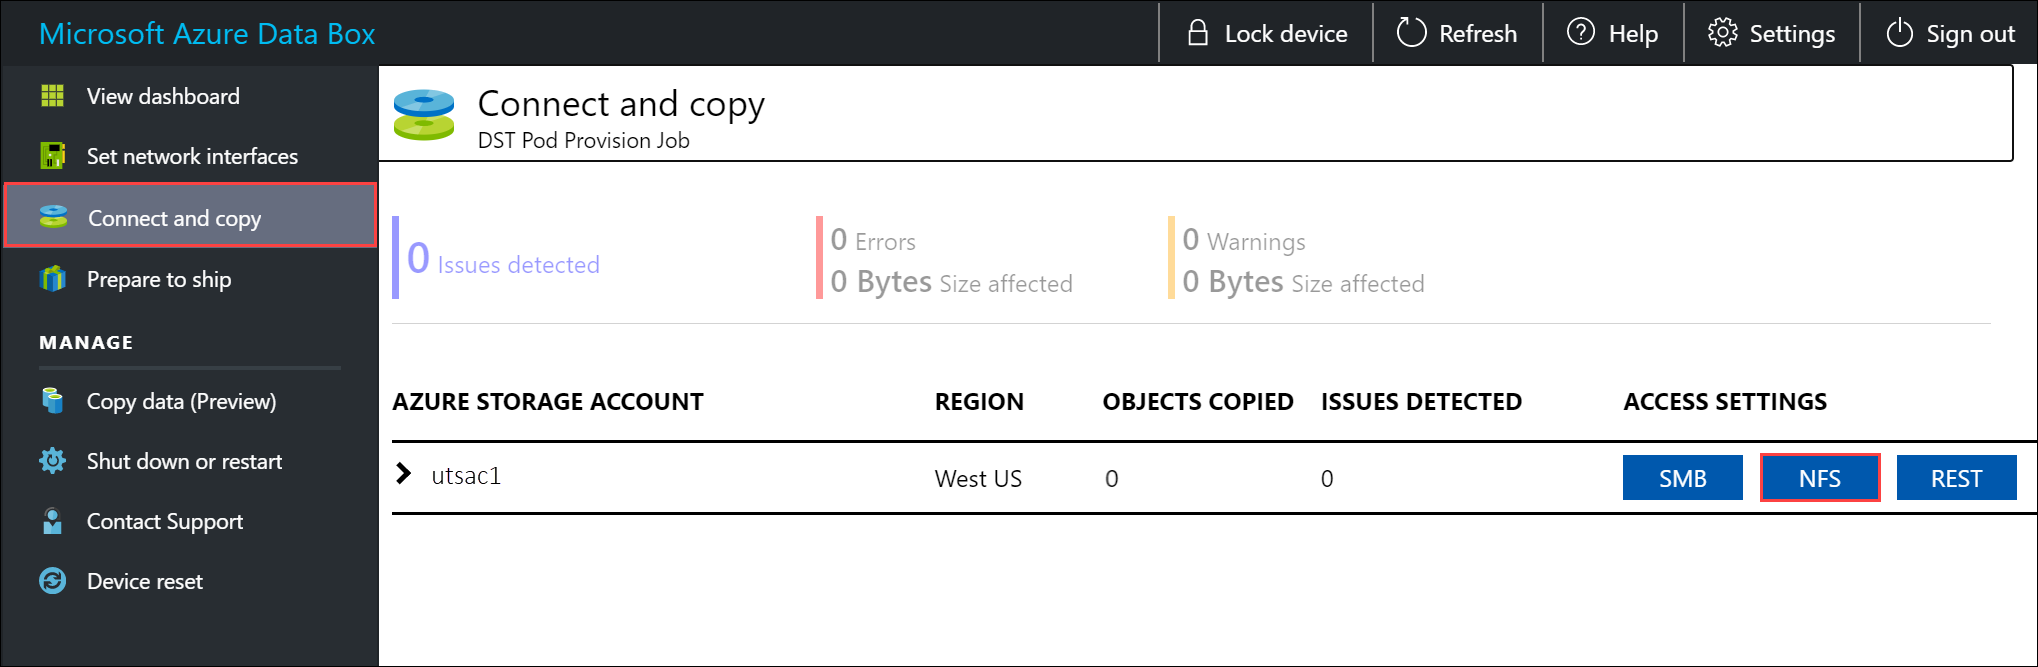
If you're using a Linux host computer, perform the following steps to configure Data Box to allow access to NFS clients.
Supply the IP addresses of the allowed clients that can access the share. In the local web UI, go to Connect and copy page. Under NFS settings, select NFS client access.
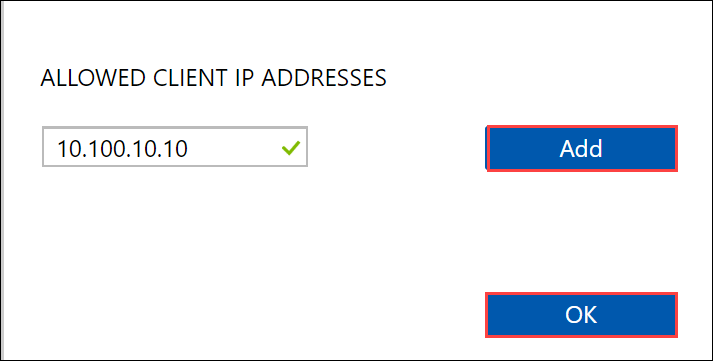
Supply the IP address of the NFS client and select Add. You can configure access for multiple NFS clients by repeating this step. Select OK.
Ensure that the Linux host computer has a supported version of NFS client installed. Use the specific version for your Linux distribution.
Once the NFS client is installed, use the following command to mount the NFS share on your Data Box device:
sudo mount <Data Box device IP>:/<NFS share on Data Box device> <Path to the folder on local Linux computer>Use the following example to connect to a Data Box share using NFS. In the example, the Data Box device IP is
10.161.23.130. The shareMystoracct_Blobis mounted on the ubuntuVM, and the mount point is/home/databoxubuntuhost/databox.sudo mount -t nfs 10.161.23.130:/Mystoracct_Blob /home/databoxubuntuhost/databoxFor Mac clients, you need to add an extra option as follows:
sudo mount -t nfs -o sec=sys,resvport 10.161.23.130:/Mystoracct_Blob /home/databoxubuntuhost/databoxImportant
You can't copy files directly to the storage account's root folder. Within a block blob storage account's root folder, you'll find a folder corresponding to each of the available access tiers.
To copy your data to Azure Data Box, you must first select the folder corresponding to one of the access tiers. Next, create a sub-folder within that tier's folder to store your data. Finally, copy your data to the newly created sub-folder. Your new sub-folder represents the container created within the storage account during ingestion. Your data is uploaded to this container as blobs.
Determine appropriate access tiers for block blobs
Important
The information contained within this section applies to orders placed after April 1st, 2024.
Azure Storage allows you to store block blob data in multiple access tiers within the same storage account. This ability allows data to be organized and stored more efficiently based on how often it's accessed. The following table contains information and recommendations about Azure Storage access tiers.
| Tier | Recommendation | Best practice |
|---|---|---|
| Hot | Useful for online data accessed or modified frequently. This tier has the highest storage costs, but the lowest access costs. | Data in this tier should be in regular and active use. |
| Cool | Useful for online data accessed or modified infrequently. This tier has lower storage costs and higher access costs than the hot tier. | Data in this tier should be stored for at least 30 days. |
| Cold | Useful for online data accessed or modified rarely but still requiring fast retrieval. This tier has lower storage costs and higher access costs than the cool tier. | Data in this tier should be stored for a minimum of 90 days. |
| Archive | Useful for offline data rarely accessed and having lower latency requirements. | Data in this tier should be stored for a minimum of 180 days. Data removed from the archive tier within 180 days is subject to an early deletion charge. |
For more information about blob access tiers, see Access tiers for blob data. For more detailed best practices, see Best practices for using blob access tiers.
You can transfer your block blob data to the appropriate access tier by copying it to the corresponding folder within Data Box. This process is discussed in greater detail within the Copy data to Azure Data Box section.
Copy data to Data Box
After you connect to one or more Data Box shares, the next step is to copy data. Before you begin the data copy, consider the following limitations:
- Make sure that you copy your data to the share that corresponds to the required data format. For instance, copy block blob data to the share for block blobs. Copy VHDs to the page blob share. If the data format doesn't match the appropriate share type, the data upload to Azure fails during a later step.
- When copying data to the AzFile or PageBlob shares, first create a folder at the share's root, then copy files to that folder.
- When copying data to the BlockBlob share, create a subfolder within the desired access tier, then copy data to the newly created subfolder. The subfolder represents a container into which data is uploaded as blobs. You can't copy files directly to a share's root folder.
- While copying data, ensure that the data size conforms to the size limits described in the Azure storage account size limits.
- Simultaneous uploads by Data Box and another non-Data Box application could potentially result in upload job failures and data corruption.
- If you use both the SMB and NFS protocols for data copies, we recommend that you:
- Use different storage accounts for SMB and NFS.
- Don't copy the same data to the same end destination in Azure using both SMB and NFS. In these cases, the final outcome can't be determined.
- Although copying via both SMB and NFS in parallel can work, we don't recommend doing that as it's prone to human error. Wait until your SMB data copy is complete before you start an NFS data copy.
- When copying data to the block blob share, create a subfolder within the desired access tier, then copy data to the newly created subfolder. The subfolder represents a container to which your data is uploaded as blobs. You can't copy files directly to the root folder in the storage account.
- If ingesting case-sensitive directory and file names from an NFS share to NFS on Data Box:
The case is preserved in the name.
The files are case-insensitive.
For example, if copying
SampleFile.txtandSamplefile.Txt, the case is preserved in the name when copied to Data Box. However, because they're considered the same file, the last file uploaded overwrites the first file.
Important
Make sure that you maintain a copy of the source data until you can confirm that your data has been copied into Azure Storage.
If you're using a Linux host computer, use a copy utility similar to Robocopy. Some of the alternatives available in Linux are rsync, FreeFileSync, Unison, or Ultracopier.
The cp command is one of best options to copy a directory. For more information on the usage, go to cp man pages.
If using rsync option for a multi-threaded copy, follow these guidelines:
Install the CIFS Utils or NFS Utils package depending on the filesystem your Linux client is using.
sudo apt-get install cifs-utilssudo apt-get install nfs-utilsInstall
rsyncand Parallel (varies depending on the Linux distributed version).sudo apt-get install rsyncsudo apt-get install parallelCreate a mount point.
sudo mkdir /mnt/databoxMount the volume.
sudo mount -t NFS4 //Databox IP Address/share_name /mnt/databoxMirror folder directory structure.
rsync -za --include='*/' --exclude='*' /local_path/ /mnt/databoxCopy files.
cd /local_path/; find -L . -type f | parallel -j X rsync -za {} /mnt/databox/{}where j specifies the number of parallelization, X = number of parallel copies
We recommend that you start with 16 parallel copies and increase the number of threads depending on the resources available.
Important
The following Linux file types are not supported: symbolic links, character files, block files, sockets, and pipes. These file types will result in failures during the Prepare to ship step.
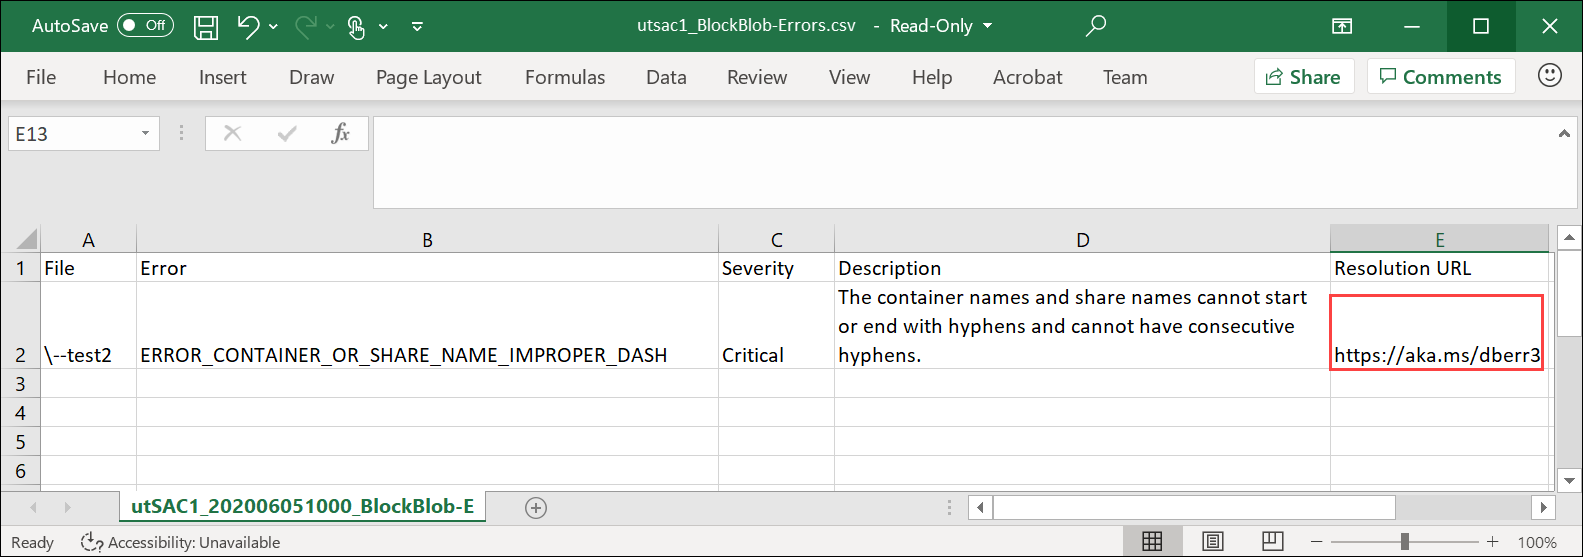
Notifications are displayed during the copy prowess to identify errors.
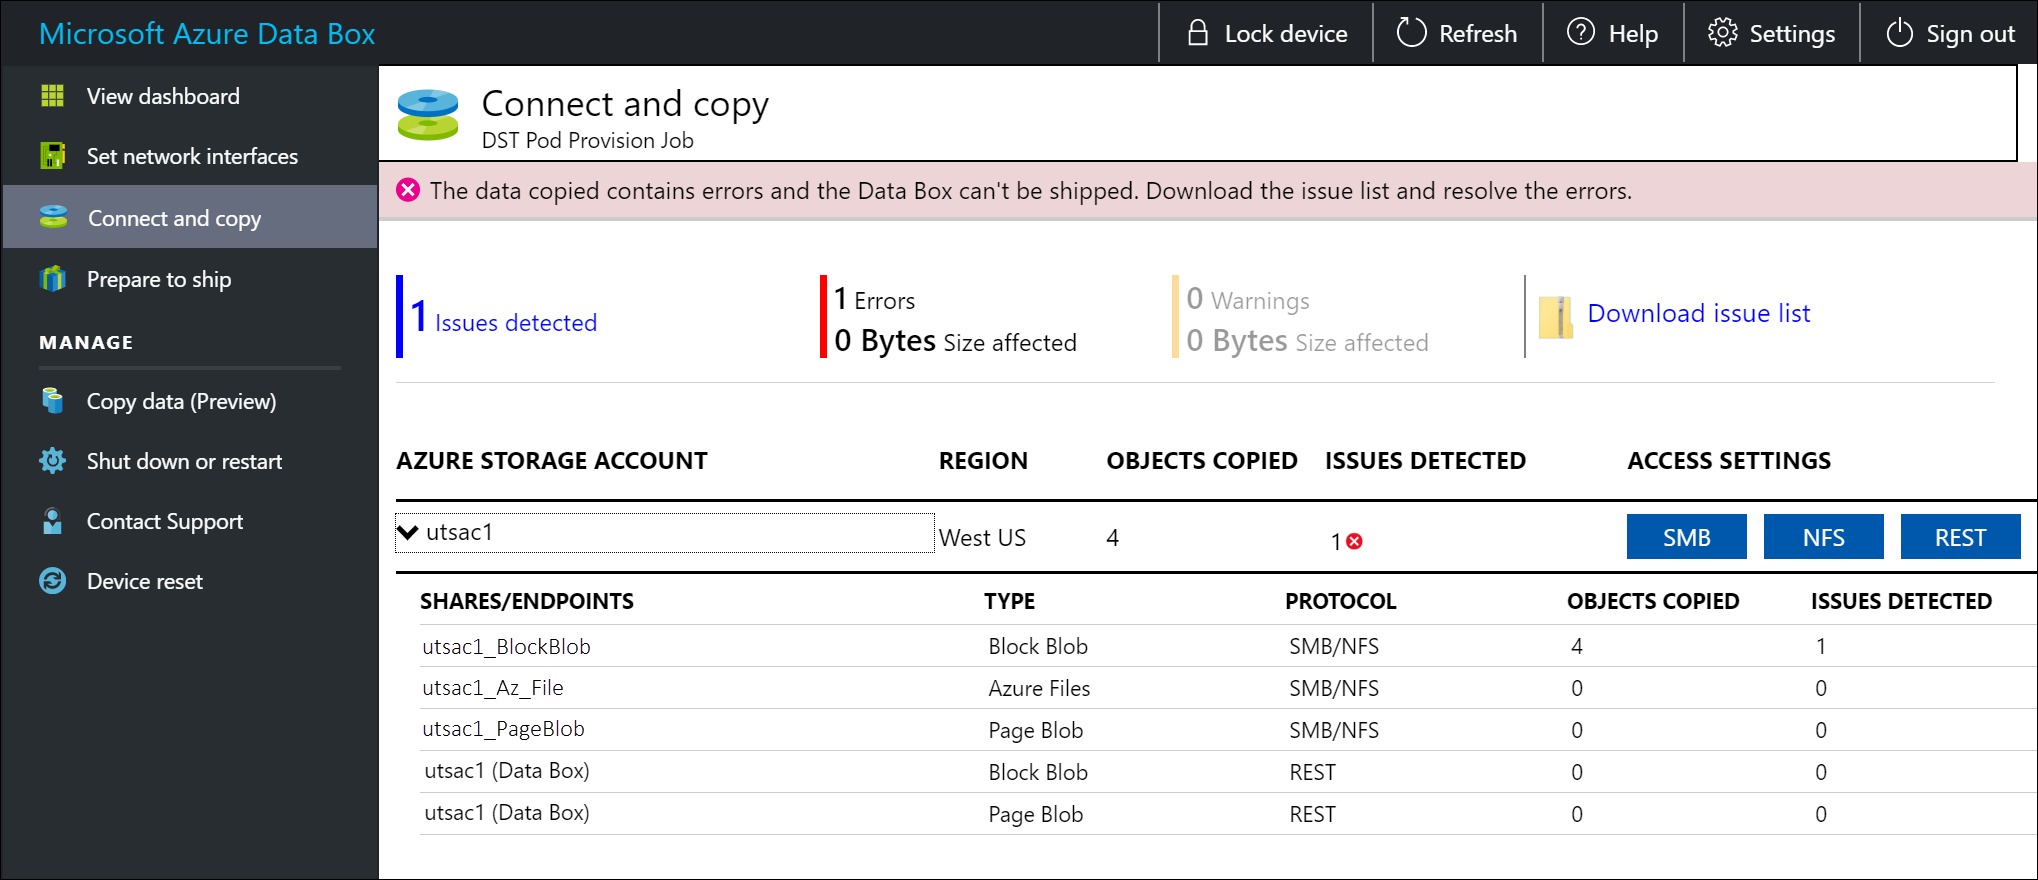
Select Download issue list.
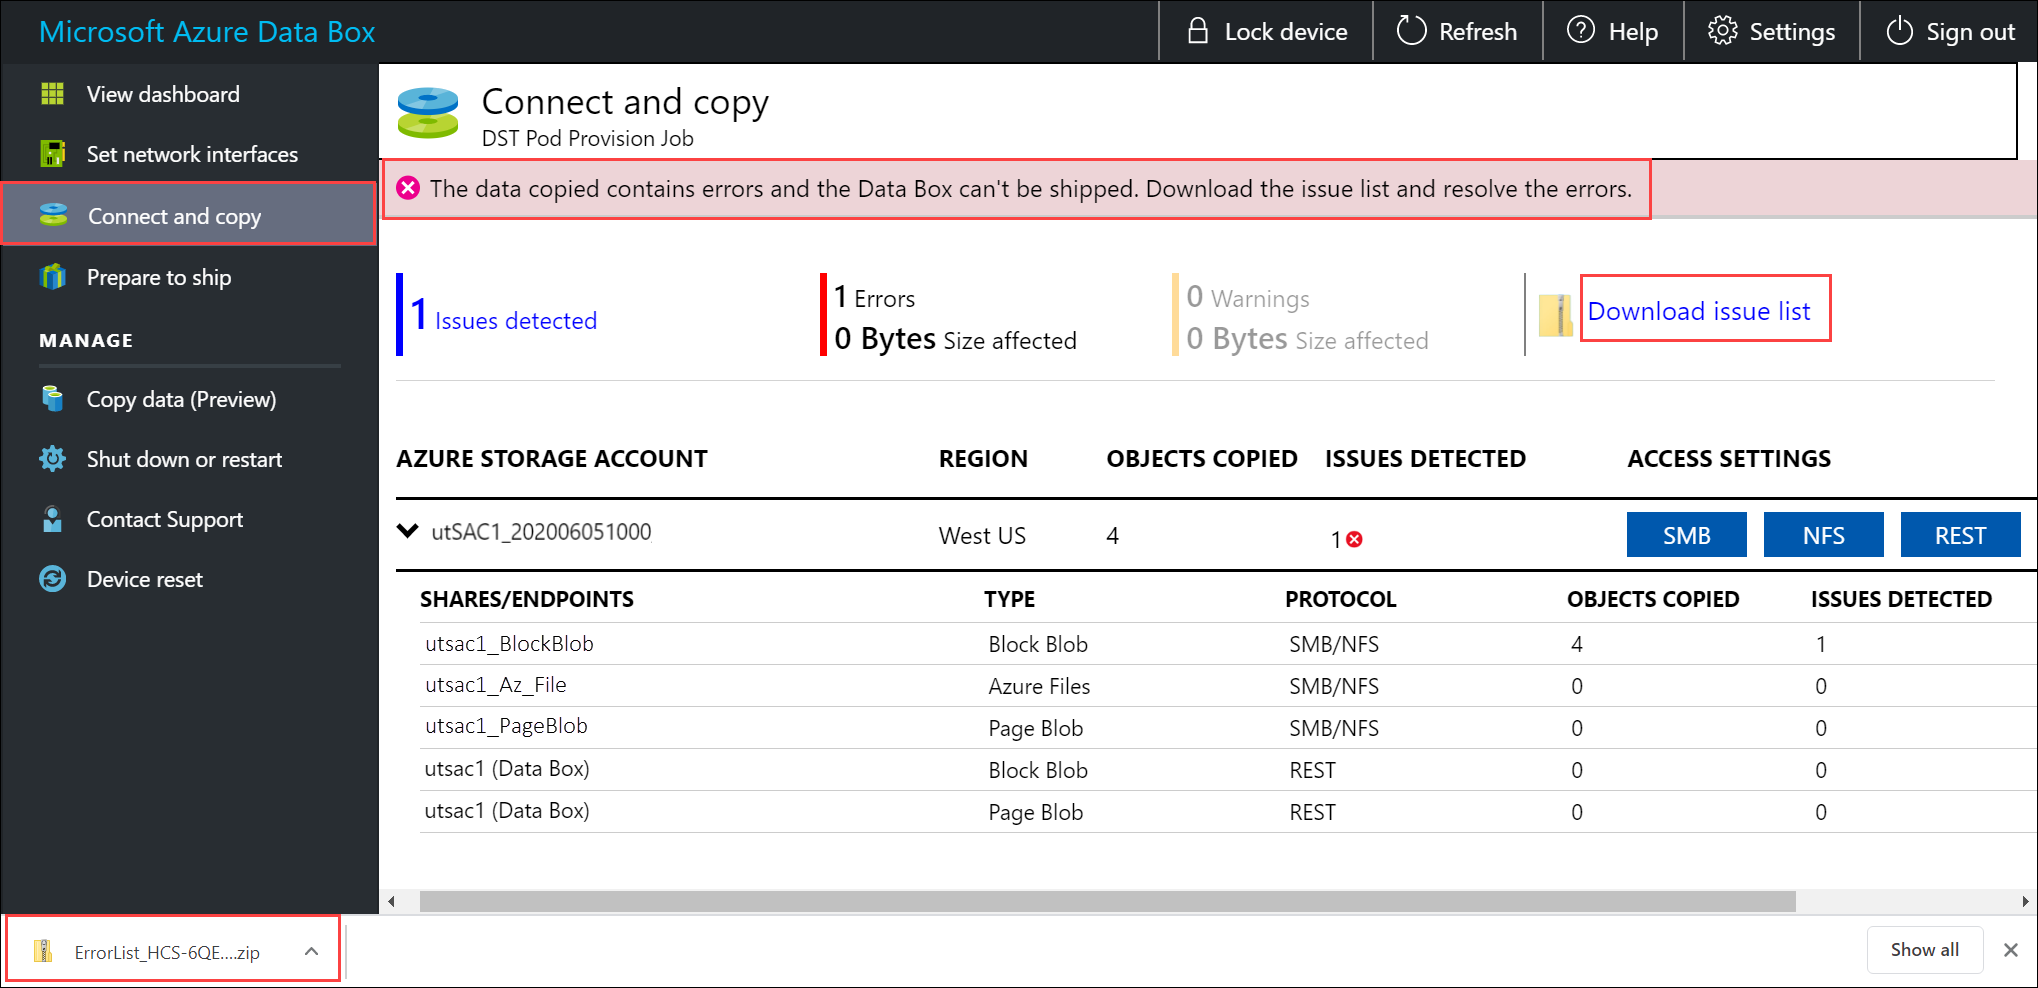
Open the list to view the details of the error and select the resolution URL to view the recommended resolution.
For more information, see View error logs during data copy to Data Box. For a detailed list of errors during data copy, see Troubleshoot Data Box issues.
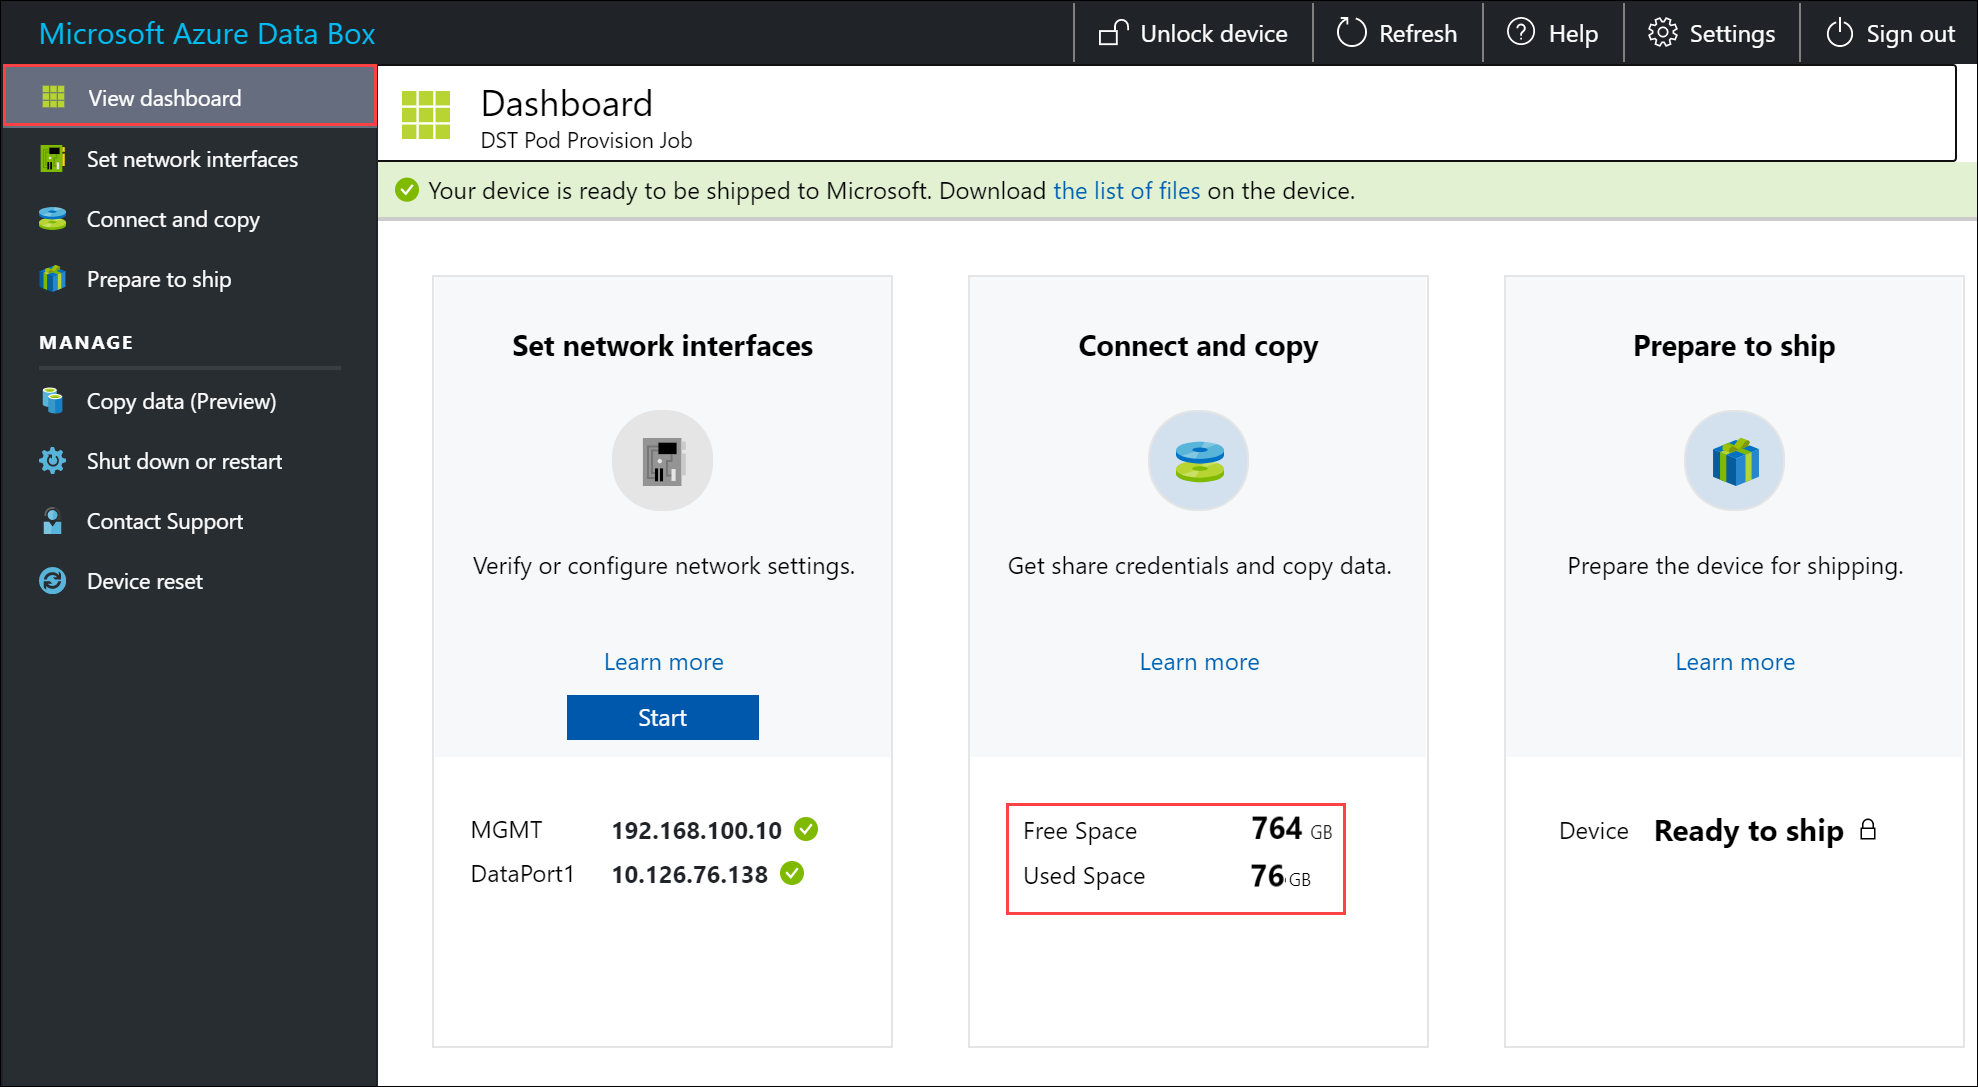
To ensure data integrity, checksum is computed inline as the data is copied. Once the copy is complete, verify the used space and the free space on your device.
Next steps
In this tutorial, you learned about Azure Data Box topics such as:
- Data Box data copy prerequisites
- Connecting to Data Box
- Determining appropriate access tiers for block blobs
- Copying data to Data Box
Advance to the next tutorial to learn how to ship your Data Box back to Azure.