Note
Access to this page requires authorization. You can try signing in or changing directories.
Access to this page requires authorization. You can try changing directories.
The Azure CLI is used to create and manage Azure resources from the command line or in scripts. This quickstart details using the Azure CLI to create an IoT hub and an IoT Hub Device Provisioning Service instance, and to link the two services together.
If you don't have an Azure trial subscription, create an Azure trial subscription before you begin.
Important
Both the IoT hub and the provisioning service you create in this quickstart are publicly discoverable as DNS endpoints. Make sure to avoid any sensitive information if you decide to change the names used for these resources.
Prerequisites
If you prefer to run CLI reference commands locally, install the Azure CLI. If you're running on Windows or macOS, consider running Azure CLI in a Docker container. For more information, see How to run the Azure CLI in a Docker container.
If you're using a local installation, sign in to the Azure CLI by using the az login command. To finish the authentication process, follow the steps displayed in your terminal. For other sign-in options, see Sign in with the Azure CLI.
When you're prompted, install the Azure CLI extension on first use. For more information about extensions, see Use extensions with the Azure CLI.
Run az version to find the version and dependent libraries that are installed. To upgrade to the latest version, run az upgrade.
Create a resource group
Create a resource group with the az group create command. An Azure resource group is a logical container into which Azure resources are deployed and managed.
The following example creates a resource group named my-sample-resource-group in the chinanorth3 location.
az group create --name my-sample-resource-group --location chinanorth3
Tip
The example creates the resource group in the China North 3location. You can view a list of available locations by running the command az account list-locations -o table.
Create an IoT hub
Create an IoT hub with the az iot hub create command.
The following example creates an IoT hub named my-sample-hub in the chinanorth3 location. An IoT hub name must be globally unique in Azure, so either add a unique prefix or suffix to the example name or choose a new name altogether. Make sure your name follows proper naming conventions for an IoT hub: it should be 3-50 characters in length, and can contain only upper or lower case alphanumeric characters or hyphens ('-').
az iot hub create --name my-sample-hub --resource-group my-sample-resource-group --location chinanorth3
Create a Device Provisioning Service instance
Create a Device Provisioning Service instance with the az iot dps create command.
The following example creates a Device Provisioning Service instance named my-sample-dps in the chinanorth3 location. You must also choose a globally unique name for your own instance. Make sure it follows proper naming conventions for an IoT Hub Device Provisioning Service: it should be 3-64 characters in length and can contain only upper or lower case alphanumeric characters or hyphens ('-').
az iot dps create --name my-sample-dps --resource-group my-sample-resource-group --location chinanorth3
Tip
The example creates the provisioning service in the China North 3location. You can view a list of available locations by running the command az provider show --namespace Microsoft.Devices --query "resourceTypes[?resourceType=='ProvisioningServices'].locations | [0]" --out table or by going to the Azure Status page and searching for "Device Provisioning Service". In commands, locations can be specified either in one word or multi-word format; for example: chinanorth3, etc. The value is not case sensitive. If you use multi-word format to specify location, enclose the value in quotes; for example, --location "China North 3".
Get the connection string for the IoT hub
You need your IoT hub's connection string to link it with the Device Provisioning Service. Use the az iot hub connection-string show command to get the connection string and use its output to set a variable used later, when you link the two resources.
The following example sets the hubConnectionString variable to the value of the connection string for the primary key of the hub's iothubowner policy (the --policy-name parameter can be used to specify a different policy). Trade out my-sample-hub for the unique IoT hub name you chose earlier. The command uses the Azure CLI query and output options to extract the connection string from the command output.
hubConnectionString=$(az iot hub connection-string show --name my-sample-hub --key primary --query connectionString -o tsv)
You can use the echo command to see the connection string.
echo $hubConnectionString
Note
These two commands are valid for a host running under Bash.
If you're using a local Windows/CMD shell or a PowerShell host, modify the commands to use the correct syntax for that environment.
Link the IoT hub and the provisioning service
Link the IoT hub and your provisioning service with the az iot dps linked-hub create command.
The following example links an IoT hub named my-sample-hub in the chinanorth3 location and a Device Provisioning Service named my-sample-dps. Trade out these names for the unique IoT hub and Device Provisioning Service names you chose earlier. The command uses the connection string for your IoT hub that was stored in the hubConnectionString variable in the previous step.
az iot dps linked-hub create --dps-name my-sample-dps --resource-group my-sample-resource-group --connection-string $hubConnectionString --location chinanorth3
The command might take a few minutes to complete.
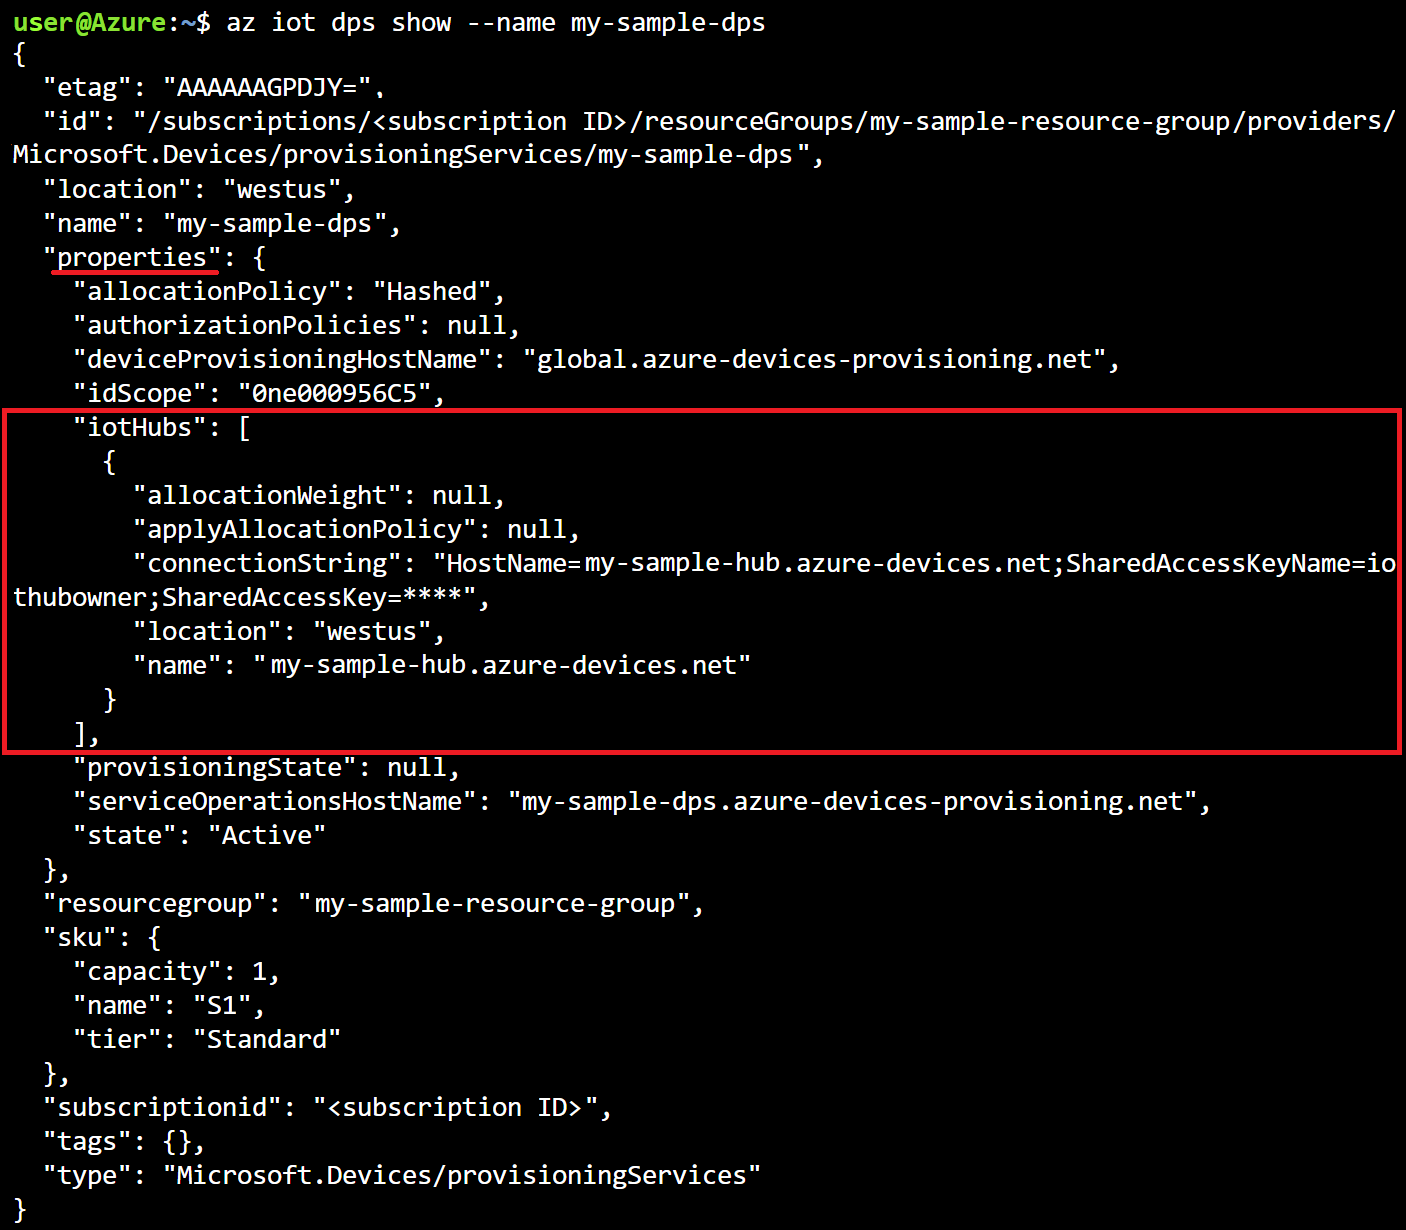
Verify the provisioning service
Get the details of your provisioning service with the az iot dps show command.
The following example gets the details of a provisioning service named my-sample-dps. Trade out this name for your own Device Provisioning Service name.
az iot dps show --name my-sample-dps
The linked IoT hub is shown in the properties.iotHubs collection.
Clean up resources
Other quickstarts in this collection build upon this quickstart. If you plan to continue on to work with subsequent quickstarts or with the tutorials, don't clean up the resources created in this quickstart. If you don't plan to continue, you can use the following commands to delete the provisioning service, the IoT hub, or the resource group and all of its resources. Replace the names of the resources included in the following commands with the names of your own resources.
To delete the provisioning service, run the az iot dps delete command:
az iot dps delete --name my-sample-dps --resource-group my-sample-resource-group
To delete the IoT hub, run the az iot hub delete command:
az iot hub delete --name my-sample-hub --resource-group my-sample-resource-group
To delete a resource group and all its resources, run the az group delete command:
az group delete --name my-sample-resource-group
Next steps
In this quickstart, you deployed an IoT hub and a Device Provisioning Service instance, and linked the two resources. To learn how to use this setup to provision a device, continue to the quickstart for creating a device.