Note
Access to this page requires authorization. You can try signing in or changing directories.
Access to this page requires authorization. You can try changing directories.
APPLIES TO:  Azure CLI ml extension v2 (current)
In this article, you learn how to create and run machine learning pipelines by using the Azure Machine Learning studio and components. You can create pipelines without using components, but components offer better flexibility and reuse. Azure Machine Learning Pipelines can be defined in YAML and run from the Azure CLI, authored in Python, or composed in Azure Machine Learning studio Designer with a drag-and-drop UI. This article focuses on the Azure Machine Learning studio Designer UI.
Prerequisites
If you don't have an Azure subscription, create a trial subscription before you begin. Try the trial subscription.
An Azure Machine Learning workspace. Create workspace resources.
Install and set up the Azure CLI extension for Machine Learning.
Clone the examples repository:
git clone https://github.com/Azure/azureml-examples --depth 1
cd azureml-examples/cli/jobs/pipelines-with-components/
Note
Designer supports two types of components, classic prebuilt components(v1) and custom components (v2). These two types of components are NOT compatible.
Classic prebuilt components provide prebuilt components mainly for data processing and traditional machine learning tasks like regression and classification. Classic prebuilt components continue to be supported but won't have any new components added. Also, deployment of classic prebuilt (v1) components doesn't support managed online endpoints (v2).
Custom components allow you to wrap your own code as a component. It supports sharing components across workspaces and seamless authoring across studio, CLI v2, and SDK v2 interfaces.
For new projects, we highly recommend that you use custom components, which is compatible with Azure Machine Learning V2 and receives new updates.
This article applies to custom components.
Register a component in your workspace
To build a pipeline using components in the Designer UI, you need to first register components to your workspace. You can use the UI, Azure CLI, or the SDK to register components to your workspace, so that you can share and reuse the component in the workspace. Registered components support automatic versioning so you can update the component but assure that pipelines that require an older version continue to work.
The following example uses the UI to register components. The component source files are in the cli/jobs/pipelines-with-components/basics/1b_e2e_registered_components directory of the azureml-examples repository. You need to clone the repository.
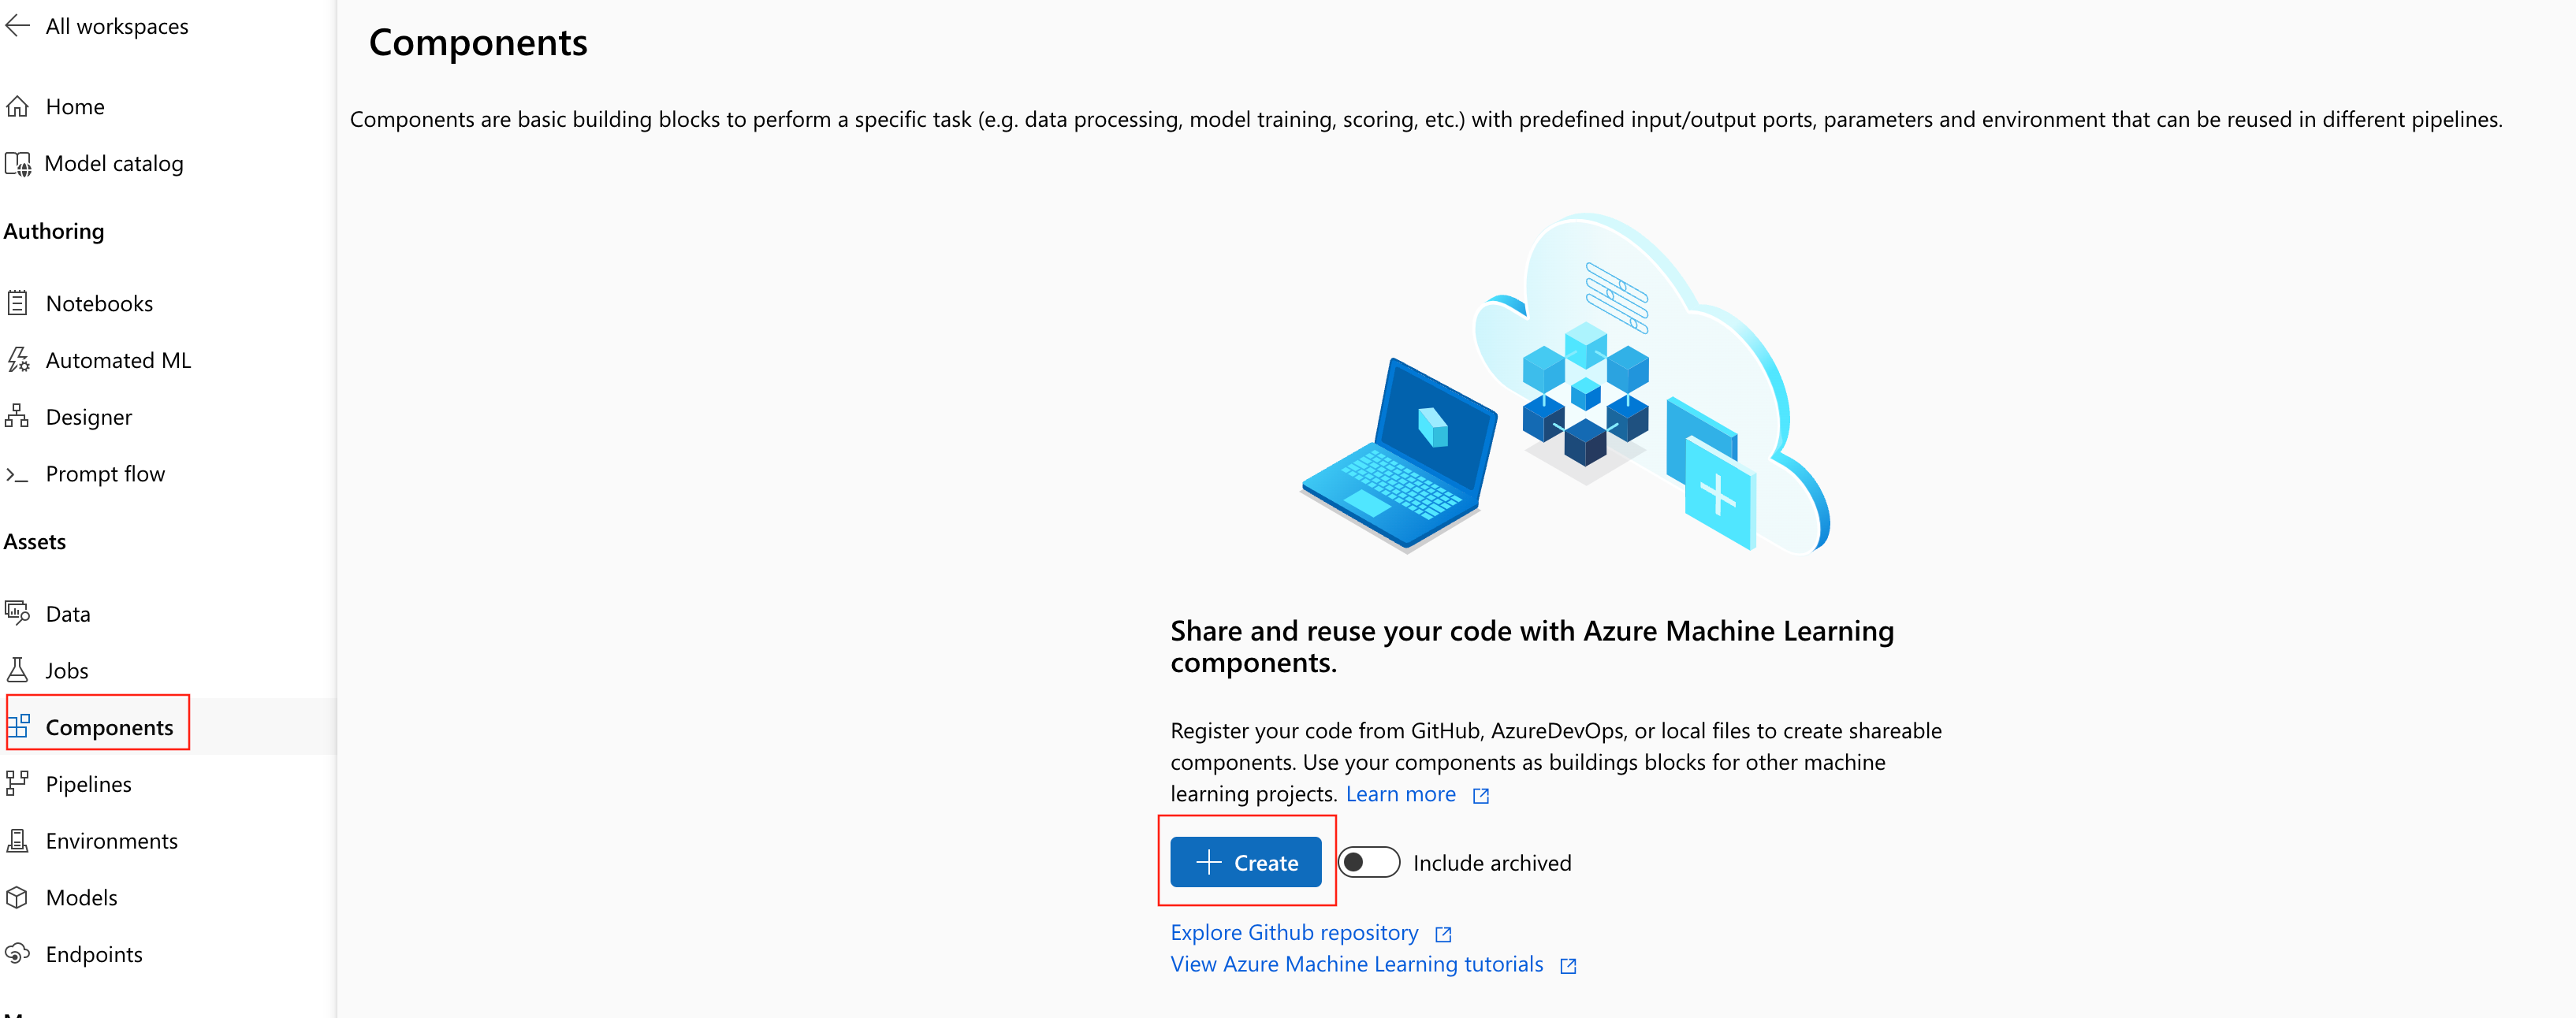
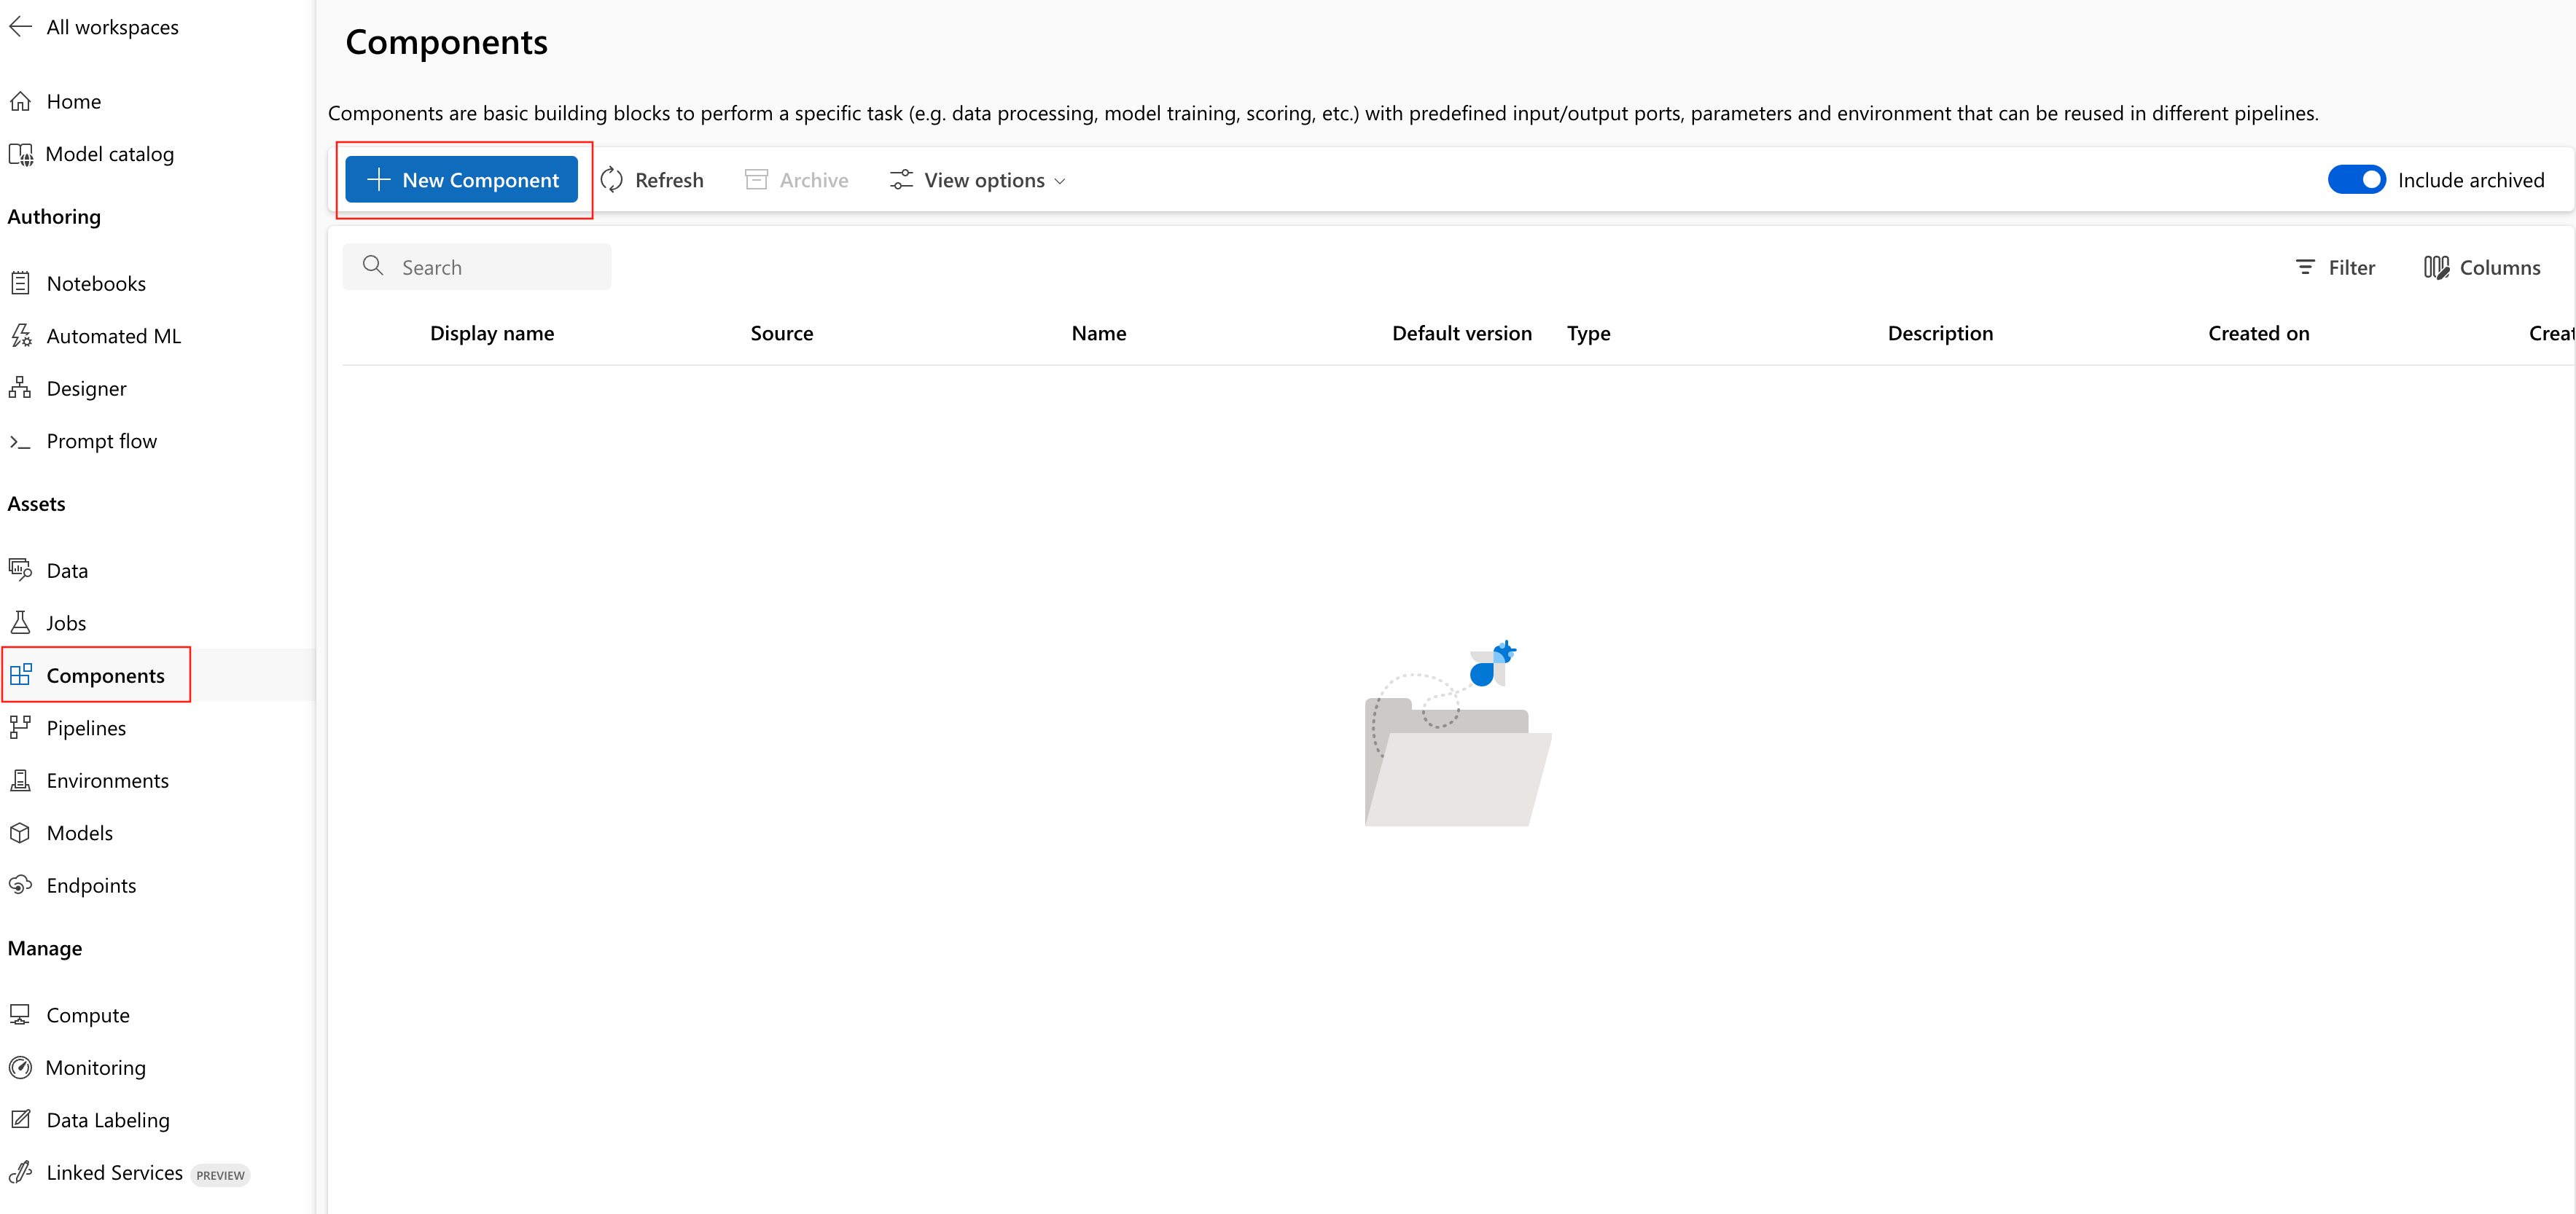
In your Azure Machine Learning workspace, navigate to Components page and select New Component. The Components page appearance differs depending on whether you previously created components.
This example uses
train.ymlin the 1b_e2e_registered_components directory. The YAML file defines the name, type, interface including inputs and outputs, code, environment, and command of this component. The code of this component (train.py) is in./train_srcfolder. That code describes the execution logic of this component. To learn more about the component schema, see the command component YAML schema reference.Note
For register components in the UI,
codedefined in the component YAML file can only point to the current folder where YAML file locates or the subfolders. Because the UI can't recognize the parent directory, you can't specify../.additional_includescan only point to the current folder or subfolder.Currently, the UI only supports registering components with
commandtype.Select Folder, then browse to the
1b_e2e_registered_componentsfolder to upload.Select
train.ymlfrom the Yaml file name.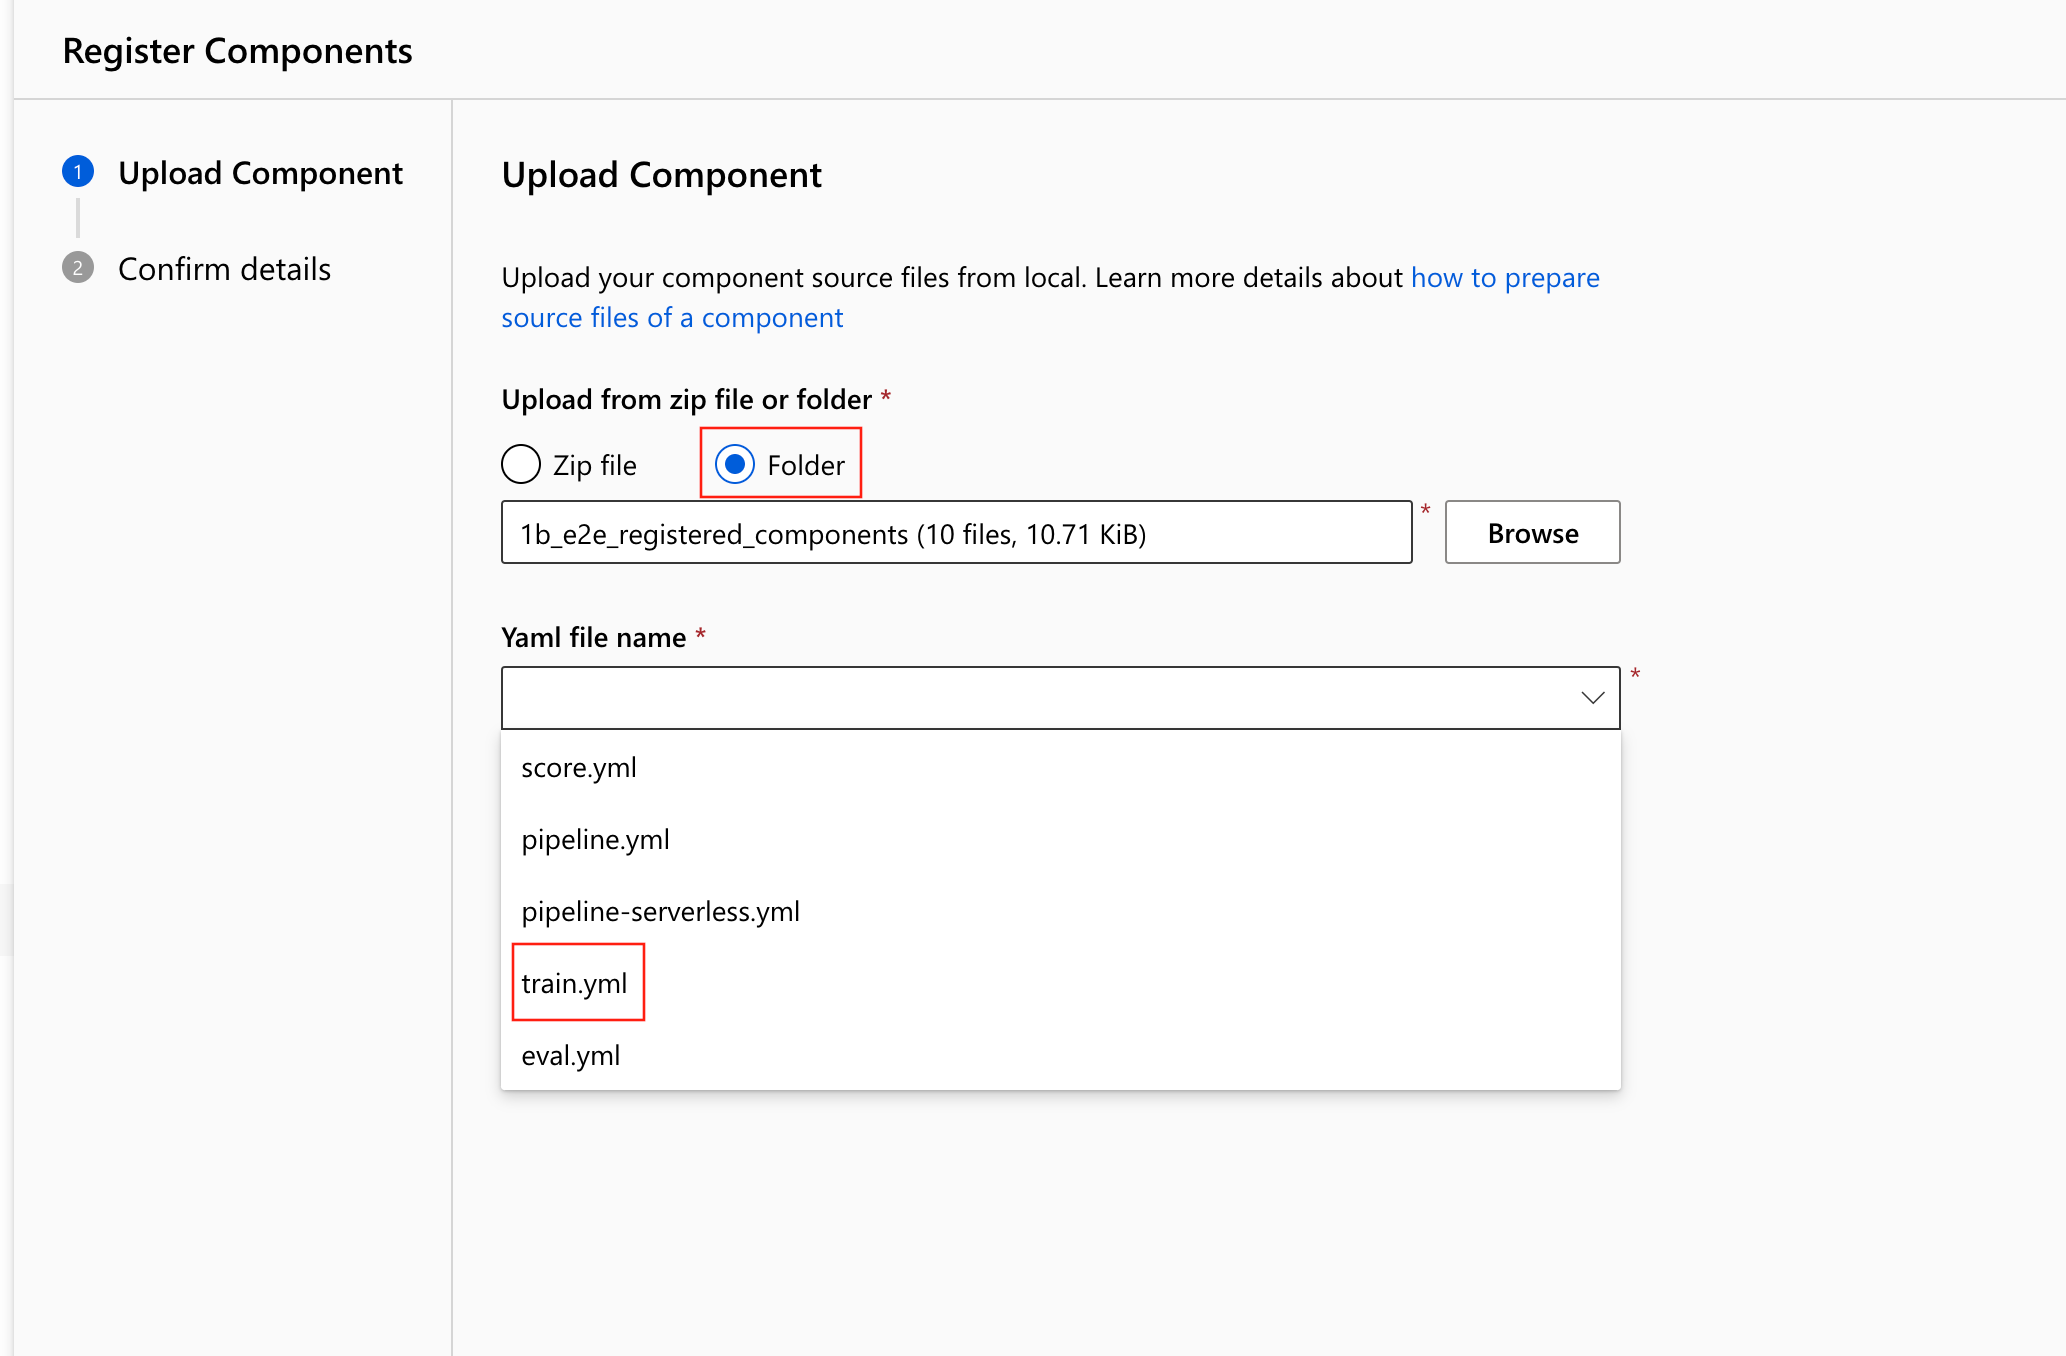
Select Next, then confirm the details of this component. After you confirm, select Create to finish the registration process.
Repeat the previous steps to register Score and Eval component using
score.ymlandeval.yml.After registering the three components successfully, you can see your components in the studio UI.


Create pipeline by using registered component
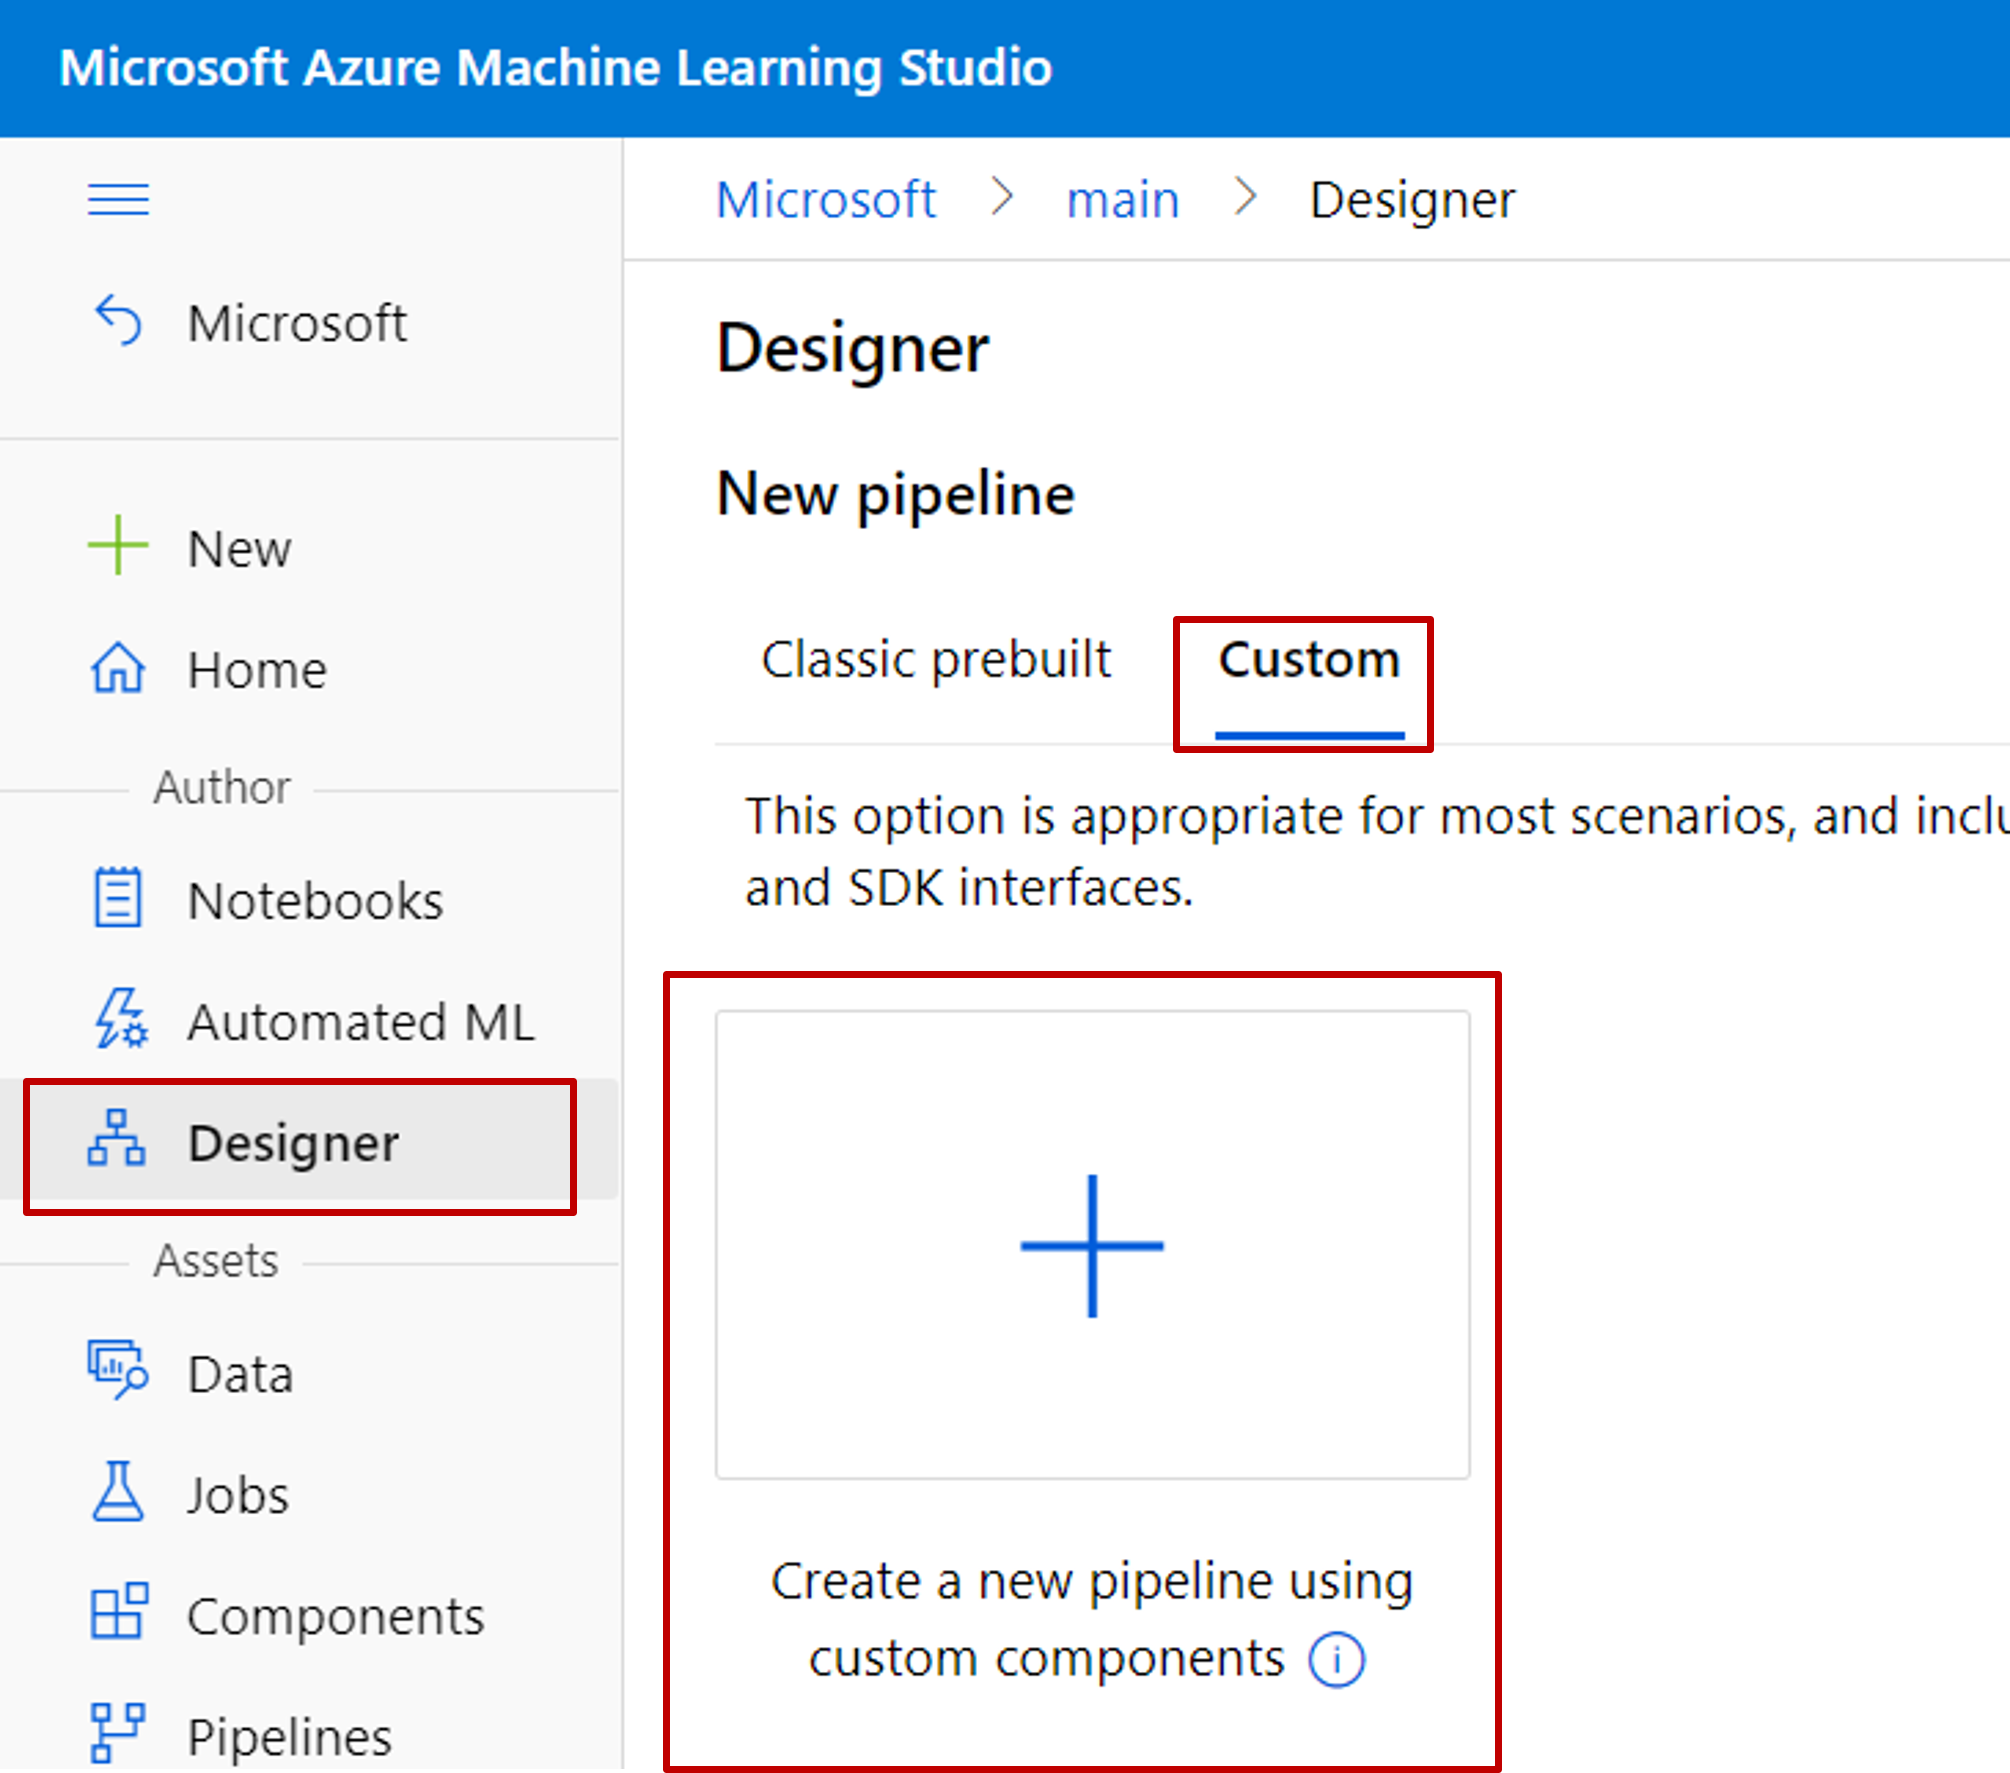
Create a new pipeline in Designer. Select the Custom option.
Select the pencil icon to give the pipeline a meaningful name.
In the Designer asset library, you can see Data, Model, and Components tabs. Select Components. You can see the components registered from previous section. If there are too many components, you can search with the component name.
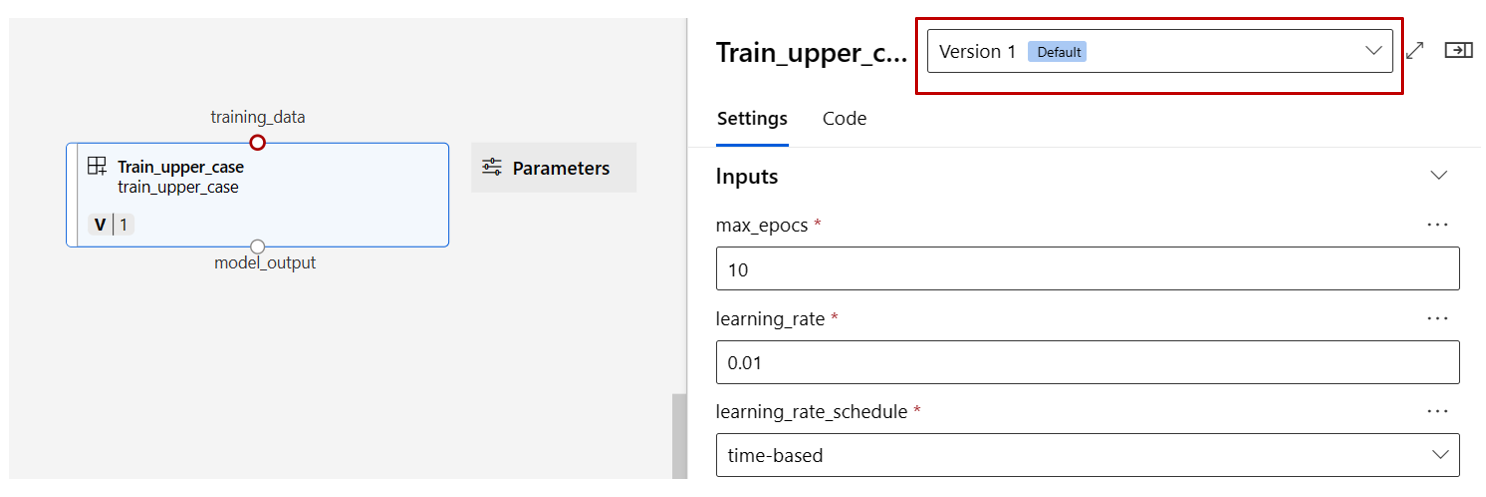
Find the train, score, and eval components registered in previous section then drag them to the canvas. By default, Designer uses the default version of the component. To change to a specific version, double-click the component to open the component pane.
In this example, use the sample data in the data folder. To register the data into your workspace, select the add icon in the asset library, then follow the wizard to register the data. The data type needs to be
uri_folderto align with the train component definition.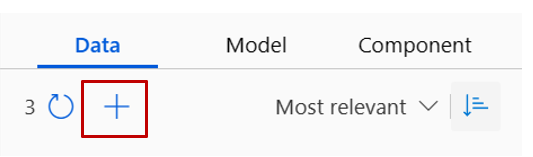
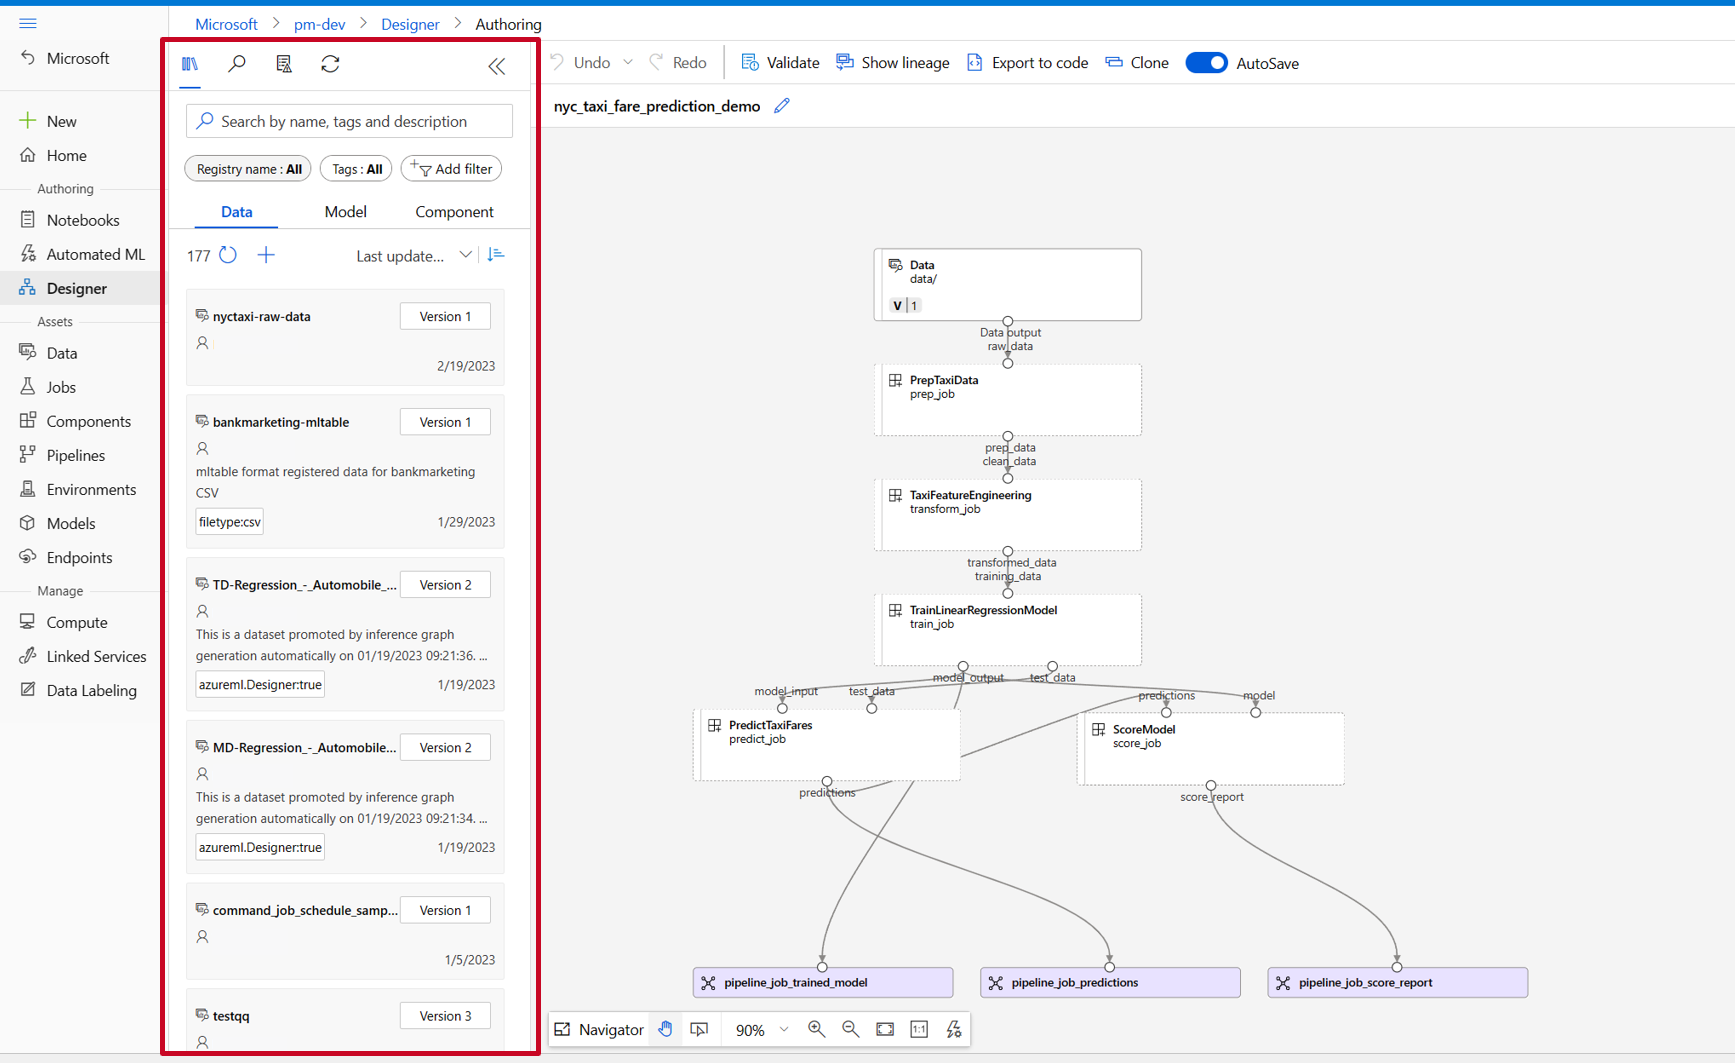
Drag the data into the canvas. Your pipeline should look like the following screenshot.
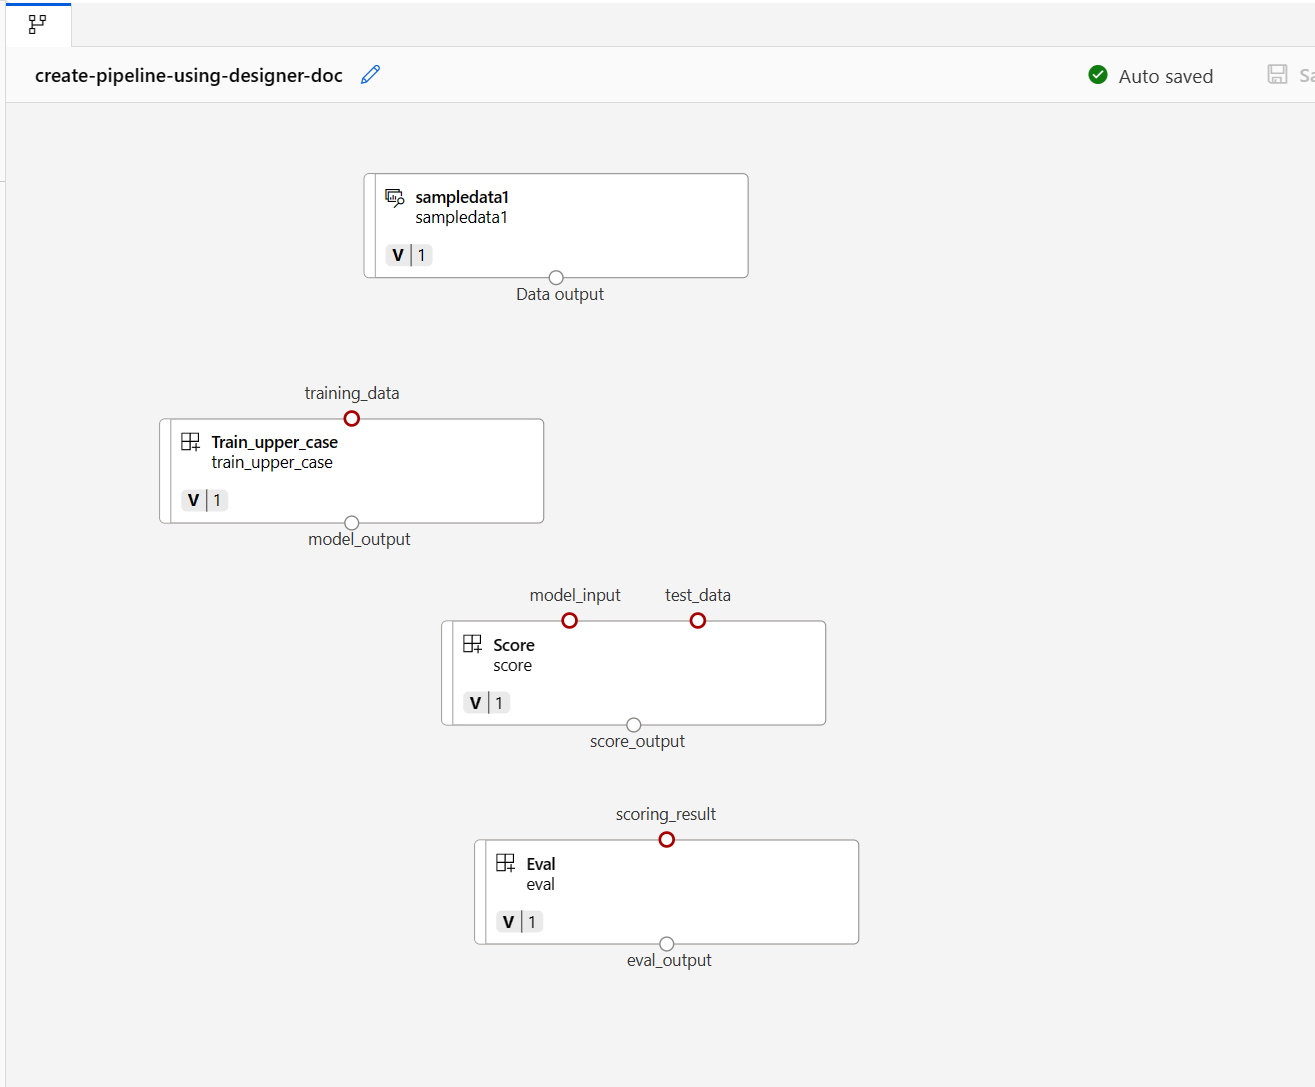
Connect the data and components by dragging connections in the canvas.
Double click one component, you'll see a right pane where you can configure the component.

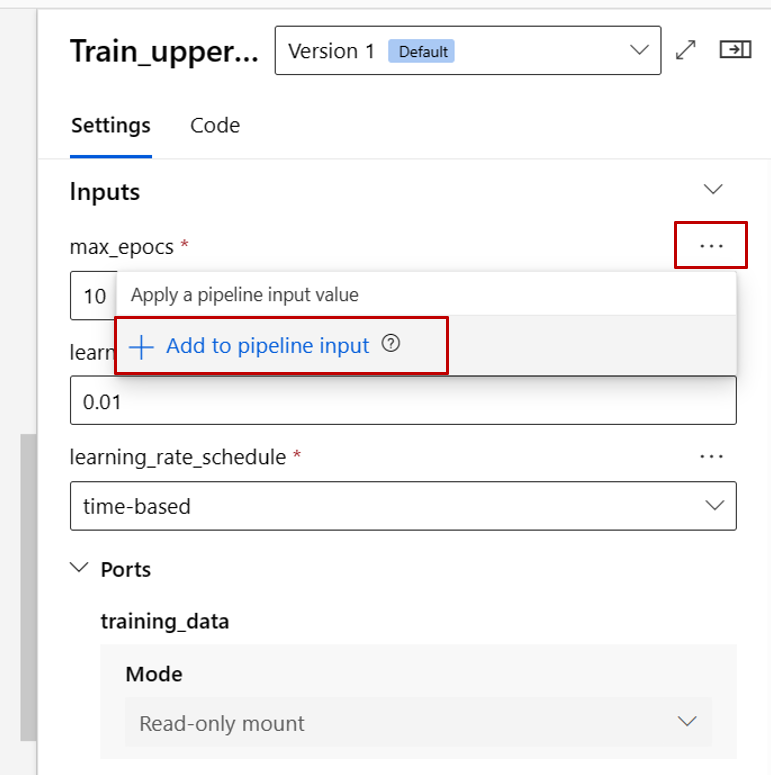
For components with primitive type inputs like number, integer, string, and boolean, you can change values of such inputs in the component detailed pane, under Inputs section.
You can also change the output settings (where to store the component's output) and run settings (compute target to run this component) in the right pane.
Promote the max_epocs input of the train component to pipeline level input. By doing so, you can assign a different value to this input every time before submitting the pipeline.


Note
Custom components and the Designer classic prebuilt components can't be used together.
Submit pipeline
To submit the pipeline, select Configure & Submit.

Then you'll see a step-by-step wizard. Follow the wizard to submit the pipeline job.

In Basics step, you can configure the experiment, job display name, job description etc.
In Inputs & Outputs step, you can configure the Inputs/Outputs that are promoted to pipeline level. In previous step, we promoted the max_epocs of train component to pipeline input, so you should be able to see and assign value to max_epocs here.
In Runtime settings, you can configure the default datastore and default compute of the pipeline. It's the default datastore/compute for all components in the pipeline. But note if you set a different compute or datastore for a component explicitly, the system respects the component level setting. Otherwise, it uses the pipeline default value.
The Review + Submit step is the last step to review all configurations before submit. The wizard remembers your last time's configuration if you ever submit the pipeline.
After submitting the pipeline job, there will be a message on the top with a link to the job detail. You can select this link to review the job details.

Specify identity in pipeline job
When you submit a pipeline job, you can specify the identity to access the data under Run settings. The default identity is AMLToken, which doesn't use any identity. A pipeline can also support UserIdentity and Managed. For UserIdentity, the identity of job submitter is used to access input data and write the result to the output folder. If you specify Managed, the system uses the managed identity to access the input data and write the result to the output folder.

Related content
- Use these Jupyter notebooks on GitHub to explore machine learning pipelines further.
- Learn how to use CLI v2 to create pipeline using components.
- Learn how to use SDK v2 to create pipeline using components.