Note
Access to this page requires authorization. You can try signing in or changing directories.
Access to this page requires authorization. You can try changing directories.
This tutorial shows you how to manage the process of labeling (also referred to as tagging) images to be used as data for building machine learning models. Data labeling in Azure Machine Learning is in public preview.
If you want to train a machine learning model to classify images, you need hundreds or even thousands of images that are correctly labeled. Azure Machine Learning helps you manage the progress of your private team of domain experts as they label your data.
In this tutorial, you'll use images of cats and dogs. Since each image is either a cat or a dog, this is a multi-class labeling project. You'll learn how to:
- Create an Azure storage account and upload images to the account.
- Create an Azure Machine Learning workspace.
- Create a multi-class image labeling project.
- Label your data. Either you or your labelers can perform this task.
- Complete the project by reviewing and exporting the data.
Prerequisites
- An Azure subscription. If you don't have an Azure subscription, create a trial account.
Create a workspace
An Azure Machine Learning workspace is a foundational resource in the cloud that you use to experiment, train, and deploy machine learning models. It ties your Azure subscription and resource group to an easily consumed object in the service.
There are many ways to create a workspace. In this tutorial, you create a workspace via the Azure portal, a web-based console for managing your Azure resources.
Sign in to the Azure portal by using the credentials for your Azure subscription.
In the upper-left corner of the Azure portal, select the three bars, then + Create a resource.

Use the search bar to find Azure Machine Learning.
Select Azure Machine Learning.

In the Machine Learning pane, select Create to begin.
Provide the following information to configure your new workspace:
Field Description Workspace name Enter a unique name that identifies your workspace. In this example, we use docs-ws. Names must be unique across the resource group. Use a name that's easy to recall and to differentiate from workspaces created by others. Subscription Select the Azure subscription that you want to use. Resource group Use an existing resource group in your subscription, or enter a name to create a new resource group. A resource group holds related resources for an Azure solution. In this example, we use docs-aml. Region Select the location closest to your users and the data resources to create your workspace. Storage account A storage account is used as the default datastore for the workspace. You may create a new Azure Storage resource or select an existing one in your subscription. Key vault A key vault is used to store secrets and other sensitive information that is needed by the workspace. You may create a new Azure Key Vault resource or select an existing one in your subscription. Application insights The workspace uses Azure Application Insights to store monitoring information about your deployed models. You may create a new Azure Application Insights resource or select an existing one in your subscription. Container registry A container registry is used to register docker images used in training and deployments. You may choose to create a resource or select an existing one in your subscription. After you're finished configuring the workspace, select Review + Create.
Select Create to create the workspace.
Warning
It can take several minutes to create your workspace in the cloud.
When the process is finished, a deployment success message appears.
To view the new workspace, select Go to resource.
From the portal view of your workspace, select Launch studio to go to the Azure Machine Learning studio.
Start a labeling project
Next you will manage the data labeling project in Azure Machine Learning studio, a consolidated interface that includes machine learning tools to perform data science scenarios for data science practitioners of all skill levels. The studio is not supported on Internet Explorer browsers.
Sign in to Azure Machine Learning studio.
Select your subscription and the workspace you created.
Create a datastore
Azure Machine Learning datastores are used to store connection information, like your subscription ID and token authorization. Here you use a datastore to connect to the storage account that contains the images for this tutorial.
On the left side of your workspace, select Datastores.
Select + New datastore.
Fill out the form with these settings:
Field Description Datastore name Give the datastore a name. Here we use labeling_tutorial. Datastore type Select the type of storage. Here we use Azure Blob Storage, the preferred storage for images. Account selection method Select Enter manually. URL https://azureopendatastorage.blob.core.chinacloudapi.cn/openimagescontainerAuthentication type Select SAS token. Account key ZPlDx0bFHFEqwoy8/B/ZZg1YKi/+cIiPamOPUrRptWbvkO6d84n4loitnSMorv/AxrvE0s86cUr6rULWaSGA2A==Select Create to create the datastore.
Create a labeling project
Now that you have access to the data you want to have labeled, create your labeling project.
At the top of the page, select Projects.
Select + Add project.
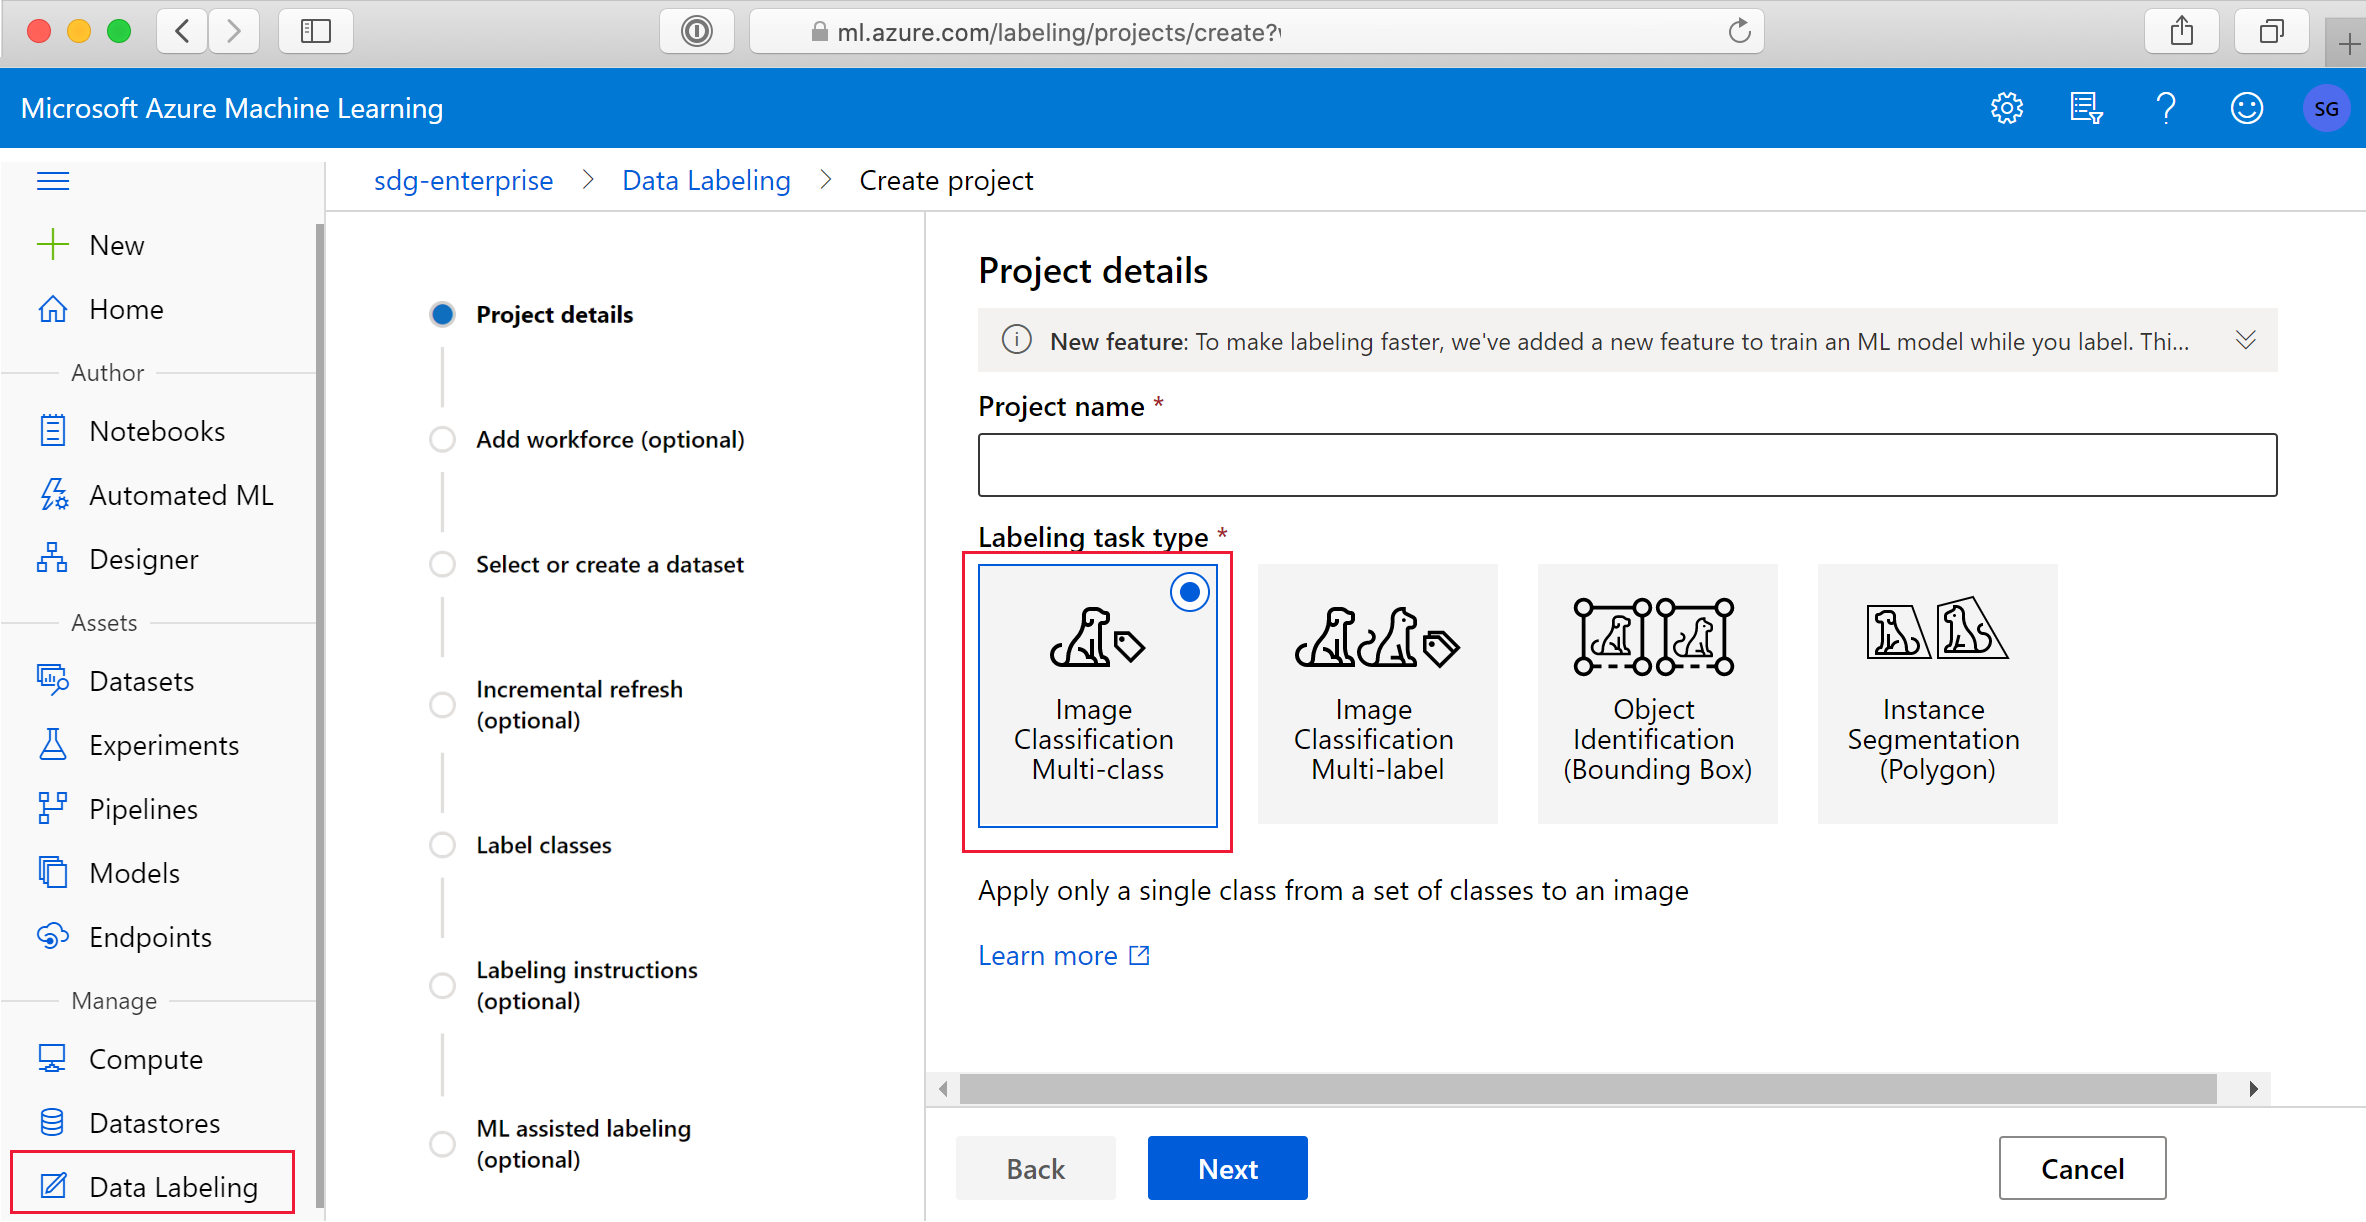
Project details
Use the following input for the Project details form:
Field Description Project name Give your project a name. Here we'll use tutorial-cats-n-dogs. Labeling task type Select Image Classification Multi-class. Select Next to continue creating the project.
Add workforce (optional)
Select Next to continue. You won't be using an external workforce for this tutorial.
Select or create a dataset
On the Select or create a dataset form, select the second choice, Create a dataset, then select the link From datastore.
Use the following input for the Create dataset from datastore form:
- On the Basic info form, add a name, here we'll use images-for-tutorial. Add a description if you wish. Then select Next.
- On the Datastore selection form, select Previously created datastore, then click on the datastore name and select Select datastore.
- On the next page, verify that the currently selected datastore is correct. If not, select Previously created datastore and repeat the prior step.
- Next, still on the Datastore selection form, select Browse and then select MultiClass - DogsCats. Select Save to use /MultiClass - DogsCats as the path.
- Select Next to confirm details and then Create to create the dataset.
- Select the circle next to the dataset name in the list, for example images-for-tutorial.
Select Next to continue creating the project.
Incremental refresh
If you plan to add new images to your dataset, incremental refresh will find these new images and add them to your project. When you enable this feature, the project will periodically check for new images. You won't be adding new images to the datastore for this tutorial, so leave this feature unchecked.
Select Next to continue.
Label classes
On the Label classes form, type a label name, then select +Add label to type the next label. For this project, the labels are Cat, Dog, and Uncertain.
Select Next when have added all the labels.
Labeling instructions
On the Labeling instructions form, you can provide a link to a website that provides detailed instructions for your labelers. We'll leave it blank for this tutorial.
You can also add a short description of the task directly on the form. Type Labeling tutorial - Cats & Dogs.
Select Next.
In the ML assisted labeling section, leave the checkbox unchecked. ML assisted labeling requires more data than you'll be using in this tutorial.
Select Create project.
This page doesn't automatically refresh. After a pause, manually refresh the page until the project's status changes to Created.
Start labeling
You have now set up your Azure resources, and configured a data labeling project. It's time to add labels to your data.
Tag the images
In this part of the tutorial, you'll switch roles from the project administrator to that of a labeler. Anyone who has contributor access to your workspace can become a labeler.
In Machine Learning studio, select Data labeling on the left-hand side to find your project.
Select Label link for the project.
Read the instructions, then select Tasks.
Select a thumbnail image on the right to display the number of images you wish to label in one go. You must label all these images before you can move on. Only switch layouts when you have a fresh page of unlabeled data. Switching layouts clears the page's in-progress tagging work.
Select one or more images, then select a tag to apply to the selection. The tag appears below the image. Continue to select and tag all images on the page. To select all the displayed images simultaneously, select Select all. Select at least one image to apply a tag.
Tip
You can select the first nine tags by using the number keys on your keyboard.
Once all the images on the page are tagged, select Submit to submit these labels.

After you submit tags for the data at hand, Azure refreshes the page with a new set of images from the work queue.
Complete the project
Now you'll switch roles back to the project administrator for the labeling project.
As a manager, you may want to review the work of your labeler.
Review labeled data
In Machine Learning studio, select Data labeling on the left-hand side to find your project.
Select the project name link.
The Dashboard shows you the progress of your project.
At the top of the page, select Data.
On the left side, select Labeled data to see your tagged images.
When you disagree with a label, select the image and then select Reject at the bottom of the page. The tags will be removed and the image is put back in the queue of unlabeled images.
Export labeled data
You can export the label data for Machine Learning experimentation at any time. Users often export multiple times and train different models, rather than wait for all the images to be labeled.
Image labels can be exported in COCO format or as an Azure Machine Learning dataset. The dataset format makes it easy to use for training in Azure Machine Learning.
In Machine Learning studio, select Data labeling on the left-hand side to find your project.
Select the project name link.
Select Export and choose Export as Azure ML Dataset.
The status of the export appears just below the Export button.
Once the labels are successfully exported, select Datasets on the left side to view the results.
Clean up resources
Important
The resources that you created can be used as prerequisites to other Azure Machine Learning tutorials and how-to articles.
If you don't plan to use any of the resources that you created, delete them so you don't incur any charges:
In the Azure portal, select Resource groups on the far left.
From the list, select the resource group that you created.
Select Delete resource group.
Enter the resource group name. Then select Delete.