Note
Access to this page requires authorization. You can try signing in or changing directories.
Access to this page requires authorization. You can try changing directories.
APPLIES TO:  Python SDK azure-ai-ml v2 (current)
This tutorial introduces some of the most used features of the Azure Machine Learning service. You create, register, and deploy a model. This tutorial helps you become familiar with the core concepts of Azure Machine Learning and their most common usage.
In this quickstart, you train, register, and deploy a machine learning model using Azure Machine Learning—all from a Python notebook. By the end, you'll have a working endpoint you can call for predictions.
You learn how to:
- Run a training job on scalable cloud compute
- Register your trained model
- Deploy the model as an online endpoint
- Test the endpoint with sample data
You create a training script to handle the data preparation, train, and register a model. After you train the model, you deploy it as an endpoint, then call the endpoint for inferencing.
The steps you take are:
- Set up a handle to your Azure Machine Learning workspace
- Create your training script
- Create a scalable compute resource, a compute cluster
- Create and run a command job that runs the training script on the compute cluster, configured with the appropriate job environment
- View the output of your training script
- Deploy the newly-trained model as an endpoint
- Call the Azure Machine Learning endpoint for inferencing
Prerequisites
-
To use Azure Machine Learning, you need a workspace. If you don't have one, complete Create resources you need to get started to create a workspace and learn more about using it.
Important
If your Azure Machine Learning workspace is configured with a managed virtual network, you might need to add outbound rules to allow access to the public Python package repositories. For more information, see Scenario: Access public machine learning packages.
-
Sign in to studio and select your workspace if it's not already open.
-
Open or create a notebook in your workspace:
- If you want to copy and paste code into cells, create a new notebook.
- Or, open tutorials/get-started-notebooks/quickstart.ipynb from the Samples section of studio. Then select Clone to add the notebook to your Files. To find sample notebooks, see Learn from sample notebooks.
Set your kernel and open in Visual Studio Code (VS Code)
On the top bar above your opened notebook, create a compute instance if you don't already have one.

If the compute instance is stopped, select Start compute and wait until it's running.

Wait until the compute instance is running. Then make sure that the kernel, found on the top right, is
Python 3.10 - SDK v2. If not, use the dropdown list to select this kernel.
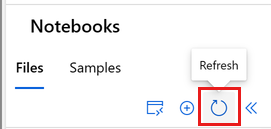
If you don't see this kernel, verify that your compute instance is running. If it is, select the Refresh button on the top right of the notebook.
If you see a banner that says you need to be authenticated, select Authenticate.
You can run the notebook here, or open it in VS Code for a full integrated development environment (IDE) with the power of Azure Machine Learning resources. Select Open in VS Code, then select either the web or desktop option. When launched this way, VS Code is attached to your compute instance, the kernel, and the workspace file system.


Important
The rest of this tutorial contains cells of the tutorial notebook. Copy and paste them into your new notebook, or switch to the notebook now if you cloned it.
Create handle to workspace
Before you dive into the code, you need a way to reference your workspace. The workspace is the top-level resource for Azure Machine Learning, providing a centralized place to work with all the artifacts you create when you use Azure Machine Learning.
Create ml_client as a handle to your workspace—this client manages all your resources and jobs.
In the next cell, enter your Subscription ID, Resource Group name, and Workspace name. To find these values:
- In the upper right Azure Machine Learning studio toolbar, select your workspace name.
- Copy the value for workspace, resource group, and subscription ID into the code.
- Copy one value, close the area, and paste it. Then come back for the next value.

from azure.ai.ml import MLClient
from azure.identity import DefaultAzureCredential, InteractiveBrowserCredential

# authenticate
try:
    credential = DefaultAzureCredential()
    credential.get_token("https://management.chinacloudapi.cn/.default")
except Exception:
    credential = InteractiveBrowserCredential()

SUBSCRIPTION = "<SUBSCRIPTION_ID>"
RESOURCE_GROUP = "<RESOURCE_GROUP>"
WS_NAME = "<AML_WORKSPACE_NAME>"
# Get a handle to the workspace
ml_client = MLClient(
    credential=credential,
    subscription_id=SUBSCRIPTION,
    resource_group_name=RESOURCE_GROUP,
    workspace_name=WS_NAME,
)
Note
Creating MLClient doesn't connect to the workspace. The client initialization is lazy. It waits until the first time it needs to make a call. This action happens in the next code cell.
# Verify that the handle works correctly.
# If you ge an error here, modify your SUBSCRIPTION, RESOURCE_GROUP, and WS_NAME in the previous cell.
ws = ml_client.workspaces.get(WS_NAME)
print(ws.location, ":", ws.resource_group)
Create training script
Create the training script, which is the main.py Python file.
First, create a source folder for the script:
import os

train_src_dir = "./src"
os.makedirs(train_src_dir, exist_ok=True)
This script preprocesses the data and splits it into test and train datasets. It trains a tree-based model by using this data and returns the output model.
During the pipeline run, use MLFlow to log the parameters and metrics.
The following cell uses IPython magic to write the training script into the directory you just created.
%%writefile {train_src_dir}/main.py
import os
import argparse
import pandas as pd
import mlflow
import mlflow.sklearn
from sklearn.ensemble import GradientBoostingClassifier
from sklearn.metrics import classification_report
from sklearn.model_selection import train_test_split

def main():
    """Main function of the script."""

    # input and output arguments
    parser = argparse.ArgumentParser()
    parser.add_argument("--data", type=str, help="path to input data")
    parser.add_argument("--test_train_ratio", type=float, required=False, default=0.25)
    parser.add_argument("--n_estimators", required=False, default=100, type=int)
    parser.add_argument("--learning_rate", required=False, default=0.1, type=float)
    parser.add_argument("--registered_model_name", type=str, help="model name")
    args = parser.parse_args()

    # Start Logging
    mlflow.start_run()

    # enable autologging
    mlflow.sklearn.autolog()

    ###################
    #<prepare the data>
    ###################
    print(" ".join(f"{k}={v}" for k, v in vars(args).items()))

    print("input data:", args.data)

    credit_df = pd.read_csv(args.data, header=1, index_col=0)

    mlflow.log_metric("num_samples", credit_df.shape[0])
    mlflow.log_metric("num_features", credit_df.shape[1] - 1)

    train_df, test_df = train_test_split(
        credit_df,
        test_size=args.test_train_ratio,
    )
    ####################
    #</prepare the data>
    ####################

    ##################
    #<train the model>
    ##################
    # Extracting the label column
    y_train = train_df.pop("default payment next month")

    # convert the dataframe values to array
    X_train = train_df.values

    # Extracting the label column
    y_test = test_df.pop("default payment next month")

    # convert the dataframe values to array
    X_test = test_df.values

    print(f"Training with data of shape {X_train.shape}")

    clf = GradientBoostingClassifier(
        n_estimators=args.n_estimators, learning_rate=args.learning_rate
    )
    clf.fit(X_train, y_train)

    y_pred = clf.predict(X_test)

    print(classification_report(y_test, y_pred))
    ###################
    #</train the model>
    ###################

    ##########################
    #<save and register model>
    ##########################
    # Registering the model to the workspace
    print("Registering the model via MLFlow")

    # pin numpy
    conda_env = {
        'name': 'mlflow-env',
        'channels': ['conda-forge'],
        'dependencies': [
            'python=3.10.15',
            'pip<=21.3.1',
            {
                'pip': [
                    'mlflow==2.17.0',
                    'cloudpickle==2.2.1',
                    'pandas==1.5.3',
                    'psutil==5.8.0',
                    'scikit-learn==1.5.2',
                    'numpy==1.26.4',
                ]
            }
        ],
    }

    mlflow.sklearn.log_model(
        sk_model=clf,
        registered_model_name=args.registered_model_name,
        artifact_path=args.registered_model_name,
        conda_env=conda_env,
    )

    # Saving the model to a file
    mlflow.sklearn.save_model(
        sk_model=clf,
        path=os.path.join(args.registered_model_name, "trained_model"),
    )
    ###########################
    #</save and register model>
    ###########################

    # Stop Logging
    mlflow.end_run()

if __name__ == "__main__":
    main()
When the model is trained, the script saves and registers the model file to the workspace. You can use the registered model in inferencing endpoints.
You might need to select Refresh to see the new folder and script in your Files.
Configure the command
You now have a script that can perform the desired tasks, and a compute cluster to run the script. Use a general purpose command that can run command line actions. This command line action can directly call system commands or run a script.
Create input variables to specify the input data, split ratio, learning rate, and registered model name. The command script:
- Uses an environment that defines software and runtime libraries needed for the training script. Azure Machine Learning provides many curated or ready-made environments, which are useful for common training and inference scenarios. You use one of those environments here. In Tutorial: Train a model in Azure Machine Learning, you learn how to create a custom environment.
- Configures the command line action itself -
python main.pyin this case. The inputs and outputs are accessible in the command via the${{ ... }}notation. - Accesses the data from a file on the internet.
- Since you didn't specify a compute resource, the script runs on a serverless compute cluster that is automatically created.
from azure.ai.ml import command
from azure.ai.ml import Input

registered_model_name = "credit_defaults_model"

job = command(
    inputs=dict(
        data=Input(
            type="uri_file",
            path="https://azuremlexamples.blob.core.chinacloudapi.cn/datasets/credit_card/default_of_credit_card_clients.csv",
        ),
        test_train_ratio=0.2,
        learning_rate=0.25,
        registered_model_name=registered_model_name,
    ),
    code="./src/",  # location of source code
    command="python main.py --data ${{inputs.data}} --test_train_ratio ${{inputs.test_train_ratio}} --learning_rate ${{inputs.learning_rate}} --registered_model_name ${{inputs.registered_model_name}}",
    environment="azureml://registries/azureml/environments/sklearn-1.5/labels/latest",
    display_name="credit_default_prediction",
)
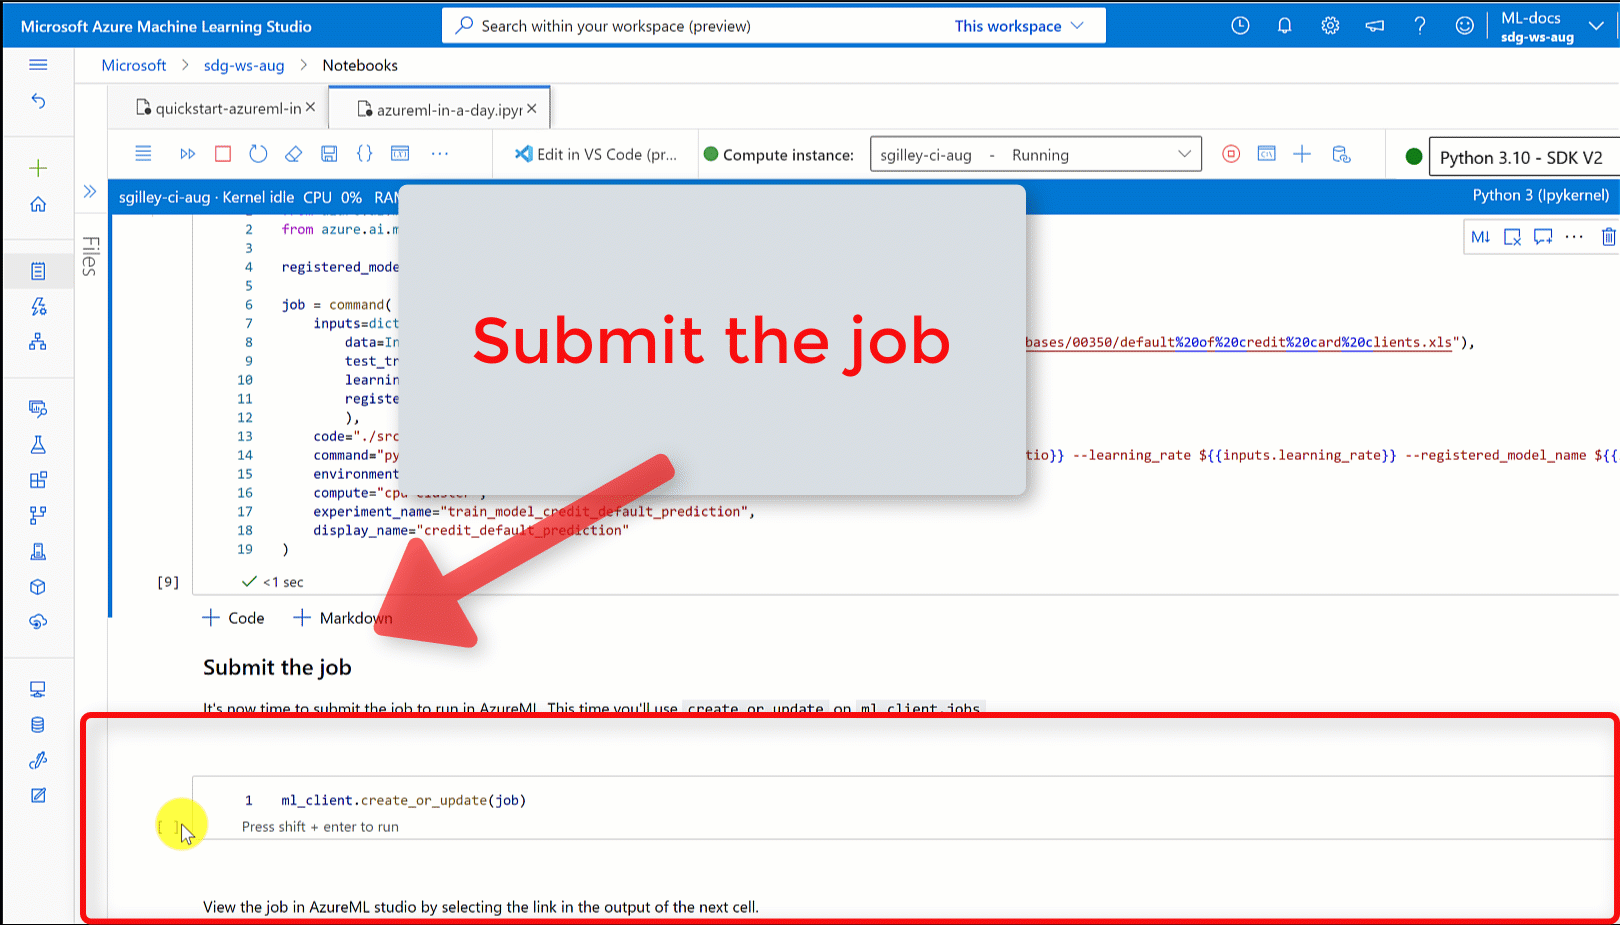
Submit the job
Submit the job to run in Azure Machine Learning. This time, use create_or_update on ml_client.
ml_client.create_or_update(job)
View job output and wait for job completion
View the job in Azure Machine Learning studio by selecting the link in the output of the previous cell.
The output of this job looks like this in the Azure Machine Learning studio. Explore the tabs for various details like metrics, outputs, and more. Once completed, the job registers a model in your workspace as a result of training.
Important
Wait until the job status shows Completed before continuing—typically 2-3 minutes. If the compute cluster scaled to zero, expect up to 10 minutes while it provisions.
While you wait, explore the job details in the studio:
- Metrics tab: View training metrics logged by MLflow
- Outputs + logs tab: Check the training logs
- Models tab: See the registered model (after completion)
Deploy the model as an online endpoint
Deploy your machine learning model as a web service in the Azure cloud by using an online endpoint.
To deploy a machine learning service, use the model you registered.
Create a new online endpoint
Now that you registered a model, create your online endpoint. The endpoint name needs to be unique in the entire Azure region. For this tutorial, create a unique name by using UUID.
import uuid

# Creating a unique name for the endpoint
online_endpoint_name = "credit-endpoint-" + str(uuid.uuid4())[:8]
Create the endpoint.
# Expect the endpoint creation to take a few minutes
from azure.ai.ml.entities import (
    ManagedOnlineEndpoint,
    ManagedOnlineDeployment,
    Model,
    Environment,
)

# create an online endpoint
endpoint = ManagedOnlineEndpoint(
    name=online_endpoint_name,
    description="this is an online endpoint",
    auth_mode="key",
    tags={
        "training_dataset": "credit_defaults",
        "model_type": "sklearn.GradientBoostingClassifier",
    },
)

endpoint = ml_client.online_endpoints.begin_create_or_update(endpoint).result()

print(f"Endpoint {endpoint.name} provisioning state: {endpoint.provisioning_state}")
Note
Expect the endpoint creation to take a few minutes.
After creating the endpoint, retrieve it as shown in the following code:
endpoint = ml_client.online_endpoints.get(name=online_endpoint_name)

print(
    f'Endpoint "{endpoint.name}" with provisioning state "{endpoint.provisioning_state}" is retrieved'
)
Deploy the model to the endpoint
After you create the endpoint, deploy the model by using the entry script. Each endpoint can have multiple deployments. You can specify rules to direct traffic to these deployments. In this example, you create a single deployment that handles 100% of the incoming traffic. Choose a color name for the deployment, such as blue, green, or red. The choice is arbitrary.
To find the latest version of your registered model, check the Models page in Azure Machine Learning studio. Alternatively, use the following code to retrieve the latest version number.
# Let's pick the latest version of the model
latest_model_version = max(
    [int(m.version) for m in ml_client.models.list(name=registered_model_name)]
)
print(f'Latest model is version "{latest_model_version}" ')
Deploy the latest version of the model.
# picking the model to deploy. Here we use the latest version of our registered model
model = ml_client.models.get(name=registered_model_name, version=latest_model_version)

# Expect this deployment to take approximately 6 to 8 minutes.
# create an online deployment.
# if you run into an out of quota error, change the instance_type to a comparable VM that is available.
# Learn more on https://www.azure.cn/pricing/details/machine-learning/.
blue_deployment = ManagedOnlineDeployment(
    name="blue",
    endpoint_name=online_endpoint_name,
    model=model,
    instance_type="Standard_DS3_v2",
    instance_count=1,
)

blue_deployment = ml_client.begin_create_or_update(blue_deployment).result()
Note
Expect this deployment to take approximately 6 to 8 minutes.
When the deployment finishes, you're ready to test it.
Test with a sample query
After you deploy the model to the endpoint, run inference by using the model.
Create a sample request file that follows the design expected in the run method in the score script.
deploy_dir = "./deploy"
os.makedirs(deploy_dir, exist_ok=True)
%%writefile {deploy_dir}/sample-request.json
{
  "input_data": {
    "columns": [0,1,2,3,4,5,6,7,8,9,10,11,12,13,14,15,16,17,18,19,20,21,22],
    "index": [0, 1],
    "data": [
            [20000,2,2,1,24,2,2,-1,-1,-2,-2,3913,3102,689,0,0,0,0,689,0,0,0,0],
            [10, 9, 8, 7, 6, 5, 4, 3, 2, 1, 10, 9, 8, 7, 6, 5, 4, 3, 2, 1, 10, 9, 8]
        ]
  }
}
# test the blue deployment with some sample data
ml_client.online_endpoints.invoke(
    endpoint_name=online_endpoint_name,
    request_file="./deploy/sample-request.json",
    deployment_name="blue",
)
Clean up resources
If you don't need the endpoint, delete it to stop using the resource. Make sure no other deployments use an endpoint before you delete it.
Note
Expect the complete deletion to take approximately 20 minutes.
ml_client.online_endpoints.begin_delete(name=online_endpoint_name)
Stop compute instance
If you don't need it now, stop the compute instance:
- In the studio, in the left pane, select Compute.
- In the top tabs, select Compute instances.
- Select the compute instance in the list.
- On the top toolbar, select Stop.
Delete all resources
Important
The resources that you created can be used as prerequisites to other Azure Machine Learning tutorials and how-to articles.
If you don't plan to use any of the resources that you created, delete them so you don't incur any charges:
In the Azure portal, in the search box, enter Resource groups and select it from the results.
From the list, select the resource group that you created.
In the Overview page, select Delete resource group.
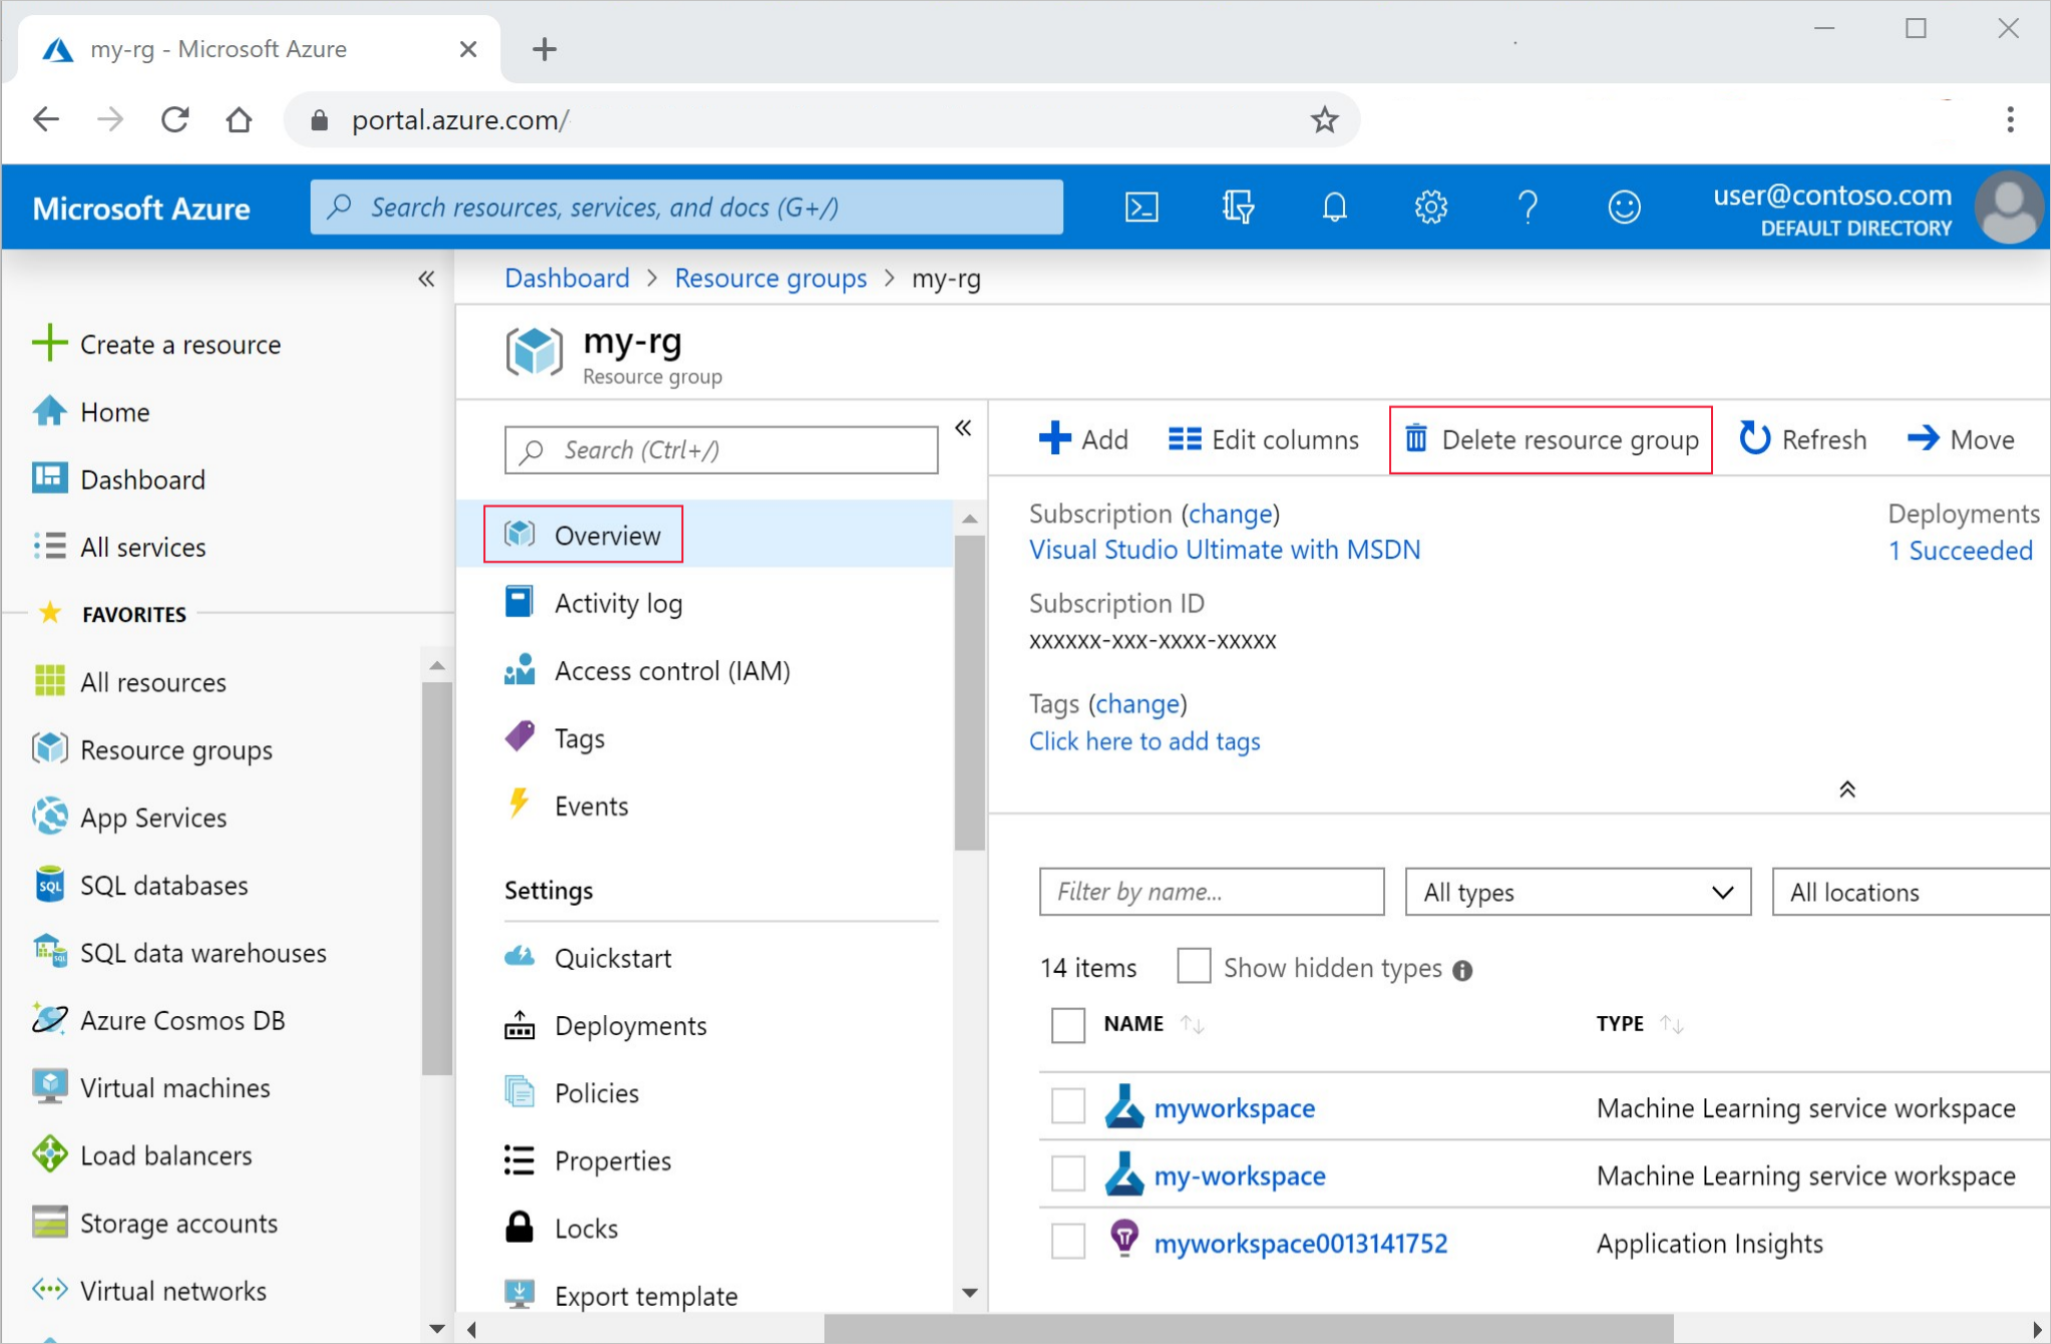
Enter the resource group name. Then select Delete.
Next steps
Explore more ways to build with Azure Machine Learning:
| Tutorial | Description |
|---|---|
| Upload, access, and explore your data | Store large data in the cloud and access it from notebooks |
| Deploy a model as an online endpoint | Learn advanced deployment configurations |
| Create production pipelines | Build automated, reusable ML workflows |