Note
Access to this page requires authorization. You can try signing in or changing directories.
Access to this page requires authorization. You can try changing directories.
To process data, Azure Managed Grafana needs permission to access data sources. In this guide, learn how to set up authentication in an Azure Managed Grafana instance, so that Grafana can access data sources using a managed identity or a service principal. This guide also introduces the action of adding a Monitoring Reader role assignment on the target subscription to provide read-only access to monitoring data across all resources within the subscription.
Prerequisites
- An Azure account with an active subscription. Create an account.
- An Azure Managed Grafana workspace. Create an Azure Managed Grafana instance.
- Owner or User Access Administrator permissions on the Azure Managed Grafana resource
Use a system-assigned managed identity
The system-assigned managed identity is the default authentication method provided in Azure Managed Grafana. The managed identity is authenticated with Microsoft Entra ID, so you don’t have to store any credentials in code. Although you can opt out, it's enabled by default when you create a new workspace, as long as you have the Owner or User Access Administrator role for the subscription. If system-assigned managed identity is disabled in your workspace and you have the necessary permissions, you can enable it later on.
To enable a system-assigned managed identity:
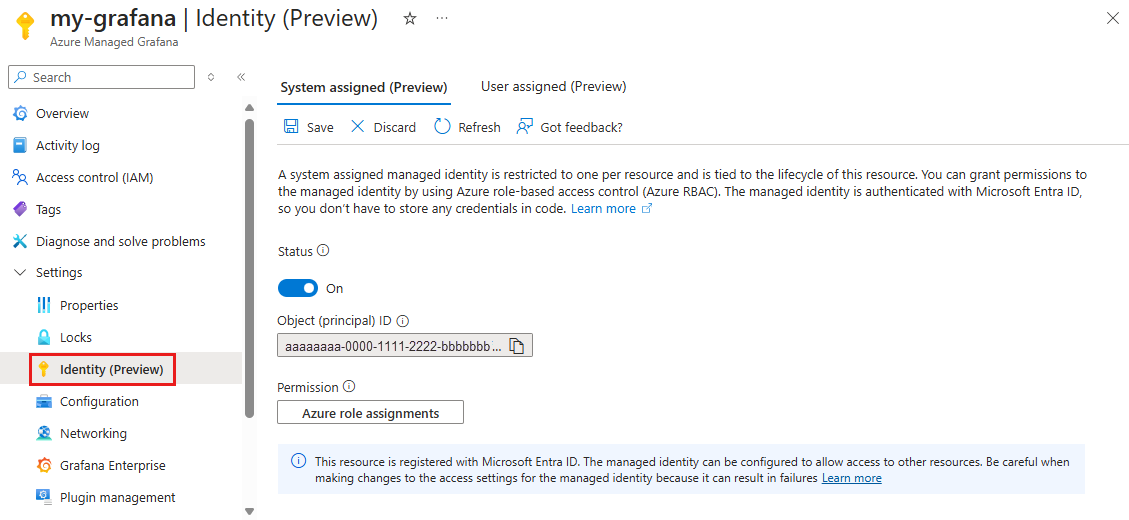
Select Settings > Identity.
In the System assigned tab, set the status for System assigned to On.
Note
Assigning multiple managed identities to a single Azure Managed Grafana resource isn't possible. If a user-assigned managed identity is already assigned to the Azure Managed Grafana resource, you must first remove the assignment from the User assigned tab before you can enable the system-assigned managed identity.
Note
Disabling a system-assigned managed identity is irreversible. Each time you enable a system-assigned managed identity, Azure creates a new identity.

Under permissions, select Azure role assignments and assign the Monitoring Reader role to this managed identity on the target subscription.
When done, select Save
Use a user-assigned managed identity
User-assigned managed identities enable Azure resources to authenticate to cloud services without storing credentials in code. This type of managed identity is created as a standalone Azure resource, and has its own lifecycle. A single user-assigned managed identity can be shared across multiple resources.
To assign a user-assigned managed identity to a workspace, you must have the Owner or User Access Administrator permissions on the resource.
To assign a user-assigned managed identity:
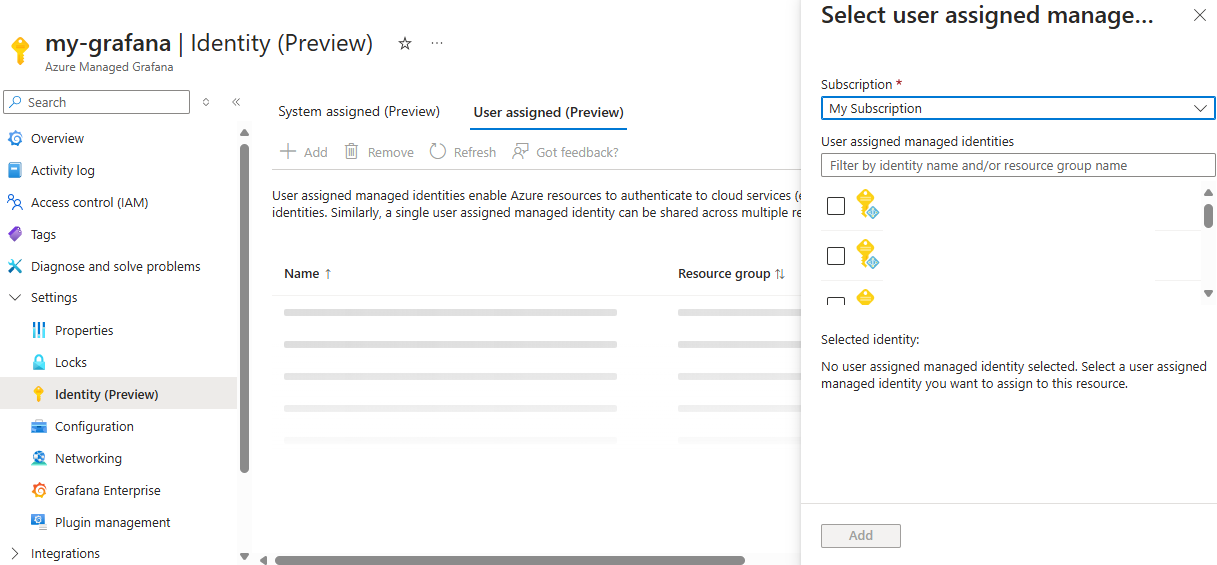
Select Settings > Identity.
In the User assigned tab, select Add.
Note
Assigning multiple managed identities to a single Azure Managed Grafana resource isn't possible. You can only use one managed identity per resource. If a system-assigned identity is enabled, you must first disable it from the System assigned tab before you can enable the user-assigned identity.
In the side panel, select a subscription and an identity, then select Add.

Once the identity is successfully added, open it by selecting its name and select Azure role assignments to assign it the Monitoring Reader role on the target subscription.
When done, select Save
Note
You can only assign one user-assigned managed identity per Azure Managed Grafana instance.
Use a service principal
Azure Managed Grafana can also access data sources using service principals for authentication, using client IDs and secrets.
Assign this service principal the Monitoring Reader role on the target subscription by opening your subscription in the Azure portal and going to Access control (IAM) > Add > Add role assignment.