Note
Access to this page requires authorization. You can try signing in or changing directories.
Access to this page requires authorization. You can try changing directories.
Note
Azure Push Notification Service (MPNS) has been deprecated and is no longer supported.
This tutorial shows you how to use Azure Notification Hubs to send push notifications to a Windows Phone 8 or Windows Phone 8.1 Silverlight applications. If you are targeting Windows Phone 8.1 (non-Silverlight), see the Windows Universal version of this tutorial.
In this tutorial, you create a blank Windows Phone 8 app that receives push notifications by using the Azure Push Notification Service (MPNS). After you create the app, you use your notification hub to broadcast push notifications to all the devices running your app.
Note
The Notification Hubs Windows Phone SDK does not support using the Windows Push Notification Service (WNS) with Windows Phone 8.1 Silverlight apps. To use WNS (instead of MPNS) with Windows Phone 8.1 Silverlight apps, follow the Notification Hubs - Windows Phone Silverlight tutorial, which uses REST APIs.
In this tutorial, you learn how to:
- Create a notification hub
- Create a Windows Phone application
- Test send a notification
Prerequisites
- Azure subscription. If you don't have an Azure subscription, create a trial Azure subscription before you begin.
- Visual Studio 2015 Express with mobile development components
Completing this tutorial is a prerequisite for all other Notification Hubs tutorials for Windows Phone 8 apps.
Create your notification hub
Sign in to the Azure portal.
Select All services on the left menu, and then select Notification Hubs in the Web + Mobile section. Select the star icon next to the service name to add the service to the FAVORITES section on the left menu. After you add Notification Hubs to FAVORITES, select it on the left menu.

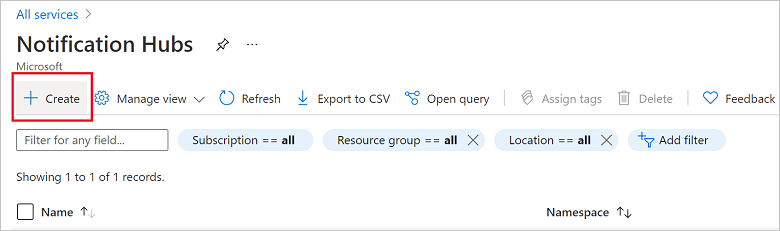
On the Notification Hubs page, select Create on the toolbar.
In the Basics tab on the Notification Hub page, do the following steps:
In Subscription, select the name of the Azure subscription you want to use, and then select an existing resource group, or create a new one.
Enter a unique name for the new namespace in Namespace Details.
A namespace contains one or more notification hubs, so type a name for the hub in Notification Hub Details.
Select a value from the Location drop-down list box. This value specifies the location in which you want to create the hub.
Select Create.
When the deployment is complete select Go to resource.
Configure Windows Phone (MPNS) settings
Select Windows Phone (MPNS) under NOTIFICATION SETTINGS.
Select Enable authentication push.
Select Save on the toolbar.
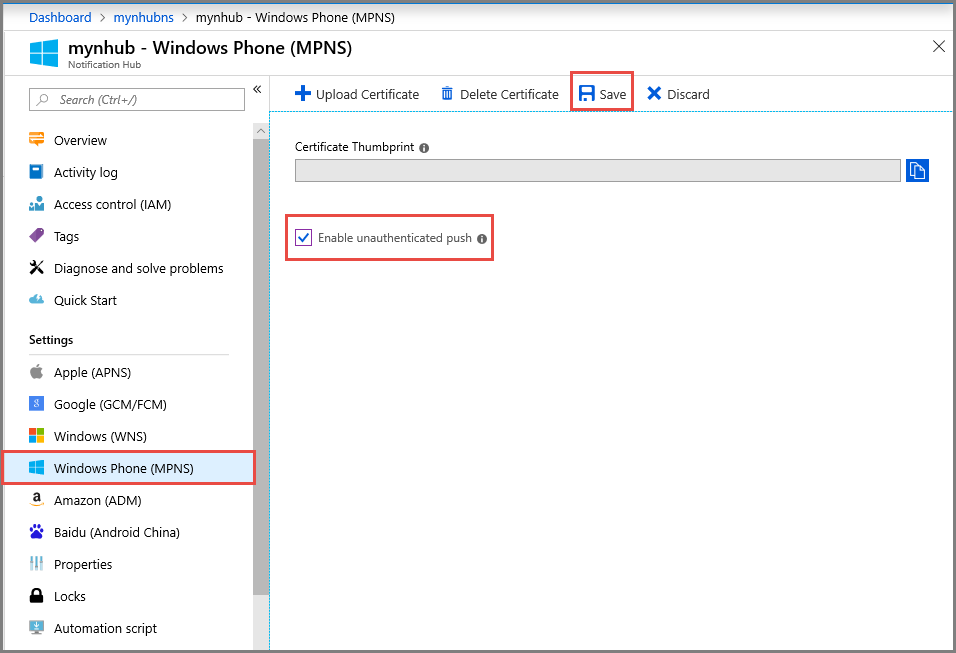
Your hub is now created and configured to send unauthenticated notification for Windows Phone.
Note
This tutorial uses MPNS in unauthenticated mode. MPNS unauthenticated mode comes with restrictions on notifications that you can send to each channel. Notification Hubs supports MPNS authenticated mode by allowing you to upload your certificate.
Create a Windows Phone application
In this section, you create a Windows Phone application that registers itself with your notification hub.
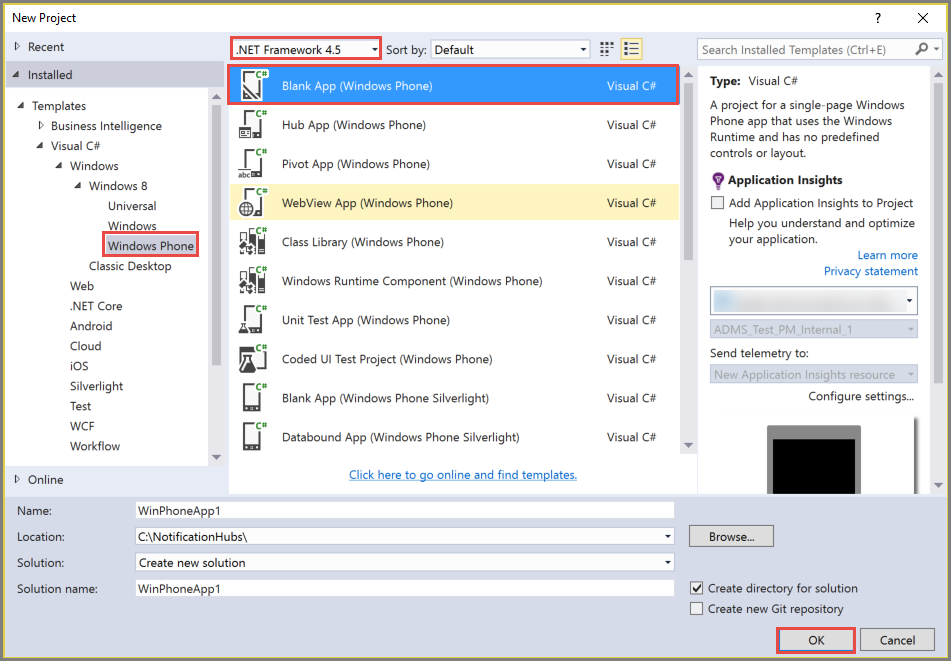
In Visual Studio, create a new Windows Phone 8 application.
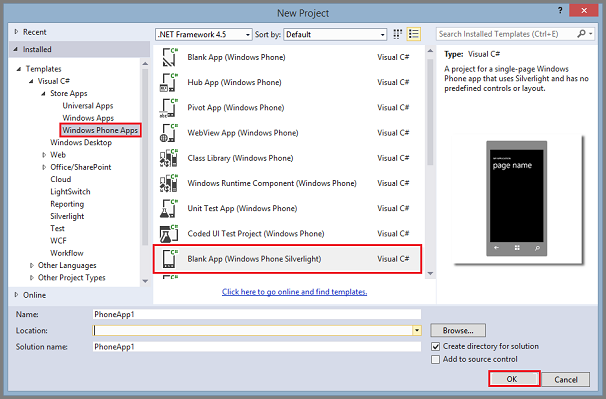
In Visual Studio 2013 Update 2 or later, you instead create a Windows Phone Silverlight application.
In Visual Studio, right-click the solution, and then click Manage NuGet Packages.
Search for
WindowsAzure.Messaging.Managedand click Install, and then accept the terms of use.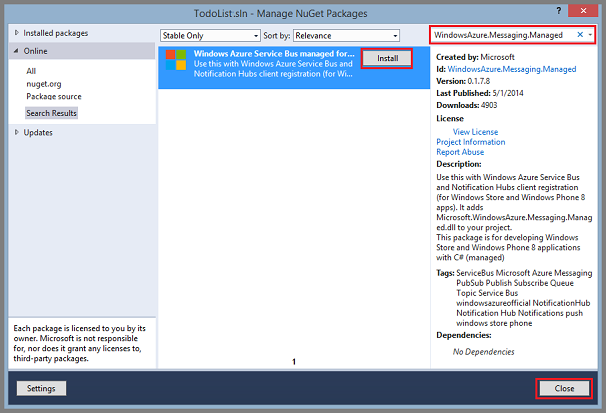
Open the file App.xaml.cs and add the following
usingstatements:using Microsoft.Phone.Notification; using Microsoft.WindowsAzure.Messaging;Add the following code at the top of
Application_Launchingmethod inApp.xaml.cs:private void Application_Launching(object sender, LaunchingEventArgs e) { var channel = HttpNotificationChannel.Find("MyPushChannel"); if (channel == null) { channel = new HttpNotificationChannel("MyPushChannel"); channel.Open(); channel.BindToShellToast(); } channel.ChannelUriUpdated += new EventHandler<NotificationChannelUriEventArgs>(async (o, args) => { var hub = new NotificationHub("<hub name>", "<connection string>"); var result = await hub.RegisterNativeAsync(args.ChannelUri.ToString()); System.Windows.Deployment.Current.Dispatcher.BeginInvoke(() => { MessageBox.Show("Registration :" + result.RegistrationId, "Registered", MessageBoxButton.OK); }); }); }Note
The value
MyPushChannelis an index that is used to lookup an existing channel in the HttpNotificationChannel collection. If there isn't one there, create a new entry with that name.Insert the name of your hub and the connection string called
DefaultListenSharedAccessSignaturethat you noted in the previous section. This code retrieves the channel URI for the app from MPNS, and then registers that channel URI with your notification hub. It also guarantees that the channel URI is registered in your notification hub each time the application is launched.Note
This tutorial sends a toast notification to the device. When you send a tile notification, you must instead call the
BindToShellTilemethod on the channel. To support both toast and tile notifications, call bothBindToShellTileandBindToShellToast.In Solution Explorer, expand Properties, open the
WMAppManifest.xmlfile, click the Capabilities tab, and make sure that the ID_CAP_PUSH_NOTIFICATION capability is checked. Your app can receive push notifications now.
Press the
F5key to run the app. A registration message is displayed in the app.Close the app or switch to the home page.
Note
To receive a toast push notification, the application must not be running in the foreground.
Test send a notification
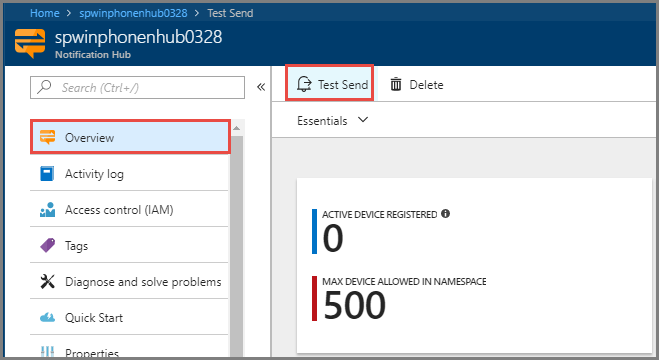
In the Azure portal, switch to the Overview tab.
Select Test Send.
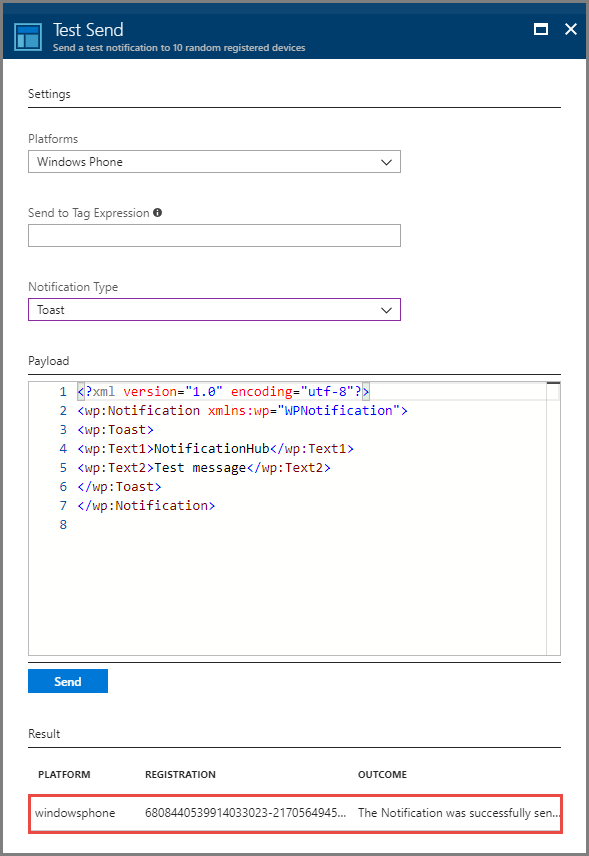
In the Test Send window, take the following steps:
For Platforms, select Windows Phone.
For Notification Type, select Toast.
Select Send
See the result in the list at the bottom of the window.
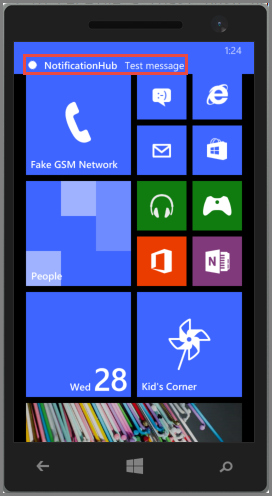
In the Windows Phone emulator or on the Windows phone, confirm that you see the notification message.
Next steps
In this simple example, you broadcasted push notifications to all your Windows Phone 8 devices. Advance to the following tutorial to learn how to push notifications to specific devices: