Note
Access to this page requires authorization. You can try signing in or changing directories.
Access to this page requires authorization. You can try changing directories.
This tutorial explains how to publish an Azure Application offer to the commercial marketplace, including different options and requirements available to you.
Prerequisites
Designing, building, and testing Azure application offers requires technical knowledge of both the Azure platform and the technologies used to build the offer. Your engineering team should have knowledge about the following Microsoft technologies:
- Basic understanding of Azure Services.
- How to design and architect Azure applications.
- Working knowledge of Azure Virtual Machines, Azure Storage, and Azure Networking.
- Working knowledge of Azure Resource Manager.
- Working knowledge of JSON.
Technical documentation and resources
Review the following resources as you plan your Azure application offer for the commercial marketplace.
Quickstarts:
Testing resources
The video Building Solution Templates, and Managed Applications for Azure Marketplace gives a comprehensive introduction to the Azure application offer type:
- What offer types are available
- What technical assets are required
- How to author an Azure Resource Manager template
- Developing and testing the app UI
- How to publish the app offer
- The application review process
Suggested tools
Choose one or both of the following scripting environments to help manage your Azure application:
We recommend adding the following tools to your development environment:
- Azure Storage Explorer
- Visual Studio Code with the following extensions:
- Extension: Azure Resource Manager Tools
- Extension: Beautify
- Extension: Prettify JSON
You can review the available tools in the Azure Developer Tools page. If you're using Visual Studio, see the Visual Studio Marketplace.
Listing options
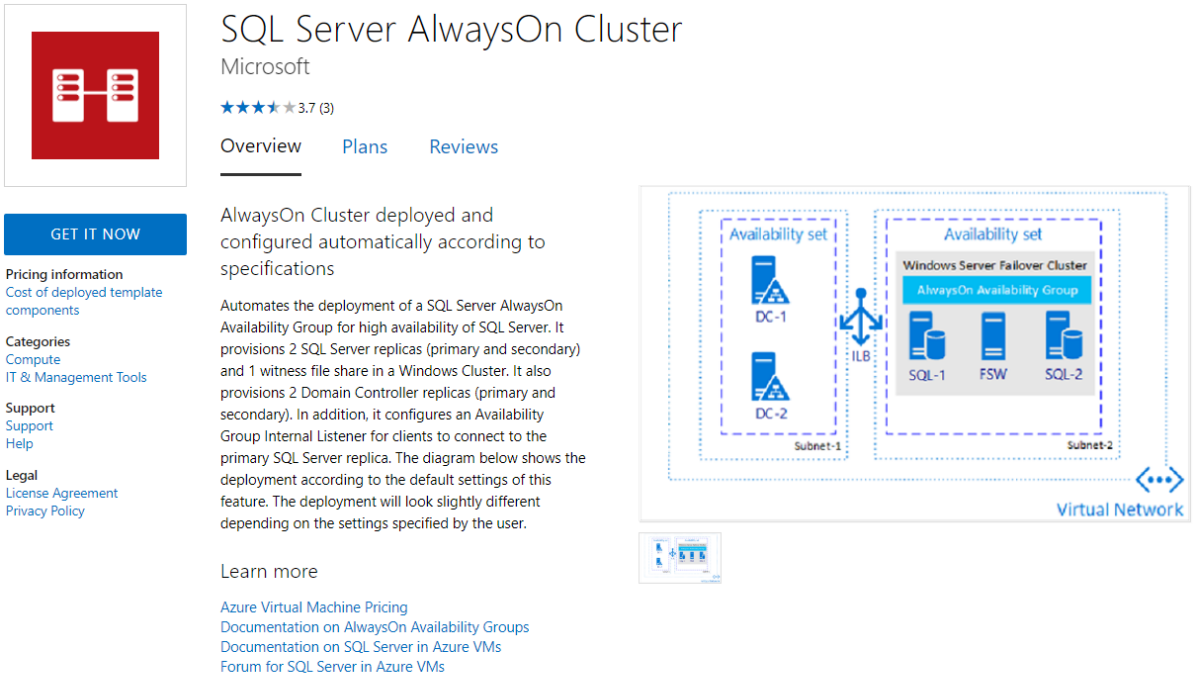
After your offer is published, the listing options for your offer appear as a button in the upper-left corner of your offer's listing page. For example, the following screenshot shows an offer listing page in Azure Marketplace with the Get It Now button. If you had chosen to offer a test drive, the Test Drive button would also be shown.

Categories and subcategories
You can choose at least one and up to two categories for grouping your offer into the appropriate commercial marketplace search areas. You can choose up to two subcategories for each primary and secondary category. For a full list of categories and subcategories, see Offer Listing Best Practices.
Offer listing details
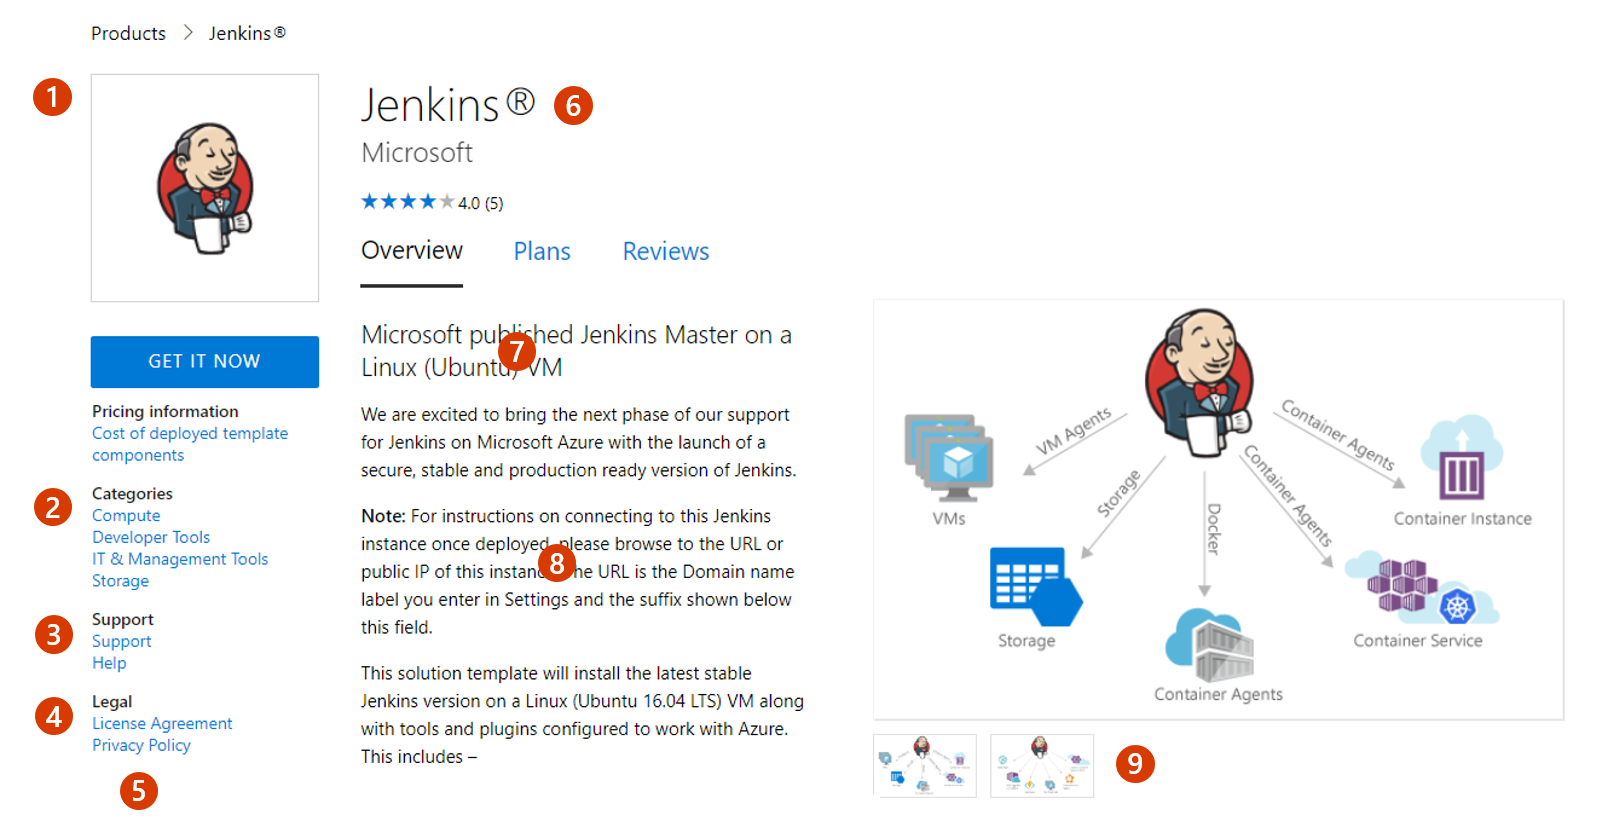
When you create a new Azure Application offer in Partner Center, you'll enter text, images, optional videos, and other details on the Offer listing page. This is the information that customers will see when they discover your offer listing in Azure Marketplace, as shown in the following example.

Call-out descriptions
- Logo
- Categories
- Support address (link)
- Terms of use
- Privacy policy address (link)
- Offer name
- Summary
- Description
- Screenshots/videos
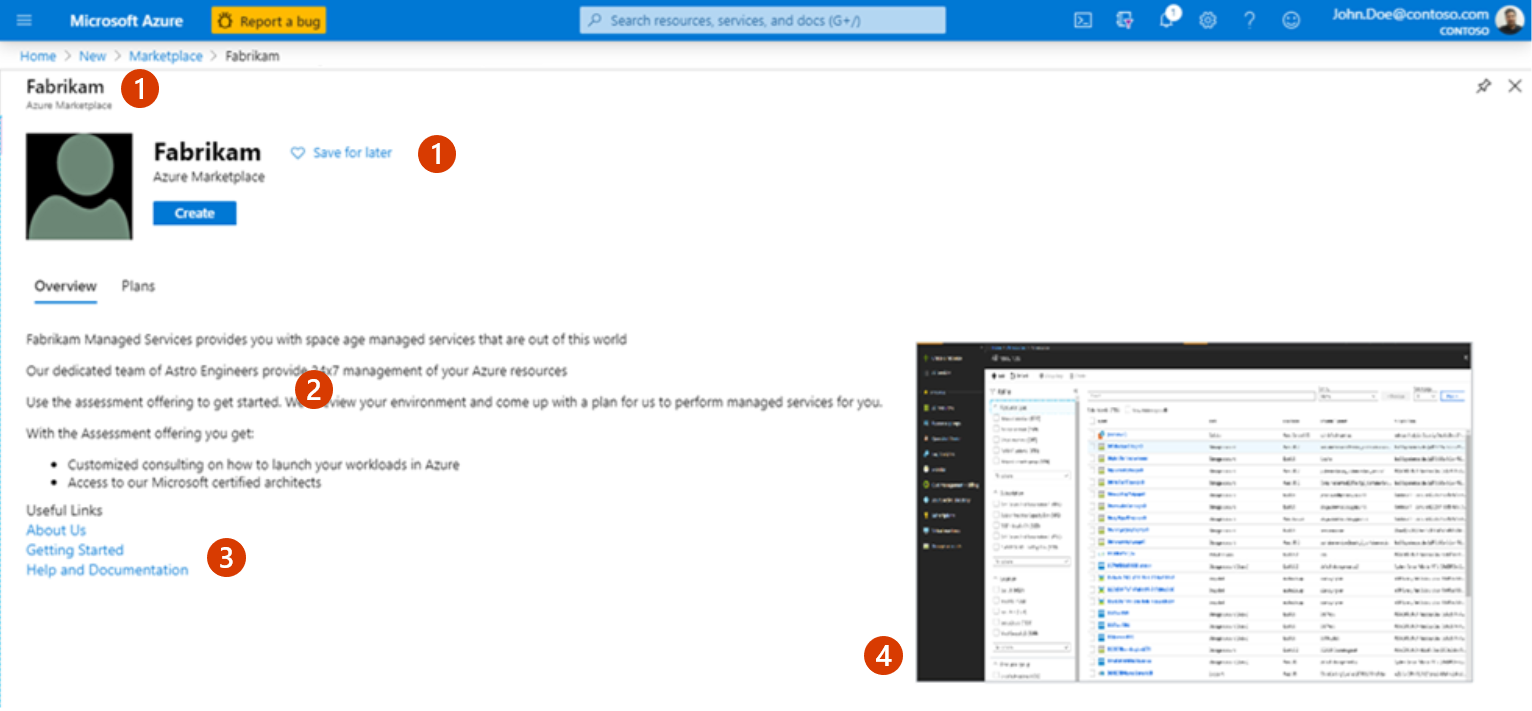
The following screenshot shows how offer information appears in the Azure portal:
Call-out descriptions
- Title
- Description
- Useful links
- Screenshots
Note
Offer listing content is not required to be in English if the offer description begins with the phrase "This application is available only in [non-English language]".
To help create your offer more easily, prepare some of these items ahead of time. The following items are required unless otherwise noted.
Name: This name will appear as the title of your offer listing in the commercial marketplace. The name may be trademarked. It can't contain emojis (unless they're the trademark and copyright symbols) and must be limited to 200 characters.
Search results summary: Describe the purpose or function of your offer as a single sentence, in plain text with no line breaks, in 100 characters or less. This summary is used in the commercial marketplace listing(s) search results.
Short description: Provide up to 256 characters of plain text. This summary will appear on your offer's details page.
Description: This description will be displayed in the Azure Marketplace listing(s) overview. Consider including a value proposition, key benefits, intended user base, any category or industry associations, in-app purchase opportunities, customer need or pain that the offer addresses, any required disclosures, and a link to learn more.
This text box has rich text editor controls that you can use to make your description more engaging. You can also use HTML tags to format your description. You can enter up to 5,000 characters of text in this box, which includes HTML markup and spaces. For additional tips, see Write a great app description and HTML tags supported in the commercial marketplace offer descriptions.
Search keywords (optional): Provide up to three search keywords that customers can use to find your offer in the online store. For best results, also use these keywords in your description. You don't need to include the offer Name and Description. That text is automatically included in search.
Privacy policy link: The URL for your company's privacy policy. You must provide a valid privacy policy and are responsible for ensuring your app complies with privacy laws and regulations.
Useful links (optional): You can provide links to various resources for users of your offer. For example, forums, FAQs, and release notes.
Contact information: You must designate the following contacts from your organization:
- Support contact: Provide the name, phone, and email for Azure partners to use when your customers open tickets. You must also include the URL for your support website.
- Engineering contact: Provide the name, phone, and email for Azure to use directly when there are problems with your offer. This contact information isn't listed in the commercial marketplace.
- CSP Program contact (optional): Provide the name, phone, and email if you opt in to the Cloud Solution Provider (CSP) program, so those partners can contact you with any questions. You can also include a URL to your marketing materials.
Media - Logos: Provide a PNG file for the Large size logo. Partner Center will use this to create a Small and a Medium logo. You can optionally replace these with different images later.
- Large (from 216x216 to 350x350 px, required)
- Medium (90x90 px, optional)
- Small (48x48 px, optional)
These logos are used in different places in the online stores:
- The Small logo appears in Azure Marketplace search results.
- The Medium logo appears when you create a new resource in Azure.
- The Large logo appears on your offer listing page in Azure Marketplace.
Follow these guidelines for your logos:
- The Azure design has a simple color palette. Limit the number of primary and secondary colors on your logo.
- The theme colors of the portal are white and black. Don't use these colors as the background color for your logo. Use a color that makes your logo prominent in the portal. We recommend simple primary colors.
- If you use a transparent background, make sure that the logo and text aren't white, black, or blue.
- The look and feel of your logo should be flat and avoid gradients in the logo or background. Don't place text on the logo, not even your company or brand name. Blurry images will cause your submission to be rejected.
- Make sure the logo isn't stretched.
Media - Screenshots (optional): We recommend that you add screenshots that show how your offer works. You can add up to five screenshots with the following requirements, that show how your offer works:
- 1280x720 pixels
- .PNG file
- Must include a caption
Media - Videos (optional): You can add up to five videos with the following requirements, that demonstrate your offer:
- Name
- URL: Must be hosted on YouTube or Vimeo only.
- Thumbnail: 1280x720 .PNG file
Note
Your offer must meet the general commercial marketplace certification policies to be published to the commercial marketplace.
Preview audience
A preview audience can access your offer prior to being published live in the online stores in order to test the end-to-end functionality before you publish it live.
Note
A preview audience differs from a private plan. A private plan is one you make available only to a specific audience you choose. This enables you to negotiate a custom plan with specific customers.
You define the preview audience using Azure subscription IDs, along with an optional description for each. Neither of these fields can be seen by customers.
Plans
Azure Application offers require at least one plan. A plan defines the solution scope and limits, and the associated pricing, if applicable. You can create multiple plans for your offer to give your customers different technical and pricing options.
Types of plans
There is one kind of Azure application plans: solution template. This plan type supports automating the deployment and configuration of a solution beyond a single virtual machine (VM). You can automate the process of providing multiple resources, including VMs, networking, and storage resources to provide complex solutions, such as IaaS solutions. This plan type can employ many different kinds of Azure resources, including but not limited to VMs.
- Solution template plans are one of the main ways to publish a solution in the commercial marketplace. Solution template plans aren't transactable in the commercial marketplace, but they can be used to deploy paid VM offers that are billed through the commercial marketplace. Use the solution template plan type when the customer will manage the solution and the transactions are billed through another plan. For more information about building solution templates, see What is Azure Resource Manager?
Next steps
- To plan a solution template, see Plan a solution template for an Azure application offer.
