Note
Access to this page requires authorization. You can try signing in or changing directories.
Access to this page requires authorization. You can try changing directories.
Privileged Azure roles, such as Contributor, Owner, or User Access Administrator, are powerful roles and may introduce risk into your system. You might want to be notified by email or text message when these or other roles are assigned. This article describes how to get notified of privileged role assignments at a subscription scope by creating an alert rule using Azure Monitor.
Prerequisites
To create an alert rule, you must have:
- Access to an Azure subscription
- Permission to create resource groups and resources within the subscription
- Log Analytics configured so it has access to the AzureActivity table
Estimate costs before using Azure Monitor
There's a cost associated with using Azure Monitor and alert rules. The cost is based on the frequency the query is executed and the notifications selected. For more information, see Azure Monitor pricing.
Create an alert rule
To get notified of privileged role assignments, you create an alert rule in Azure Monitor.
Sign in to the Azure portal.
Navigate to Monitor.
In the left navigation, click Alerts.
Click Create > Alert rule. The Create an alert rule page opens.
On the Scope tab, select your subscription.
On the Condition tab, select the Custom log search signal name.
In the Log query box, add the following Kusto query that will run on the subscription's log and trigger the alert.
This query filters for attempts to assign the Contributor, Owner, or User Access Administrator roles at the scope of the selected subscription.
AzureActivity
| where CategoryValue =~ "Administrative" and
    OperationNameValue =~ "Microsoft.Authorization/roleAssignments/write" and
    (ActivityStatusValue =~ "Start" or ActivityStatus =~ "Started")
| extend Properties_d = todynamic(Properties)
| extend RoleDefinition = extractjson("$.Properties.RoleDefinitionId",tostring(Properties_d.requestbody),typeof(string))
| extend PrincipalId = extractjson("$.Properties.PrincipalId",tostring(Properties_d.requestbody),typeof(string))
| extend PrincipalType = extractjson("$.Properties.PrincipalType",tostring(Properties_d.requestbody),typeof(string))
| extend Scope = extractjson("$.Properties.Scope",tostring(Properties_d.requestbody),typeof(string))
| where Scope !contains "resourcegroups"
| extend RoleId = split(RoleDefinition,'/')[-1]
| extend RoleDisplayName = case(
    RoleId =~ 'b24988ac-6180-42a0-ab88-20f7382dd24c', "Contributor",
    RoleId =~ '8e3af657-a8ff-443c-a75c-2fe8c4bcb635', "Owner",
    RoleId =~ '18d7d88d-d35e-4fb5-a5c3-7773c20a72d9', "User Access Administrator",
    "Irrelevant")
| where RoleDisplayName != "Irrelevant"
| project TimeGenerated,Scope, PrincipalId,PrincipalType,RoleDisplayName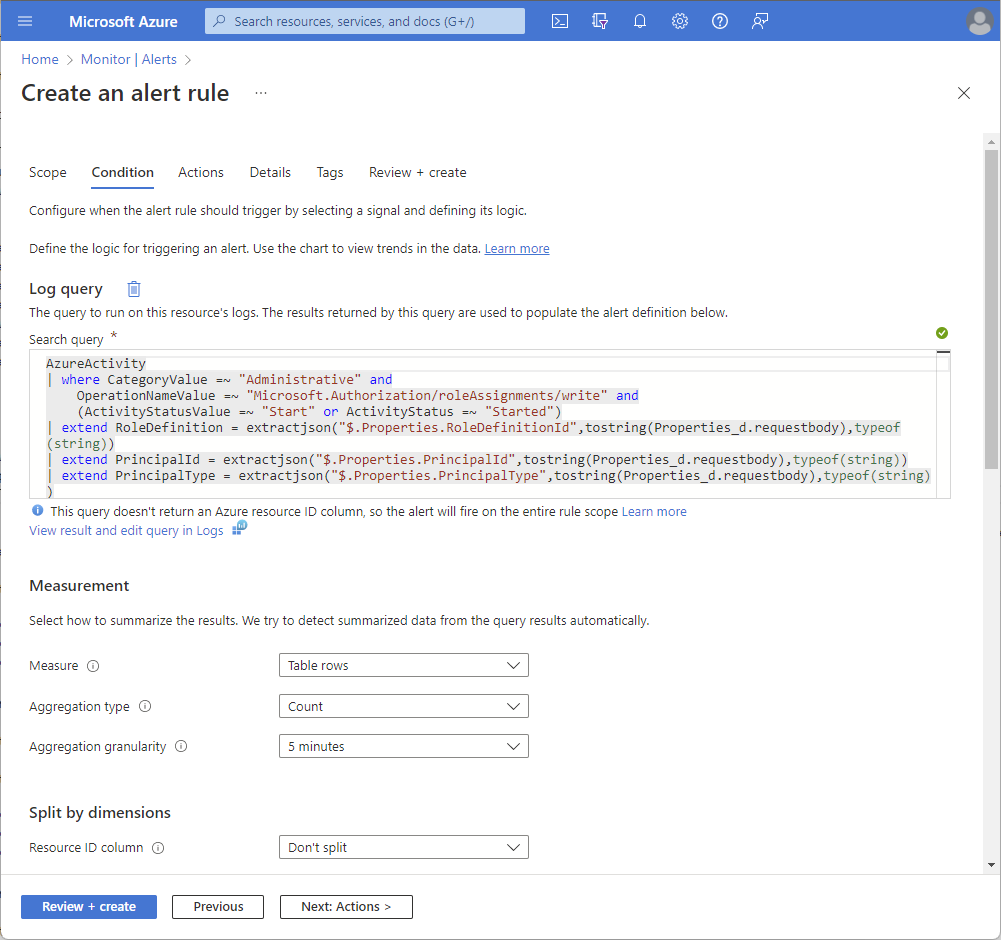
In the Measurement section, set the following values:
- Measure: Table rows
- Aggregation type: Count
- Aggregation granularity: 5 minutes
For Aggregation granularity, you can change the default value to a frequency you desire.
In the Split by dimensions section, set Resource ID column to Don't split.
In the Alert logic section, set the following values:
- Operator: Greater than
- Threshold value: 0
- Frequency of evaluation: 5 minutes
For Frequency of evaluation, you can change the default value to a frequency you desire.
On the Actions tab, create an action group or select an existing action group.
An action group defines the actions and notifications that are executed when the alert is triggered.
When you create an action group, you must specify the resource group to put the action group within. Then, select the notifications (Email/SMS message/Push/Voice action) to invoke when the alert rule triggers. You can skip the Actions and Tag tabs. For more information, see Create and manage action groups in the Azure portal.
On the Details tab, select the resource group to save the alert rule.
In the Alert rule details section, select a Severity and specify an Alert rule name.
For Region, you can select any region since Azure activity logs are global.
Skip the Tags tab.
On the Review + create tab, click Create to create your alert rule.

Test the alert rule
Once you've created an alert rule, you can test that it fires.
Assign the Contributor, Owner, or User Access Administrator role at subscription scope. For more information, see Assign Azure roles using the Azure portal.
Wait a few minutes to receive the alert based on the aggregation granularity and the frequency of evaluation of the log query.
On the Alerts page, monitor for alert you specified in the action group.
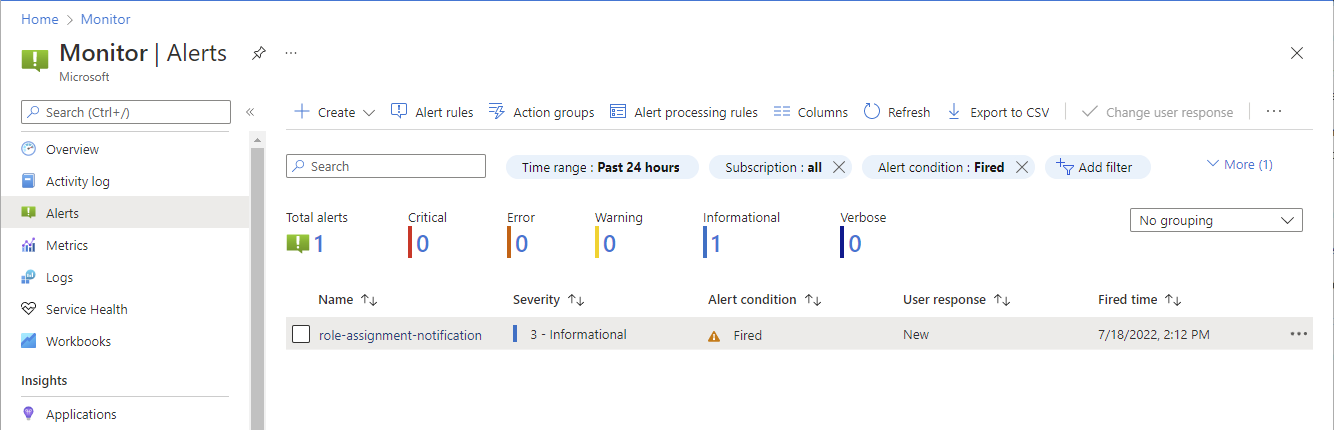
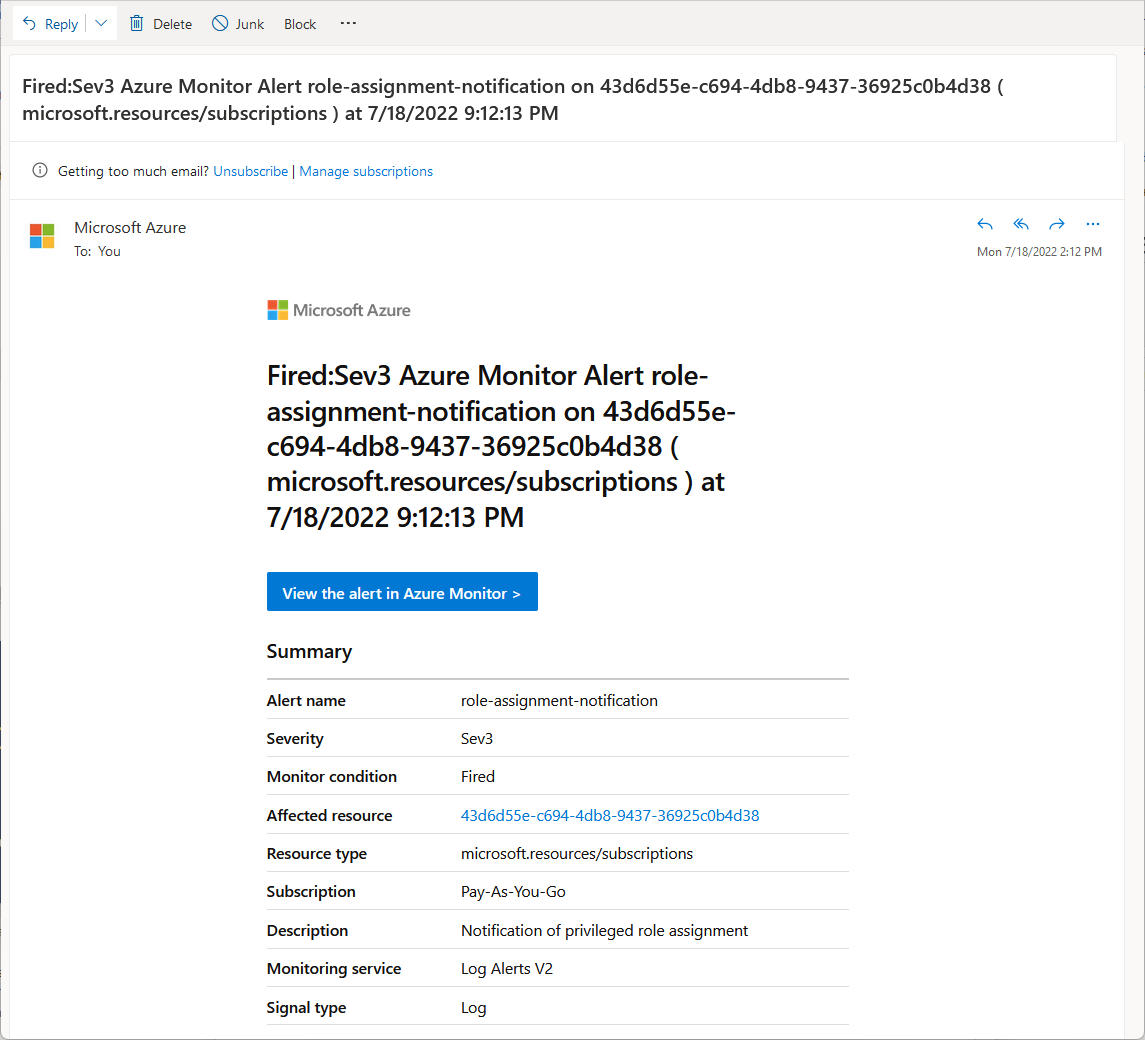
The following image shows an example of the email alert.


Delete the alert rule
Follow these steps to delete the role assignment alert rule and stop additional costs.
In Monitor, navigate to Alerts.
In the bar, click Alert rules.
Add a checkmark next to the alert rule you want to delete.
Click Delete to remove the alert.