Note
Access to this page requires authorization. You can try signing in or changing directories.
Access to this page requires authorization. You can try changing directories.
Azure AI Search makes external, outbound calls during indexer processing for content and skills, and for agentic retrieval requests that include calls to large language models (LLMs). If the target Azure resource uses IP firewall rules to filter incoming calls, you must create an inbound rule in your firewall that admits requests from Azure AI Search.
This article explains how to find the IP address of your search service and configure an inbound IP rule on an Azure Storage account. While specific to Azure Storage, this approach also works for other Azure resources that use IP firewall rules for data access, such as Azure Cosmos DB and Azure SQL.
Prerequisites
- Azure AI Search service (Basic tier or higher). You can't set firewall rules on the Free tier.
- An existing target Azure resource protected by a firewall.
- Contributor or Owner role on the search service.
Note
Applicable to Azure Storage only. To define IP firewall rules, your storage account and search service must be in different regions. If your setup doesn't permit different regions, try the trusted service exception or resource instance rule instead.
For private connections from indexers to any supported Azure resource, we recommend setting up a shared private link. Private connections travel the Microsoft backbone network, bypassing the public internet completely.
Get a search service IP address
Go to your search service in the Azure portal.
From the left pane, select Overview.
Copy the fully qualified domain name (FQDN) of your search service, which should look like
my-search-service.search.azure.cn.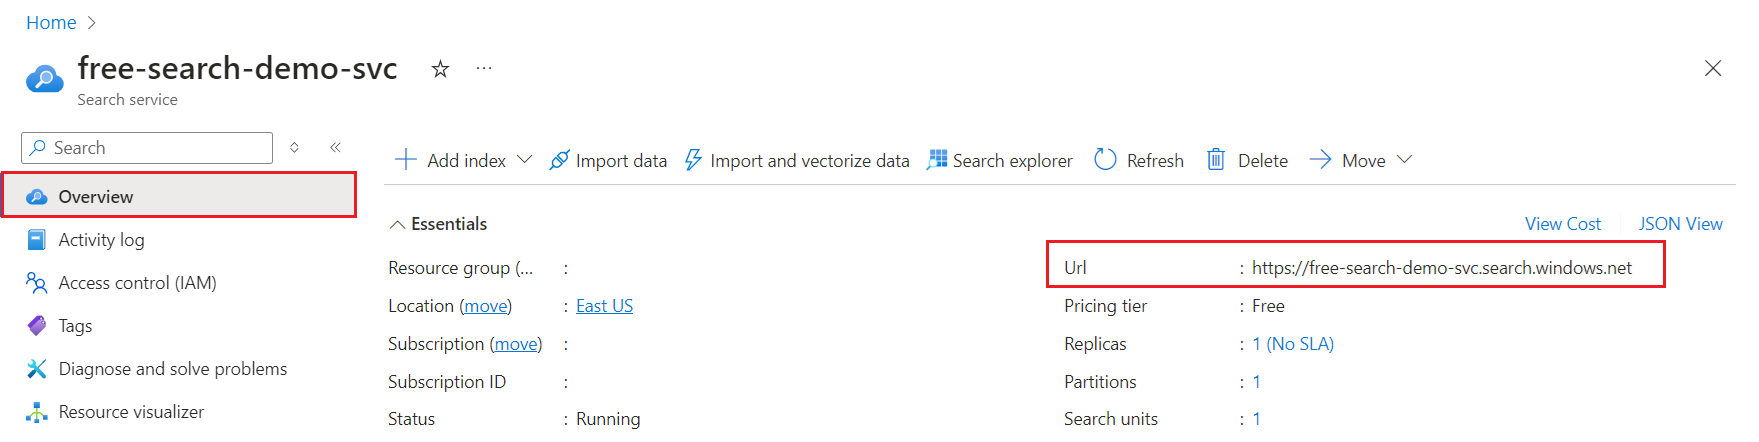
Look up the IP address of the search service by performing an
nslookup(or aping) of the FQDN on a command prompt. Make sure you remove thehttps://prefix.Copy the IP address for use in the next step. In the following example, the IP address that you copy is
150.0.0.1.nslookup my-search-service.search.azure.cn Server: server.example.org Address: 10.50.10.50 Non-authoritative answer: Name: <name> Address: 150.0.0.1 aliases: my-search-service.search.azure.cnThe IP address in the
Addressfield under "Non-authoritative answer" (150.0.0.1 in this example) is the value you need for the firewall rule.

Allow access from your client IP address
Client applications that push indexing and query requests to the search service must be represented in an IP range. On Azure, you can generally determine the IP address by pinging the FQDN of a service. For example, ping <your-search-service-name>.search.azure.cn returns the IP address of a search service.
Add your client IP address to allow access to the service from the Azure portal on your current computer.
In the Azure portal, select your search service.
From the left pane, select Settings > Networking.
On the Firewall and virtual networks tab, set Public network access to Selected IP addresses.
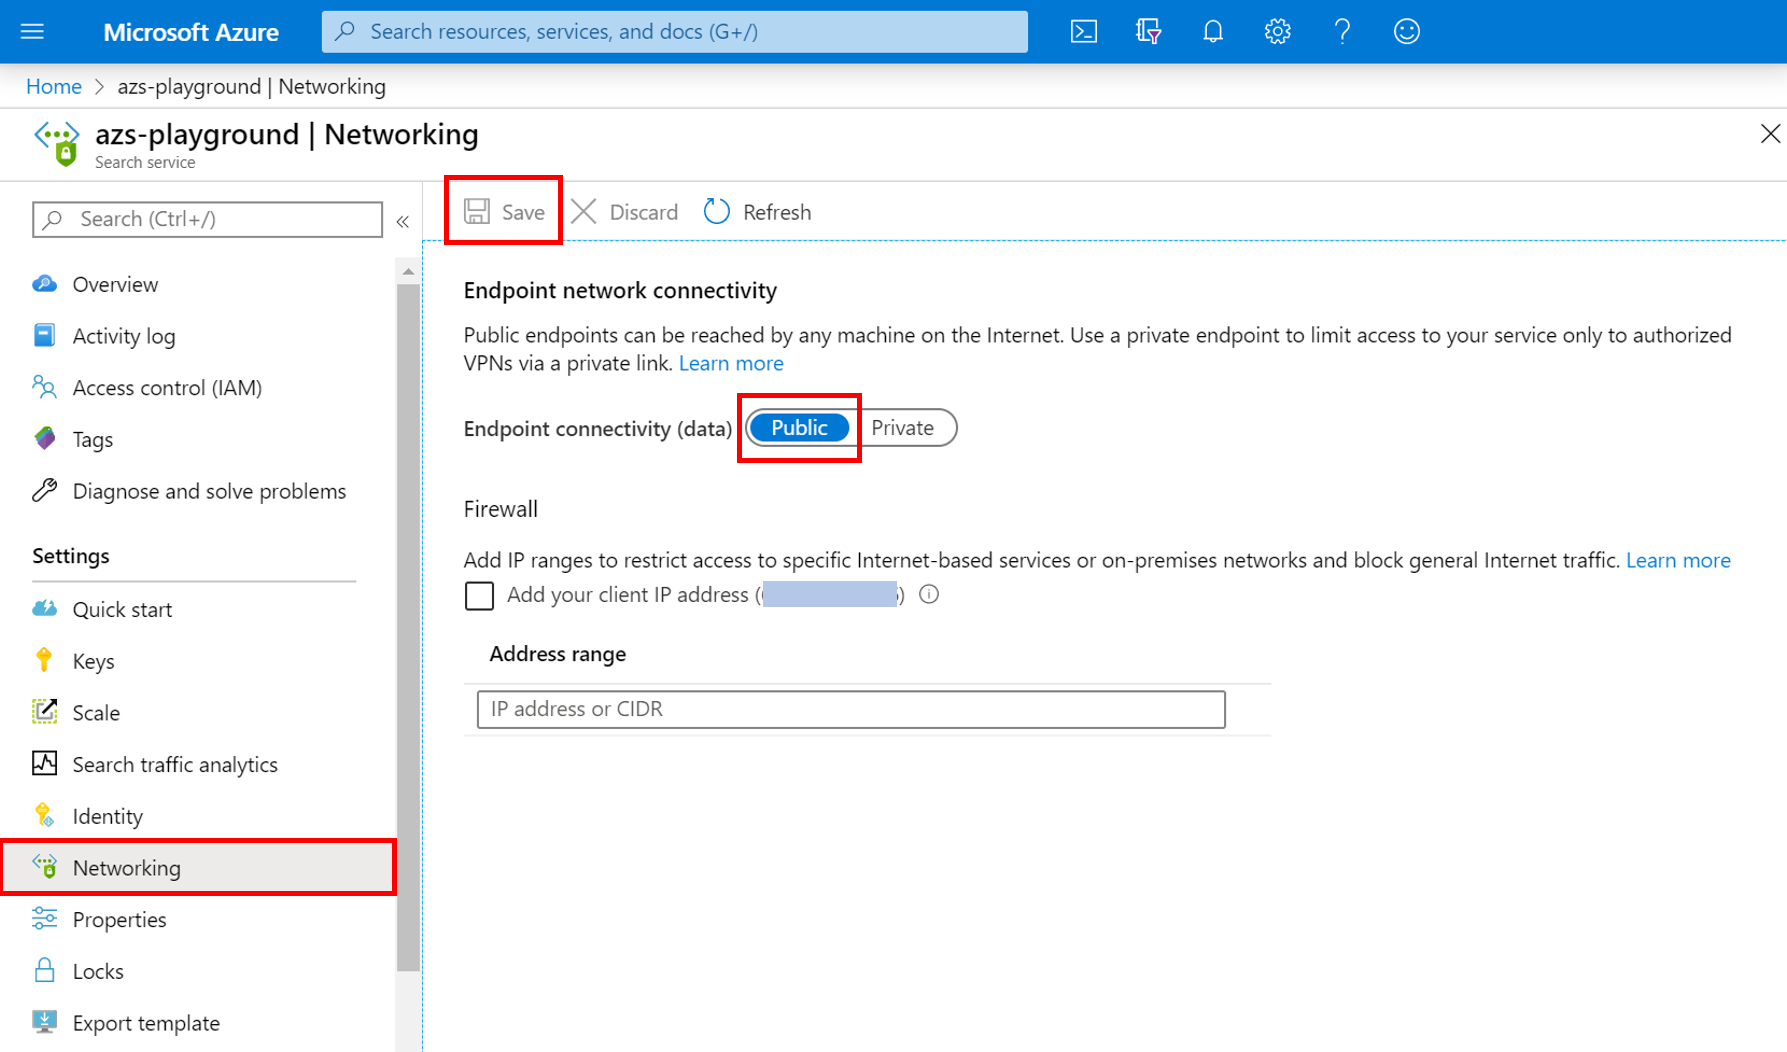
Under IP Firewall, select Add your client IP address.
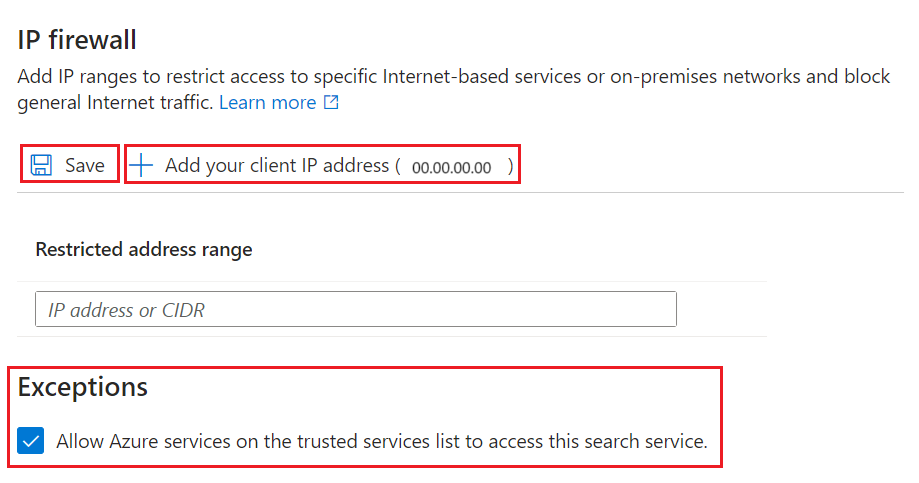
Save your changes.
Get IP addresses for "AzureCognitiveSearch" service tag
You'll also need to create an inbound rule that allows requests from the multitenant execution environment. This environment is managed by Azure and it's used to offload processing intensive jobs that could otherwise overwhelm your search service. This section explains how to get the range of IP addresses needed to create this inbound rule.
An IP address range is defined for each region that supports Azure AI Search. Specify the full range to ensure the success of requests originating from the multitenant execution environment.
You can get this IP address range from the AzureCognitiveSearch service tag.
Use either the discovery API or the downloadable JSON file. If the search service is the Azure Public cloud, download the Azure Public JSON file.
Open the JSON file and search for "AzureCognitiveSearch". For a search service in chinanorth3, the IP addresses for the multitenant indexer execution environment are:
{
"name": "AzureCognitiveSearch.chinanorth3",
"id": "AzureCognitiveSearch.chinanorth3",
"properties": {
   "changeNumber": 1,
   "region": "chinanorth3",
   "regionId": 38,
   "platform": "Azure",
   "systemService": "AzureCognitiveSearch",
   "addressPrefixes": [
      "20.42.129.192/26",
      "40.91.93.84/32",
      "40.91.127.116/32",
      "40.91.127.241/32",
      "51.143.104.54/32",
      "51.143.104.90/32",
      "2603:1030:c06:1::180/121"
   ],
   "networkFeatures": null
}
},
Copy all IP addresses in the
addressPrefixesarray for your region.For IP addresses having the "/32" suffix, drop the "/32" (40.91.93.84/32 becomes 40.91.93.84 in the rule definition). All other IP addresses can be used verbatim.
Copy all of the IP addresses for the region.
Add IP addresses to IP firewall rules
After you get the necessary IP addresses, set up the inbound rules. The easiest way to add IP address ranges to a storage account's firewall rule is through the Azure portal.
In the Azure portal, select your storage account.
From the left pane, select Security + networking > Networking.
On the Public access tab, select Manage.
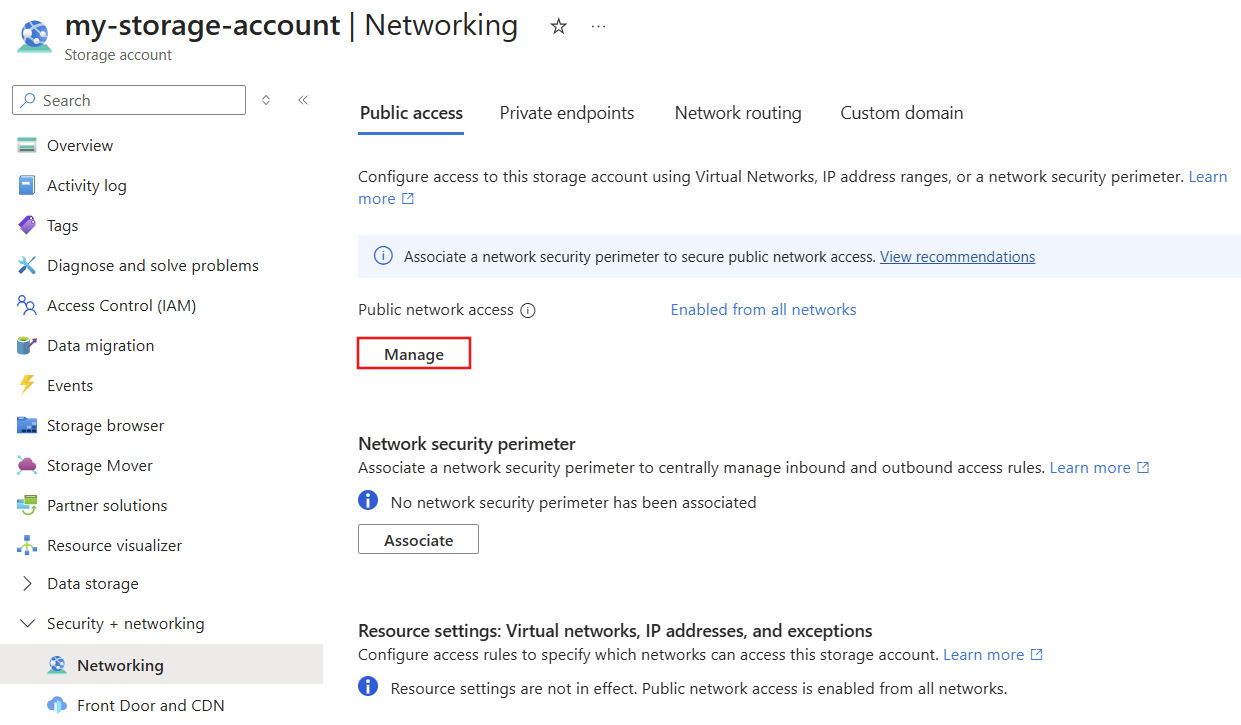
Under Public network access scope, select Enable from selected networks.

Add the IP addresses you obtained previously, and then select Save. You should have rules for the search service, the Azure portal (optional), and all of the IP addresses for the "AzureCognitiveSearch" service tag for your region.
It can take five to ten minutes for the firewall rules to update. After the update, indexers can access storage account data behind the firewall.
Supplement network security with token authentication
Firewalls and network security are a first step in preventing unauthorized access to data and operations. Authorization should be your next step.
We recommend role-based access, where Microsoft Entra ID users and groups are assigned to roles that determine read and write access to your service. For a description of built-in roles and instructions for creating custom roles, see Connect to Azure AI Search using role-based access controls.
If you don't need key-based authentication, we recommend that you disable API keys and use role assignments exclusively.