Note
Access to this page requires authorization. You can try signing in or changing directories.
Access to this page requires authorization. You can try changing directories.
Azure Site Recovery helps organizations with business continuity and disaster recovery by keeping business apps running during planned and unplanned outages. Site Recovery manages and orchestrates disaster recovery of on-premises machines and Azure virtual machines (VMs), including replication, failover, and recovery.
This tutorial is the first in a series that describes how to set up disaster recovery for on-premises Hyper-V VMs.
Note
We design tutorials to show the simplest deployment path for a scenario. The tutorials use default options when possible, and they don't show all possible settings and paths. For more information about a scenario, see the How-to Guides section of the Site Recovery documentation.
This tutorial shows you how to prepare Azure components when you want to replicate on-premises Hyper-V VMs to Azure.
In this tutorial, you learn how to:
- Create an Azure Storage account to store images of replicated machines.
- Create a Recovery Services vault to store metadata and configuration information for VMs and other replication components.
- Set up an Azure network. When Azure VMs are created after failover, the VMs are joined to this network.
Sign in to Azure
Sign in to the Azure portal. If you don't have an Azure subscription, create a Trial before you begin.
Prerequisites
Before you begin the tutorial, make sure that you meet the prerequisites.
Verify account permissions
If you just created a Azure account, you're the administrator for that subscription by default. If you're not the administrator for the Azure subscription you'll use to complete the tutorial, work with the subscription administrator to get the permissions you need.
To enable replication for a new VM, you must have permissions to:
- Create a VM in the selected resource group.
- Create a VM in the selected virtual network.
- Write to the selected storage account.
To complete these tasks, your account should be assigned the Virtual Machine Contributor built-in role.
To manage Site Recovery operations in a vault, your account should be assigned the Site Recovery Contributor built-in role.
Create a storage account
Images of replicated machines are held in an Azure storage account. Azure VMs are created from the storage account when you fail over from on-premises to Azure. The storage account must be in the same region as your Recovery Services vault.
In the Azure portal portal, select Create a resource.
On the Categories menu, select Storage, and then select Storage account.
On Create a storage account, on the Basics tab, complete these steps:
For Subscription, select the Azure subscription in which to create the storage account.
For Resource group, select Create new, and then enter a new resource group name. For example, enter ContosoRG.
An Azure resource group is a logical container in which Azure resources are deployed and managed.
For Storage account name, enter a name for the account. For example, enter contosovmsacct1910171607.
The account name must be unique within Azure. It must be between 3 and 24 characters long and use only lowercase letters and numbers.
For Region, select the geographic location for your storage account. For example, select China North 3.
For Performance, select Standard.
For Redundancy, retain the default Geo-redundant storage (GRS) for storage redundancy.
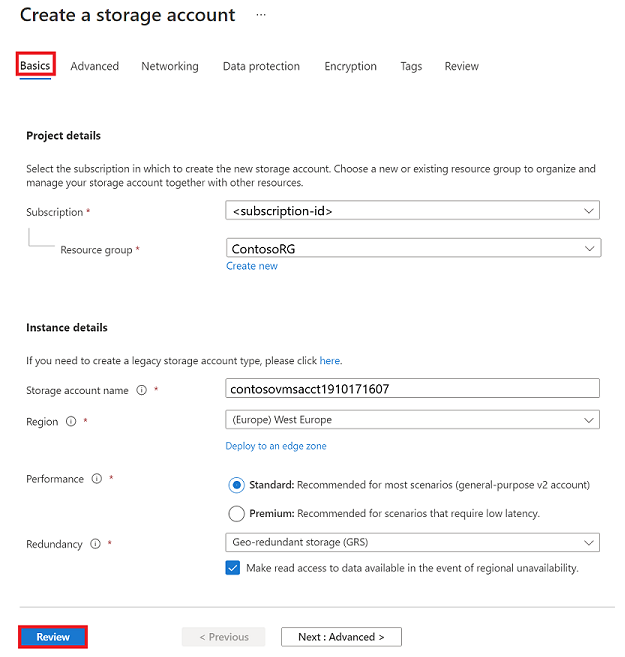
Select Review and review your settings.
Select Create.
Note
If you want to create a legacy storage account type, select the related link in the Instance details section. The link redirects you to the Create a storage account pane to create a legacy storage account.

Create a Recovery Services vault
In the Azure portal, select Create a resource.
Search Azure Marketplace for Recovery Services.
In the search results, select Backup and Site Recovery. Next, select Create.
On Create Recovery Services vault, on the Basics tab, complete these steps:
- For Subscription, select the subscription in which to create the new Recovery Services vault.
- For Resource group, select an existing resource group or create a new one. For example, select contosoRG.
- For Vault name, enter a name you can use to identify the vault. For example, enter ContosoVMVault.
- For Region, select the region where the vault should be located. For example, select China North 3.
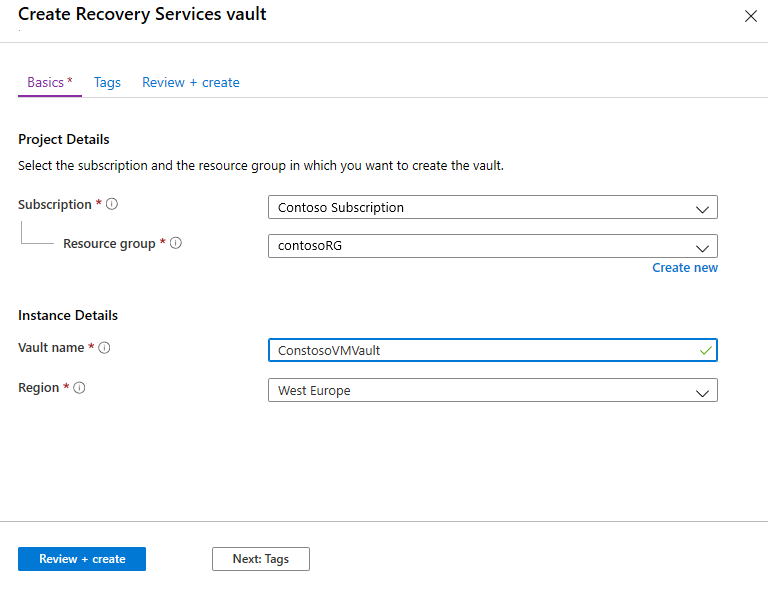
Select Review + create, and then select Create to create the recovery vault.
Note
To quickly access the vault from your dashboard in the Azure portal, select Pin to dashboard.
The new vault appears on Dashboard > All resources and on the main Recovery Services vaults pane.
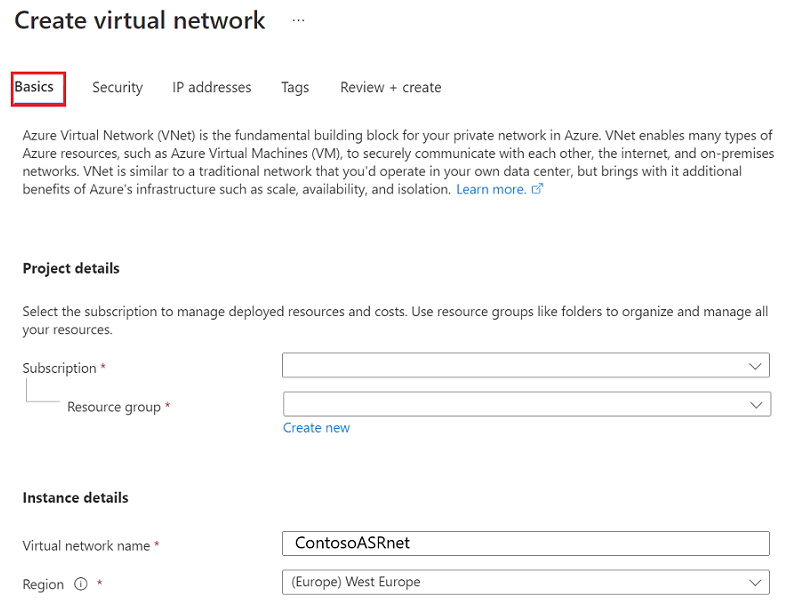
Set up an Azure network
When an Azure VM is created from storage after failover, the VM is joined to this network.
In the Azure portal, select Create a resource.
On the Categories menu, select Networking, and then select Virtual Network.
On Create virtual network, on the Basics tab, complete these steps:
- For Subscription, select the subscription in which to create the network.
- For Resource group, select the resource group in which to create the network. For this tutorial, select the existing resource group contosoRG.
- For Name, enter a name for the network. The name must be unique within the Azure resource group. For example, enter ContosoASRnet.
- For Region, select China North 3. The network must be in the same region as your Recovery Services vault.
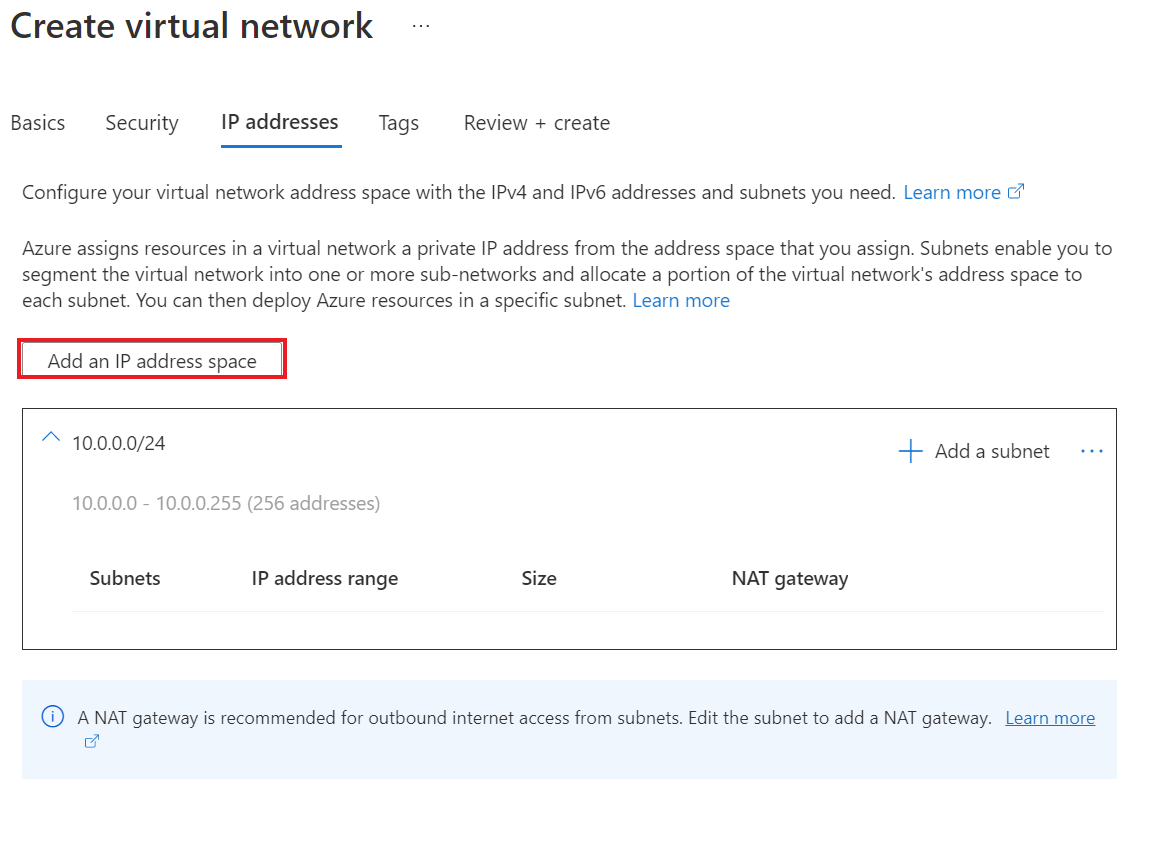
On Create virtual network, on the IP addresses tab, complete these steps:
Because there's no subnet for this network, first delete the existing address range. To delete the range, select the ellipsis (...), under the available IP address range, and then select Delete address space.
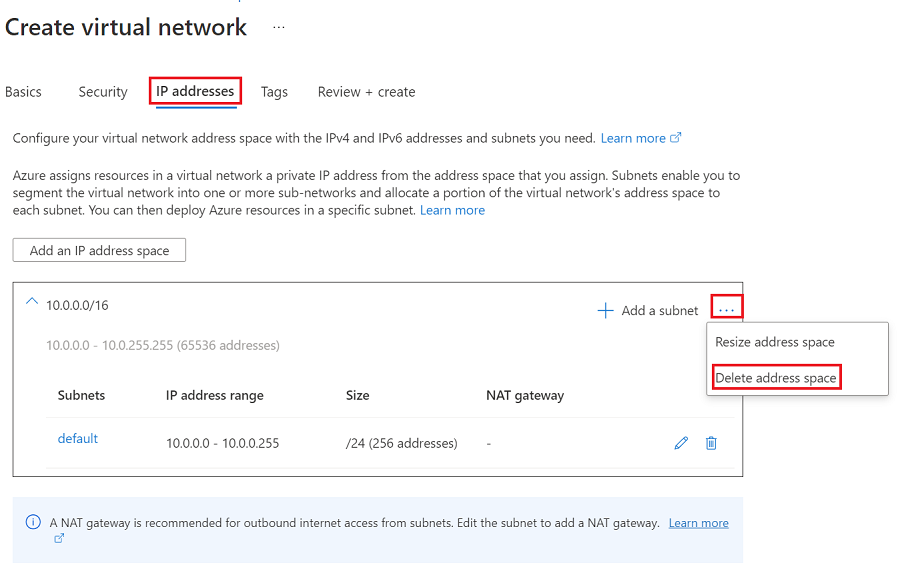
After you delete the existing address range, select Add an IP address space.
For Starting address, enter 10.0.0.
For Address space size, select /24 (256 addresses).
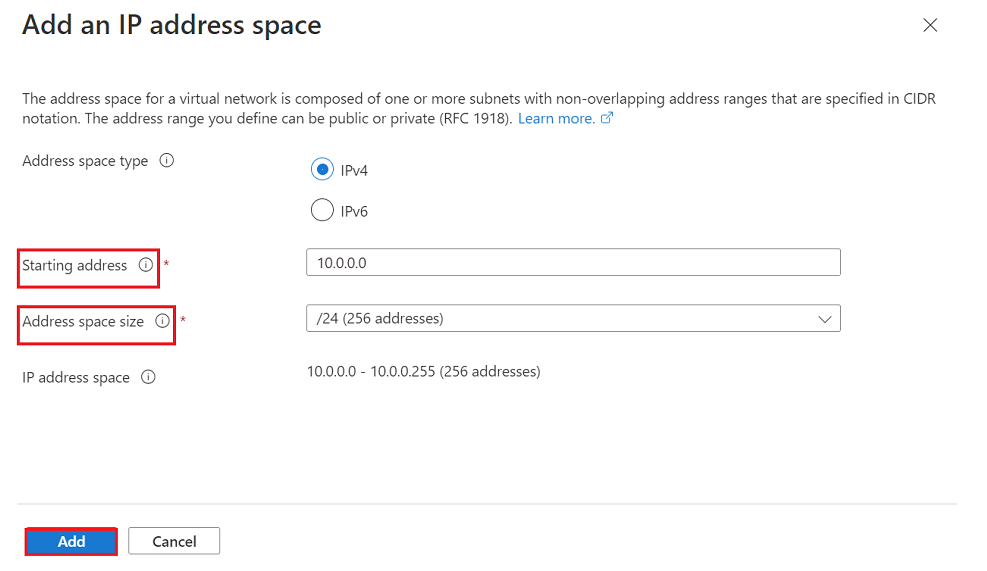
Select Add.
Select Review + create, and then select Create to create a new virtual network.
It takes a few minutes for the virtual network to be created. After it's created, it's included on your Azure portal dashboard.
Next steps
- Prepare the on-premises Hyper-V infrastructure for disaster recovery to Azure.
- Learn about Azure networks.
- Learn about Managed disks.