Note
Access to this page requires authorization. You can try signing in or changing directories.
Access to this page requires authorization. You can try changing directories.
When connecting to your VNet, you can use certificate-based authentication or RADIUS authentication. However, when you use the Open VPN protocol, you can also use Microsoft Entra authentication. If you want different set of users to be able to connect to different gateways, you can register multiple apps in AD and link them to different gateways.
This article helps you set up a Microsoft Entra tenant for P2S OpenVPN authentication, and create and register multiple apps in Microsoft Entra ID to allow different access for different users and groups.
Note
Microsoft Entra authentication is supported only for OpenVPN® protocol connections.
1. Create the Microsoft Entra tenant
Create a Microsoft Entra tenant using the steps in the Create a new tenant article:
Organizational name
Initial domain name
Example:

2. Create tenant users
In this step, you create two Microsoft Entra tenant users: One Global Admin account and one master user account. The master user account is used as your master embedding account (service account). When you create a Microsoft Entra tenant user account, you adjust the Directory role for the type of user that you want to create. Use the steps in this article to create at least two users for your Microsoft Entra tenant. Be sure to change the Directory Role to create the account types:
- Global Admin
- User
3. Register the VPN Client
Register the VPN client in the Microsoft Entra tenant.
Locate the Directory ID of the directory that you want to use for authentication. It is listed in the properties section of the Active Directory page.

Copy the Directory ID.
Sign in to the Azure portal as a user that is assigned the Global administrator role.
Next, give admin consent. Copy and paste the URL that pertains to your deployment location in the address bar of your browser:
Microsoft Azure operated by 21Vianet
https://login.chinacloudapi.cn/common/oauth2/authorize?client_id=49f817b6-84ae-4cc0-928c-73f27289b3aa&response_type=code&redirect_uri=https://portal.azure.cn&nonce=1234&prompt=admin_consent
Note
If you using a global admin account that is not native to the Microsoft Entra tenant to provide consent, please replace "common" with the Microsoft Entra directory id in the URL. You may also have to replace "common" with your directory id in certain other cases as well.
Select the Global Admin account if prompted.

On the Permissions requested page, select Accept to grant permissions to the app.
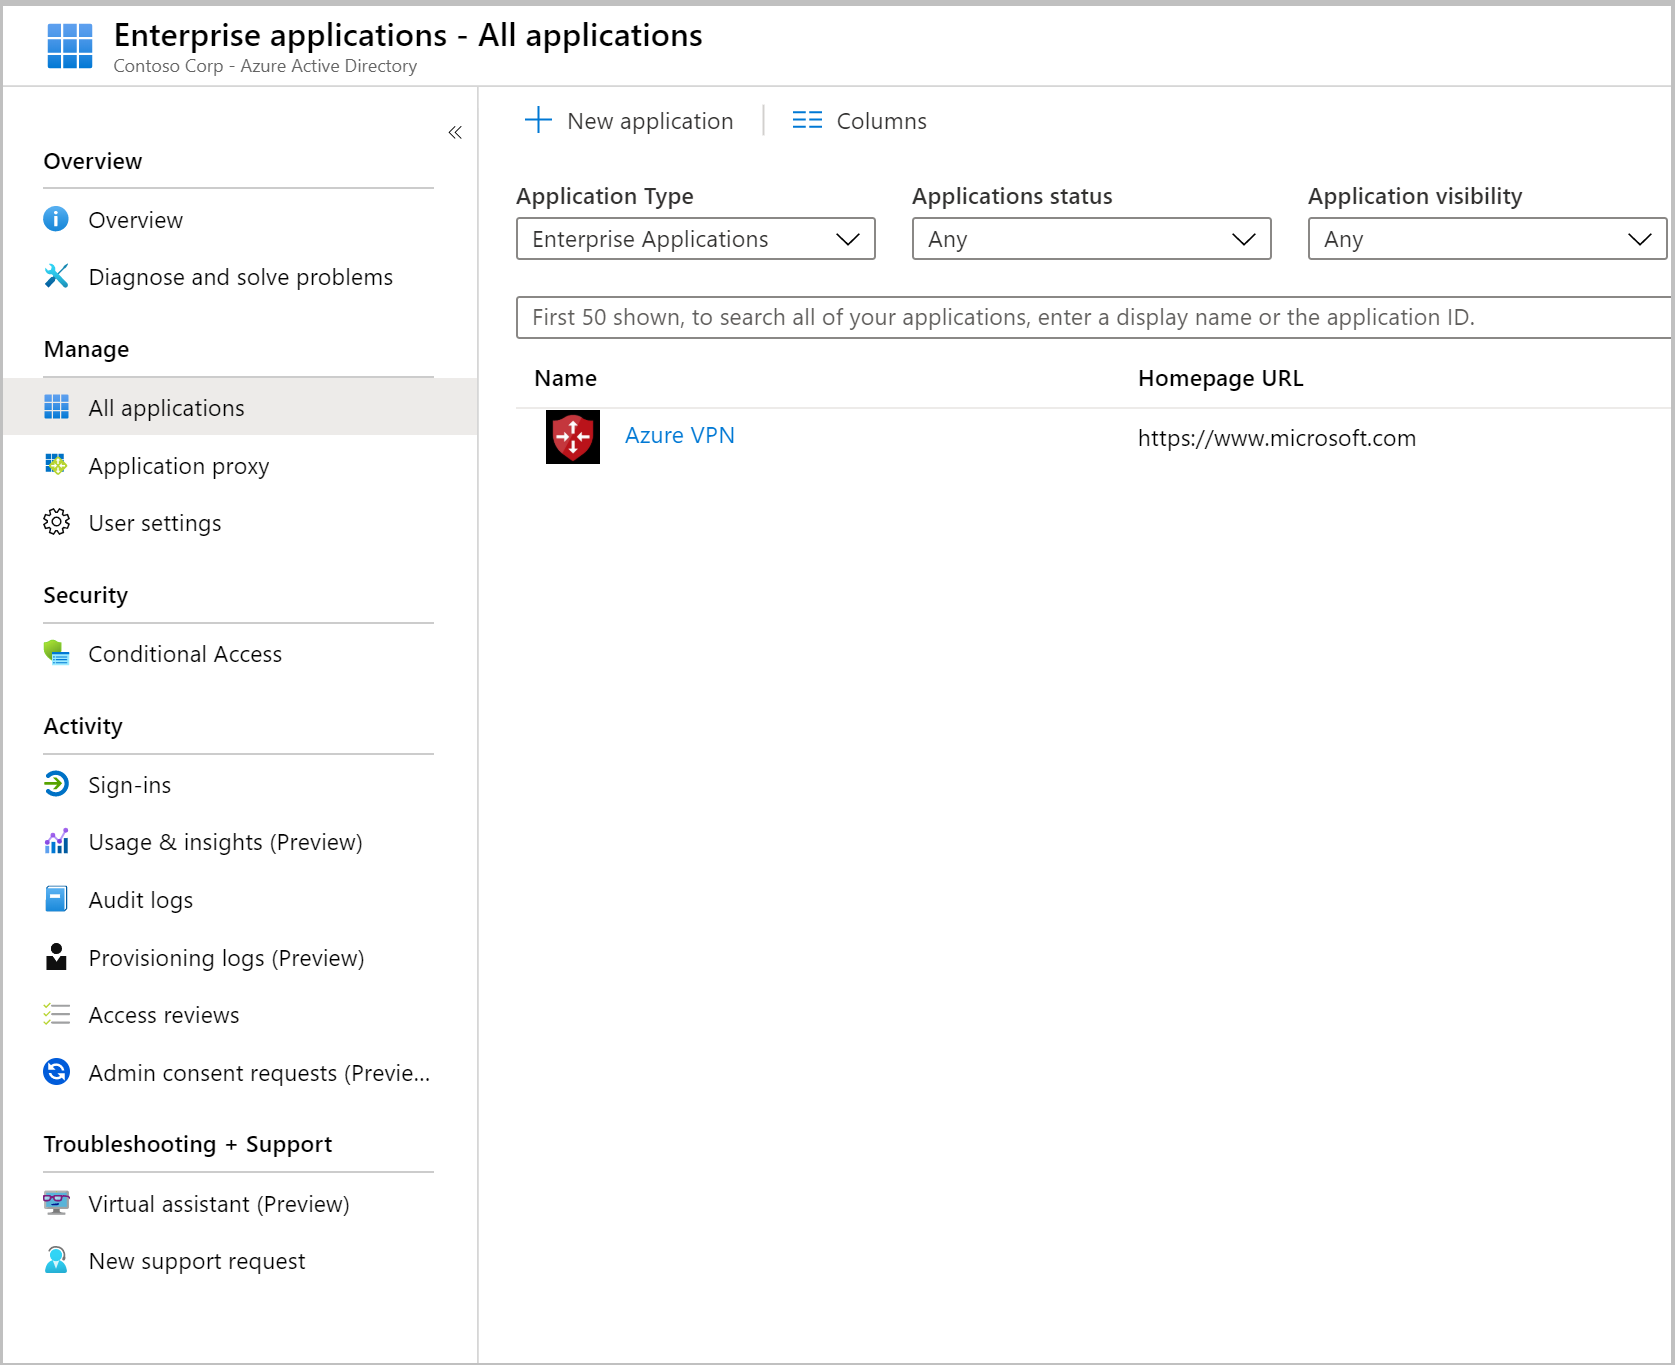
Under your Microsoft Entra ID, in Enterprise applications, you will see Azure VPN listed.
4. Register additional applications
In this step, you register additional applications for various users and groups.
Under your Microsoft Entra ID, click App registrations and then + New registration.
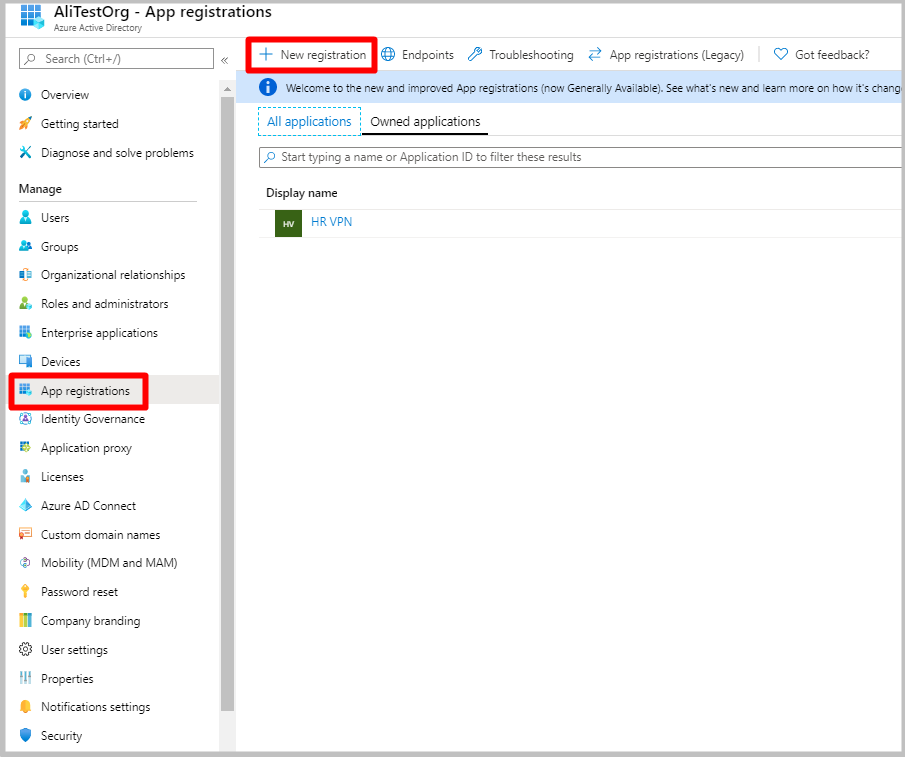
On the Register an application page, enter the Name. Select the desired Supported account types, then click Register.

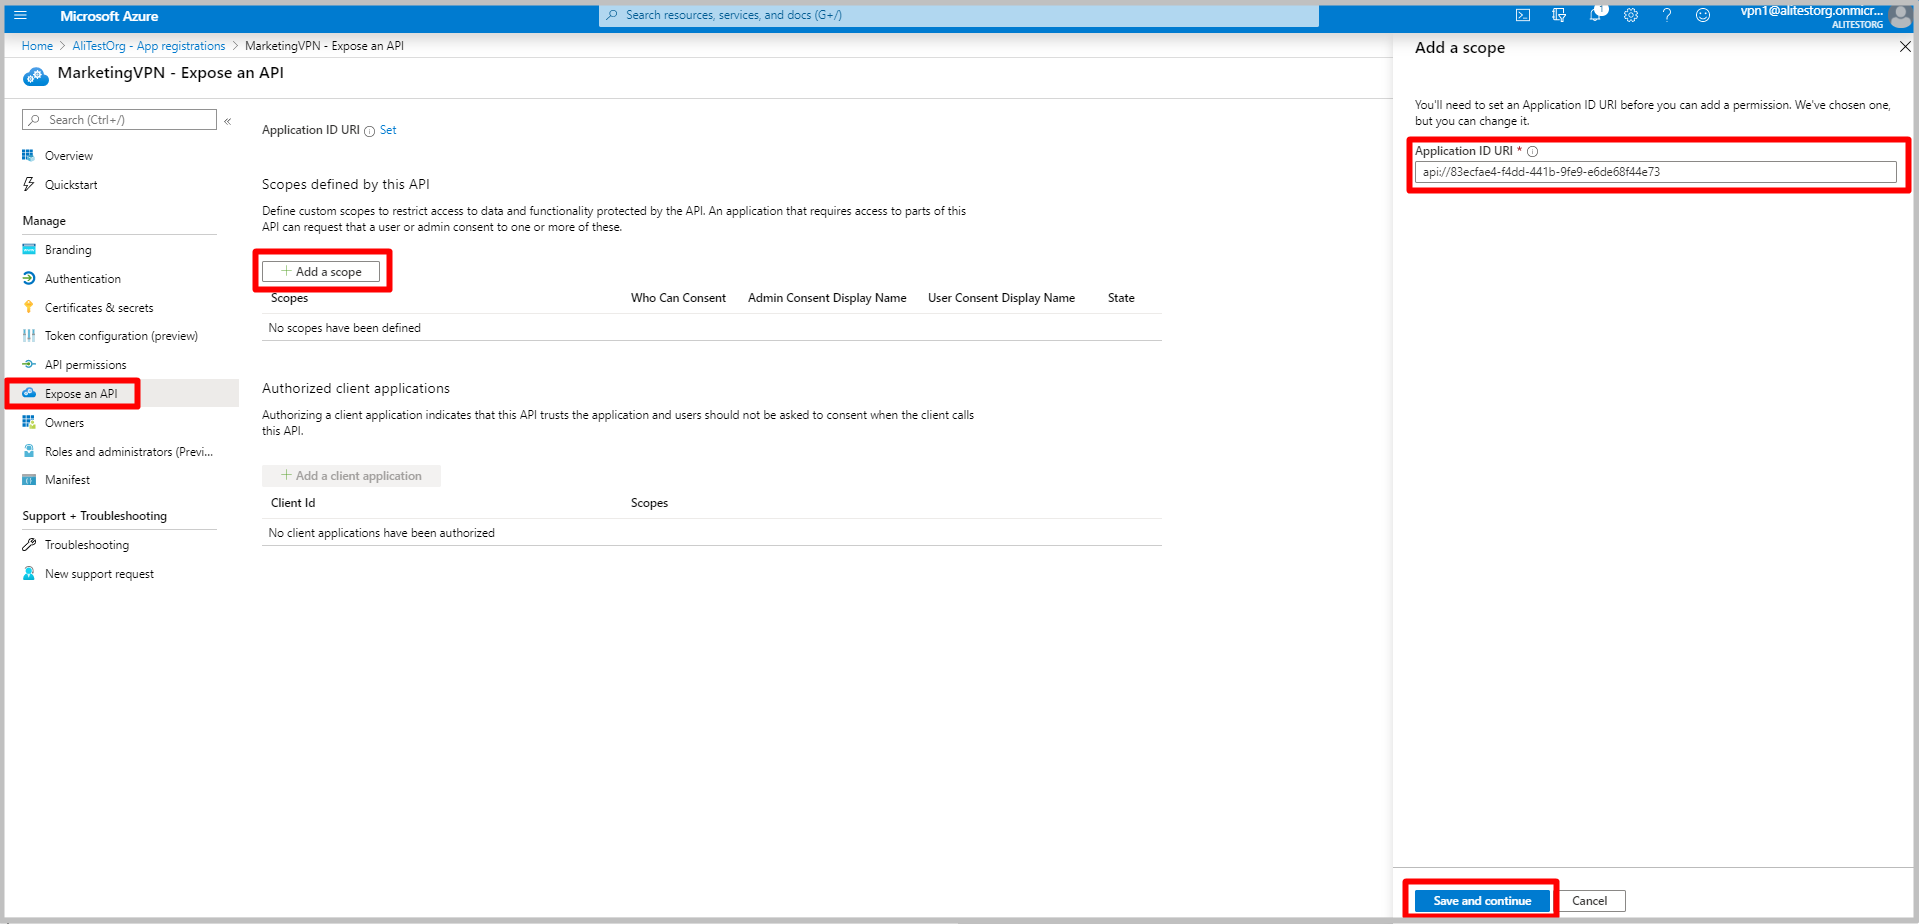
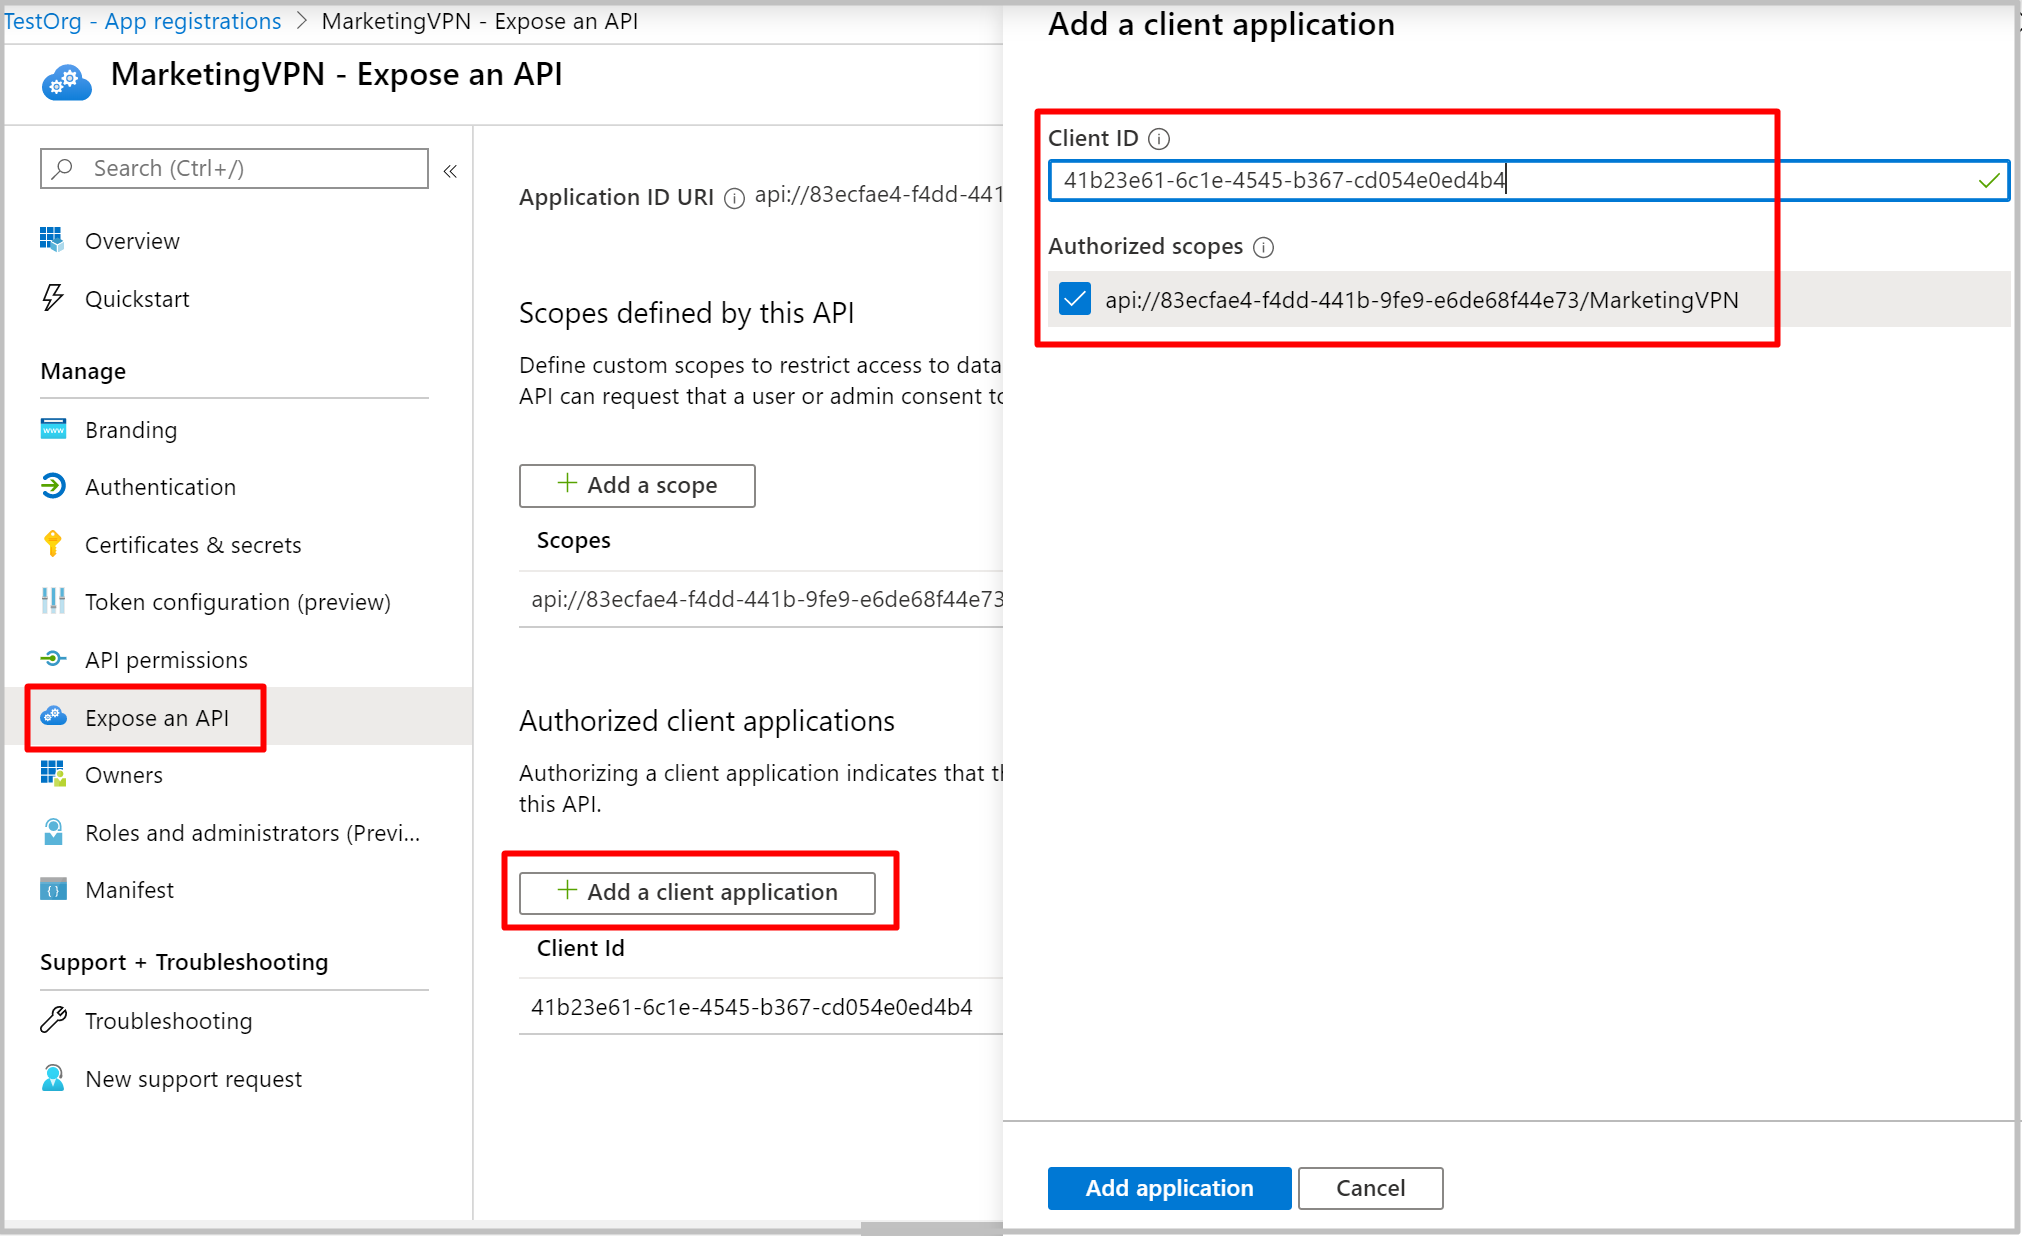
Once the new app has been registered, click Expose an API under the app blade.
Click + Add a scope.
Leave the default Application ID URI. Click Save and continue.
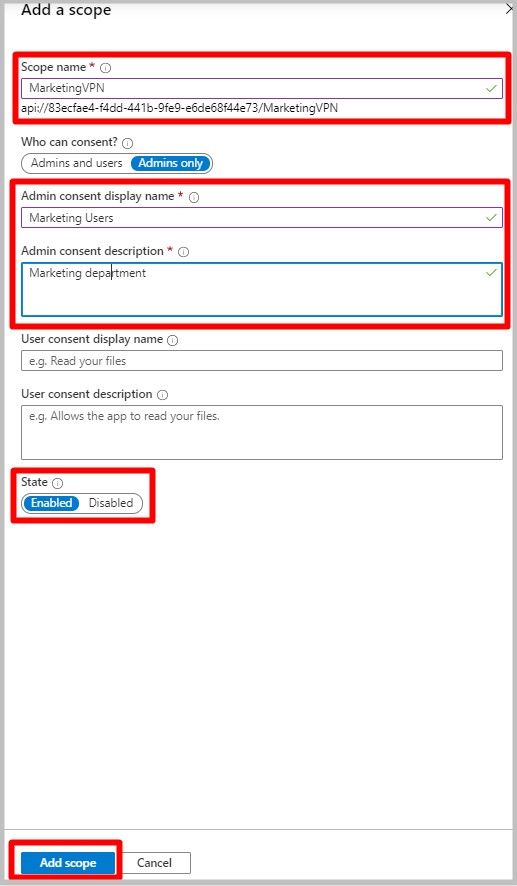
Fill in the required fields and ensure that State is Enabled. Click Add scope.
Click Expose an API then + Add a client application. For Client ID, Enter 49f817b6-84ae-4cc0-928c-73f27289b3aa for Azure China 21Vianet.
Click Add application.
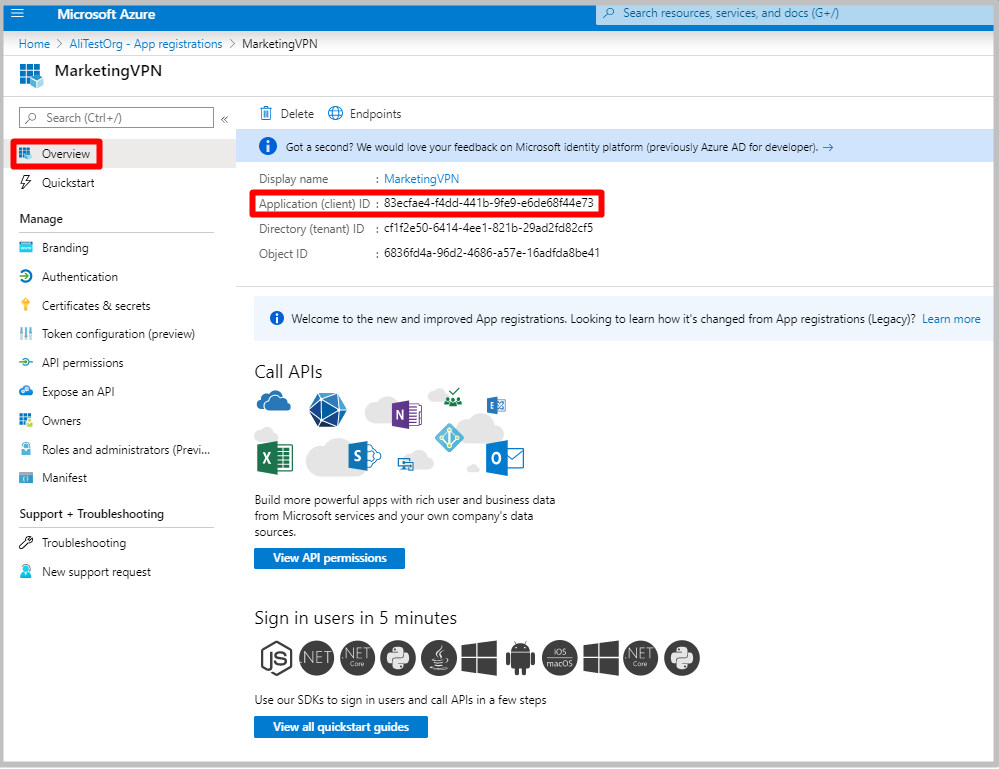
Copy the Application (client) ID from the Overview page. You will need this information to configure your VPN gateway(s).
Repeat the steps in this register additional applications section to create as many applications that are needed for your security requirement. Each application will be associated to a VPN gateway and can have a different set of users. Only one application can be associated to a gateway.
5. Assign users to applications
Assign the users to your applications.
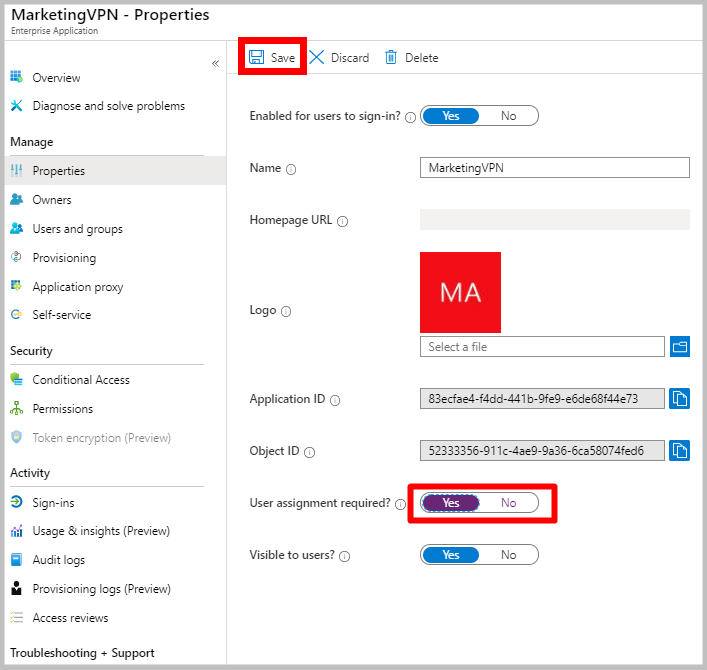
Under Microsoft Entra ID -> Enterprise applications, select the newly registered application and click Properties. Ensure that User assignment required? is set to yes. Click Save.
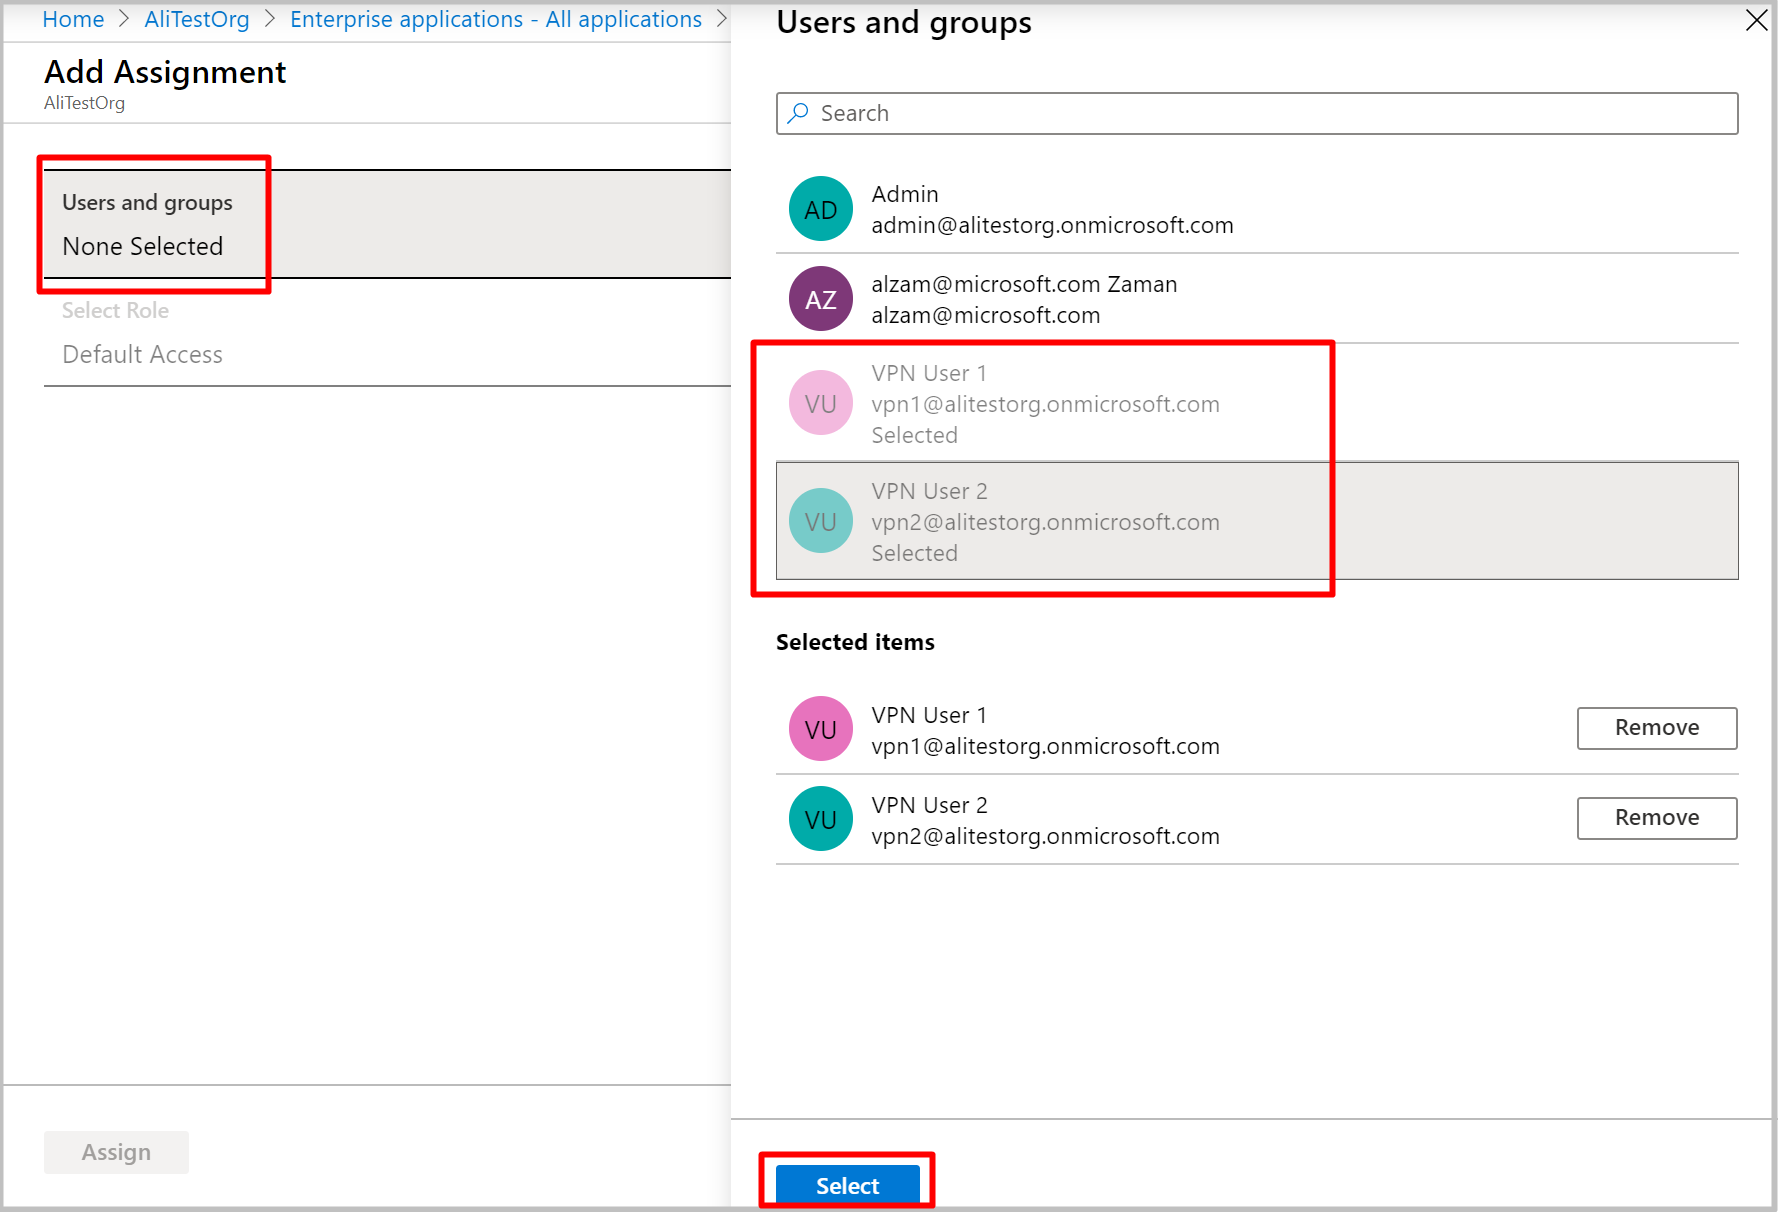
On the app page, click Users and groups, and then click +Add user.
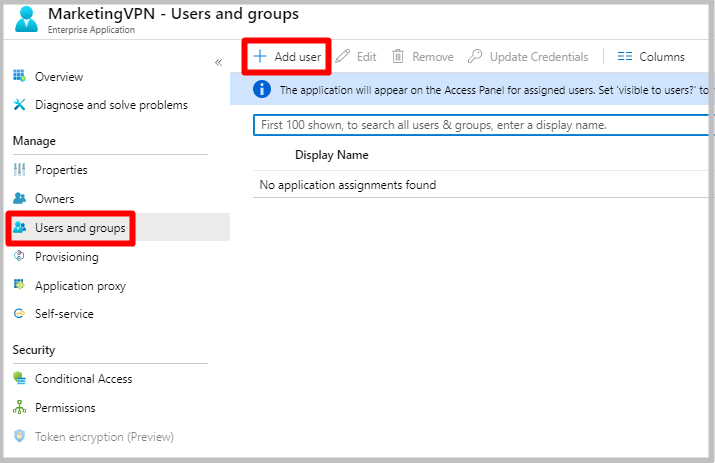
Under Add Assignment, click Users and groups. Select the users that you want to be able to access this VPN application. Click Select.
6. Create a new P2S configuration
A P2S configuration defines the parameters for connecting remote clients.
Set the following variables, replacing values as needed for your environment.
$aadAudience = "00000000-abcd-abcd-abcd-999999999999"
$aadIssuer = "https://sts.chinacloudapi.cn/00000000-abcd-abcd-abcd-999999999999/"
$aadTenant = "https://login.partner.microsoftonline.cn/00000000-abcd-abcd-abcd-999999999999"
Run the following commands to create the configuration:
$aadConfig = New-AzVpnServerConfiguration -ResourceGroupName <ResourceGroup> -Name newAADConfig -VpnProtocol OpenVPN -VpnAuthenticationType AAD -AadTenant $aadTenant -AadIssuer $aadIssuer -AadAudience $aadAudience -Location chinaeast2Note
Do not use the Azure VPN client's application ID in the commands above: It will grant all users access to the gateway. Use the ID of the application(s) you registered.
7. Edit hub assignment
Navigate to the Hubs blade under the virtual WAN.
Select the hub that you want to associate the vpn server configuration to and click the ellipsis (...).

Click Edit virtual hub.
Check the Include point-to-site gateway check box and pick the Gateway scale unit that you want.

Enter the Address pool from which the VPN clients will be assigned IP addresses.
Click Confirm.
The operation can take up to 30 minutes to complete.
8. Download VPN profile
Use the VPN profile to configure your clients.
On the page for your virtual WAN, click User VPN configurations.
At the top of the page, click Download user VPN config.
Once the file has finished creating, you can click the link to download it.
Use the profile file to configure the VPN clients.
Extract the downloaded zip file.
Browse to the unzipped "AzureVPN" folder.
Make a note of the location of the "azurevpnconfig.xml" file. The azurevpnconfig.xml contains the setting for the VPN connection and can be imported directly into the Azure VPN Client application. You can also distribute this file to all the users that need to connect via e-mail or other means. The user will need valid Microsoft Entra credentials to connect successfully.
9. Configure User VPN clients
To connect, you need to download the Azure VPN Client and import the VPN client profile that was downloaded in the previous steps on every computer that wants to connect to the VNet.
Note
Microsoft Entra authentication is supported only for OpenVPN® protocol connections.
To download the Azure VPN client
Use this link to download the Azure VPN Client.
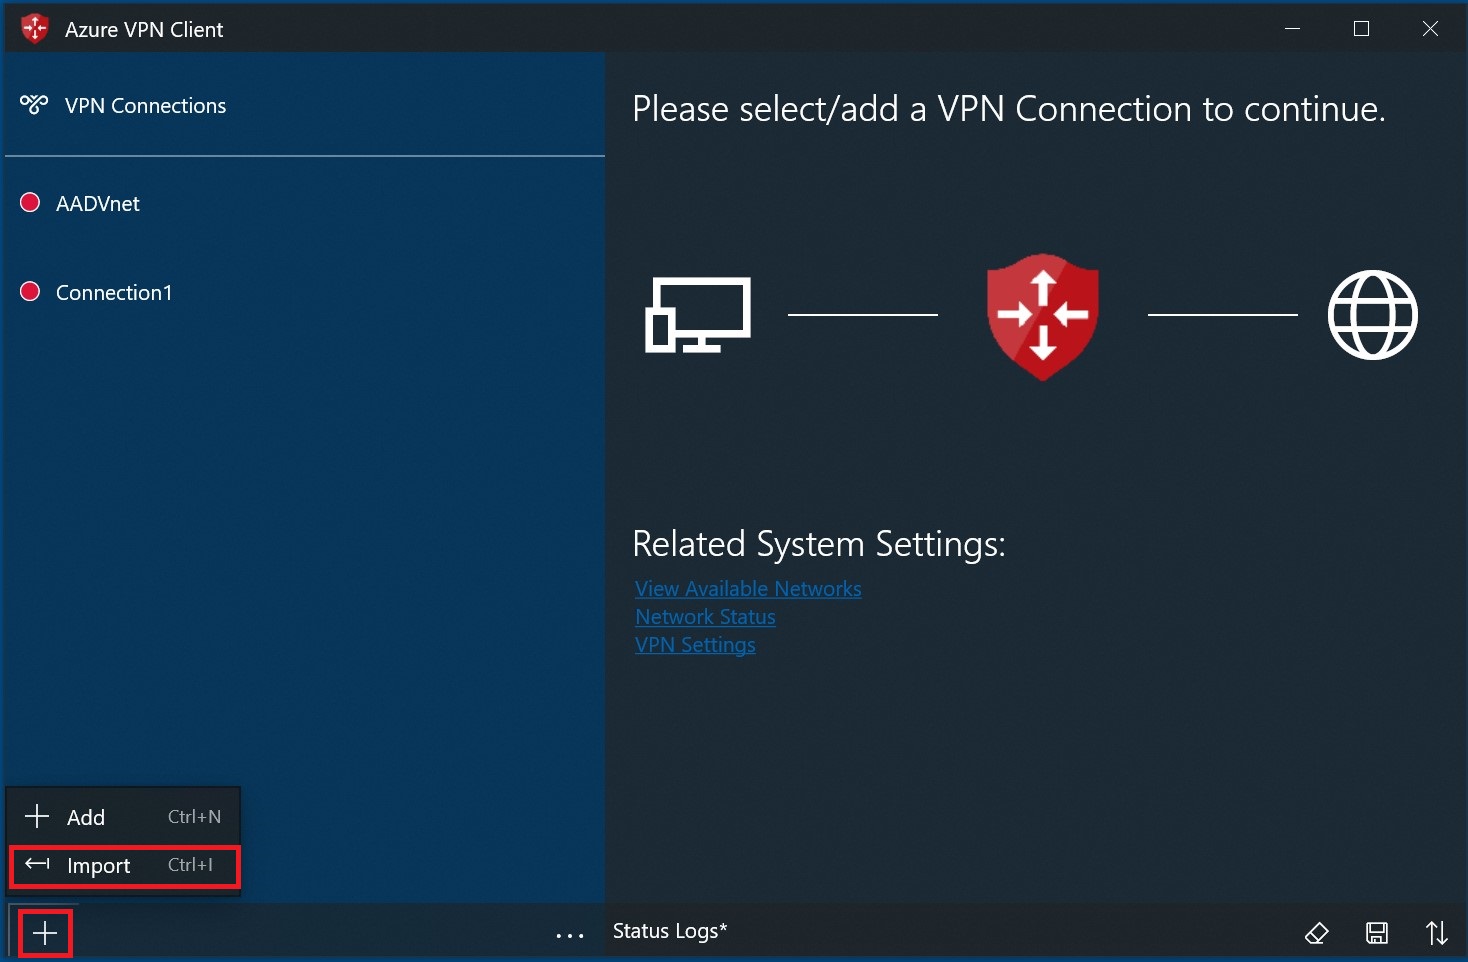
To import a client profile
On the page, select Import.
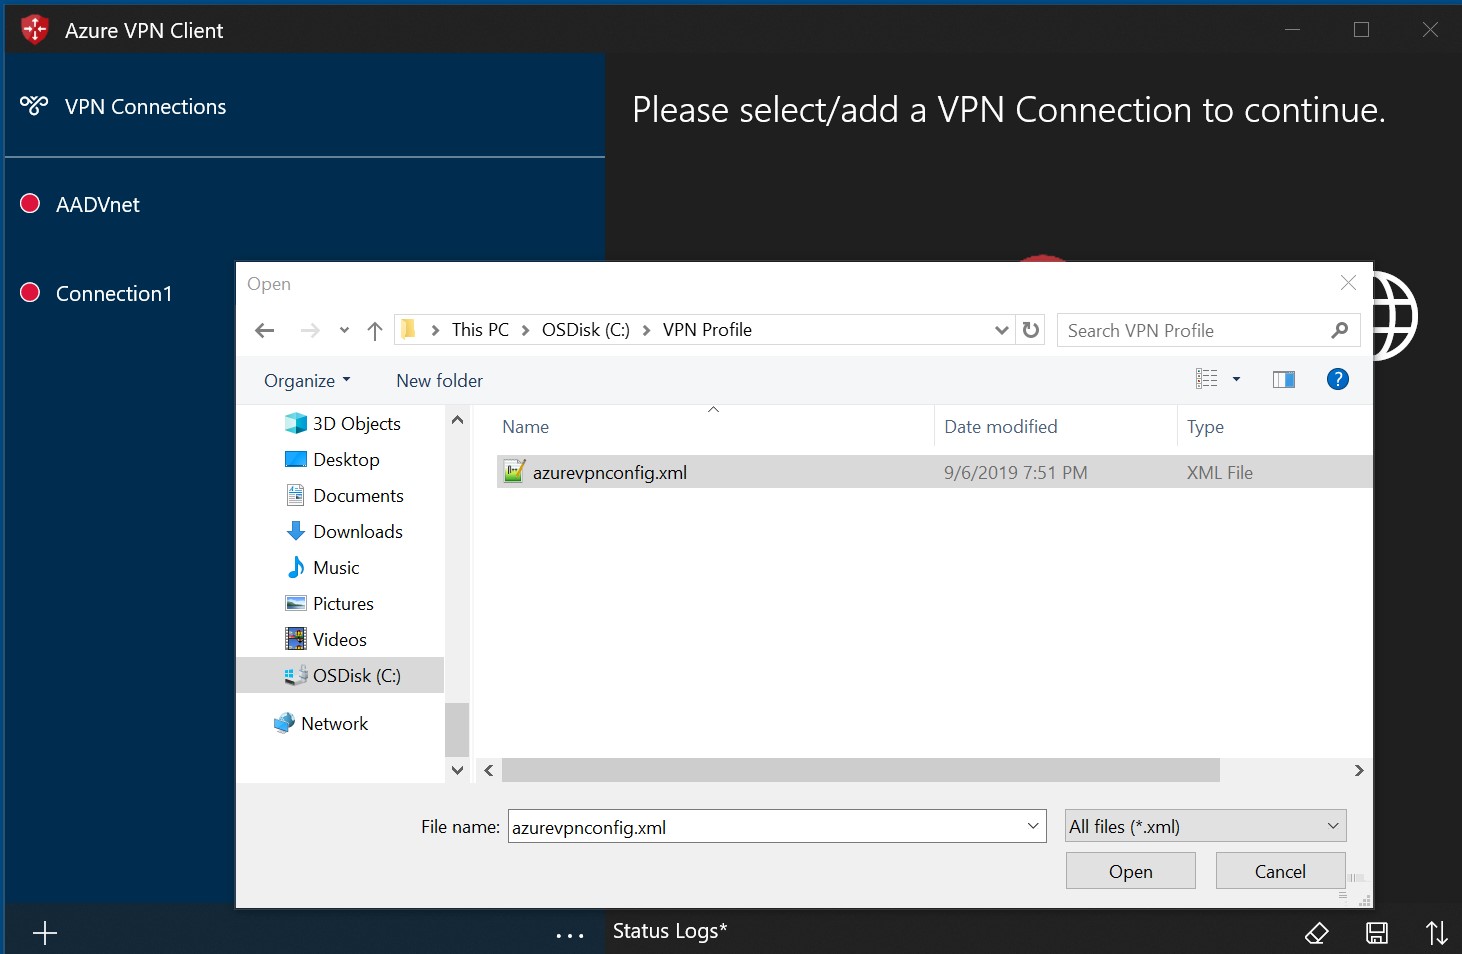
Browse to the profile xml file and select it. With the file selected, select Open.
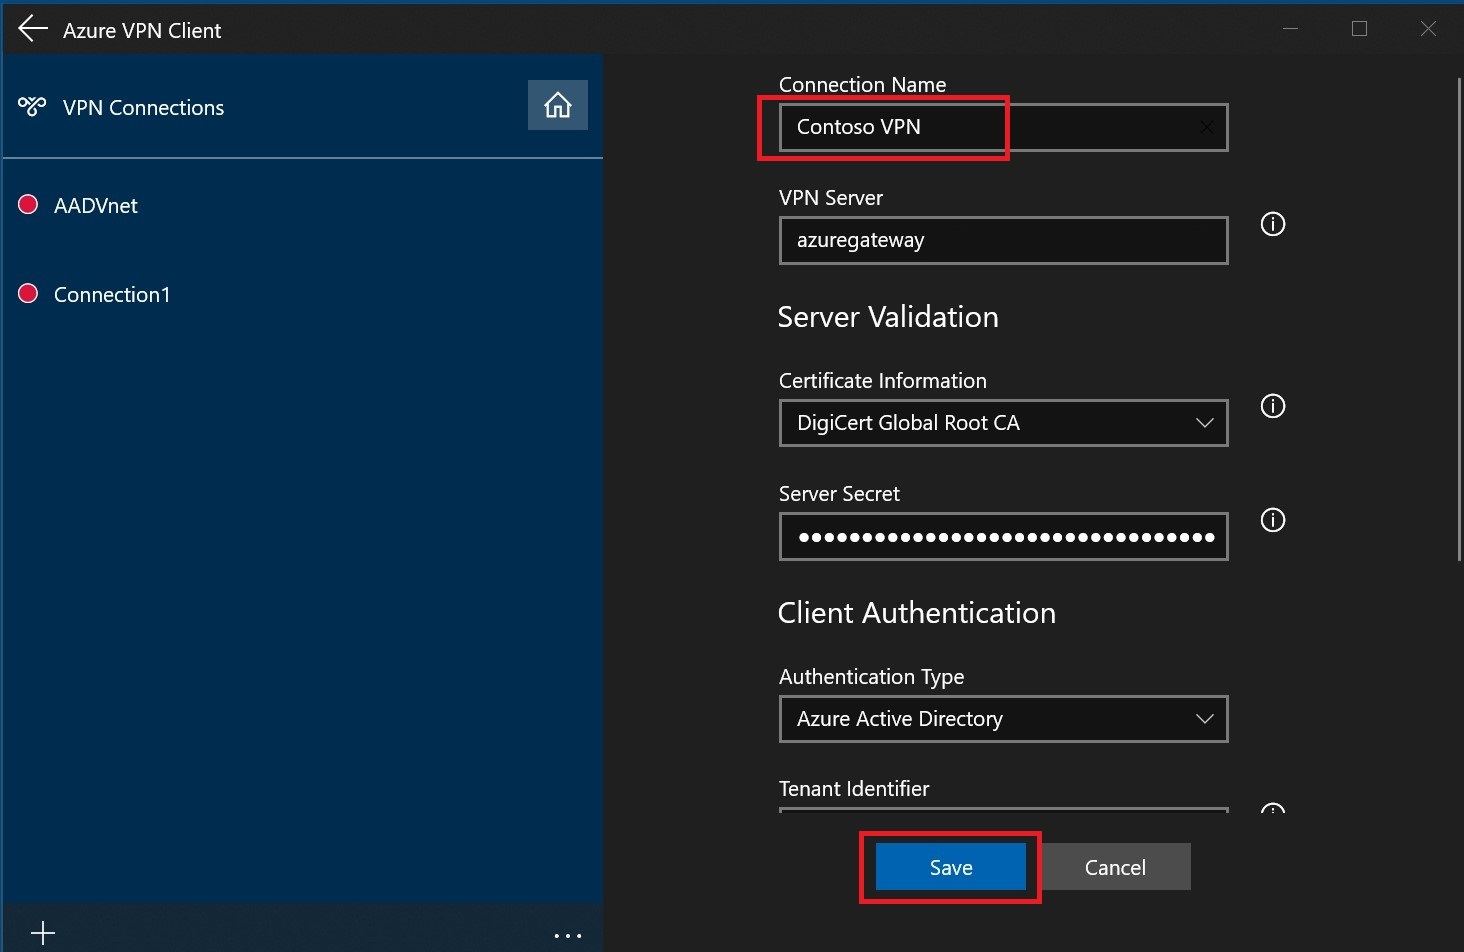
Specify the name of the profile and select Save.
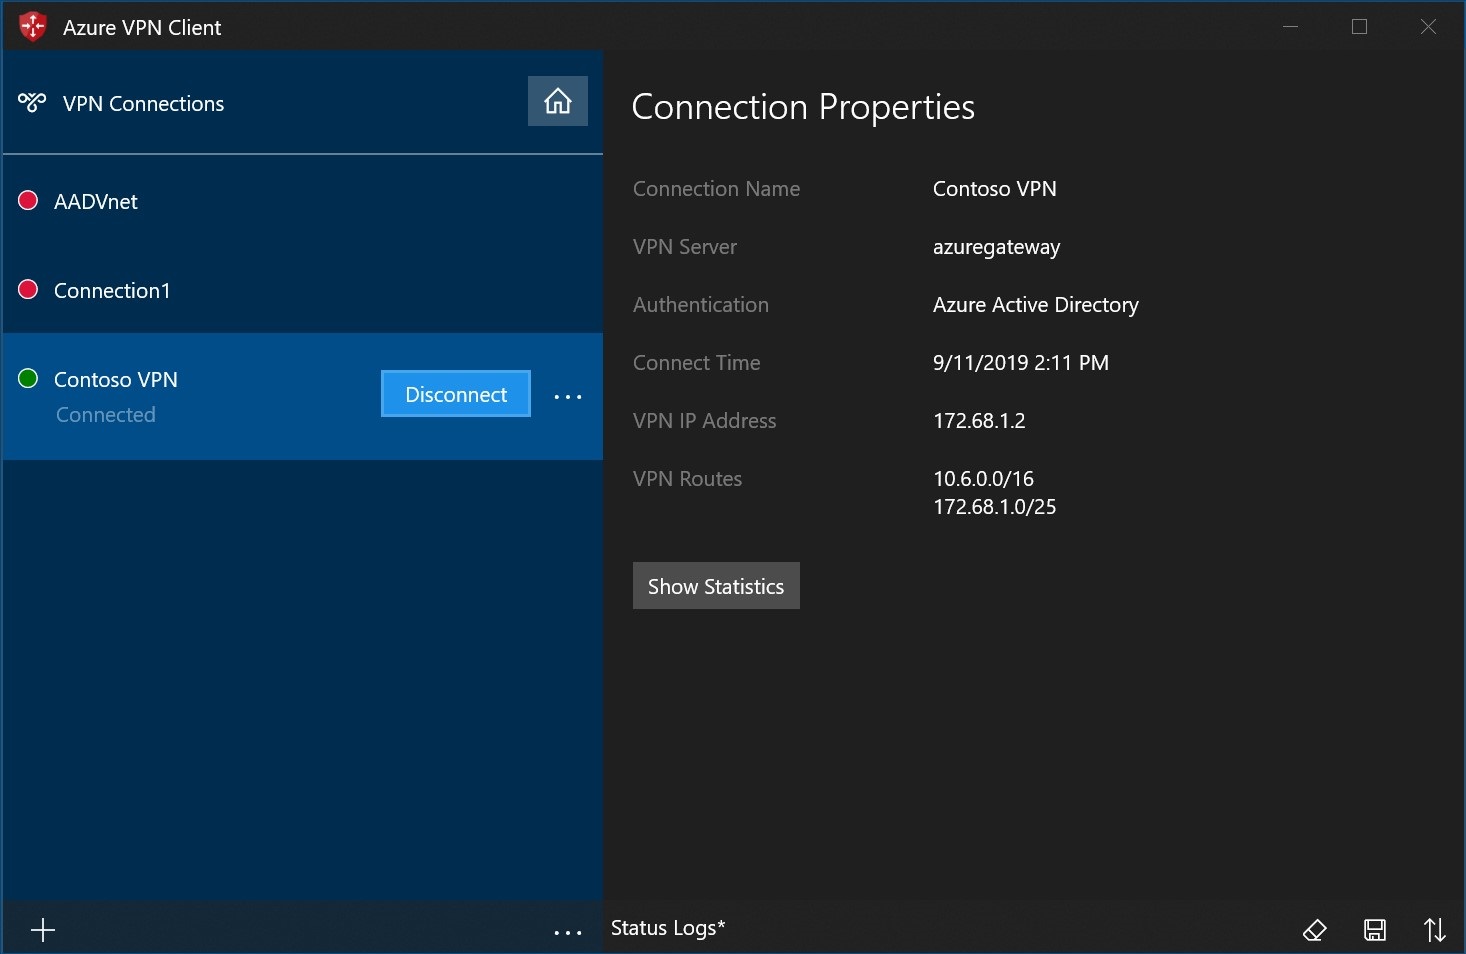
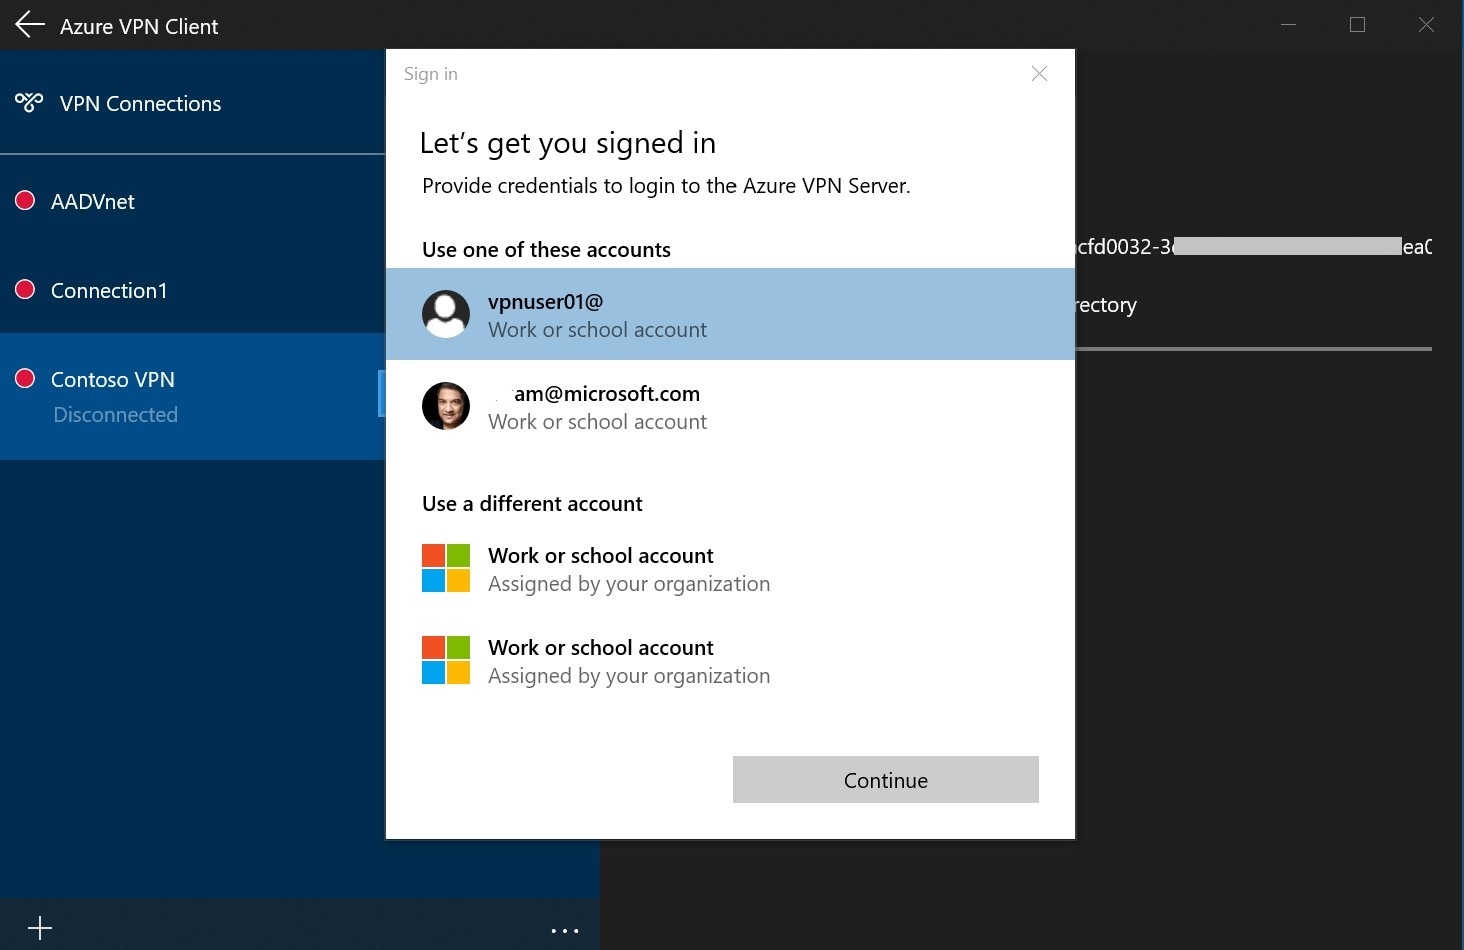
Select Connect to connect to the VPN.
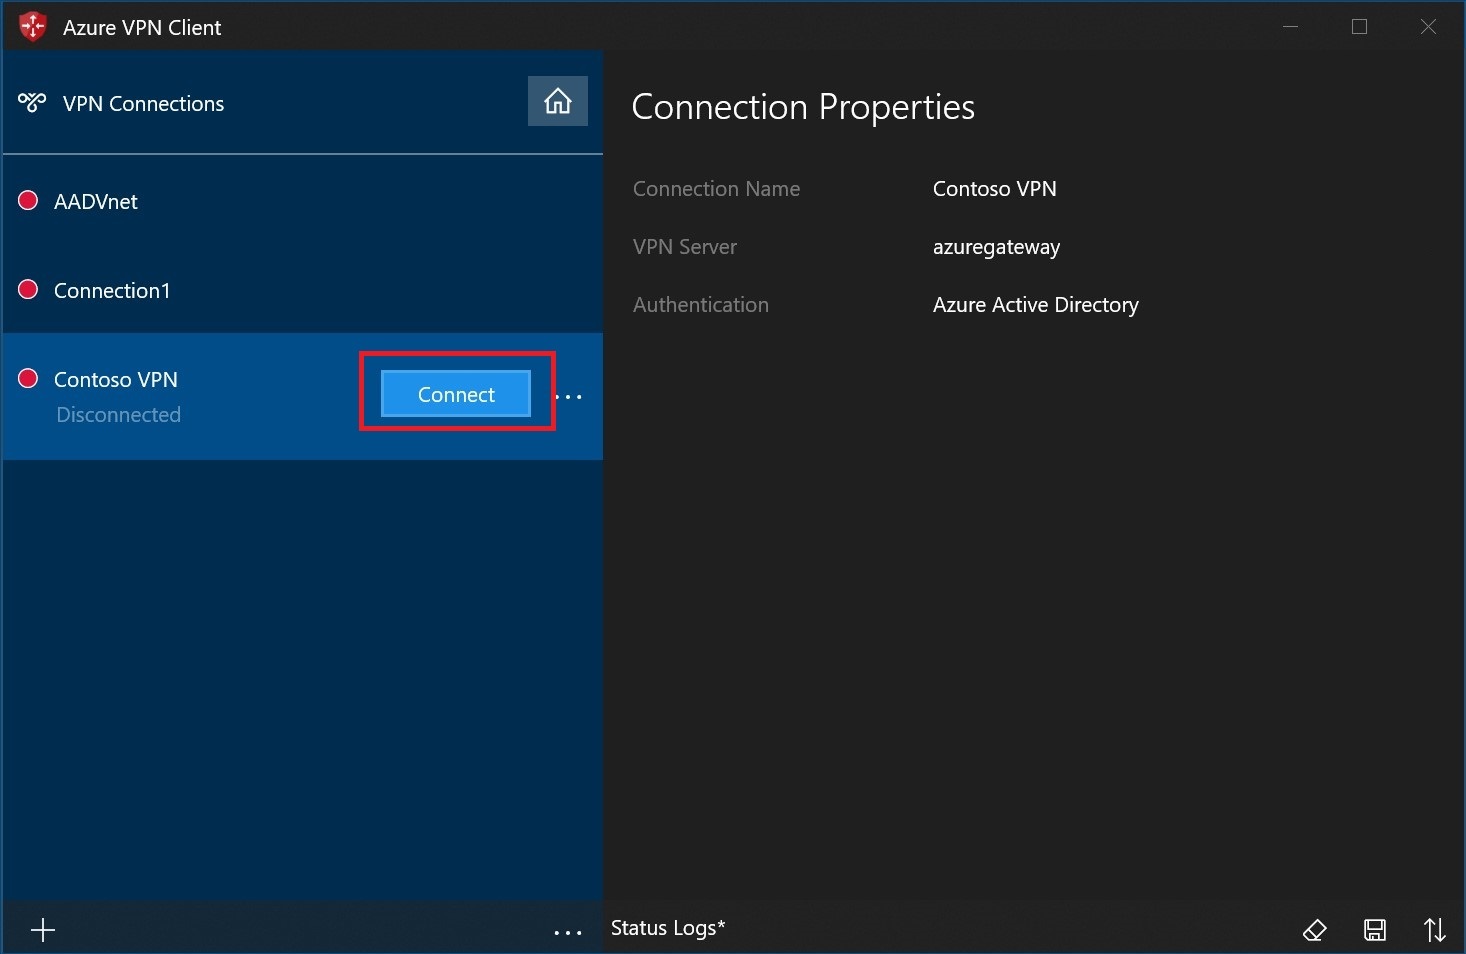
Once connected, the icon will turn green and say Connected.
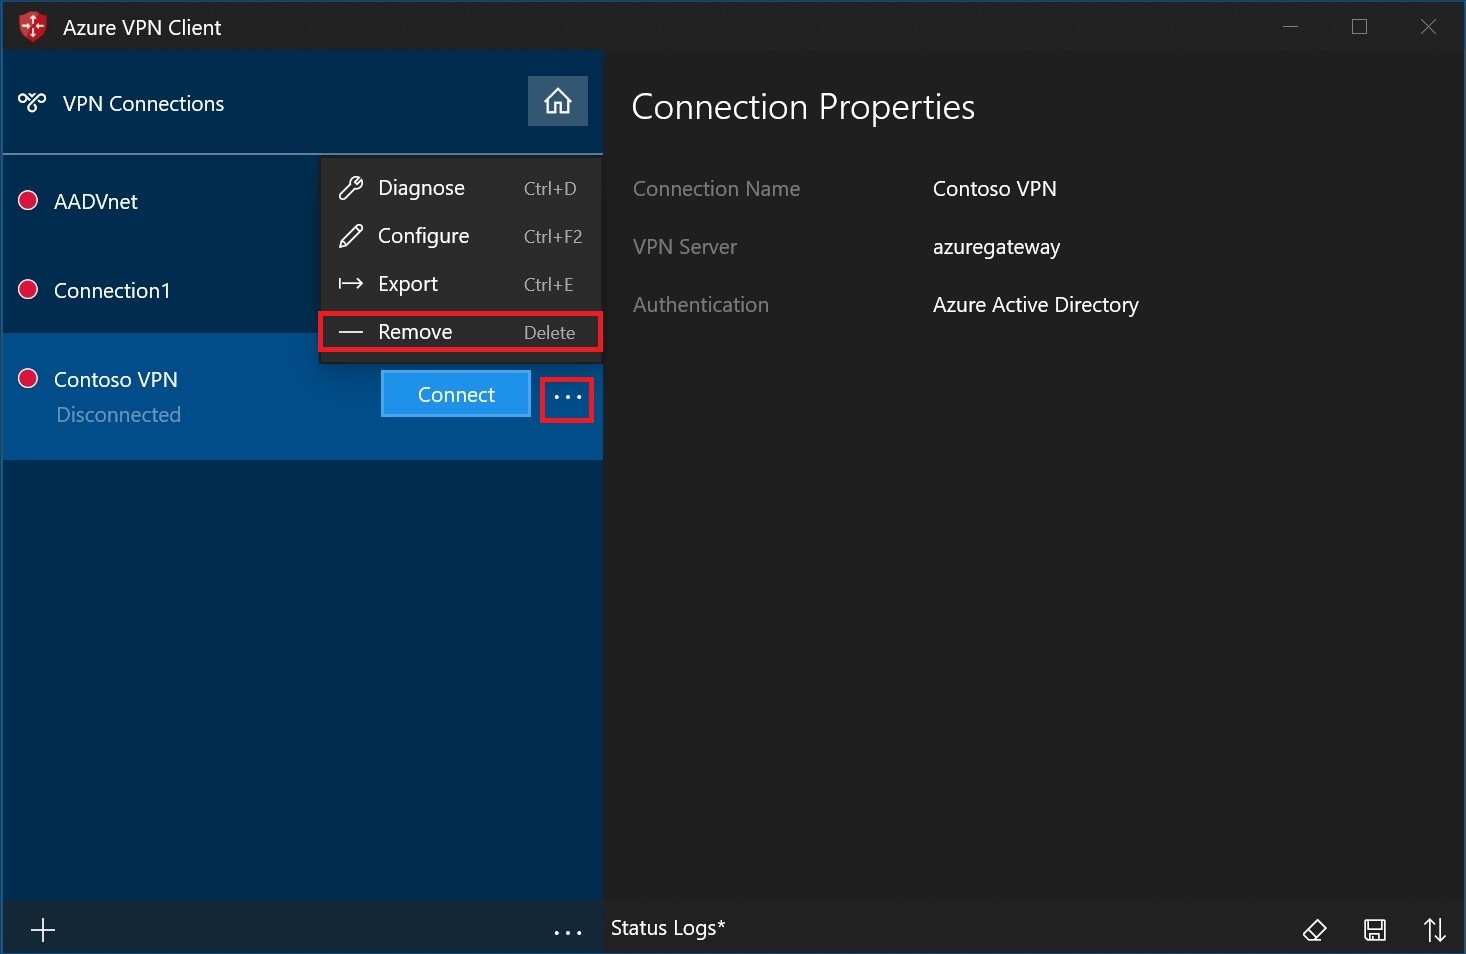
To delete a client profile
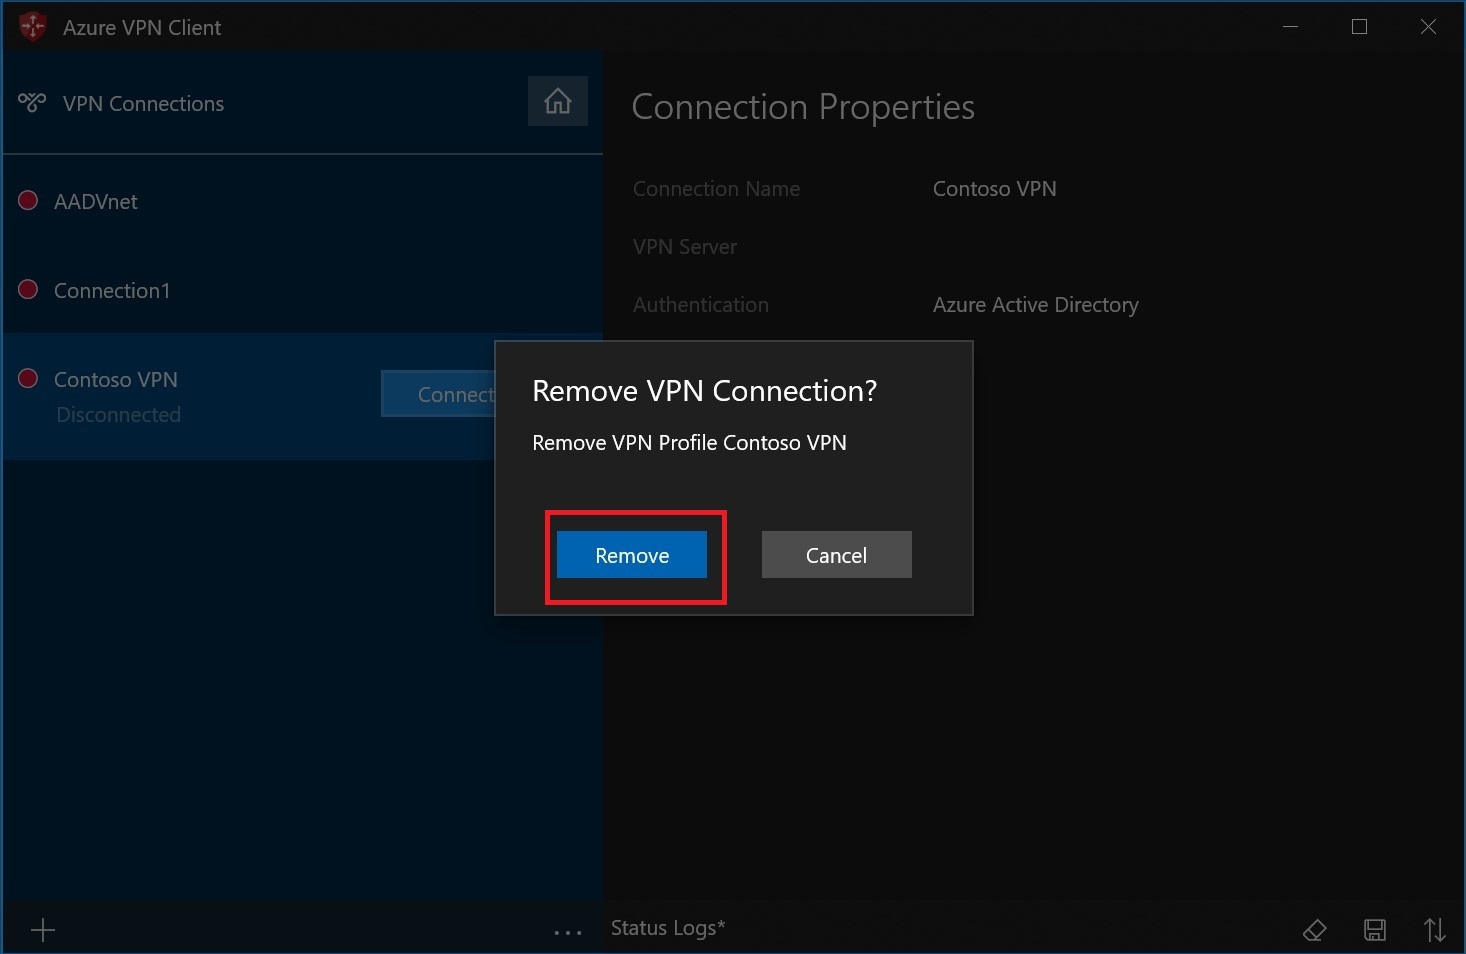
Select the ellipsis (...) next to the client profile that you want to delete. Then, select Remove.
Select Remove to delete.
To diagnose connection issues
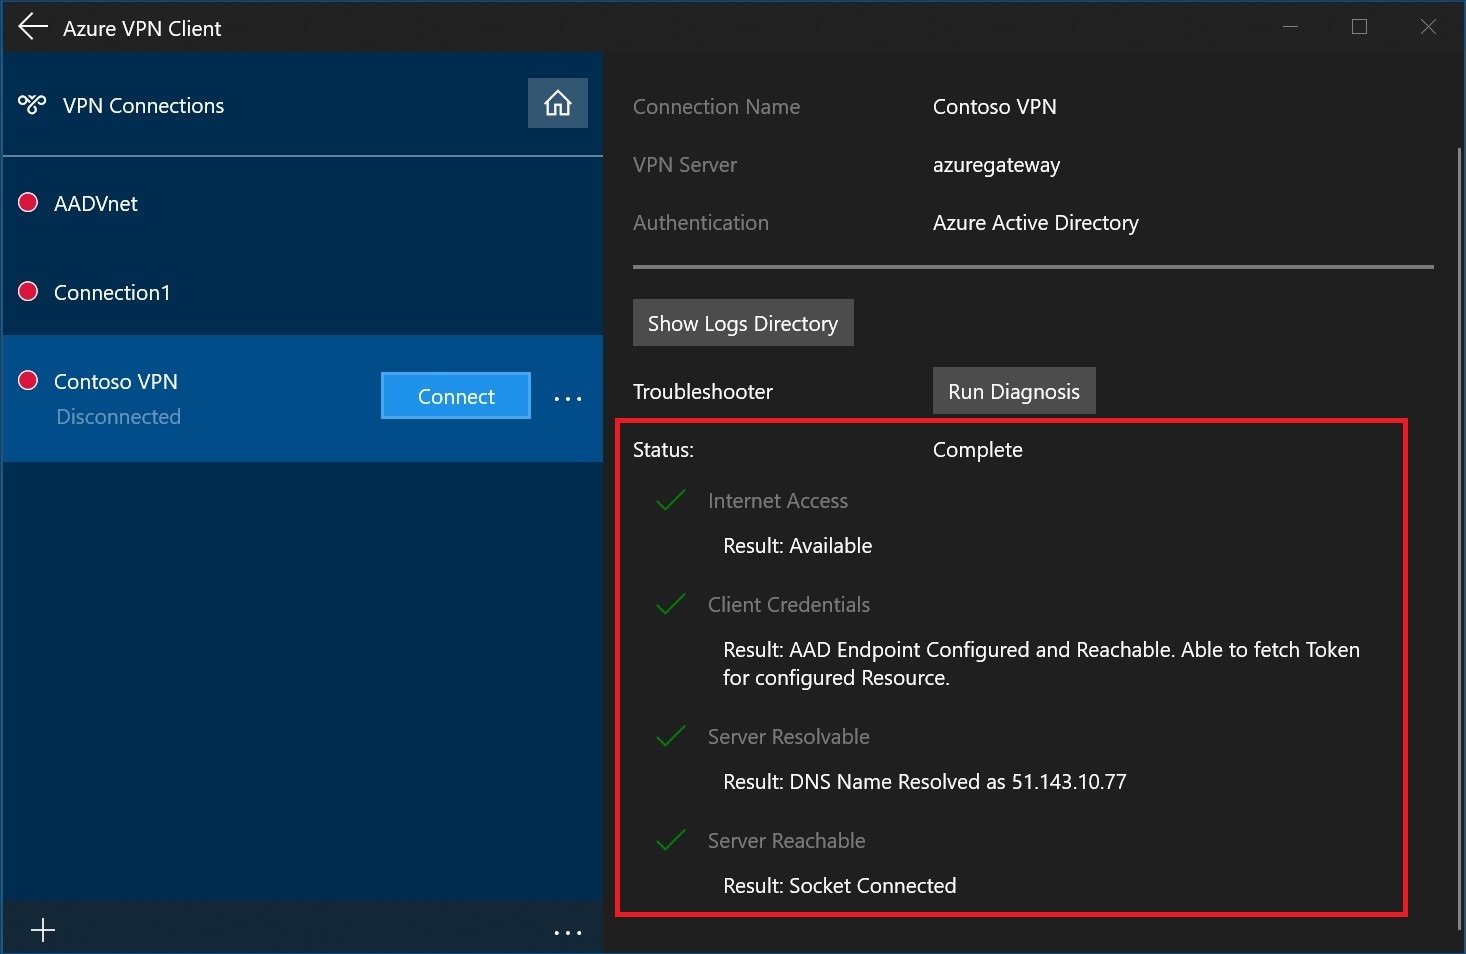
To diagnose connection issues, you can use the Diagnose tool. Select the ellipsis (...) next to the VPN connection that you want to diagnose to reveal the menu. Then select Diagnose.

On the Connection Properties page, select Run Diagnosis.

Sign in with your credentials.
View the diagnosis results.
10. View your virtual WAN
Navigate to the virtual WAN.
On the Overview page, each point on the map represents a hub.
In the Hubs and connections section, you can view hub status, site, region, VPN connection status, and bytes in and out.
Clean up resources
When you no longer need these resources, you can use Remove-AzResourceGroup to remove the resource group and all of the resources it contains. Replace "myResourceGroup" with the name of your resource group and run the following PowerShell command:
Remove-AzResourceGroup -Name myResourceGroup -Force
Next steps
To learn more about Virtual WAN, see the Virtual WAN Overview page.