Nota:
El acceso a esta página requiere autorización. Puede intentar iniciar sesión o cambiar directorios.
El acceso a esta página requiere autorización. Puede intentar cambiar los directorios.
了解如何使用 Azure 虚拟机扩展在 Azure VM 上执行部署后配置和自动化任务。 有许多不同的 VM 扩展可与 Azure VM 配合使用。 在本教程中,你将从 Azure 资源管理器模板(ARM 模板)部署自定义脚本扩展,以便在 Windows VM 上运行 PowerShell 脚本。 此脚本在 VM 上安装 Web 服务器。
本教程涵盖以下任务:
- 准备 PowerShell 脚本
- 打开快速入门模板
- 编辑模板
- 部署模板
如果没有 Azure 订阅,请在开始前创建一个试用版订阅。
先决条件
若要完成本文,需要做好以下准备:
若要提高安全性,请使用为虚拟机管理员帐户生成的密码。 可以在 PowerShell 或 CLI 中使用本地 Shell 运行以下命令:
openssl rand -base64 32若要了解详细信息,请运行
man openssl rand打开手册页。Azure Key Vault 旨在保护加密密钥和其他机密。 有关详细信息,请参阅教程:在 ARM 模板部署中集成 Azure Key Vault。 我们还建议每三个月更新一次密码。
准备 PowerShell 脚本
可以使用内联 PowerShell 脚本或脚本文件。 本教程介绍如何使用脚本文件。 从 GitHub 共享包含以下内容的 PowerShell 脚本:
Install-WindowsFeature -Name Web-Server -IncludeManagementTools
如果选择将文件发布到你自己的位置,请在本教程的后面部分更新模板中的 fileUri 元素。
打开快速入门模板
Azure 快速入门模板是 ARM 模板的存储库。 无需从头开始创建模板,只需找到一个示例模板并对其自定义即可。 本教程中使用的模板称为部署简单的 Windows VM。
在 Visual Studio Code 中,选择“文件”“打开文件”。
在“文件名”框中粘贴以下 URL:
https://raw.githubusercontent.com/Azure/azure-quickstart-templates/master/quickstarts/microsoft.compute/vm-simple-windows/azuredeploy.json若要打开该文件,请选择“打开”。 该模板定义五个资源:
-
Microsoft.Storage/storageAccounts。 -
Microsoft.Network/publicIPAddresses。 -
Microsoft.Network/networkSecurityGroups。 -
Microsoft.Network/virtualNetworks。 -
Microsoft.Network/networkInterfaces。 -
Microsoft.Compute/virtualMachines。
在自定义模板之前,不妨对其进行一些基本的了解。
-
选择“文件”“另存为”,使用文件名 azuredeploy.json 将该文件的副本保存到本地计算机。
编辑模板
将虚拟机扩展资源添加到包含以下内容的现有模板:
{
  "type": "Microsoft.Compute/virtualMachines/extensions",
  "apiVersion": "2025-04-01",
  "name": "[format('{0}/{1}', variables('vmName'), 'InstallWebServer')]",
  "location": "[parameters('location')]",
  "dependsOn": [
    "[format('Microsoft.Compute/virtualMachines/{0}',variables('vmName'))]"
  ],
  "properties": {
    "publisher": "Microsoft.Compute",
    "type": "CustomScriptExtension",
    "typeHandlerVersion": "1.7",
    "autoUpgradeMinorVersion": true,
    "settings": {
      "fileUris": [
        "https://raw.githubusercontent.com/Azure/azure-docs-json-samples/master/tutorial-vm-extension/installWebServer.ps1"
      ],
      "commandToExecute": "powershell.exe -ExecutionPolicy Unrestricted -File installWebServer.ps1"
    }
  }
}
下面是一些重要元素:
-
name:由于扩展资源是虚拟机对象的子资源,因此其名称必须有虚拟机名称前缀。 请参阅设置子资源的名称和类型。 -
dependsOn:在创建虚拟机以后创建扩展资源。 -
fileUris:存储脚本文件的位置。 如果不使用提供的位置,则需更新这些值。 -
commandToExecute:此命令调用脚本。
若要使用内联脚本,请删除 fileUris,然后将 commandToExecute 更新为:
powershell.exe Install-WindowsFeature -name Web-Server -IncludeManagementTools && powershell.exe remove-item 'C:\\inetpub\\wwwroot\\iisstart.htm' && powershell.exe Add-Content -Path 'C:\\inetpub\\wwwroot\\iisstart.htm' -Value $('Hello World from ' + $env:computername)
此内联脚本还更新 iisstart.html 内容。
还必须打开 HTTP 端口,以便访问 Web 服务器。
在模板中找到
securityRules。将以下规则添加到 default-allow-3389 旁边。
{
  "name": "AllowHTTPInBound",
  "properties": {
    "priority": 1010,
    "access": "Allow",
    "direction": "Inbound",
    "destinationPortRange": "80",
    "protocol": "Tcp",
    "sourcePortRange": "*",
    "sourceAddressPrefix": "*",
    "destinationAddressPrefix": "*"
  }
}
部署模板
有关部署过程,请参阅“部署模板”部分,文档为教程:创建包含依赖资源的 ARM 模板。 建议使用为虚拟机管理员帐户生成的密码。 请参阅本文的先决条件部分。
在 Azure PowerShell 中,运行以下命令来检索 VM 的公共 IP 地址:
(Get-AzPublicIpAddress -ResourceGroupName $resourceGroupName).IpAddress
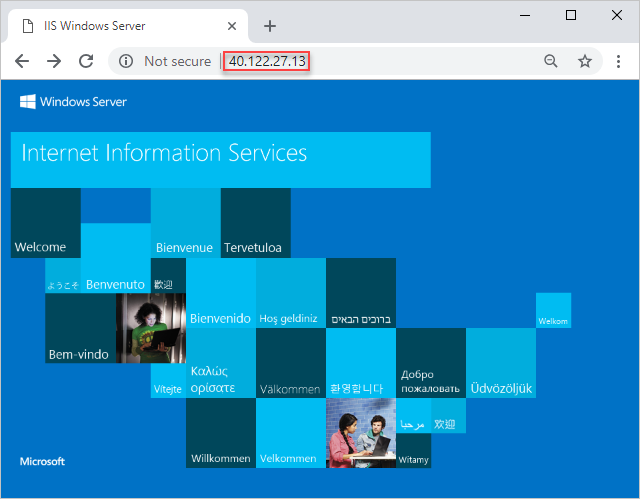
将该 IP 地址粘贴到 Web 浏览器中。 此时会打开默认的 Internet Information Services (IIS) 欢迎页:
清理资源
不再需要部署的 Azure 资源时,请通过删除资源组将其清除。
- 在 Azure 门户的左窗格中选择“资源组”。
- 在“按名称筛选”框中输入资源组名称。
- 选择资源组名称。 将显示资源组中的六个资源。
- 在顶部菜单中选择“删除资源组”。
后续步骤
在本教程中,你已部署虚拟机和虚拟机扩展。 此扩展在虚拟机上安装了 IIS Web 服务器。 若要了解如何使用 Azure SQL 数据库扩展导入 BACPAC 文件,请参阅: