Nota:
El acceso a esta página requiere autorización. Puede intentar iniciar sesión o cambiar directorios.
El acceso a esta página requiere autorización. Puede intentar cambiar los directorios.
在本快速入门中,你将使用 Java 创建基本的 Azure DocumentDB 应用程序。 Azure DocumentDB 是一种NoSQL数据存储,允许应用程序将文档存储在云中,并使用官方 MongoDB 驱动程序访问文档。 本指南演示如何使用 Java 在 Azure DocumentDB 群集中创建文档和执行基本任务。
先决条件
- 一份 Azure 订阅。 如果没有 Azure 订阅,请创建一个试用帐户。
- Java 21 或更高版本
创建 Azure DocumentDB 群集
若要开始,首先需要创建一个 Azure DocumentDB 群集,该群集充当存储和管理NoSQL数据的基础。
登录到 Azure 门户(https://portal.azure.cn)。
在Azure门户菜单或 Home 页面中,选择创建资源。
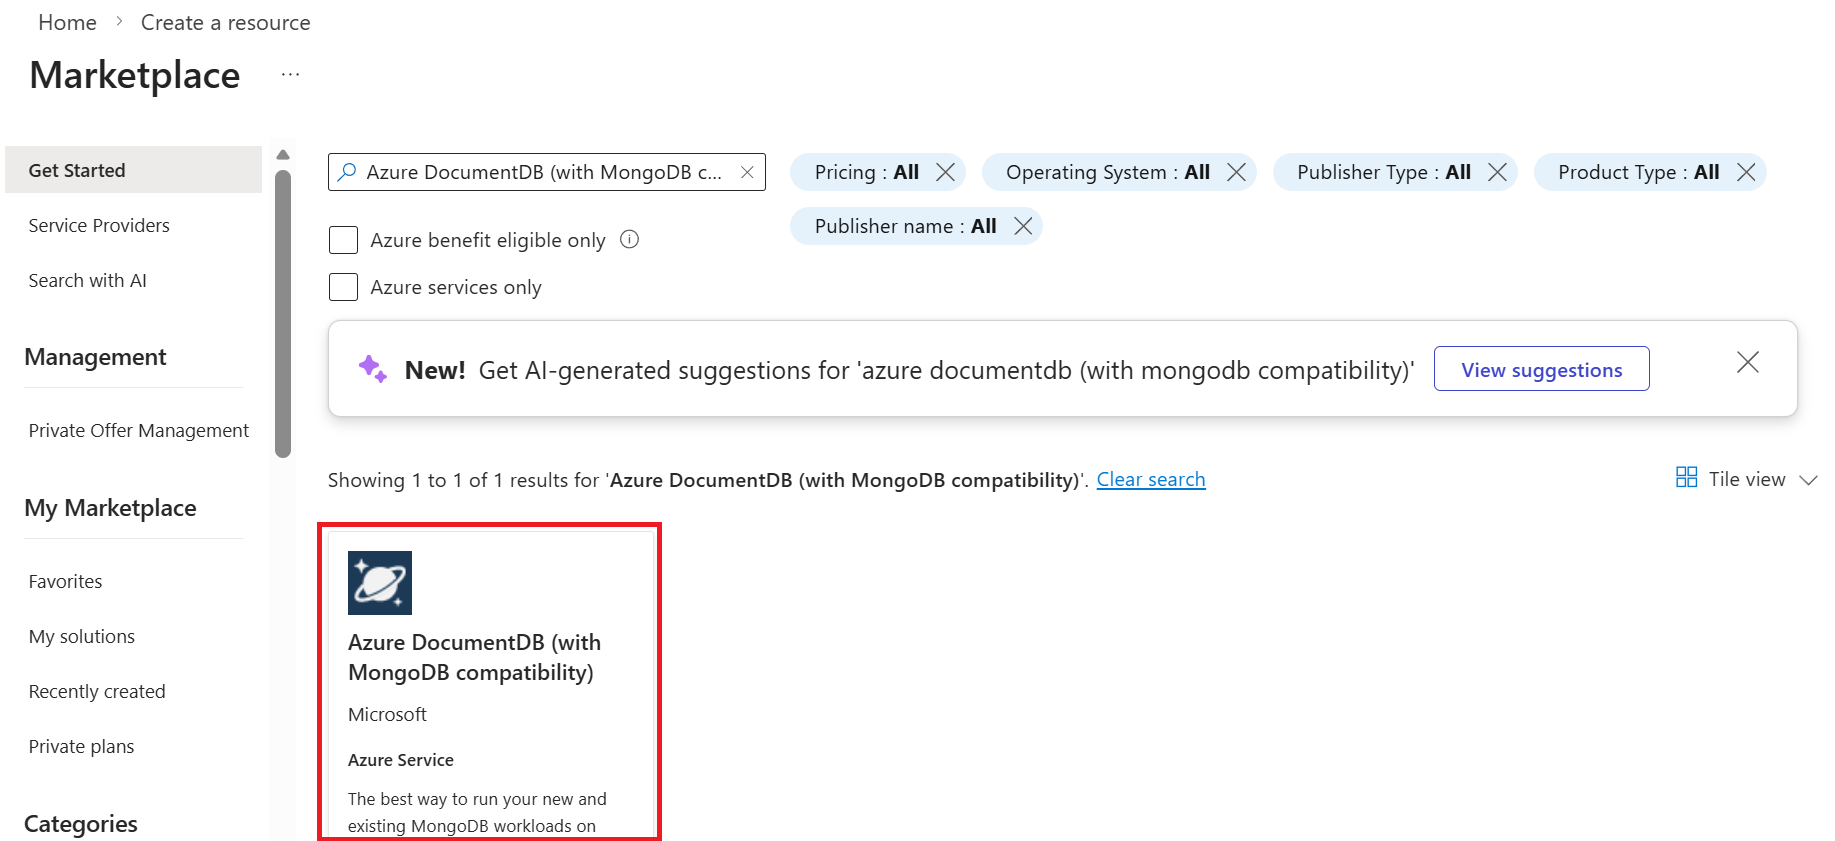
在 New 页上,搜索并选择 Azure DocumentDB。
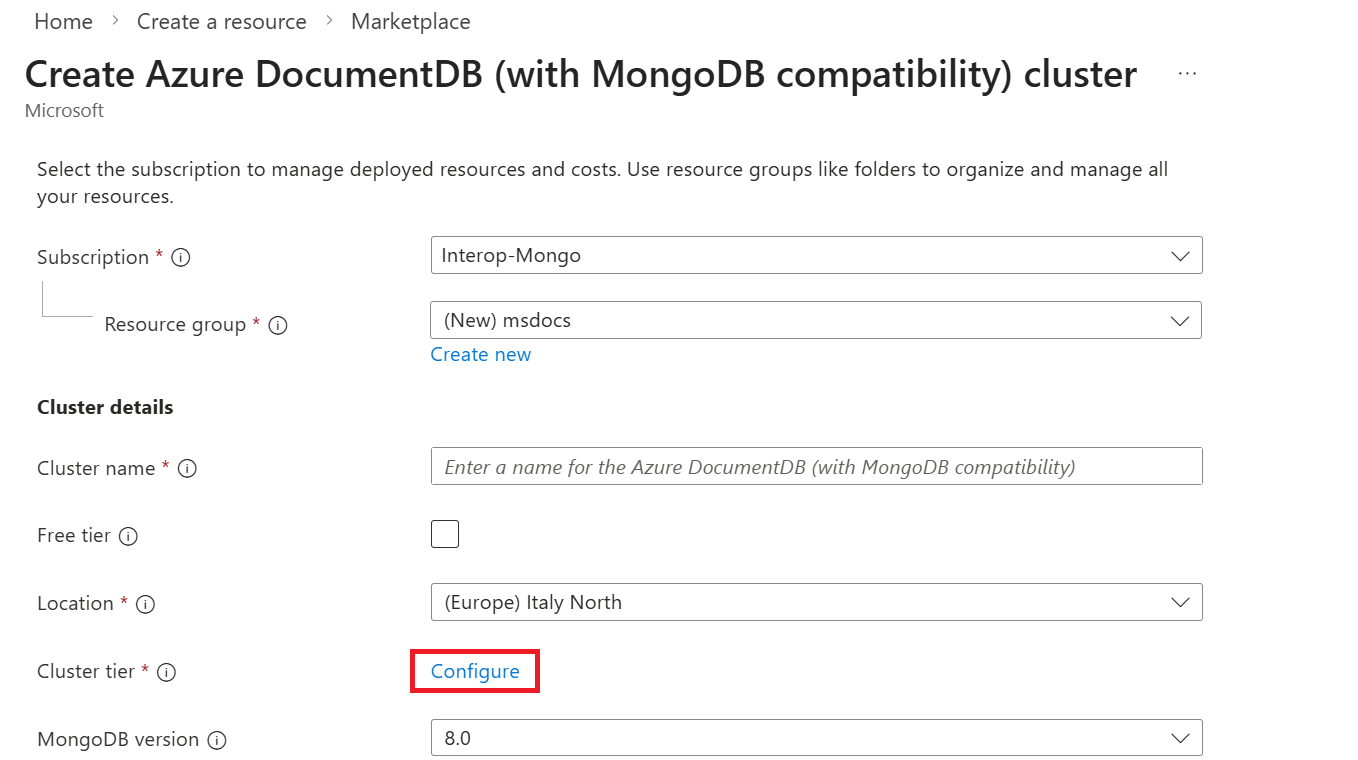
在 Create Azure DocumentDB 群集页上,并在 Basics 节中, 在 Cluster 层节中选择 Configure 选项。
在“ 缩放 ”页上,配置这些选项,然后选择“ 保存 ”以将更改保存到群集层。
价值 群集层 M30 tier, 2 vCore, 8-GiB RAM每个分片的存储量 128 GiB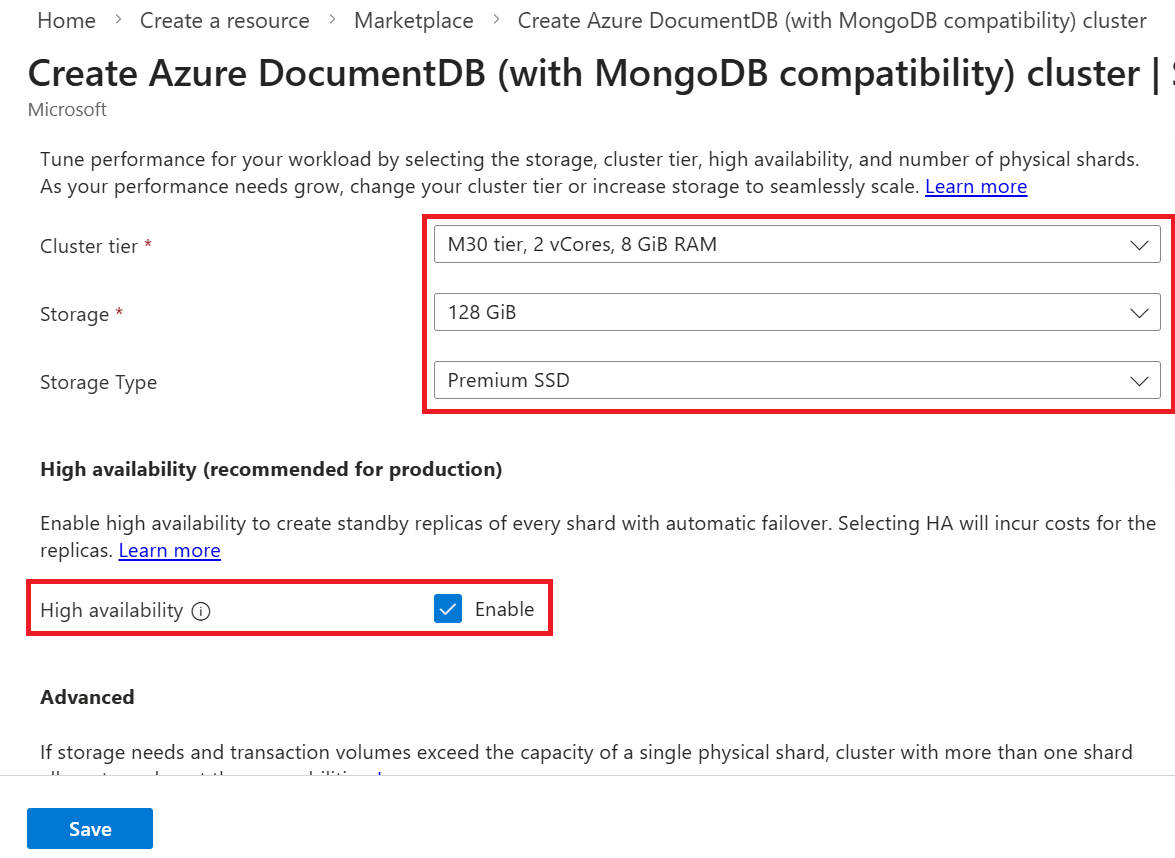
返回 “基本信息 ”部分,配置以下选项:
价值 Subscription 选择Azure订阅 资源组 创建新的资源组,或选择现有资源组 群集名称 提供一个全局唯一的名称 位置 为订阅选择受支持的Azure区域 MongoDB 版本 选择 8.0管理员用户名 创建用户名以以用户管理员身份访问群集 密码 使用与用户名关联的唯一密码 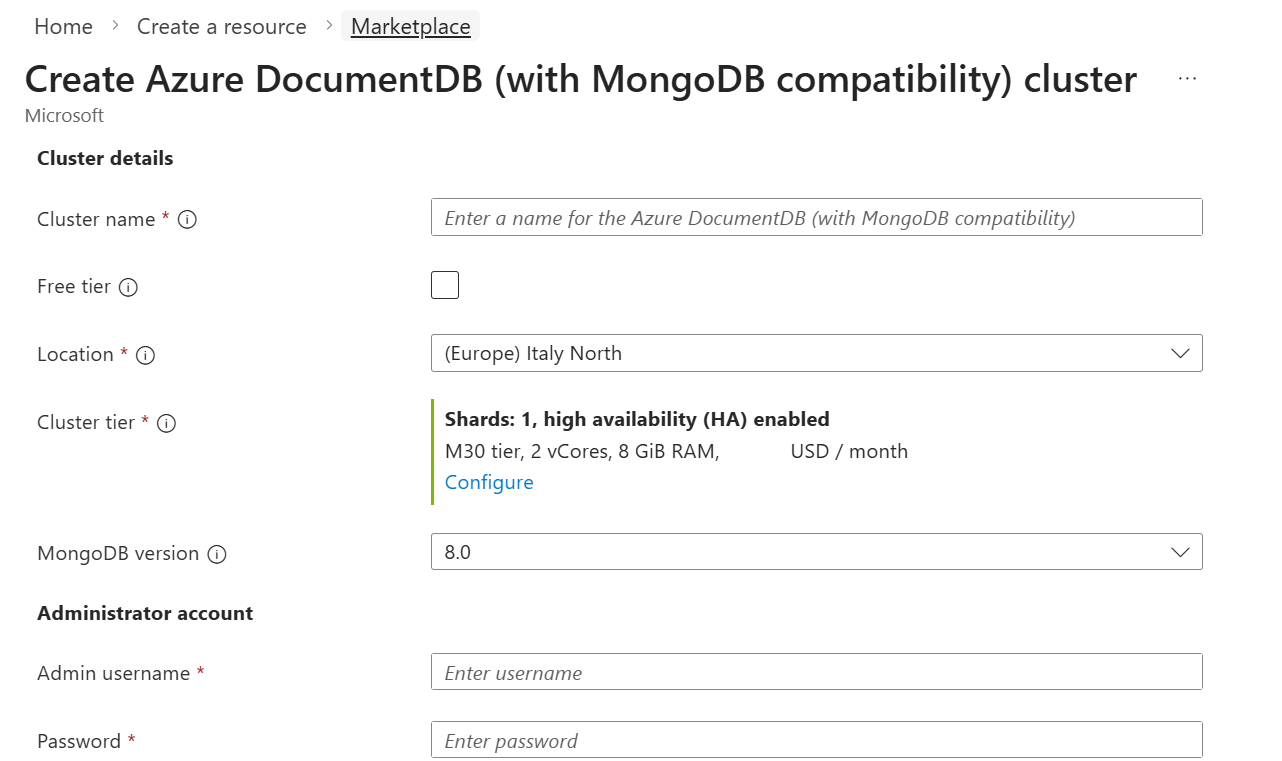
小窍门
记录用于用户名和密码的值。 本指南稍后会使用这些值。 有关有效值的详细信息,请参阅 群集限制。
选择下一步:网络。
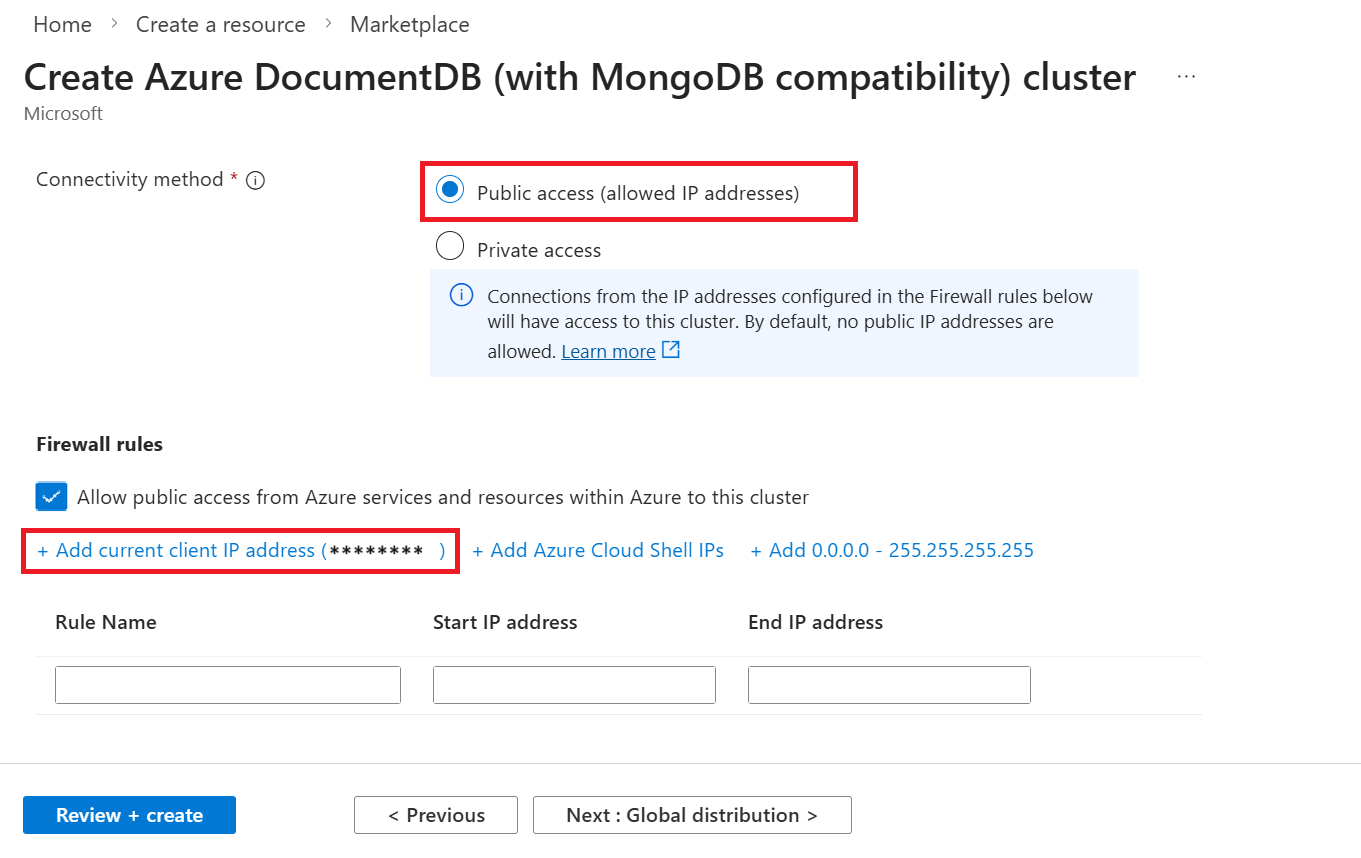
在“网络”选项卡上的“防火墙规则”部分中,配置以下选项:
价值 连接方法 Public access允许Azure中的服务和资源公开访问此群集 已启用 为当前客户端设备添加防火墙规则,通过选择 “+ 添加当前客户端 IP 地址”来授予对群集的访问权限。
小窍门
在许多企业环境中,由于 VPN 或其他企业网络的设置,开发人员计算机 IP 地址会隐藏。 在这些情况下,可以通过将 IP 地址范围添加
0.0.0.0-255.255.255.255为防火墙规则来暂时允许访问所有 IP 地址。 将此防火墙规则暂时用作连接测试和开发的一部分。选择“查看 + 创建”。
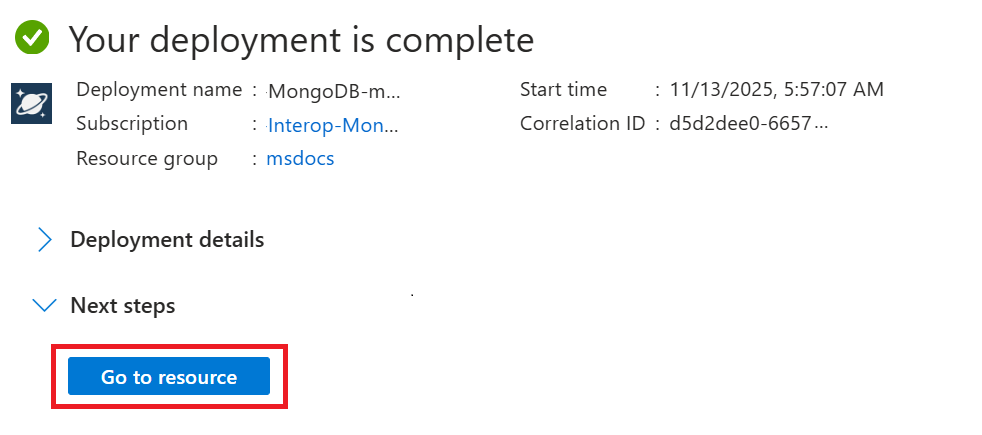
查看提供的设置,然后选择“创建”。 创建群集需要几分钟时间。 等待资源部署完成。
最后,选择转到资源导航到门户中的 Azure DocumentDB 群集。
获取群集凭据
获取用于连接到群集的凭据。
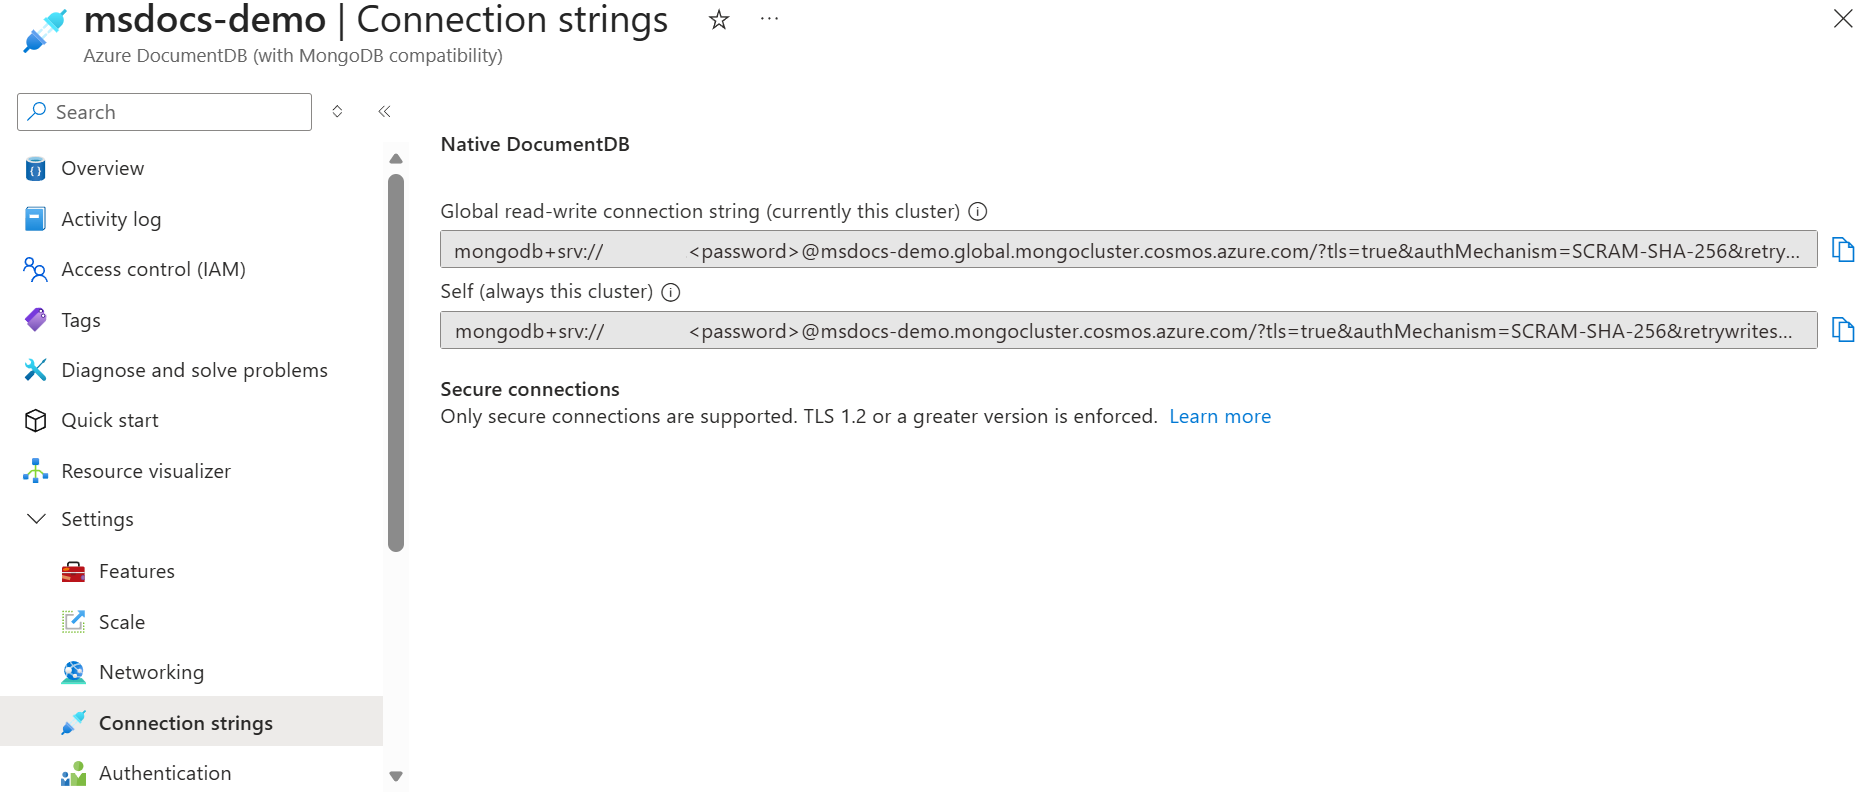
在群集页上,在资源菜单中选择 “连接字符串 ”选项。
在 “连接字符串 ”部分中,复制或记录 “连接字符串 ”字段中的值。
重要
门户中的连接字符串不包含密码值。 必须将占位符替换为 <password> 在创建群集时输入的凭据,或以交互方式输入密码。
初始化项目
在当前目录中创建新的 Maven 项目。
从空目录中开始。
在当前目录中打开终端。
使用快速入门原型创建新的 Maven 项目。
mvn archetype:generate -DgroupId=com.example -DartifactId=azure-documentdb-java-quickstart -DarchetypeArtifactId=maven-archetype-quickstart -DinteractiveMode=false导航到生成的项目目录。
cd azure-documentdb-java-quickstart生成项目以确保该项目已成功创建。
mvn compile
安装客户端库
客户端库可通过 Maven 作为 mongodb-driver-sync 项目提供。
将 MongoDB Java 驱动程序依赖项添加到
pom.xml文件中。<dependency> <groupId>org.mongodb</groupId> <artifactId>mongodb-driver-sync</artifactId> <version>5.2.0</version> </dependency>打开并查看 pom.xml 文件,以验证依赖项条目是否存在。
将所需的包导入应用程序代码:
import com.mongodb.client.MongoClient;
import com.mongodb.client.MongoClients;
import com.mongodb.client.MongoCollection;
import com.mongodb.client.MongoDatabase;
import com.mongodb.client.model.Filters;
import com.mongodb.client.model.ReplaceOptions;
import org.bson.Document;
import org.bson.conversions.Bson;

import java.util.Arrays;
import java.util.List;
对象模型
| Name | Description |
|---|---|
MongoClient |
用于连接到 MongoDB 的类型。 |
MongoDatabase |
表示群集中的数据库。 |
MongoCollection<Document> |
表示群集中数据库内的集合。 |
代码示例
注释
资源名称(例如表名、数据库名)和资源标签中不得包含任何个人、敏感或机密信息。 你在这些字段中输入的数据不被视为客户数据。
此应用程序中的代码连接到名为adventureworks的数据库和名为products的集合。 该 products 集合包含每个产品的名称、类别、数量、唯一标识符和销售标志等详细信息。 此处的代码示例在处理集合时执行最常见的作。
对客户端进行身份验证
首先,使用基本的连接字符串连接到客户端。
创建主方法并设置连接字符串。 替换
<your-cluster-name>、<your-username>和<your-password>为实际群集信息。public class App { public static void main(String[] args) { // Connection string for Azure DocumentDB cluster String connectionString = "mongodb+srv://<your-username>:<your-password>@<your-cluster-name>.global.mongocluster.cosmos.azure.cn/?tls=true&authMechanism=SCRAM-SHA-256&retrywrites=false&maxIdleTimeMS=120000";创建 MongoDB 客户端并验证连接。
        // Create a new client and connect to the server
        try (MongoClient mongoClient = MongoClients.create(connectionString)) {

            // Ping the server to verify connection
            MongoDatabase database = mongoClient.getDatabase("admin");
            database.runCommand(new Document("ping", 1));

            System.out.println("Successfully connected and pinged Azure DocumentDB");
获取集合
现在获取数据库和集合。 如果数据库和集合尚不存在,请使用驱动程序自动创建它。
获取对数据库的引用。
            // Get database reference
            MongoDatabase adventureWorksDatabase = mongoClient.getDatabase("adventureworks");
            System.out.println("Connected to database: " + adventureWorksDatabase.getName());
获取对数据库中集合的引用。
            // Get collection reference
            MongoCollection<Document> productsCollection = adventureWorksDatabase.getCollection("products");
            System.out.println("Connected to collection: products");
创建文档
然后,在集合中创建几个新文档。 向上插入文档,以确保它已使用同一唯一标识符替换任何现有文档。
使用 Document 类创建示例产品文档。
            // Create sample products
            List<Document> products = Arrays.asList(
                new Document("_id", "00000000-0000-0000-0000-000000004018")
                    .append("name", "Windry Mittens")
                    .append("category", "apparel-accessories-gloves-and-mittens")
                    .append("quantity", 121)
                    .append("price", 35.00)
                    .append("sale", false),
                new Document("_id", "00000000-0000-0000-0000-000000004318")
                    .append("name", "Niborio Tent")
                    .append("category", "gear-camp-tents")
                    .append("quantity", 140)
                    .append("price", 420.00)
                    .append("sale", true)
            );
通过upsert操作插入文档。
            // Insert documents with upsert
            for (Document product : products) {
                Bson filter = Filters.eq("_id", product.getString("_id"));
                ReplaceOptions options = new ReplaceOptions().upsert(true);

                productsCollection.replaceOne(filter, product, options);
                System.out.println("Upserted product: " + product.getString("name"));
            }
检索文档
接下来,执行点读取操作,从集合中检索特定文档。
定义筛选器以按 ID 查找特定文档。
            // Retrieve a specific document by ID
            Bson filter = Filters.eq("_id", "00000000-0000-0000-0000-000000004018");
执行查询并检索结果。
            Document retrievedProduct = productsCollection.find(filter).first();

            if (retrievedProduct != null) {
                System.out.println("Retrieved product: " + retrievedProduct.getString("name") +
                                 " - $" + retrievedProduct.getDouble("price"));
            } else {
                System.out.println("Product not found");
            }
查询文档
最后,使用 MongoDB 查询语言(MQL)查询多个文档。
定义查询以查找符合特定条件的文档。
            // Query for products on sale
            Bson saleFilter = Filters.eq("sale", true);
遍历游标以检索所有匹配的文档。
            System.out.println("Products on sale:");
            for (Document product : productsCollection.find(saleFilter)) {
                System.out.printf("- %s: $%.2f (Category: %s)%n",
                    product.getString("name"),
                    product.getDouble("price"),
                    product.getString("category"));
            }

        } catch (Exception e) {
            System.err.println("An error occurred: " + e.getMessage());
            e.printStackTrace();
        }
    }
}
使用 Visual Studio Code 浏览数据
使用 适用于 Visual Studio Code 的 DocumentDB 扩展浏览数据并运行查询,而无需离开编辑器。 按照使用 Visual Studio Code 进行连接安装扩展并连接到群集。
对于公共连接,允许你的客户端 IP 地址访问。 对于专用连接,请使用可以访问群集专用终结点的开发环境。
在边栏中展开群集,然后打开包含此快速入门创建的
products集合的数据库。打开
products的上下文菜单,然后选择 新建查询操场。 Playground 会自动连接到该群集和数据库。将生成的示例替换为以下查询:
db.products.find({ price: { $gt: 200 }, sale: true }) .sort({ price: -1 }) .limit(3)选择该块上方的“运行”。 结果显示在侧面板中。
将脚本保存为
.documentdb.js文件,以便稍后再次运行。
清理资源
完成 Azure DocumentDB 群集后,可以删除创建的Azure资源,以免产生更多费用。
在Azure门户搜索栏中,搜索并选择资源组。
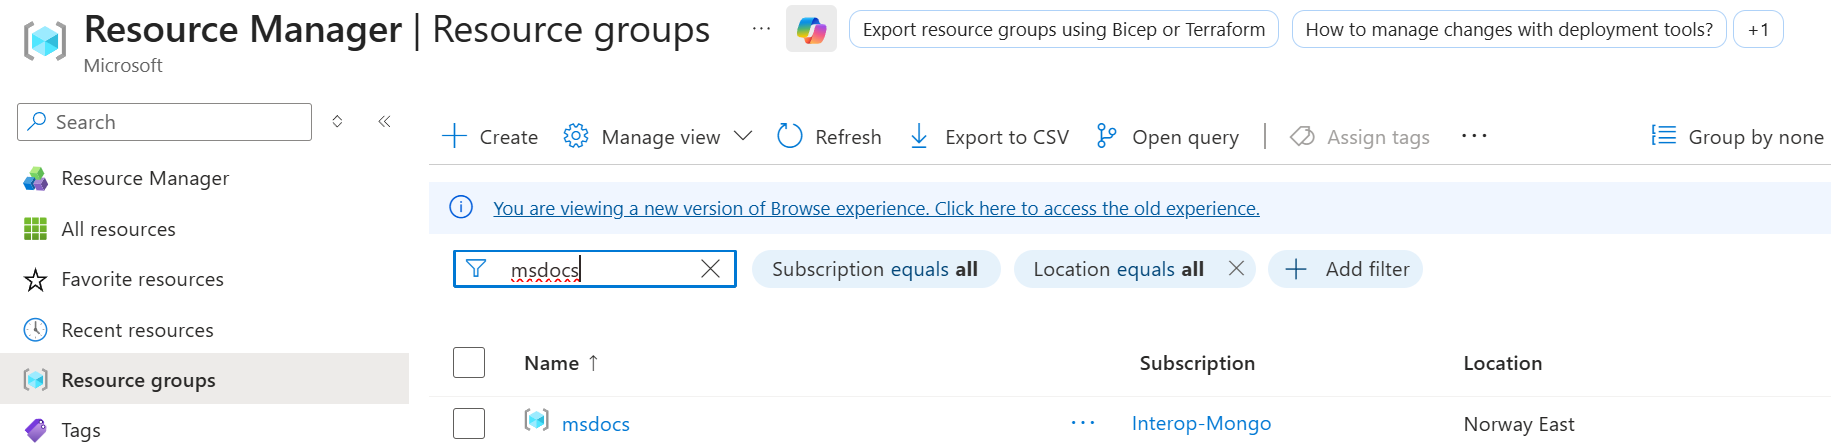
在列表中选择为本快速入门使用的资源组。
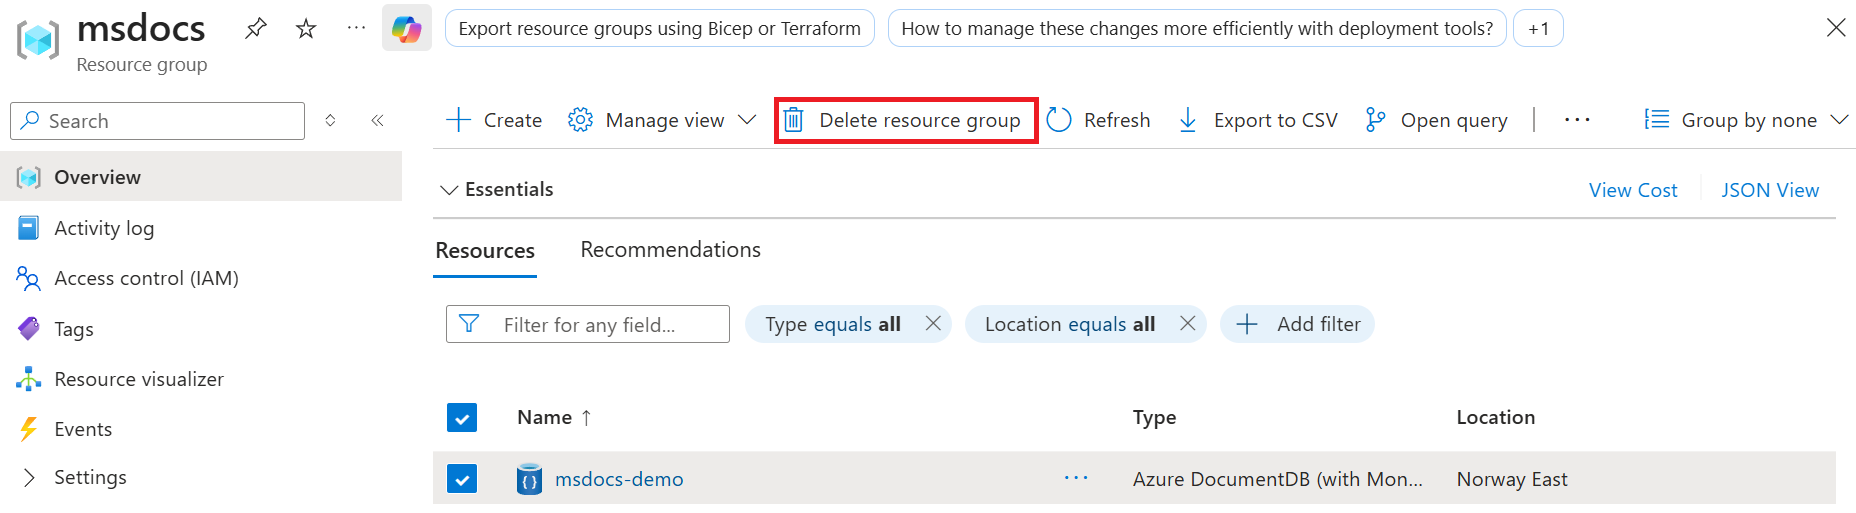
在资源组页上,选择“删除资源组”。
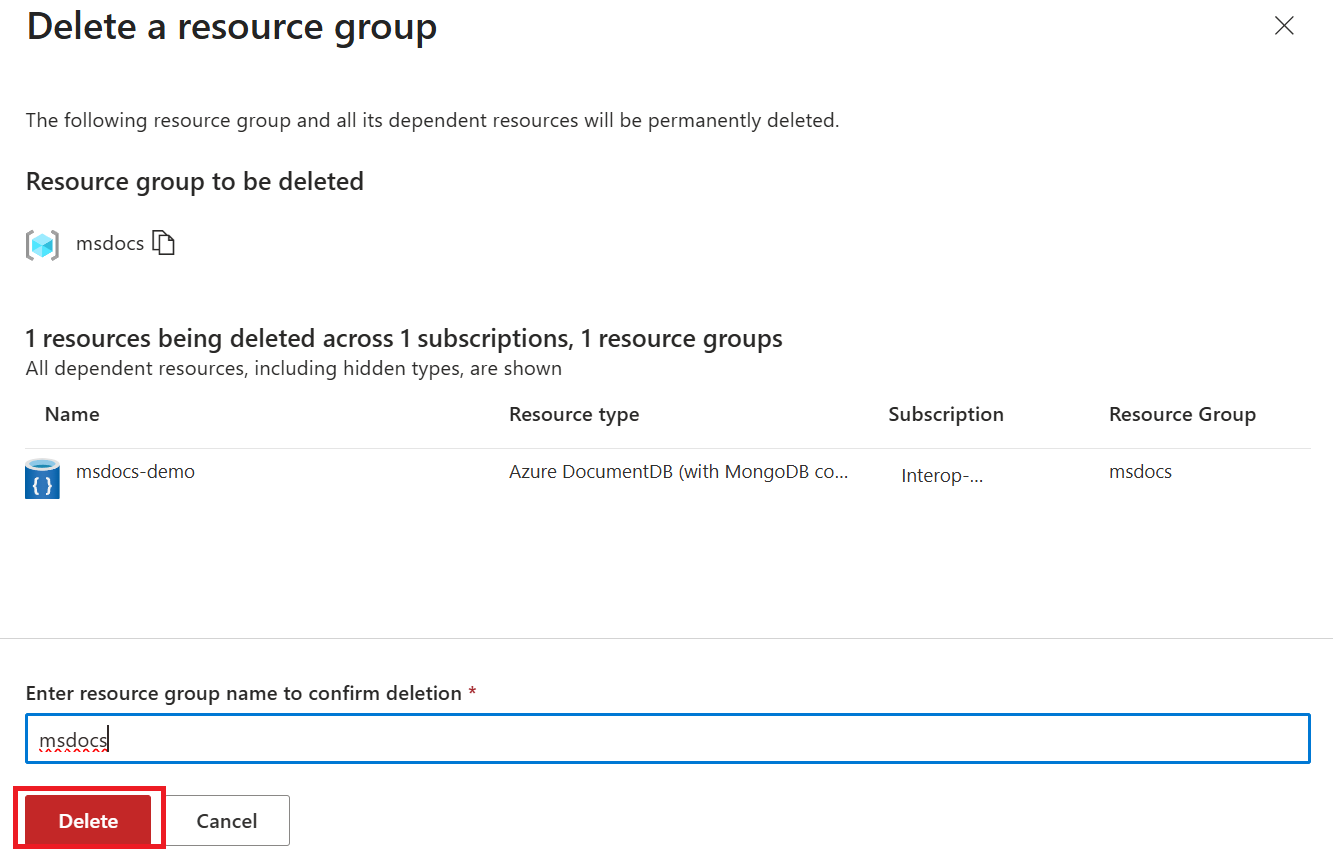
在删除确认对话框中,输入资源组的名称以确认要删除它。 最后,选择“删除”以永久删除资源组。