本教程介绍如何使用 Azure Monitor 排查应用服务应用问题。 示例应用中的代码故意耗尽内存并导致 HTTP 500 错误,使你可以使用 Azure Monitor 来诊断和解决问题。 完成后,某个示例应用将在与 Azure Monitor 集成的“Linux 上的应用服务”中运行。
Azure Monitor 提供用于收集、分析和处理来自云与本地环境的遥测数据的综合解决方案,可将应用程序和服务的可用性和性能最大化。
在本教程中,你将了解如何执行以下操作:
- 使用 Azure Monitor 配置 Web 应用
- 将控制台日志发送到 Log Analytics
- 使用日志查询来识别和排查 Web 应用错误
可以在 macOS、Linux、Windows 中执行本教程中的步骤。
如果没有 Azure 订阅,可在开始前创建一个试用帐户。
要完成本教程,需要:
如需在本地运行 CLI 参考命令,请安装 Azure CLI。 如果在 Windows 或 macOS 上运行,请考虑在 Docker 容器中运行 Azure CLI。 有关详细信息,请参阅如何在 Docker 容器中运行 Azure CLI。
如果使用的是本地安装,请使用 az login 命令登录到 Azure CLI。 若要完成身份验证过程,请遵循终端中显示的步骤。 有关其他登录选项,请参阅使用 Azure CLI 登录。
出现提示时,请在首次使用时安装 Azure CLI 扩展。 有关扩展详细信息,请参阅使用 Azure CLI 的扩展。
运行 az version 以查找安装的版本和依赖库。 若要升级到最新版本,请运行 az upgrade。
首先在本地运行多个命令,以设置要在本教程中使用的示例应用。 这些命令将创建 Azure 资源,创建部署用户,然后将示例应用部署到 Azure。 系统会提示输入在创建部署用户期间提供的密码。
az group create --name myResourceGroup --location "China East 2"
az webapp deployment user set --user-name <username> --password <password>
az appservice plan create --name myAppServicePlan --resource-group myResourceGroup --sku B1 --is-linux
az webapp create --resource-group myResourceGroup --plan myAppServicePlan --name <app-name> --runtime "PHP|8.1" --deployment-local-git
az webapp config appsettings set --name <app-name> --resource-group myResourceGroup --settings DEPLOYMENT_BRANCH='main'
git clone https://github.com/Azure-Samples/App-Service-Troubleshoot-Azure-Monitor
cd App-Service-Troubleshoot-Azure-Monitor
git branch -m main
git remote add azure <url-from-app-webapp-create>
git push azure main
将示例应用部署到 Azure 应用服务后,接下来配置监视功能,以便在出现问题时对应用进行故障排除。 Azure Monitor 将日志数据存储在 Log Analytics 工作区中。 工作区是包含数据和配置信息的容器。
此步骤将创建一个用来为应用配置 Azure Monitor 的 Log Analytics 工作区。
az monitor log-analytics workspace create --resource-group myResourceGroup --workspace-name myMonitorWorkspace
使用诊断设置可将特定 Azure 服务的指标收集到 Azure Monitor 日志中,以使用日志查询结合其他监视数据进行分析。 在本教程中,请启用 Web 服务器和标准输出/错误日志。 有关日志类型和说明的完整列表,请参阅支持的日志类型。
运行以下命令创建 AppServiceConsoleLogs(标准输出/错误)和 AppServiceHTTPLogs(Web 服务器日志)的诊断设置。 请将 <app-name> 和 workspace-name< 替换为你自己的值。
备注
前两个命令 resourceID 和 workspaceID 是在 az monitor diagnostic-settings create 命令中使用的变量。 有关此命令的详细信息,请参阅使用 Azure CLI 创建诊断设置。
resourceID=$(az webapp show -g myResourceGroup -n <app-name> --query id --output tsv)

workspaceID=$(az monitor log-analytics workspace show -g myResourceGroup --workspace-name <workspace-name> --query id --output tsv)

az monitor diagnostic-settings create --resource $resourceID \
 --workspace $workspaceID \
 -n myMonitorLogs \
 --logs '[{"category": "AppServiceConsoleLogs", "enabled": true},
  {"category": "AppServiceHTTPLogs", "enabled": true}]'
浏览到 http://<app-name>.chinacloudsites.cn 。
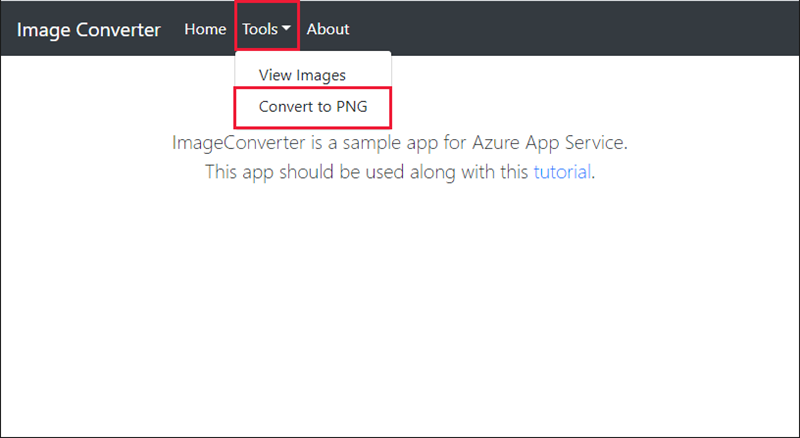
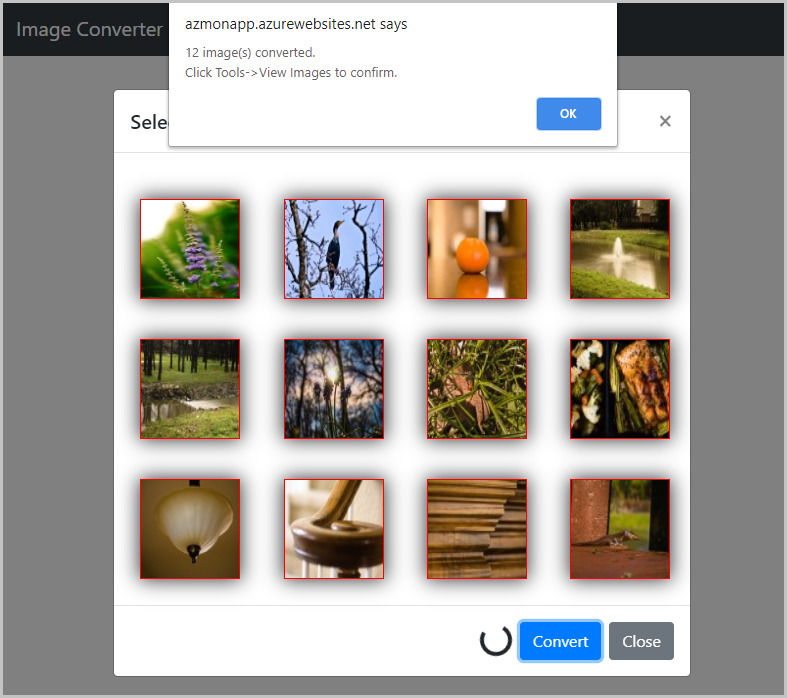
示例应用 ImageConverter 将包含的图像从 JPG 转换为 PNG。 我们有意在本教程的代码中安排了一个 bug。 如果选择了足够多的图像,该应用会在转换图像期间生成 HTTP 500 错误。 假设在开发阶段并未考虑到这种情况。 你将使用 Azure Monitor 来排查该错误。
若要转换图像,请单击 Tools 并选择 Convert to PNG。
选择前两个图像,然后单击 convert。 转换将成功。

通过成功转换前两个图像来验证应用后,我们将尝试转换前五个图像。
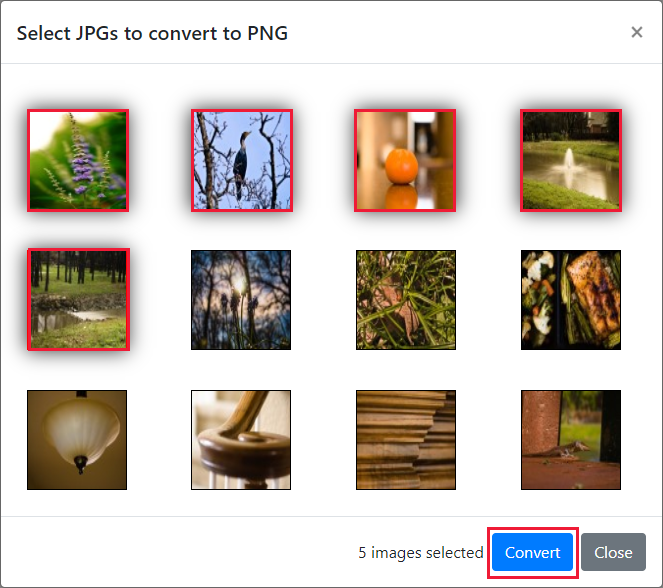
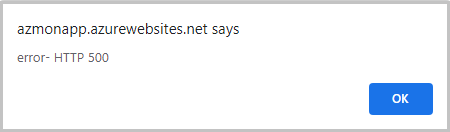
此操作失败,并生成一个在开发期间未测试过的 HTTP 500 错误。
让我们看看 Log Analytics 工作区中提供了哪些日志。
单击此 Log Analytics 工作区链接在 Azure 门户中访问工作区。
在 Azure 门户中,选择 Log Analytics 工作区。
日志查询可帮助你充分利用在 Azure Monitor 日志中收集的数据的价值。 使用日志查询可以识别 AppServiceHTTPLogs 和 AppServiceConsoleLogs 中的日志。 有关日志查询的详细信息,请参阅日志查询概述。
访问应用后,让我们查看 AppServiceHTTPLogs 中的与 HTTP 请求关联的数据。
- 在左侧导航栏中单击
Logs。
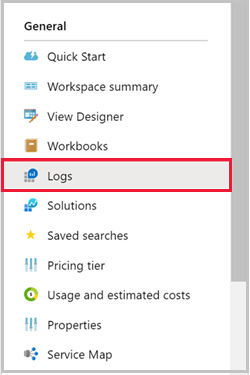
- 搜索
appservice并双击AppServiceHTTPLogs。
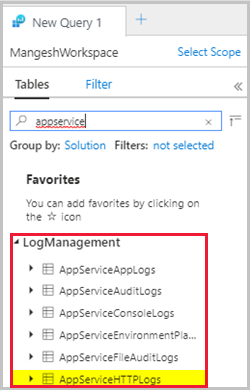
- 单击
Run。
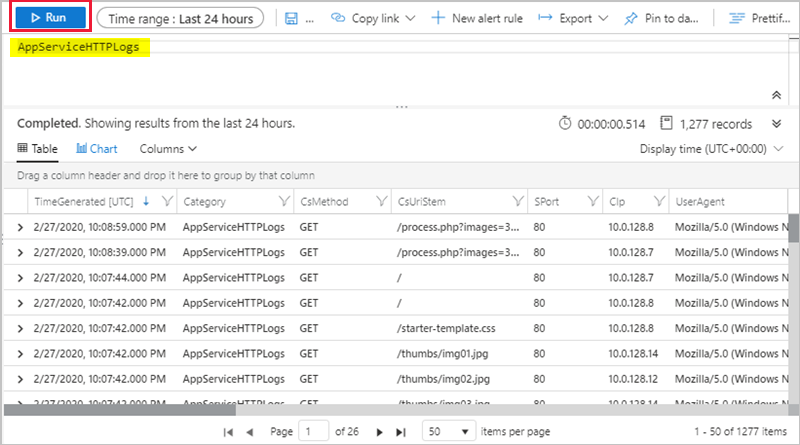
AppServiceHTTPLogs 查询返回过去 24 小时发出的所有请求。 列 ScStatus 包含 HTTP 状态。 若要诊断 HTTP 500 错误,请将 ScStatus 限制为 500 并运行查询,如下所示:
AppServiceHTTPLogs
| where ScStatus == 500
确认 HTTP 500 错误后,让我们查看应用发出的标准输出/错误。 可在“AppServiceConsoleLogs”中找到这些日志。
(1) 单击 + 创建新查询。
(2) 双击 AppServiceConsoleLogs 表并单击 Run。
由于转换五个图像会导致服务器错误,可以根据 ResultDescription 筛选错误以确定应用是否也写入了错误,如下所示:
AppServiceConsoleLogs |
where ResultDescription  contains "error"
在 ResultDescription 列中,将看到以下错误:
PHP Fatal error:  Allowed memory size of 134217728 bytes exhausted
(tried to allocate 16384 bytes) in /home/site/wwwroot/process.php on line 20,
referer: http://<app-name>.chinacloudsites.cn/
识别 HTTP 500 和标准错误后,需要确认这些消息之间是否存在关联。 接下来,根据时间戳 TimeGenerated 联接这些表。
备注
事先已准备好一个可执行以下操作的查询:
- 在 HTTPLogs 中筛选 500 错误
- 查询控制台日志
- 根据
TimeGenerated联接表
运行以下查询:
let myHttp = AppServiceHTTPLogs | where  ScStatus == 500 | project TimeGen=substring(TimeGenerated, 0, 19), CsUriStem, ScStatus;

let myConsole = AppServiceConsoleLogs | project TimeGen=substring(TimeGenerated, 0, 19), ResultDescription;

myHttp | join myConsole on TimeGen | project TimeGen, CsUriStem, ScStatus, ResultDescription;
在 ResultDescription 列中,将会看到发生时间与 Web 服务器错误相同的以下错误:
PHP Fatal error:  Allowed memory size of 134217728 bytes exhausted
(tried to allocate 16384 bytes) in /home/site/wwwroot/process.php on line 20,
referer: http://<app-name>.chinacloudsites.cn/
消息在 process.php 的第 20 行指出内存已耗尽。 现已确认应用程序在出现 HTTP 500 错误期间生成了错误。 让我们查看代码以识别问题。
在本地目录中,打开 process.php 并查看第 20 行。
imagepng($imgArray[$x], $filename);
第一个参数 $imgArray[$x] 是变量,包含所有需要转换的 JPG(内存中图像)。 但是,imagepng 只需要正在转换的图像,而不需要所有图像。 预先加载图像是没有必要的,可能会导致内存耗尽,从而导致 HTTP 500 错误。 让我们更新代码以按需加载图像,然后查看是否解决了问题。 接下来,改进代码以解决内存问题。
对 process.php 进行以下更改,以处理内存耗尽问题:
<?php

//Retrieve query parameters
$maxImages = $_GET['images'];
$imgNames  = explode(",",$_GET['imgNames']);

//Load JPEGs into an array (in memory)
for ($x=0; $x<$maxImages; $x++){
    $filename = './images/converted_' . substr($imgNames[$x],0,-4) . '.png';
    imagepng(imagecreatefromjpeg("./images/" . $imgNames[$x]), $filename);
}
提交在 Git 中所做的更改,然后将代码更改推送到 Azure。
git commit -am "Load images on-demand in process.php"
git push azure main
浏览到 http://<app-name>.chinacloudsites.cn 。
转换图像应该不再会生成 HTTP 500 错误。
在前面的步骤中,你在资源组中创建了 Azure 资源。 如果认为将来不需要这些资源,请在本地 Azure CLI 中运行以下命令删除资源组:
az group delete --name myResourceGroup
此命令可能需要花费一点时间运行。
使用以下命令删除诊断设置:
az monitor diagnostic-settings delete --resource $resourceID -n myMonitorLogs
你已了解:
- 使用 Azure Monitor 配置 Web 应用
- 将日志发送到 Log Analytics
- 使用日志查询来识别和排查 Web 应用错误