重要
自 2025 年 5 月 1 日起,Azure AD B2C 将不再可供新客户购买。 在我们的常见问题解答中了解详细信息。
在开始之前,请使用此页面顶部的 “选择策略类型 选择器”来选择要设置的策略类型。 Azure Active Directory B2C 提供了两种定义用户如何与应用程序交互的方法:通过预定义的用户流,或者通过可完全配置的自定义策略。 对于每种方法,本文中所需的步骤都不同。
品牌打造和自定义 Azure Active Directory B2C(Azure AD B2C)向客户显示的用户界面,有助于在应用程序中提供无缝的用户体验。 这些体验包括注册、登录、个人资料编辑和密码重置。 在本文中,你将使用页面模板和公司品牌自定义 Azure AD B2C 页面。
提示
若要自定义页面模板、横幅徽标、背景图像或背景色以外的用户流页面的其他方面,请参阅如何使用 HTML 模板自定义 UI。
- 创建用户流,以便用户能够注册并登录应用程序。
- 注册 Web 应用程序。
- 完成 Active Directory B2C 中的自定义策略入门中的步骤。 本教程指导你如何更新自定义策略文件以使用 Azure AD B2C 租户配置。
- 注册 Web 应用程序。
Azure AD B2C 提供了多个内置模板,你可以从中进行选择来提供用户体验页面的专业外观。 这些页面模板还可以作为初始模板用于后续使用公司品牌功能对页面进行自定义设计。
备注
经典模板支持的浏览器包括 Internet Explorer 的当前版本和早期版本、Microsoft Edge、Google Chrome、Mozilla Firefox 和 Safari。 海洋蓝色和石板灰色模板可能对较旧的浏览器版本(如 Internet Explorer 11 和 10)的支持有限;建议使用要支持的浏览器测试应用程序。
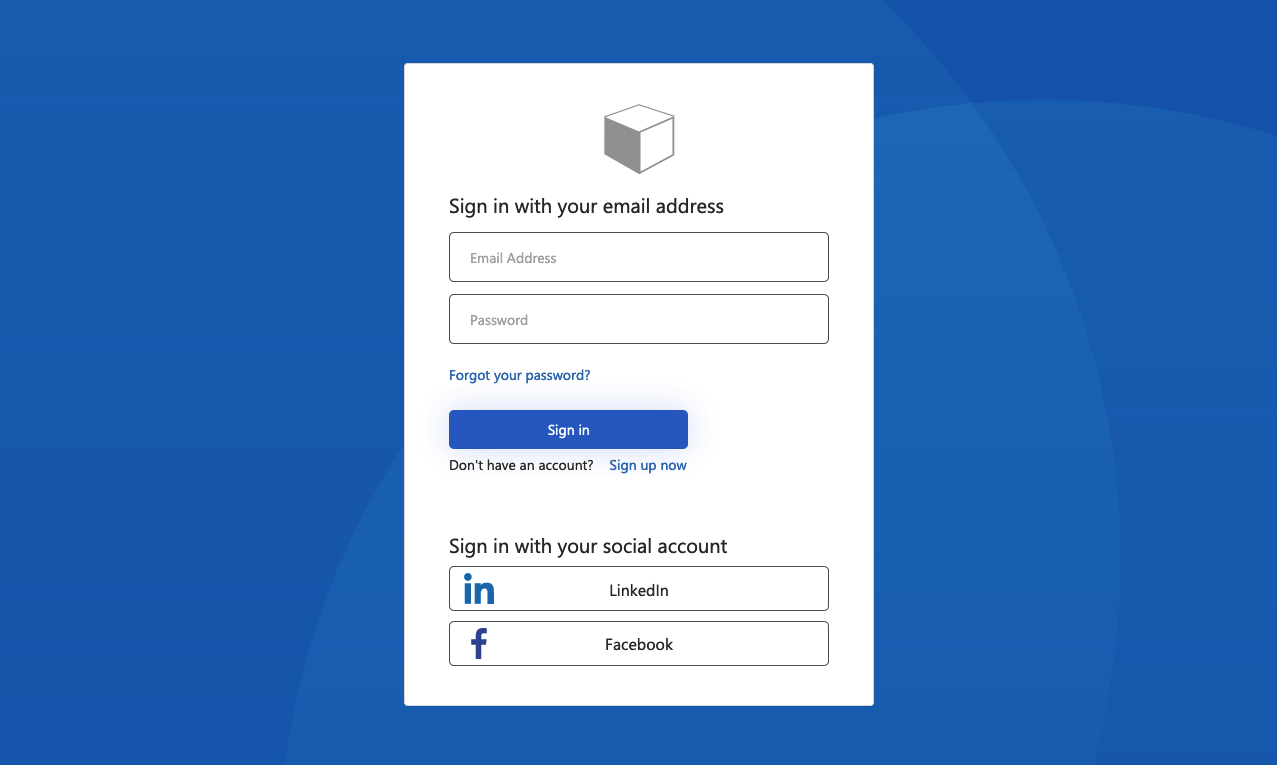
在注册和登录页上呈现的“海洋蓝色”模板示例:
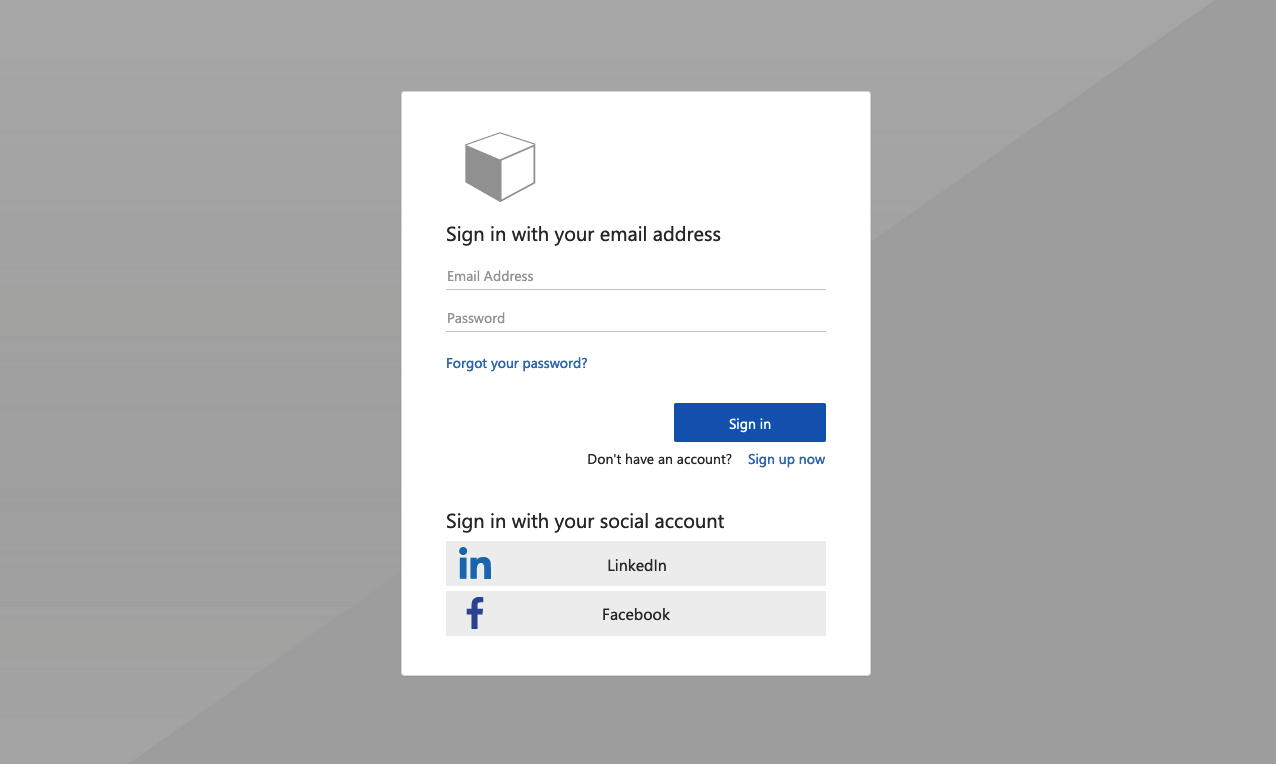
注册登录页上呈现的 Slate Gray 模板示例:
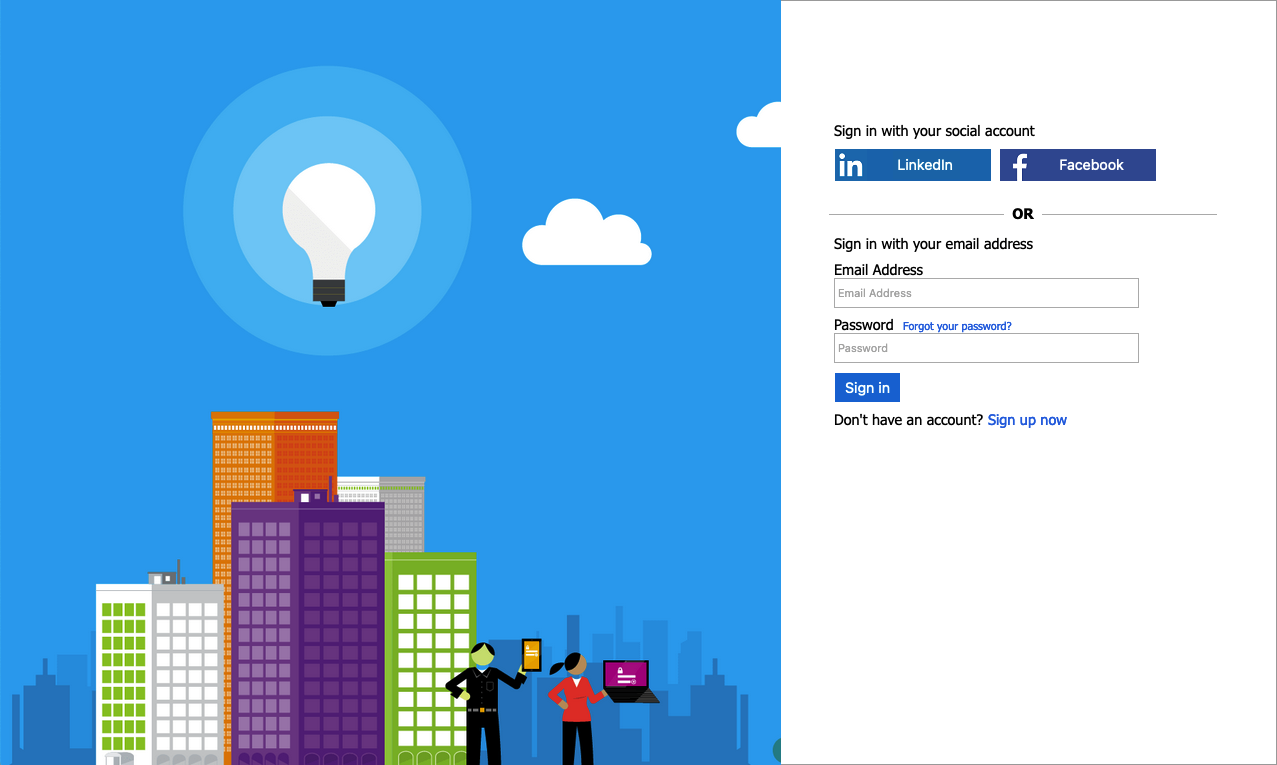
注册登录页上呈现的经典模板示例:
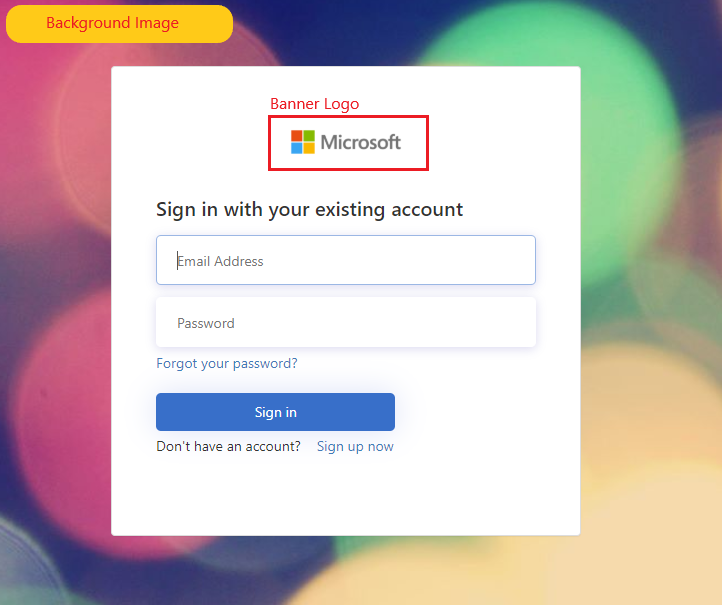
可以使用Microsoft Entra ID 公司品牌,使用横幅徽标、背景图像和背景色自定义 Azure AD B2C 页面。 公司品牌包括注册、登录、配置文件编辑和密码重置。
以下示例演示了一个 注册和登录 页,其中包含使用海洋蓝色模板的自定义徽标、背景图像:
- 登录到 Azure 门户。
- 如果有权访问多个租户,请选择顶部菜单中的“设置”图标,从“目录 + 订阅”菜单切换到你的 Azure AD B2C 租户。
- 在 Azure 门户中,搜索并选择 Azure AD B2C。
- 选择“用户流”。
- 选择要自定义的用户流。
- 在左侧菜单中的“ 自定义 ”下,选择 “页面布局 ”,然后选择“ 模板”。
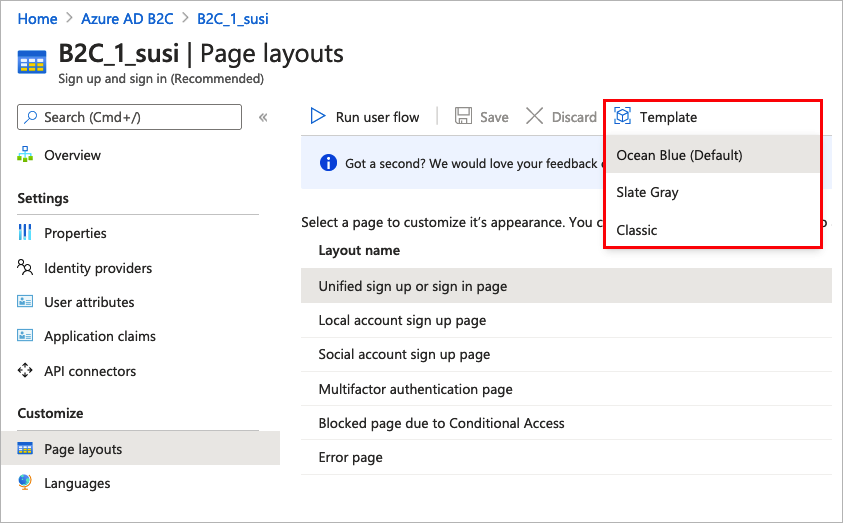
选择模板时,所选模板将应用于用户流中的所有页面。 每个页面的 URI 在 “自定义页面 URI ”字段中可见。
若要选择页面模板,请设置LoadUri内容定义的元素。 以下示例显示了内容定义标识符和相应的 LoadUri标识符。
海洋蓝色:
<ContentDefinitions>
  <ContentDefinition Id="api.error">
    <LoadUri>~/tenant/templates/AzureBlue/exception.cshtml</LoadUri>
  </ContentDefinition>
  <ContentDefinition Id="api.idpselections">
    <LoadUri>~/tenant/templates/AzureBlue/idpSelector.cshtml</LoadUri>
  </ContentDefinition>
  <ContentDefinition Id="api.idpselections.signup">
    <LoadUri>~/tenant/templates/AzureBlue/idpSelector.cshtml</LoadUri>
  </ContentDefinition>
  <ContentDefinition Id="api.signuporsignin">
    <LoadUri>~/tenant/templates/AzureBlue/unified.cshtml</LoadUri>
  </ContentDefinition>
  <ContentDefinition Id="api.selfasserted">
    <LoadUri>~/tenant/templates/AzureBlue/selfAsserted.cshtml</LoadUri>
  </ContentDefinition>
  <ContentDefinition Id="api.selfasserted.profileupdate">
    <LoadUri>~/tenant/templates/AzureBlue/selfAsserted.cshtml</LoadUri>
  </ContentDefinition>
  <ContentDefinition Id="api.localaccountsignup">
    <LoadUri>~/tenant/templates/AzureBlue/selfAsserted.cshtml</LoadUri>
  </ContentDefinition>
  <ContentDefinition Id="api.localaccountpasswordreset">
    <LoadUri>~/tenant/templates/AzureBlue/selfAsserted.cshtml</LoadUri>
  </ContentDefinition>
  <ContentDefinition Id="api.phonefactor">
    <LoadUri>~/tenant/templates/AzureBlue/multifactor-1.0.0.cshtml</LoadUri>
  </ContentDefinition>
</ContentDefinitions>
石板灰色:
<ContentDefinitions>
  <ContentDefinition Id="api.error">
    <LoadUri>~/tenant/templates/MSA/exception.cshtml</LoadUri>
  </ContentDefinition>
  <ContentDefinition Id="api.idpselections">
    <LoadUri>~/tenant/templates/MSA/idpSelector.cshtml</LoadUri>
  </ContentDefinition>
  <ContentDefinition Id="api.idpselections.signup">
    <LoadUri>~/tenant/templates/MSA/idpSelector.cshtml</LoadUri>
  </ContentDefinition>
  <ContentDefinition Id="api.signuporsignin">
    <LoadUri>~/tenant/templates/MSA/unified.cshtml</LoadUri>
  </ContentDefinition>
  <ContentDefinition Id="api.selfasserted">
    <LoadUri>~/tenant/templates/MSA/selfAsserted.cshtml</LoadUri>
  </ContentDefinition>
  <ContentDefinition Id="api.selfasserted.profileupdate">
    <LoadUri>~/tenant/templates/MSA/selfAsserted.cshtml</LoadUri>
  </ContentDefinition>
  <ContentDefinition Id="api.localaccountsignup">
    <LoadUri>~/tenant/templates/MSA/selfAsserted.cshtml</LoadUri>
  </ContentDefinition>
  <ContentDefinition Id="api.localaccountpasswordreset">
    <LoadUri>~/tenant/templates/MSA/selfAsserted.cshtml</LoadUri>
  </ContentDefinition>
  <ContentDefinition Id="api.phonefactor">
    <LoadUri>~/tenant/templates/MSA/multifactor-1.0.0.cshtml</LoadUri>
  </ContentDefinition>
</ContentDefinitions>
经典:
<ContentDefinitions>
  <ContentDefinition Id="api.error">
    <LoadUri>~/tenant/default/exception.cshtml</LoadUri>
  </ContentDefinition>
  <ContentDefinition Id="api.idpselections">
    <LoadUri>~/tenant/default/idpSelector.cshtml</LoadUri>
  </ContentDefinition>
  <ContentDefinition Id="api.idpselections.signup">
    <LoadUri>~/tenant/default/idpSelector.cshtml</LoadUri>
  </ContentDefinition>
  <ContentDefinition Id="api.signuporsignin">
    <LoadUri>~/tenant/default/unified.cshtml</LoadUri>
  </ContentDefinition>
  <ContentDefinition Id="api.selfasserted">
    <LoadUri>~/tenant/default/selfAsserted.cshtml</LoadUri>
  </ContentDefinition>
  <ContentDefinition Id="api.selfasserted.profileupdate">
    <LoadUri>~/tenant/default/selfAsserted.cshtml</LoadUri>
  </ContentDefinition>
  <ContentDefinition Id="api.localaccountsignup">
    <LoadUri>~/tenant/default/selfAsserted.cshtml</LoadUri>
  </ContentDefinition>
  <ContentDefinition Id="api.localaccountpasswordreset">
    <LoadUri>~/tenant/default/selfAsserted.cshtml</LoadUri>
  </ContentDefinition>
  <ContentDefinition Id="api.phonefactor">
    <LoadUri>~/tenant/default/multifactor-1.0.0.cshtml</LoadUri>
  </ContentDefinition>
</ContentDefinitions>
若要自定义用户流页,请先在 Microsoft Entra ID 中配置公司品牌,然后在 Azure AD B2C 中的用户流中启用它。
首先,在 公司品牌中设置横幅徽标、背景图像和背景色。
- 登录到 Azure 门户。
- 如果有权访问多个租户,请选择顶部菜单中的“设置”图标,从“目录 + 订阅”菜单切换到你的 Azure AD B2C 租户。
- 在 Azure 门户中,搜索并选择 Azure AD B2C。
- 在“管理”下,选择“公司品牌”。
- 按照 将品牌添加到组织的 Microsoft Entra 登录页面中的步骤进行操作。
在 Azure AD B2C 中配置公司品牌时,请记住以下事项:
- Azure AD B2C 中的公司品牌目前仅限于 背景图像、 横幅徽标和 背景色 自定义。 不支持公司品牌窗格中的其他属性,例如 “高级设置”。
- 在用户流页中,背景色显示在加载背景图像之前。 建议选择与背景图像中的颜色紧密匹配的背景色,以便更流畅地加载体验。
- 当用户启动注册用户流时,横幅徽标将显示在发送给用户的验证电子邮件中。
配置公司品牌后,请在用户流中启用它。
- 在 Azure 门户的左侧菜单中,选择 Azure AD B2C。
- 在 Policies (策略) 下,选择 User flows (policies) (用户流(策略))。
- 选择需要启用“公司品牌”的用户流。 标准登录和标准配置文件编辑用户流类型不支持公司品牌。
- 在“ 自定义”下,选择 “页面”布局,然后选择要打造品牌的页面。 例如,选择 “统一注册”或“登录”页。
- 对于 页面布局版本(预览版),请选择 版本 1.2.0 或更高版本。
- 选择“保存”。
如果要为用户流中的所有页面打造品牌,请为用户流中的每个页面布局设置页面布局版本。

配置公司品牌后,请在自定义策略中启用它。 为自定义策略中的所有内容定义配置contract和页面版本。 值的格式必须包含单词 contract:urn:com:microsoft:aad:b2c:elements:contract:page-name:version。 在使用旧 DataUri 值的自定义策略中指定页面布局。 有关详细信息,请参阅如何根据页面版本迁移到页面布局。
以下示例显示了内容定义及其对应的页面协定和 海洋蓝色 页面模板:
<ContentDefinitions>
  <ContentDefinition Id="api.error">
    <LoadUri>~/tenant/templates/AzureBlue/exception.cshtml</LoadUri>
    <DataUri>urn:com:microsoft:aad:b2c:elements:contract:globalexception:1.2.0</DataUri>
  </ContentDefinition>
  <ContentDefinition Id="api.idpselections">
    <LoadUri>~/tenant/templates/AzureBlue/idpSelector.cshtml</LoadUri>
    <DataUri>urn:com:microsoft:aad:b2c:elements:contract:providerselection:1.2.0</DataUri>
  </ContentDefinition>
  <ContentDefinition Id="api.idpselections.signup">
    <LoadUri>~/tenant/templates/AzureBlue/idpSelector.cshtml</LoadUri>
    <DataUri>urn:com:microsoft:aad:b2c:elements:contract:providerselection:1.2.0</DataUri>
  </ContentDefinition>
  <ContentDefinition Id="api.signuporsignin">
    <LoadUri>~/tenant/templates/AzureBlue/unified.cshtml</LoadUri>
    <DataUri>urn:com:microsoft:aad:b2c:elements:contract:unifiedssp:1.2.0</DataUri>
  </ContentDefinition>
  <ContentDefinition Id="api.selfasserted">
    <LoadUri>~/tenant/templates/AzureBlue/selfAsserted.cshtml</LoadUri>
    <DataUri>urn:com:microsoft:aad:b2c:elements:contract:selfasserted:1.2.0</DataUri>
  </ContentDefinition>
  <ContentDefinition Id="api.selfasserted.profileupdate">
     <LoadUri>~/tenant/templates/AzureBlue/selfAsserted.cshtml</LoadUri>
    <DataUri>urn:com:microsoft:aad:b2c:elements:contract:selfasserted:1.2.0</DataUri>
  </ContentDefinition>
  <ContentDefinition Id="api.localaccountsignup">
     <LoadUri>~/tenant/templates/AzureBlue/selfAsserted.cshtml</LoadUri>
    <DataUri>urn:com:microsoft:aad:b2c:elements:contract:selfasserted:1.2.0</DataUri>
  </ContentDefinition>
  <ContentDefinition Id="api.localaccountpasswordreset">
     <LoadUri>~/tenant/templates/AzureBlue/selfAsserted.cshtml</LoadUri>
    <DataUri>urn:com:microsoft:aad:b2c:elements:contract:selfasserted:1.2.0</DataUri>
  </ContentDefinition>
  <ContentDefinition Id="api.phonefactor">
    <LoadUri>~/tenant/templates/AzureBlue/multifactor-1.0.0.cshtml</LoadUri>
    <DataUri>urn:com:microsoft:aad:b2c:elements:contract:multifactor:1.2.0</DataUri>
  </ContentDefinition>
</ContentDefinitions>
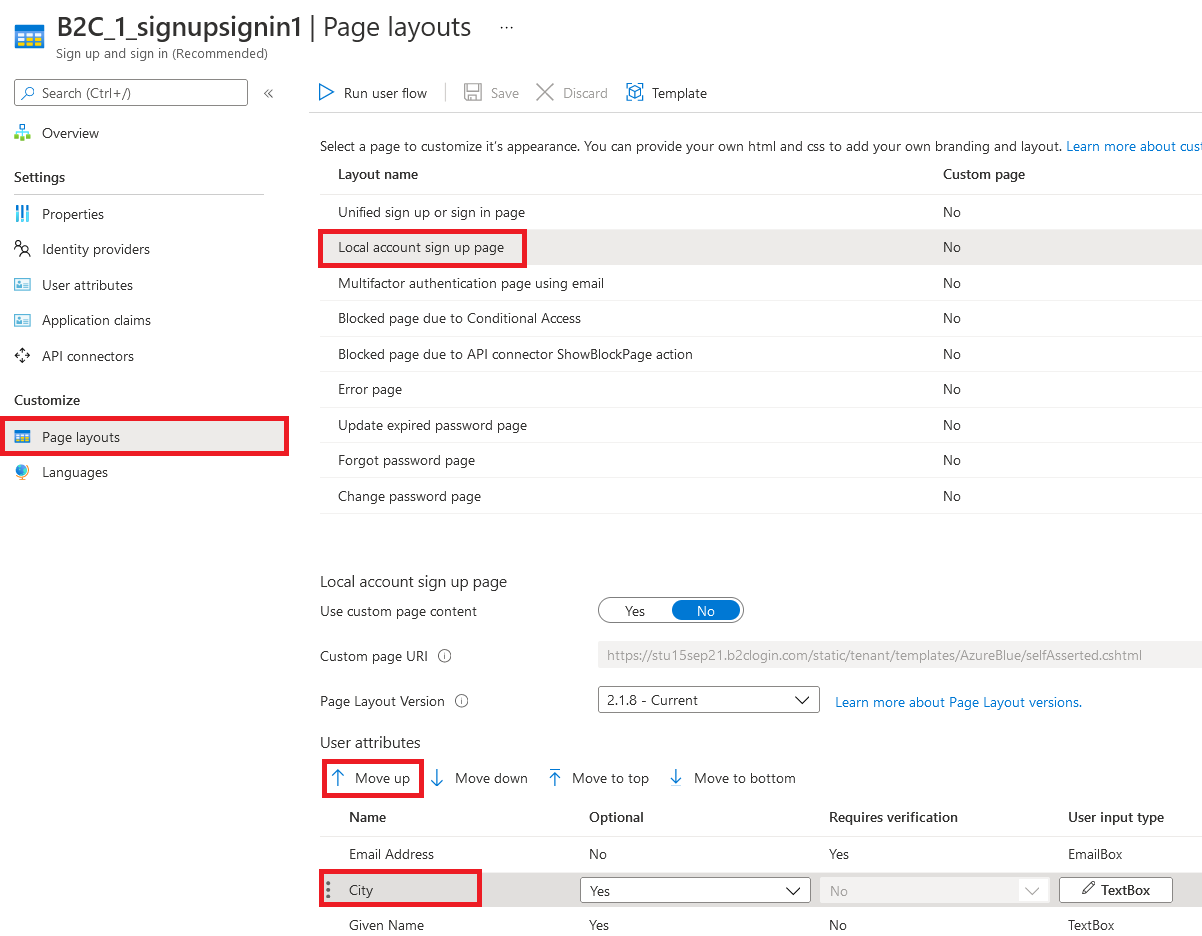
若要重新排列本地帐户表单注册页上的输入字段,请执行以下步骤:
- 登录到 Azure 门户。
- 如果有权访问多个租户,请选择顶部菜单中的“设置”图标,从“目录 + 订阅”菜单切换到你的 Azure AD B2C 租户。
- 在 Azure 门户中,搜索并选择 Azure AD B2C。
- 在左侧菜单中,选择 “用户流”。
- 选择要重新排列其输入字段的用户流(仅适用于本地帐户)。
- 在左侧菜单中,选择 “页面布局”
- 在表中,选择行 本地帐户注册页面。
- 在 “用户属性”下,选择要重新排列的输入字段,然后拖动(向上或向下)并放下,或使用 “上移” 或 “下移” 控件来实现所需的顺序。
- 在页面顶部,选择 保存。
在 Azure Active Directory B2C 中自定义应用程序的用户界面中,查找有关如何自定义应用程序的用户界面的详细信息。