OpenFaaS 是一种框架,它使用容器来生成无服务器函数。 作为一个开源项目,它在社区中大规模采用。 本文档详细介绍了如何在 Azure Kubernetes 服务 (AKS) 群集上安装和使用 OpenFaas。
开始之前
- 本文假定你对 Kubernetes 概念有基本的了解。 有关详细信息,请参阅 Azure Kubernetes 服务 (AKS) 的 Kubernetes 核心概念。
- 需要一个活动 Azure 订阅。 如果没有订阅,请在开始之前创建一个试用帐户。
- 需要一个 AKS 群集。 如果你没有现成的群集,则可以使用 Azure CLI、Azure PowerShell 或 Azure 门户创建一个。
- 需要安装 OpenFaaS CL。 有关安装选项,请参阅 OpenFaaS CLI 文档。
添加 OpenFaaS helm 图表存储库
在本地计算机上以管理员权限打开 Azure 本地 Shell。
使用以下
helm命令添加 OpenFaaS helm 图表存储库并更新到最新版本。helm repo add openfaas https://openfaas.github.io/faas-netes/ helm repo update
部署 OpenFaaS
作为一种良好做法,OpenFaaS 和 OpenFaaS 函数应分别存储在其自己的 Kubernetes 命名空间中。
使用
kubectl apply命令为 OpenFaaS 系统和函数创建一个命名空间。kubectl apply -f https://raw.githubusercontent.com/openfaas/faas-netes/master/namespaces.yml使用以下命令为 OpenFaaS UI 门户和 REST API 生成密码。 helm 图表将使用此密码在 OpenFaaS 网关上启用基本的身份验证,该网关通过云 LoadBalancer 公开给 Internet。
# generate a random password
PASSWORD=$(head -c 12 /dev/urandom | shasum| cut -d' ' -f1)

kubectl -n openfaas create secret generic basic-auth \
--from-literal=basic-auth-user=admin \
--from-literal=basic-auth-password="$PASSWORD"
重要
使用用户名和密码进行身份验证是不安全模式。 如果你有 OpenFaaS 企业许可证,我们建议改用标识和访问管理 (IAM) 作为 OpenFaaS。
使用以下
echo命令获取密码的值。echo $PASSWORD使用
helm upgrade命令将 OpenFaaS 部署到 AKS 群集。helm upgrade openfaas --install openfaas/openfaas \ --namespace openfaas \ --set basic_auth=true \ --set functionNamespace=openfaas-fn \ --set serviceType=LoadBalancer输出应该类似于以下简洁示例输出:
NAME: openfaas
LAST DEPLOYED: Tue Aug 29 08:26:11 2023
NAMESPACE: openfaas
STATUS: deployed
...
NOTES:
To verify that openfaas has started, run:

kubectl --namespace=openfaas get deployments -l "release=openfaas, app=openfaas"
...
创建了一个用于访问 OpenFaaS 网关的公共 IP 地址。 使用
kubectl get service命令获取 IP 地址。kubectl get service -l component=gateway --namespace openfaas输出应类似于以下示例输出:
NAME               TYPE           CLUSTER-IP     EXTERNAL-IP    PORT(S)          AGE
gateway            ClusterIP      10.0.156.194   <none>         8080/TCP         7m
gateway-external   LoadBalancer   10.0.28.18     52.186.64.52   8080:30800/TCP   7m
通过浏览到端口 8080 上的外部 IP 地址(在本示例中为
http://52.186.64.52:8080)来测试 OpenFaaS 系统,系统会提示你登录。 默认用户是admin,并且可以使用echo $PASSWORD来检索密码。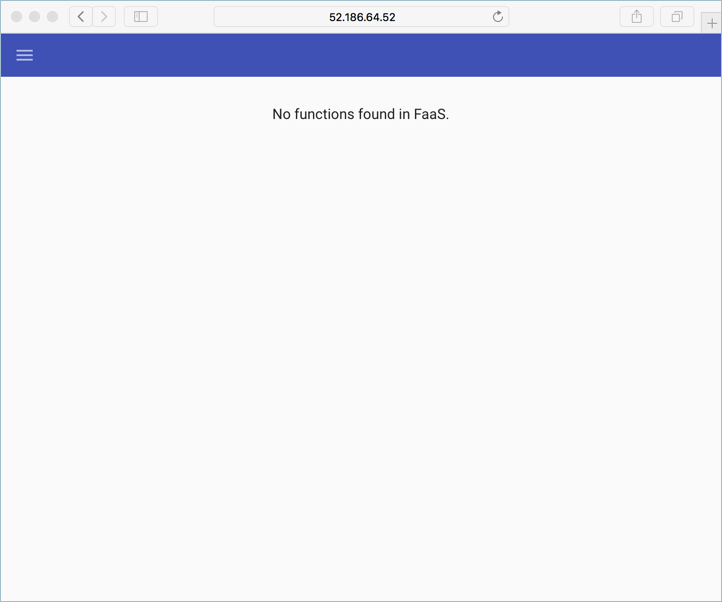
将
$OPENFAAS_URL设置为端口 8080 上外部 IP 地址的 URL,并使用以下命令通过 Azure CLI 进行登录。export OPENFAAS_URL=http://52.186.64.52:8080 echo -n $PASSWORD | ./faas-cli login -g $OPENFAAS_URL -u admin --password-stdin
创建第一个函数
使用 OpenFaaS URL 导航到 OpenFaaS 系统。
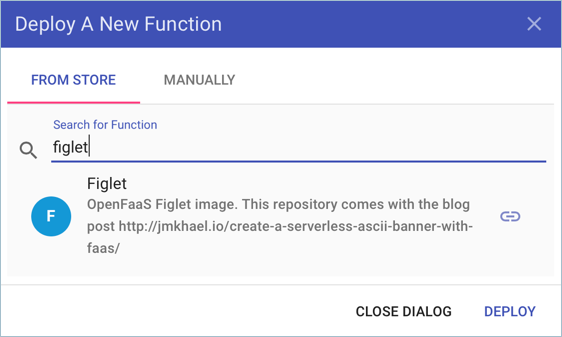
使用 OpenFaas 门户创建一个函数,方法是选择“部署新函数”,然后搜索 Figlet。
选择 Figlet 函数,然后选择“部署”。
使用以下
curl命令调用该函数。 确保将以下示例中的 IP 地址替换为 OpenFaaS 网关地址。curl -X POST http://52.186.64.52:8080/function/figlet -d "Hello Azure"输出应类似于以下示例输出:
 _   _      _ _            _
| | | | ___| | | ___      / \    _____   _ _ __ ___
| |_| |/ _ \ | |/ _ \    / _ \  |_  / | | | '__/ _ \
|  _  |  __/ | | (_) |  / ___ \  / /| |_| | | |  __/
|_| |_|\___|_|_|\___/  /_/   \_\/___|\__,_|_|  \___|
创建第二个函数
配置 Azure Cosmos DB 实例
使用
az group create命令为 Azure Cosmos DB 实例创建一个新的资源组。az group create --name serverless-backing --location chinanorth2使用
MongoDB命令部署类型为az cosmosdb create的 Azure Cosmos DB 实例。 将openfaas-cosmos替换为你自己唯一的实例名称。az cosmosdb create --resource-group serverless-backing --name openfaas-cosmos --kind MongoDB使用
az cosmosdb keys list命令获取 Azure Cosmos DB 数据库连接字符串并将其存储在一个变量中。 确保将--resource-group参数的值替换为资源组名称,并将--name参数替换为 Azure Cosmos DB 实例的名称。COSMOS=$(az cosmosdb keys list \ --type connection-strings \ --resource-group serverless-backing \ --name openfaas-cosmos \ --output tsv)通过创建名为
plans.json的文件并将其复制到以下 json 中,使用测试数据填充 Azure Cosmos DB。{ "name" : "two_person", "friendlyName" : "Two Person Plan", "portionSize" : "1-2 Person", "mealsPerWeek" : "3 Unique meals per week", "price" : 72, "description" : "Our basic plan, delivering 3 meals per week, which will feed 1-2 people.", "__v" : 0 }
创建函数
安装 MongoDB 工具。 以下示例命令使用 brew 安装这些工具。 如需更多安装选项,请参阅 MongoDB 文档。
brew install mongodb使用 mongoimport 工具加载包含数据的 Azure Cosmos DB 实例。
mongoimport --uri=$COSMOS -c plans < plans.json输出应类似于以下示例输出:
2018-02-19T14:42:14.313+0000    connected to: localhost
2018-02-19T14:42:14.918+0000    imported 1 document
使用
faas-cli deploy命令创建函数。 确保将-g参数的值更新为 OpenFaaS 网关地址。faas-cli deploy -g http://52.186.64.52:8080 --image=shanepeckham/openfaascosmos --name=cosmos-query --env=NODE_ENV=$COSMOS部署后,输出应类似于以下示例输出:
Deployed. 202 Accepted.
URL: http://52.186.64.52:8080/function/cosmos-query
使用以下
curl命令测试函数。 确保将 IP 地址更新为 OpenFaaS 网关地址。curl -s http://52.186.64.52:8080/function/cosmos-query输出应类似于以下示例输出:
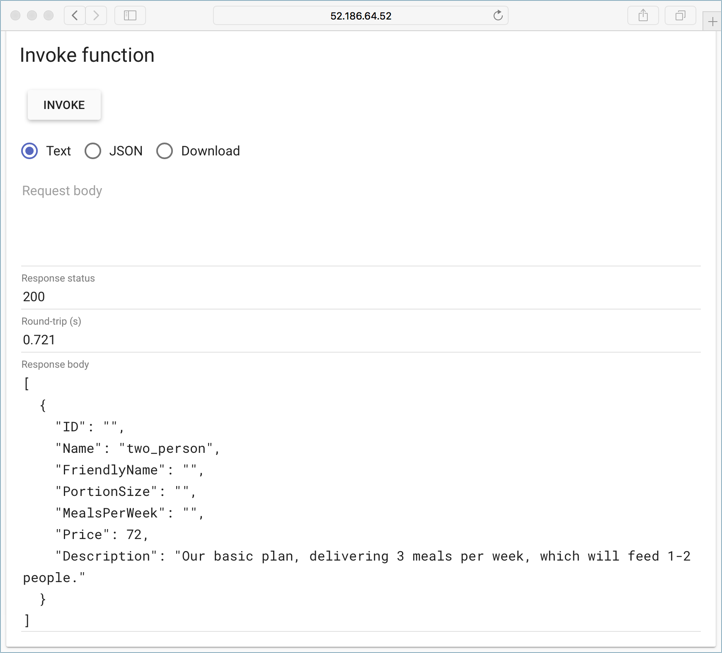
[{"ID":"","Name":"two_person","FriendlyName":"","PortionSize":"","MealsPerWeek":"","Price":72,"Description":"Our basic plan, delivering 3 meals per week, which will feed 1-2 people."}]注意
还可以在 OpenFaaS UI 中测试函数:
后续步骤
请通过 OpenFaaS 研讨会继续学习,它包含一系列动手实验室,这些实验室涵盖的主题包括:如何创建自己的 GitHub 机器人、如何使用机密、如何查看指标,以及如何进行自动缩放。