自动检测(也称为运行时监视)是启用适用于 Azure 应用程序服务的 Application Insights 的最简单方法,无需任何代码更改或高级配置。 根据具体的应用场景,通过手动检测评估是否需要更高级的监视。
启用 Application Insights
重要
如果同时检测到自动检测监视和基于 SDK 的手动检测,则仅遵循手动检测设置。 这样安排可防止发送重复数据。 若要了解详细信息,请参阅 对 Application Insights 与 Azure 应用服务的集成进行故障排除。
Azure 门户中的自动检测
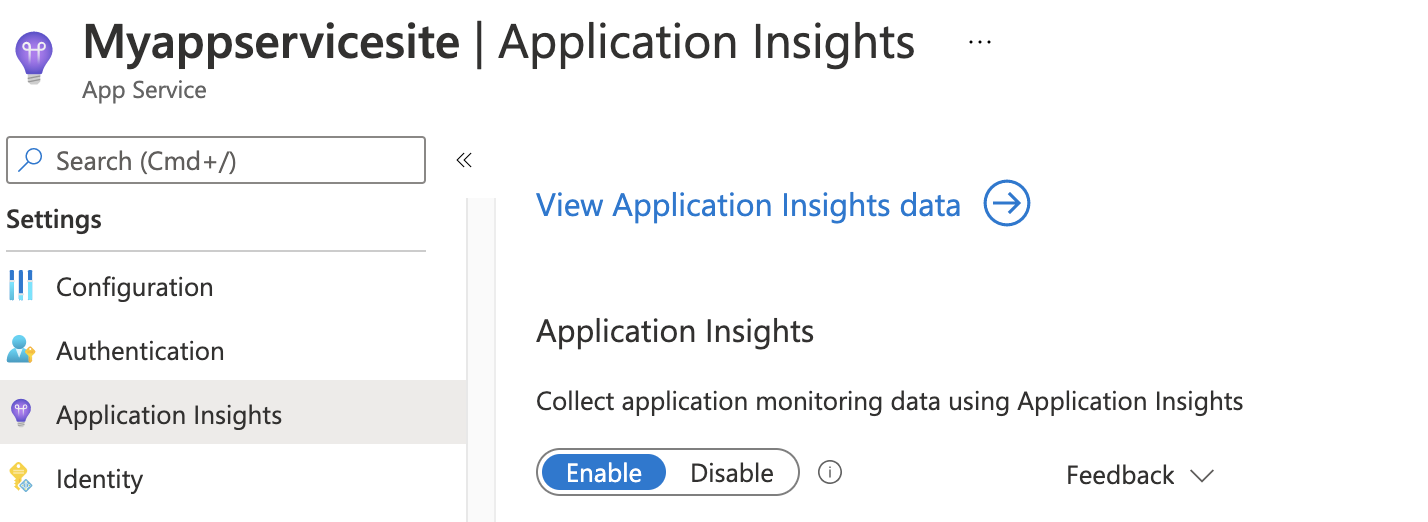
在应用程序服务的左侧导航菜单中选择“Application Insights”,然后选择“启用”。
创建新资源,或为此应用程序选择现有 Application Insights 资源。
注意
选择“确定”以创建新资源时,系统将提示你“应用监视设置”。 选择“继续”会将新的 Application Insights 资源链接到应用程序服务。 然后,应用程序服务将重启。
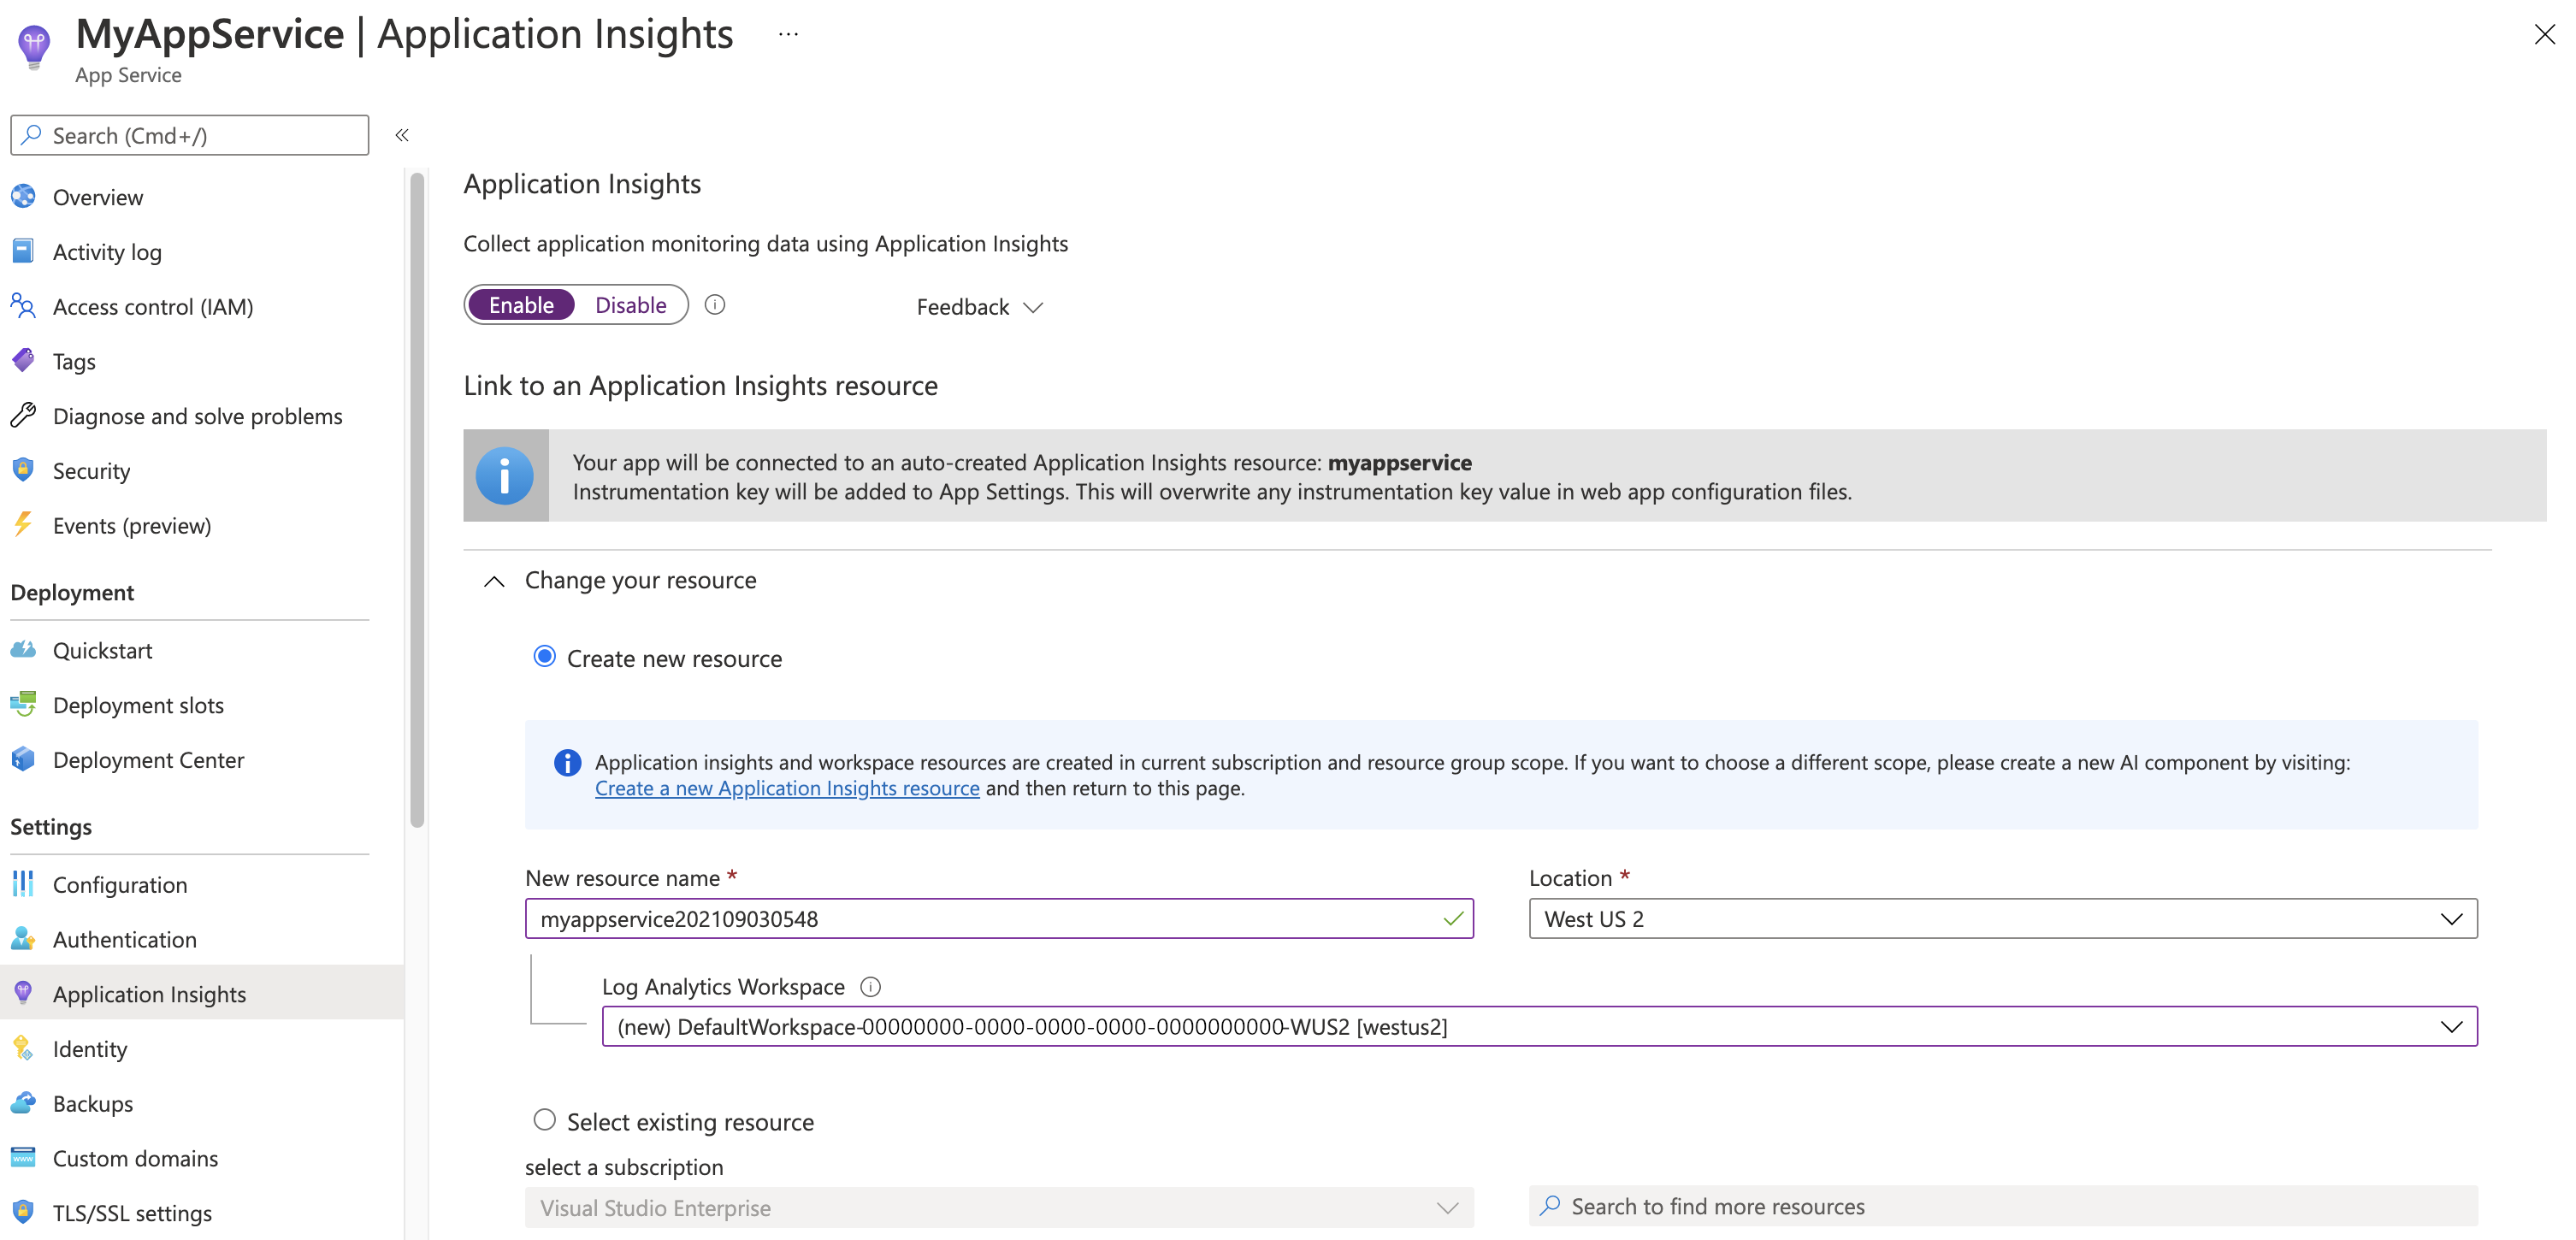
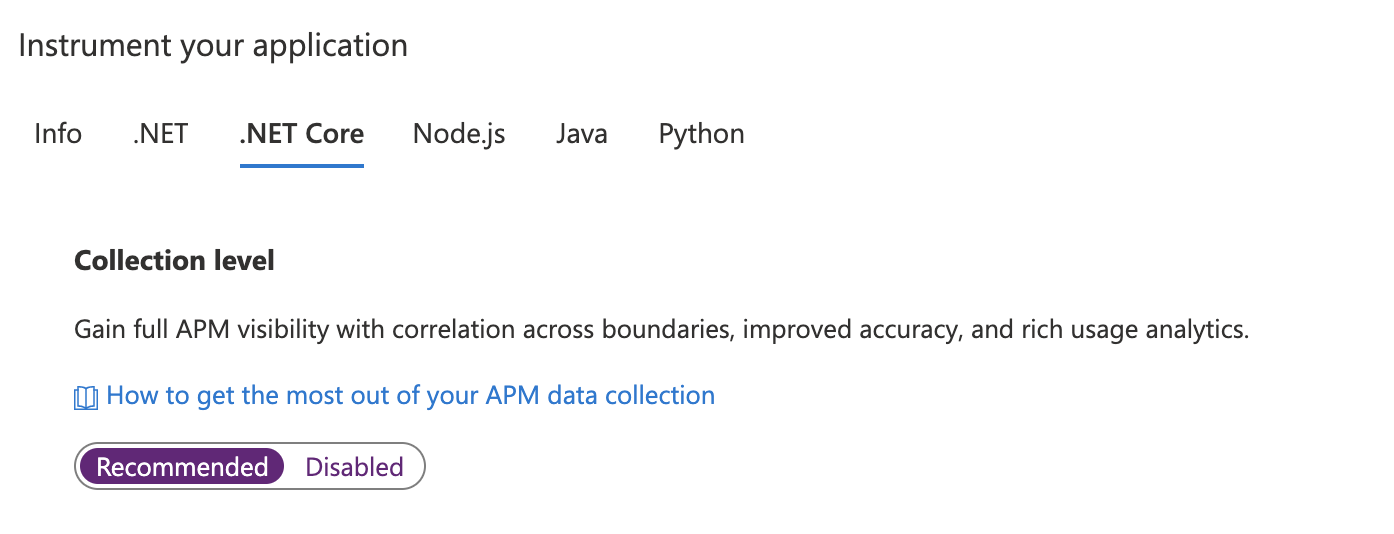
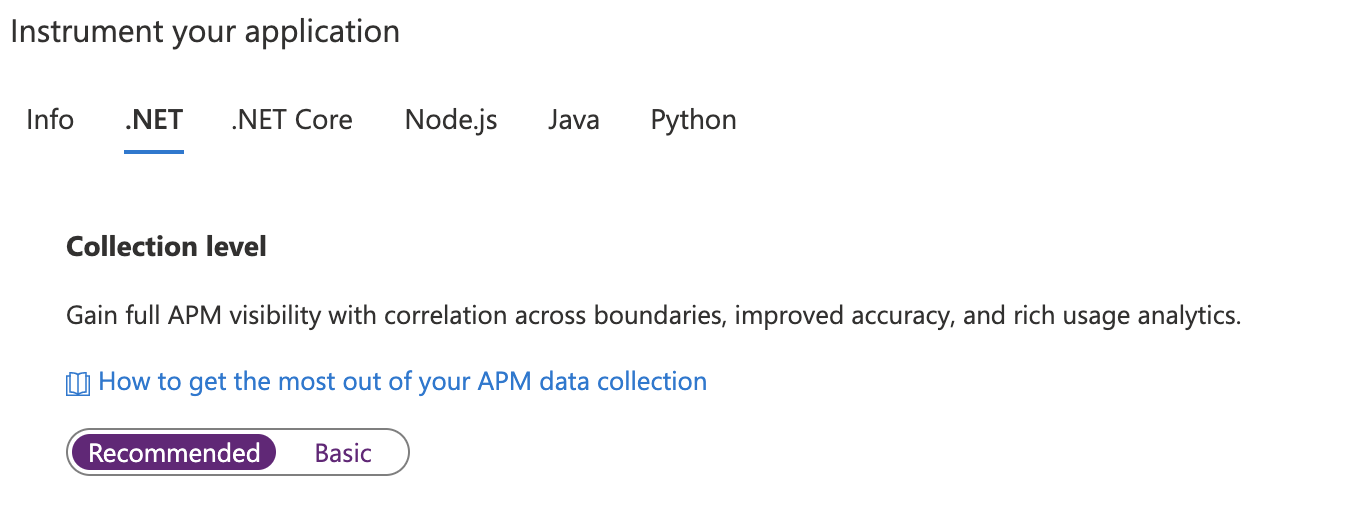
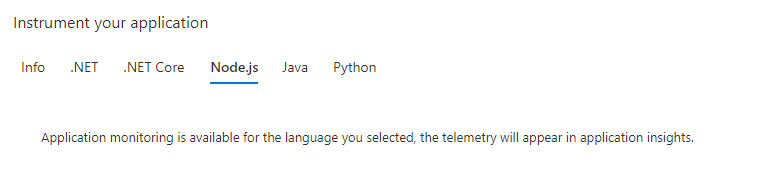
指定要使用哪些资源后,可以选择 Application Insights 根据平台为应用程序收集数据的方式。 ASP.NET 收集选项为“建议”或“禁用”。

手动升级监视扩展/代理
从版本 2.8.9 及更高版本升级
从版本 2.8.9 自动升级,无需其他操作。 新的监视位将在后台传送到目标应用服务,并在应用程序重启时拾取。
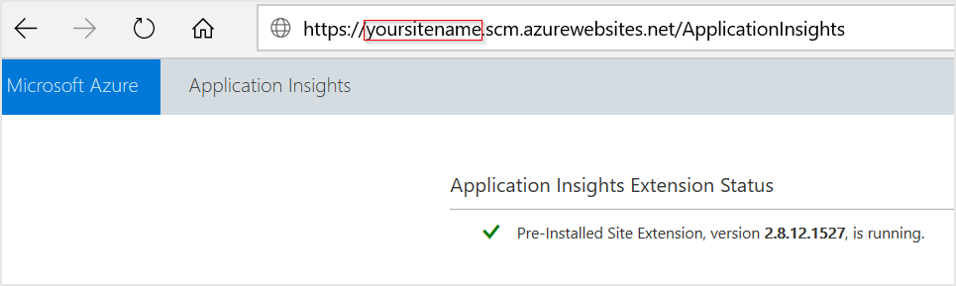
若要查看正在运行的扩展的版本,请转到 https://yoursitename.scm.chinacloudsites.cn/ApplicationInsights。
从版本 1.0.0 - 2.6.5 升级
从版本 2.8.9 开始,将使用预装的站点扩展。 如果使用更低的版本,可通过下述两种方法之一进行更新:
通过 Azure 门户启用升级:即使安装了应用程序服务的 Application Insights 扩展,UI 也仅显示“启用”按钮。 在后台,旧的专用站点扩展将被移除。
-
- 设置应用程序设置以启用预装的站点扩展
ApplicationInsightsAgent。 有关详细信息,请参阅通过 PowerShell 启用。 - 手动删除名为 用于 Azure 应用服务的 Application Insights 扩展的专用站点扩展。
- 设置应用程序设置以启用预装的站点扩展
如果已从低于 2.5.1 的版本完成升级,请检查是否已从应用程序 bin 文件夹中移除了 ApplicationInsights DLL。 有关详细信息,请参阅 对 Application Insights 与 Azure 应用服务的集成进行故障排除。

配置监视扩展/代理
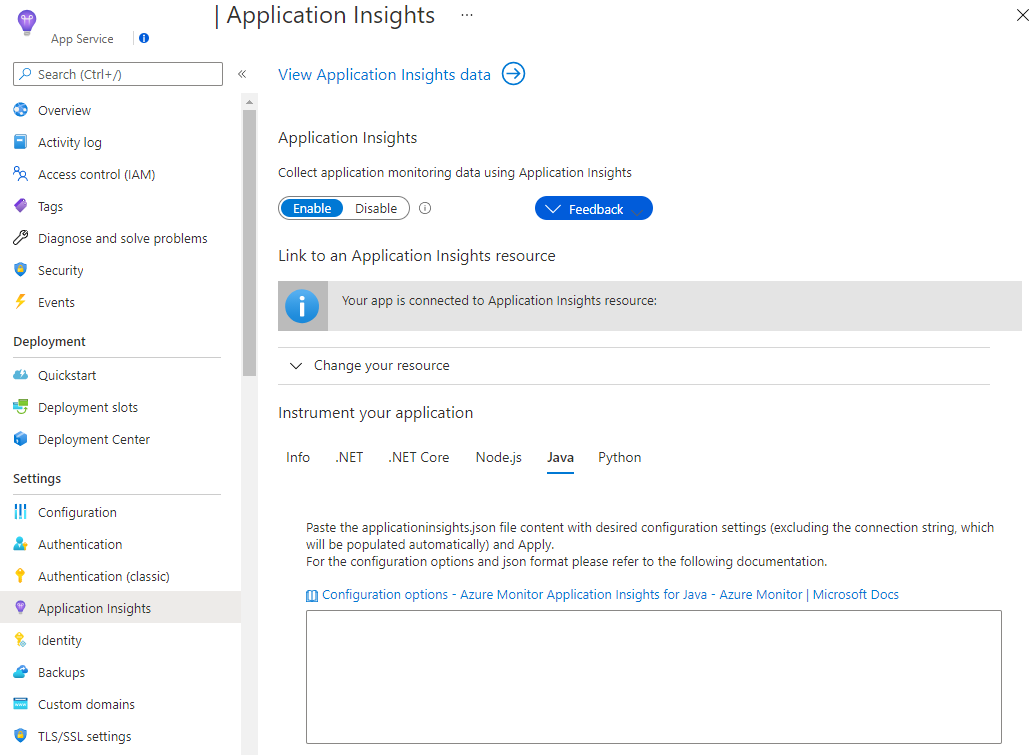
我们目前不提供用于为 ASP.NET Core 配置监视扩展的选项。
启用客户端监视
对于使用Recommended集合的 ASP.NET Core 应用程序,默认已启用客户端监视,无论是否存在应用设置APPINSIGHTS_JAVASCRIPT_ENABLED。
如果要禁用客户端监视:
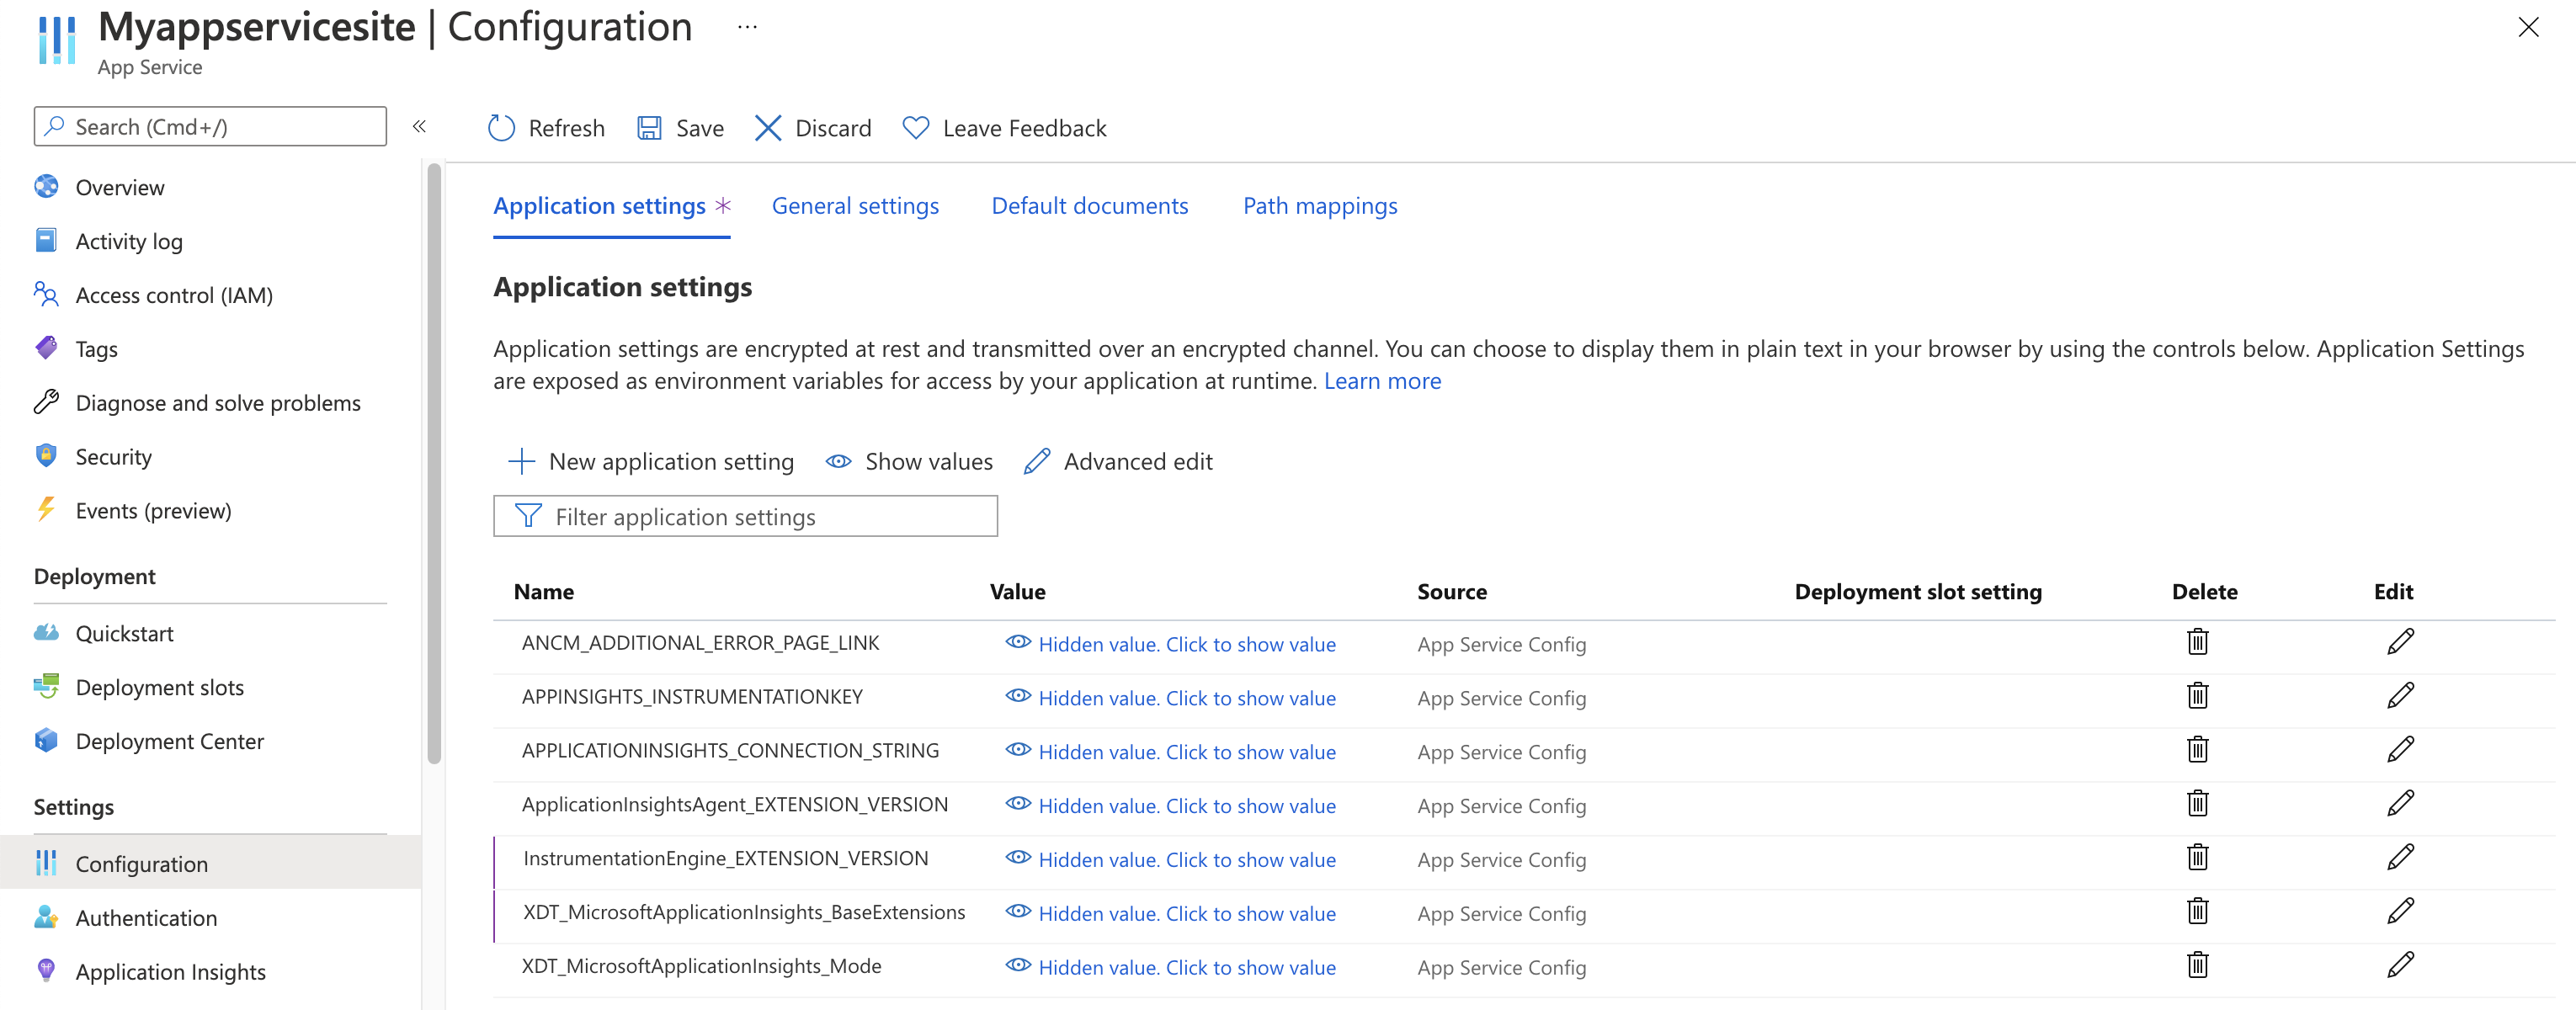
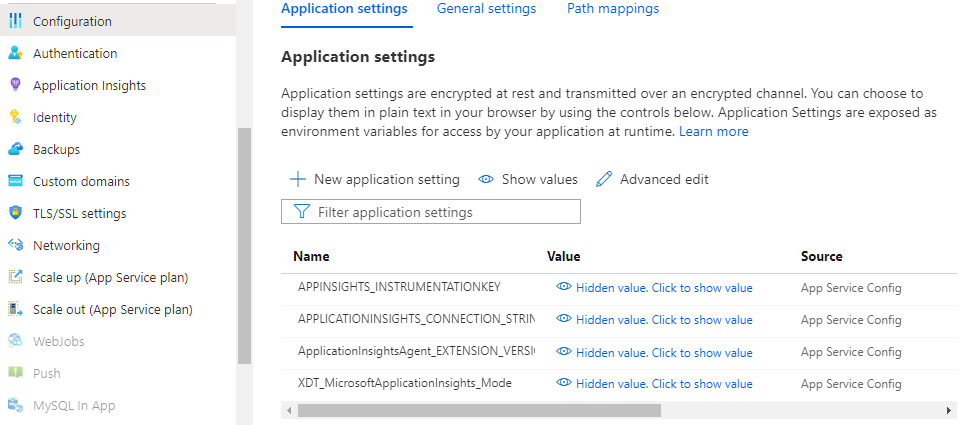
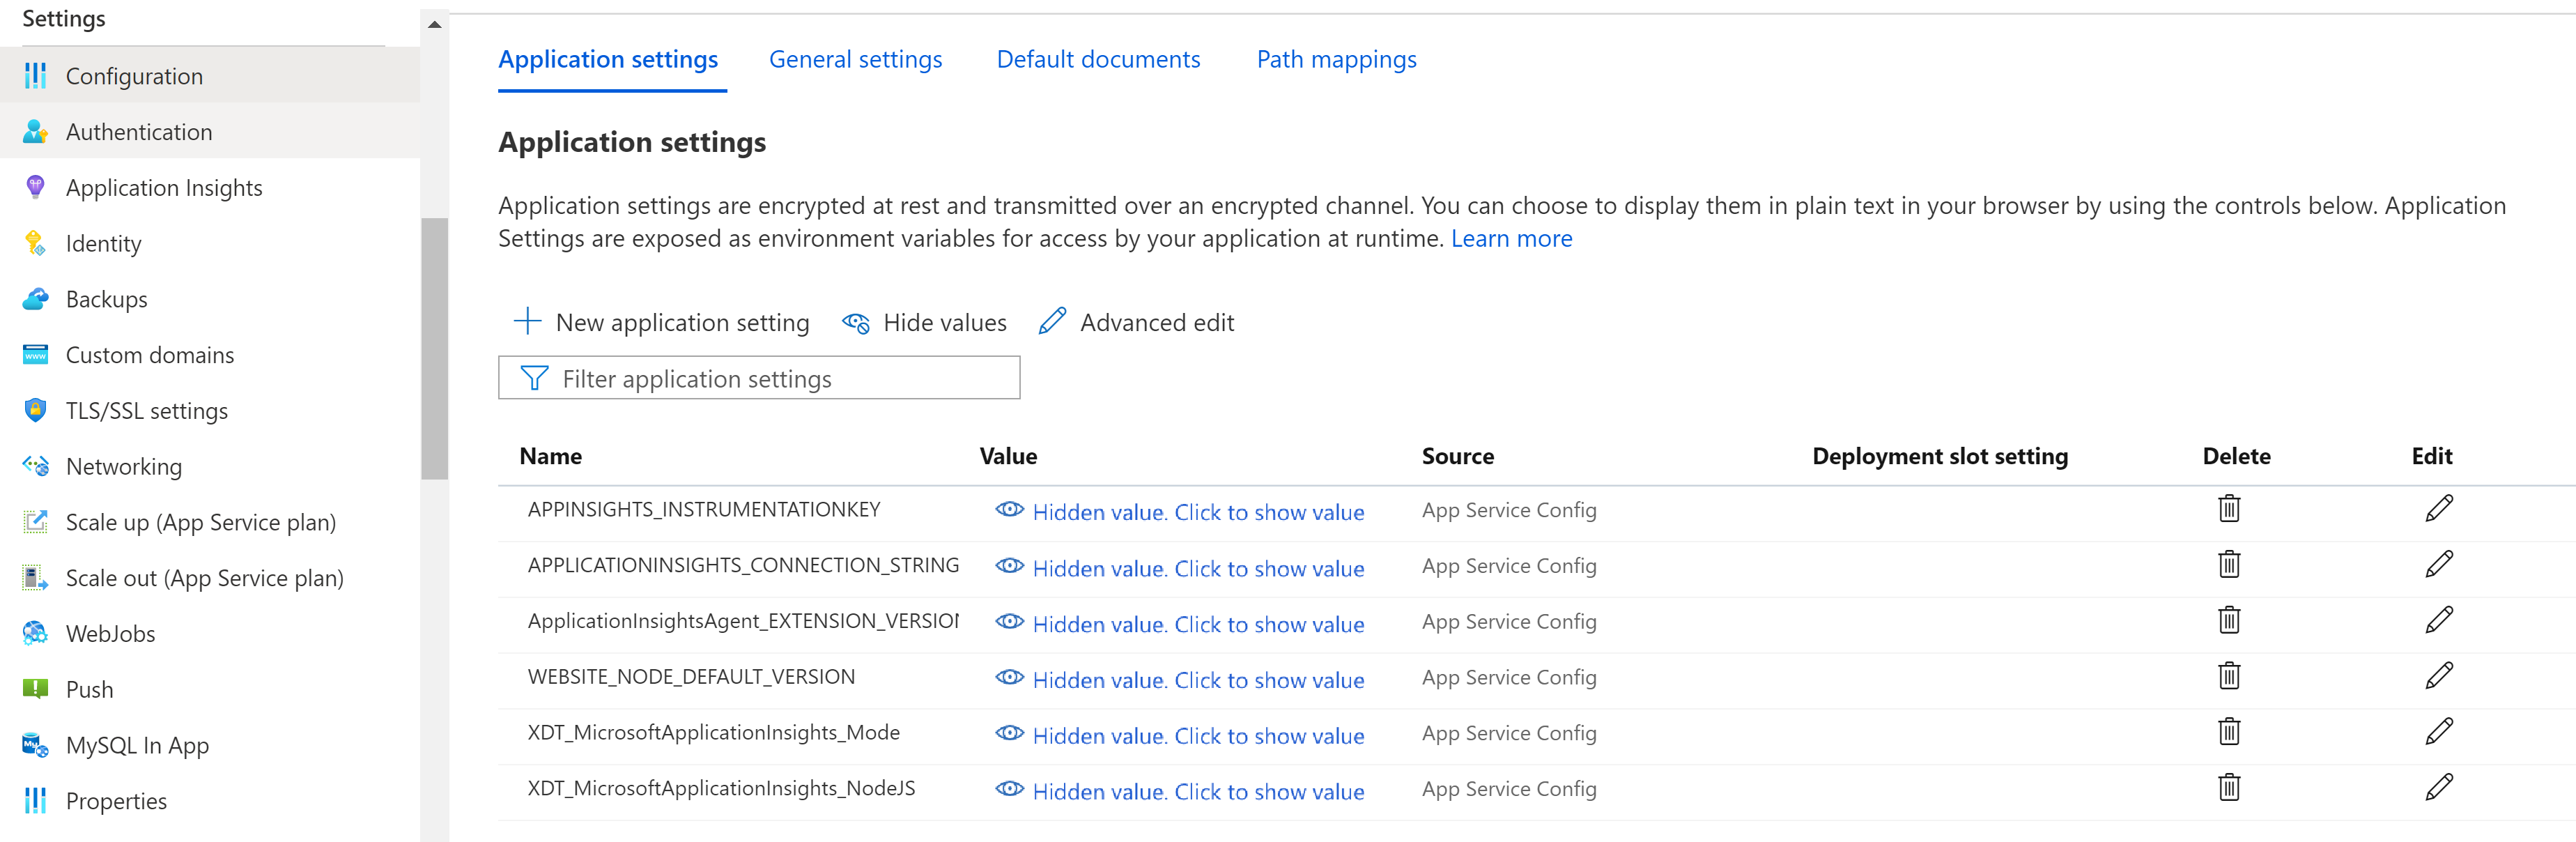
选择设置>配置。
在“应用程序设置”下,创建包含以下信息的“新应用程序设置”:
-
名称:
APPINSIGHTS_JAVASCRIPT_ENABLED - 值:
false
-
名称:
保存 设置。 重启应用。
自动监视
若要为 Application Insights 启用遥测数据收集,只需设置以下应用程序设置:
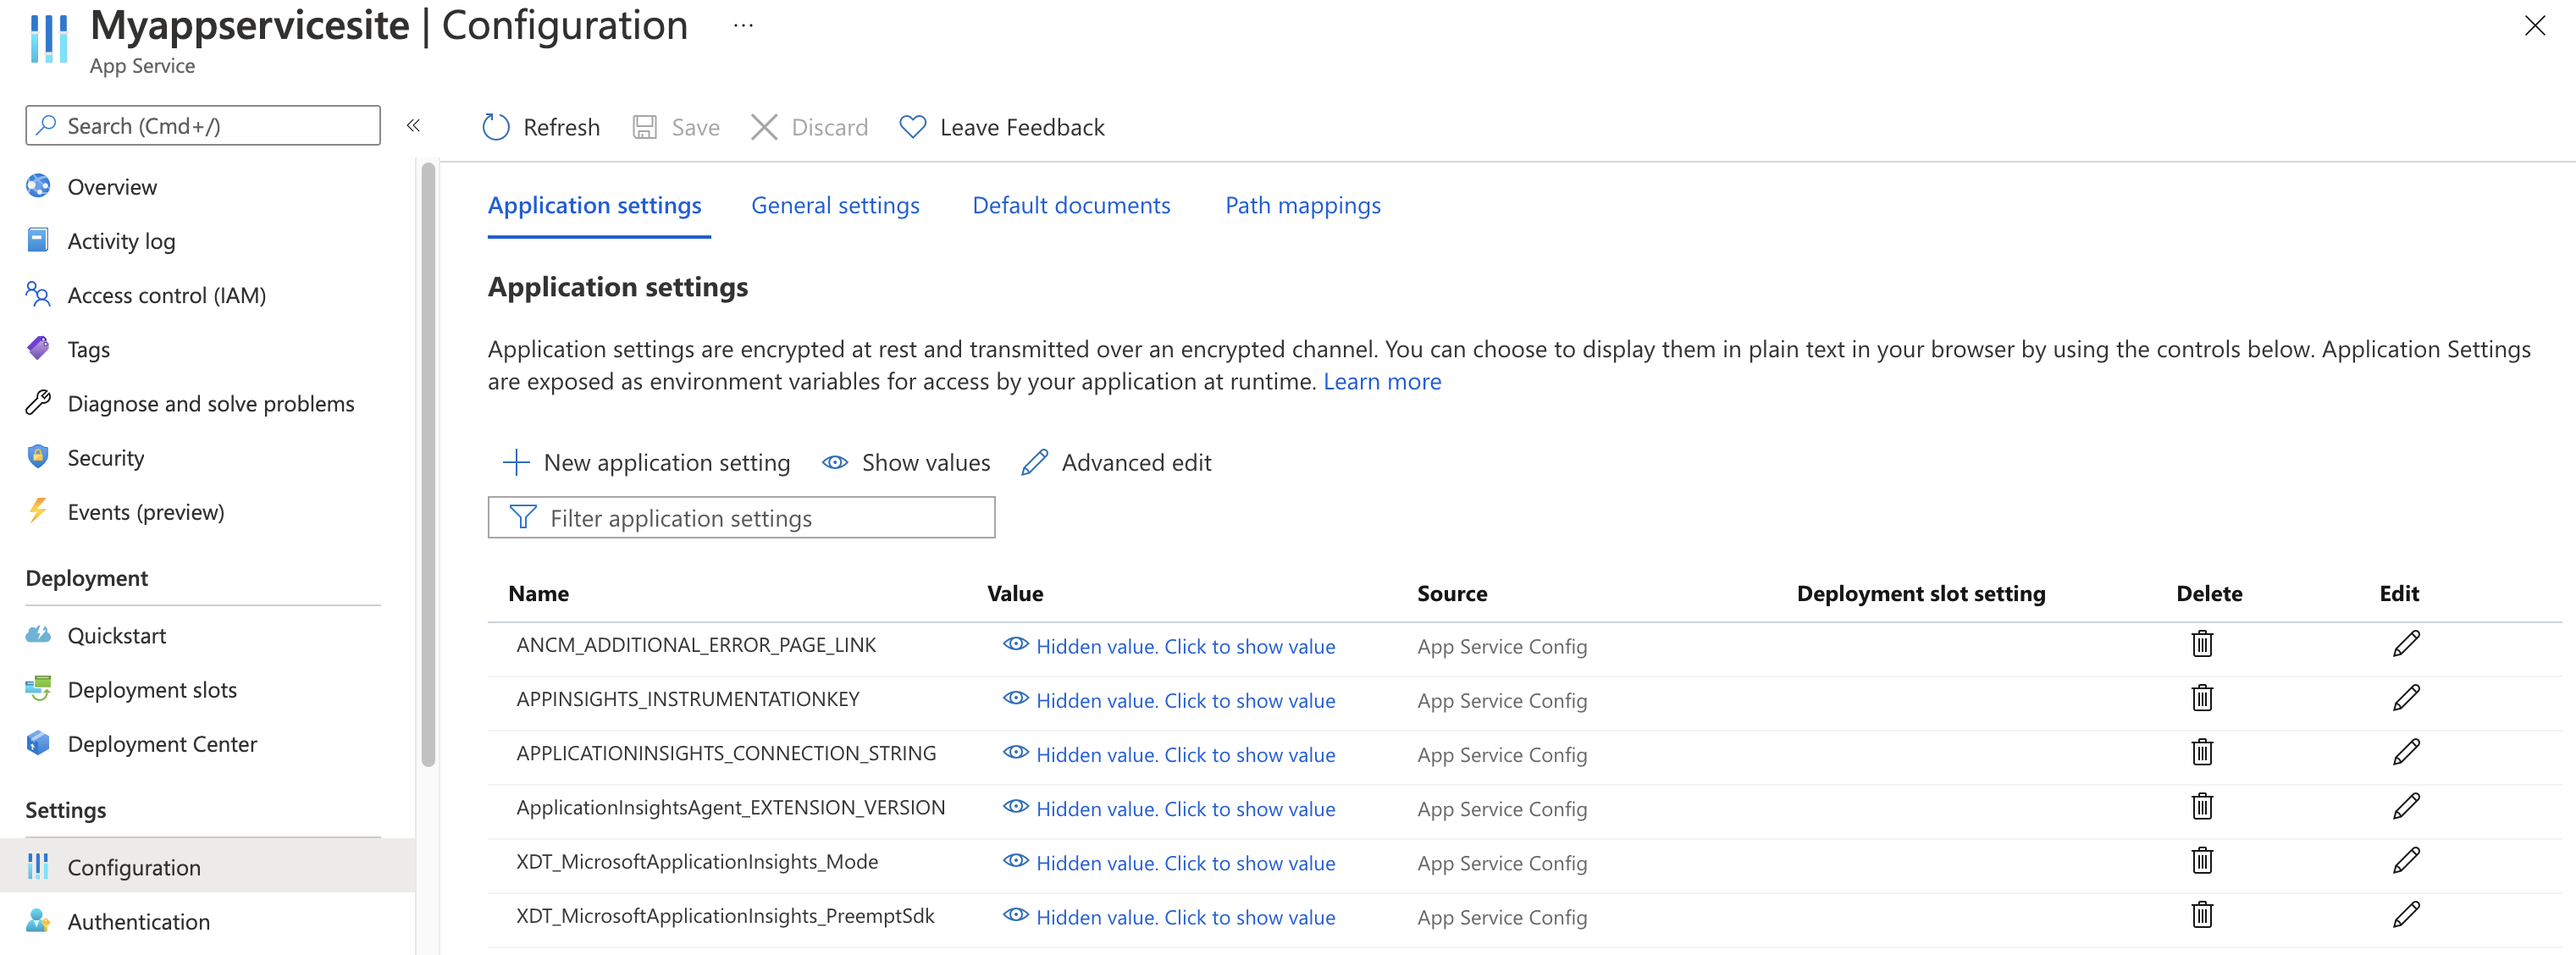
应用程序设置定义
| 应用设置名称 | 定义 | 价值 |
|---|---|---|
| ApplicationInsightsAgent_EXTENSION_VERSION | 用于控制运行时监视的主扩展。 |
~2 (Windows) 或 ~3 (Linux) |
| XDT_MicrosoftApplicationInsights_Mode | 默认模式下,仅启用基本功能以确保最佳性能。 |
disabled 或 recommended。 |
| XDT_MicrosoftApplicationInsights_PreemptSdk | 仅适用于 ASP.NET Core 应用。 实现与 Application Insights SDK 的互操作。 将扩展与 SDK 并排加载,并使用它来发送遥测数据。 (禁用 Application Insights SDK。) | 1 |

使用 Azure 资源管理器配置应用程序服务应用程序设置
可以使用 Azure 资源管理器模板来管理和配置 Azure 应用程序服务的应用程序设置。 在使用资源管理器自动化部署新的应用程序服务资源或修改现有资源的设置时,可以使用此方法。
下面是应用程序服务资源的应用程序设置 JSON 的基本结构:
      "resources": [
        {
          "name": "appsettings",
          "type": "config",
          "apiVersion": "2015-08-01",
          "dependsOn": [
            "[resourceId('Microsoft.Web/sites', variables('webSiteName'))]"
          ],
          "tags": {
            "displayName": "Application Insights Settings"
          },
          "properties": {
            "key1": "value1",
            "key2": "value2"
          }
        }
      ]
自动创建 Application Insights 资源并链接到新建的应用程序服务资源
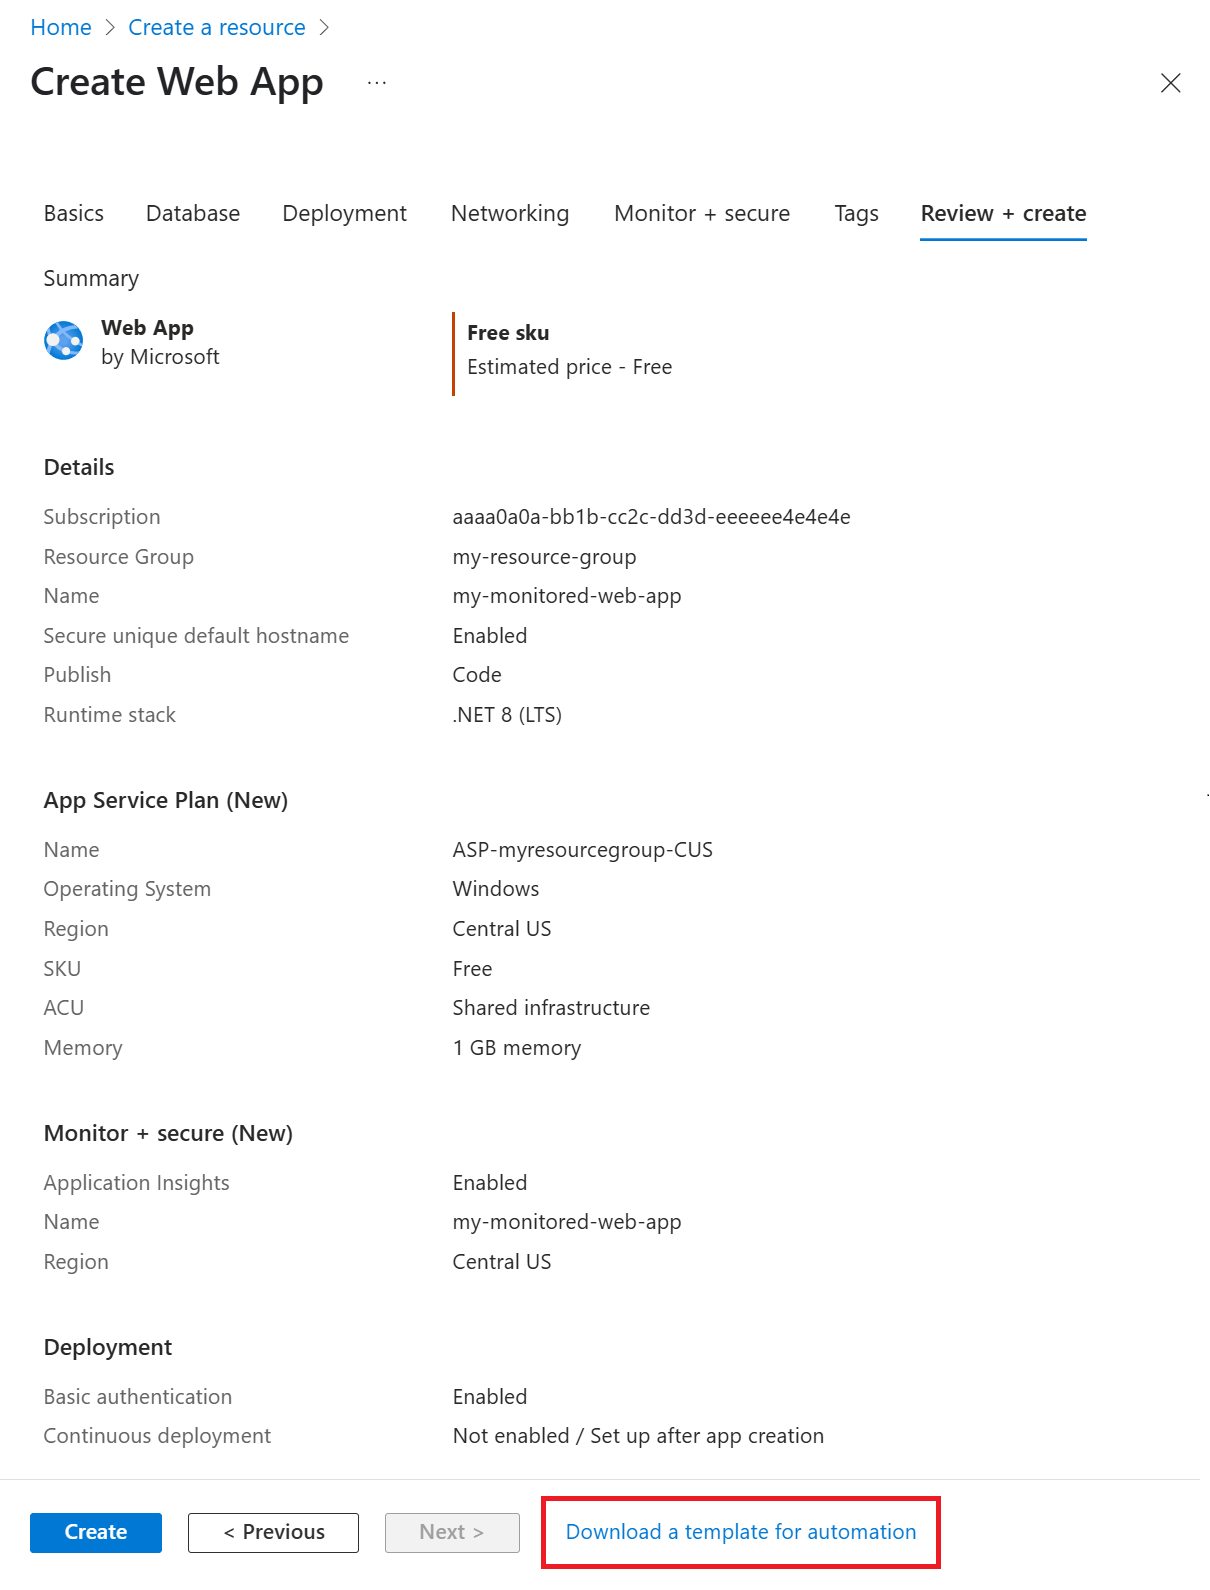
若要创建使用默认 Application Insights 设置的资源管理器模板,请像创建启用了 Application Insights 的新 Web 应用程序一样开始该过程。
在 Azure 门户中,使用所需的信息创建新的 Web 应用资源。 在“监视器 + 安全”选项卡上启用 Application Insights。
转到 “查看 + 创建”,然后选择“ 下载用于自动化的模板”。 此选项将生成配置了全部所需设置的最新资源管理器模板。

注意
以下示例模板适用于在 Windows 上运行的 .NET 8 (LTS) 应用程序。 它使用占位符 my-monitored-web-app 来表示应用程序的名称和 aaaa0a0a-bb1b-cc2c-dd3d-eeeeee4e4e4e 订阅 ID。
不建议直接复制和使用它。 而是根据上述说明生成自己的模板。
展开以查看示例模板
{
    "$schema": "http://schema.management.azure.com/schemas/2015-01-01/deploymentTemplate.json#",
    "contentVersion": "1.0.0.0",
    "parameters": {
        "subscriptionId": {
            "type": "string"
        },
        "resourceGroupName": {
            "type": "string"
        },
        "name": {
            "type": "string"
        },
        "location": {
            "type": "string"
        },
        "hostingPlanName": {
            "type": "string"
        },
        "serverFarmResourceGroup": {
            "type": "string"
        },
        "alwaysOn": {
            "type": "bool"
        },
        "ftpsState": {
            "type": "string"
        },
        "autoGeneratedDomainNameLabelScope": {
            "type": "string"
        },
        "sku": {
            "type": "string"
        },
        "skuCode": {
            "type": "string"
        },
        "workerSize": {
            "type": "string"
        },
        "workerSizeId": {
            "type": "string"
        },
        "numberOfWorkers": {
            "type": "string"
        },
        "currentStack": {
            "type": "string"
        },
        "phpVersion": {
            "type": "string"
        },
        "netFrameworkVersion": {
            "type": "string"
        }
    },
    "variables": {},
    "resources": [
        {
            "apiVersion": "2022-03-01",
            "name": "[parameters('name')]",
            "type": "Microsoft.Web/sites",
            "location": "[parameters('location')]",
            "tags": null,
            "dependsOn": [
                "microsoft.insights/components/my-monitored-web-app",
                "[concat('Microsoft.Web/serverfarms/', parameters('hostingPlanName'))]"
            ],
            "properties": {
                "name": "[parameters('name')]",
                "siteConfig": {
                    "appSettings": [
                        {
                            "name": "APPLICATIONINSIGHTS_CONNECTION_STRING",
                            "value": "[reference('microsoft.insights/components/my-monitored-web-app', '2015-05-01').ConnectionString]"
                        },
                        {
                            "name": "ApplicationInsightsAgent_EXTENSION_VERSION",
                            "value": "~2"
                        },
                        {
                            "name": "XDT_MicrosoftApplicationInsights_Mode",
                            "value": "default"
                        }
                    ],
                    "metadata": [
                        {
                            "name": "CURRENT_STACK",
                            "value": "[parameters('currentStack')]"
                        }
                    ],
                    "phpVersion": "[parameters('phpVersion')]",
                    "netFrameworkVersion": "[parameters('netFrameworkVersion')]",
                    "alwaysOn": "[parameters('alwaysOn')]",
                    "ftpsState": "[parameters('ftpsState')]"
                },
                "serverFarmId": "[concat('/subscriptions/', parameters('subscriptionId'),'/resourcegroups/', parameters('serverFarmResourceGroup'), '/providers/Microsoft.Web/serverfarms/', parameters('hostingPlanName'))]",
                "clientAffinityEnabled": true,
                "virtualNetworkSubnetId": null,
                "httpsOnly": true,
                "publicNetworkAccess": "Enabled",
                "autoGeneratedDomainNameLabelScope": "[parameters('autoGeneratedDomainNameLabelScope')]"
            },
            "resources": [
                {
                    "type": "Microsoft.Web/sites/basicPublishingCredentialsPolicies",
                    "apiVersion": "2022-09-01",
                    "name": "[concat(parameters('name'), '/scm')]",
                    "properties": {
                        "allow": true
                    },
                    "dependsOn": [
                        "[resourceId('Microsoft.Web/Sites', parameters('name'))]"
                    ]
                },
                {
                    "type": "Microsoft.Web/sites/basicPublishingCredentialsPolicies",
                    "apiVersion": "2022-09-01",
                    "name": "[concat(parameters('name'), '/ftp')]",
                    "properties": {
                        "allow": true
                    },
                    "dependsOn": [
                        "[resourceId('Microsoft.Web/Sites', parameters('name'))]"
                    ]
                }
            ]
        },
        {
            "apiVersion": "2018-11-01",
            "name": "[parameters('hostingPlanName')]",
            "type": "Microsoft.Web/serverfarms",
            "location": "[parameters('location')]",
            "kind": "",
            "tags": null,
            "dependsOn": [],
            "properties": {
                "name": "[parameters('hostingPlanName')]",
                "workerSize": "[parameters('workerSize')]",
                "workerSizeId": "[parameters('workerSizeId')]",
                "numberOfWorkers": "[parameters('numberOfWorkers')]",
                "zoneRedundant": false
            },
            "sku": {
                "Tier": "[parameters('sku')]",
                "Name": "[parameters('skuCode')]"
            }
        },
        {
            "apiVersion": "2020-02-02-preview",
            "name": "my-monitored-web-app",
            "type": "microsoft.insights/components",
            "location": "chinanorth2",
            "tags": null,
            "dependsOn": [
                "newWorkspaceTemplate"
            ],
            "properties": {
                "ApplicationId": "[parameters('name')]",
                "Request_Source": "IbizaWebAppExtensionCreate",
                "Flow_Type": "Redfield",
                "Application_Type": "web",
                "WorkspaceResourceId": "/subscriptions/aaaa0a0a-bb1b-cc2c-dd3d-eeeeee4e4e4e/resourceGroups/DefaultResourceGroup-CUS/providers/Microsoft.OperationalInsights/workspaces/DefaultWorkspace-aaaa0a0a-bb1b-cc2c-dd3d-eeeeee4e4e4e-CUS"
            }
        },
        {
            "type": "Microsoft.Resources/deployments",
            "apiVersion": "2021-04-01",
            "name": "newWorkspaceTemplate",
            "resourceGroup": "DefaultResourceGroup-CUS",
            "subscriptionId": "[parameters('subscriptionId')]",
            "properties": {
                "mode": "Incremental",
                "template": {
                    "$schema": "https://schema.management.azure.com/schemas/2015-01-01/deploymentTemplate.json#",
                    "contentVersion": "1.0.0.0",
                    "parameters": {},
                    "variables": {},
                    "resources": [
                        {
                            "apiVersion": "2020-08-01",
                            "name": "DefaultWorkspace-aaaa0a0a-bb1b-cc2c-dd3d-eeeeee4e4e4e-CUS",
                            "type": "Microsoft.OperationalInsights/workspaces",
                            "location": "chinanorth2",
                            "properties": {}
                        }
                    ]
                }
            }
        }
    ]
}
通过 PowerShell 启用
若要通过 PowerShell 启用应用程序监视,仅须更改基础的应用程序设置。 以下示例为资源组 my-monitored-web-app 中名为 my-resource-group 的网站启用应用程序监视。 它将配置数据,以便发送到 InstrumentationKey=012345678-abcd-ef01-2345-6789abcd 连接字符串。
注意
建议使用 Azure Az PowerShell 模块与 Azure 交互。 若要开始,请参阅安装 Azure PowerShell。 若要了解如何迁移到 Az PowerShell 模块,请参阅 将 Azure PowerShell 从 AzureRM 迁移到 Az。
注意
对于 Windows,请将ApplicationInsightsAgent_EXTENSION_VERSION设置为 ~2.
对于 Linux,请将ApplicationInsightsAgent_EXTENSION_VERSION设置为 ~3。
$app = Get-AzWebApp -ResourceGroupName "my-resource-group" -Name "my-monitored-web-app" -ErrorAction Stop
$newAppSettings = @{} # Case-insensitive hash map
$app.SiteConfig.AppSettings | %{$newAppSettings[$_.Name] = $_.Value} # Preserve non-Application-Insights application settings.
$newAppSettings["APPLICATIONINSIGHTS_CONNECTION_STRING"] = "InstrumentationKey=aaaa0a0a-bb1b-cc2c-dd3d-eeeeee4e4e4e"; # Set the Application Insights connection string
$newAppSettings["ApplicationInsightsAgent_EXTENSION_VERSION"] = "~3"; # Enable the ApplicationInsightsAgent.
$app = Set-AzWebApp -AppSettings $newAppSettings -ResourceGroupName $app.ResourceGroup -Name $app.Name -ErrorAction Stop
故障排除
请参阅专用疑难解答文章。
后续步骤
- 查看常见问题(FAQ):适用于 .NET、Node.js、Python 和 Java 应用程序的 Azure 应用服务监控常见问题。
- 在您的在线应用中为 Azure 应用服务应用启用 .NET Profiler。
- 将 Azure 诊断配置为向 Application Insights 发送数据。
- 监视服务运行状况指标以确保服务可用且做出快速响应。
- 接收警报通知,当发生操作事件或指标超过阈值时。
- 为应用程序设置可用性测试。