ACR 任务是 Azure 容器注册表中的功能套件,用于在 Azure 中以简化、高效的方式生成 Docker 容器映像。 本文介绍如何使用 ACR 任务的快速任务功能。
“内部循环”开发周期是指编写代码、生成和测试应用程序,然后提交到源代码管理的迭代过程。 快速任务可将内部循环扩展到云中,同时提供成功生成验证并自动将成功生成的映像推送到容器注册表。 映像将在云中本机生成,其位置靠近注册表,可加快部署。
所有 Dockerfile 专业知识都可以直接转移到 ACR 任务。 要通过 ACR 任务在云中生成,无需更改 Dockerfile,只需运行命令。
本教程是系列教程的第一部分,将介绍:
- 获取示例应用程序源代码
- 在 Azure 中生成容器映像
- 将容器部署到 Azure 容器实例
后续教程将会介绍如何使用 ACR 任务在代码提交和基础映像更新时自动生成容器映像。 ACR 任务也可运行多步骤任务,使用 YAML 文件来定义相关步骤,以便生成并推送多个容器,并可选择对其进行测试。
先决条件
GitHub 帐户
在 https://github.com 上创建帐户(如果还没有帐户)。 本系列教程使用 GitHub 存储库来演示 ACR 任务中的自动映像生成。
创建示例存储库分支
接下来,使用 GitHub UI 在 GitHub 帐户中创建示例存储库分支。 本教程从存储库的源生成容器映像,下一教程会将提交推送到存储库的分支以启动自动化任务。
创建此存储库的分支: https://github.com/Azure-Samples/acr-build-helloworld-node

克隆分支
创建存储库分支后,克隆分支然后输入包含本地克隆的目录。
使用 git 克隆存储库,将“<your-github-username>”替换为你的 GitHub 用户名 :
git clone https://github.com/<your-github-username>/acr-build-helloworld-node
输入包含源代码的目录:
cd acr-build-helloworld-node
Bash命令解释器
本系列教程中的命令设置为 Bash Shell 的格式。 如果更希望使用 PowerShell、命令提示符或另一种 shell,可能需要相应地调整行延续和环境变量格式。
为 Azure CLI 准备环境
如需在本地运行 CLI 参考命令,请安装 Azure CLI。 如果在 Windows 或 macOS 上运行,请考虑在 Docker 容器中运行 Azure CLI。 有关详细信息,请参阅如何在 Docker 容器中运行 Azure CLI。
如果使用的是本地安装,请使用 az login 命令登录到 Azure CLI。 若要完成身份验证过程,请遵循终端中显示的步骤。 有关其他登录选项,请参阅使用 Azure CLI 登录。
出现提示时,请在首次使用时安装 Azure CLI 扩展。 有关扩展详细信息,请参阅使用 Azure CLI 的扩展。
运行 az version 以查找安装的版本和依赖库。 若要升级到最新版本,请运行 az upgrade。
注意
在可以在由世纪互联运营的 Microsoft Azure 中使用 Azure CLI 之前,请先运行 az cloud set -n AzureChinaCloud 来更改云环境。 若要切换回 Azure 公有云,请再次运行 az cloud set -n AzureCloud。
使用 ACR 任务在 Azure 中生成
现已将源代码拉取到计算机中,请执行以下步骤来创建容器注册表并使用 ACR 任务生成容器映像。
为使执行示例命令更轻松,本系列教程使用 shell 环境变量。 执行以下命令来设置 ACR_NAME 变量。 将“<registry-name>”替换为新容器注册表的唯一名称 。 注册表名称在 Azure 中必须唯一,仅包含小写字母,并且包含 5-50 个字母数字字符。 本教程中创建的其他资源都基于该名称,因此仅需要修改该第一个变量。
注意
必须使用 az acr build 功能来完成本教程的其余部分,目前只有 China East 2 区域支持 Azure 中国世纪互联上的 az acr build 功能。
请注意,在后续步骤中尝试调用 China East 2 之前,请先提前在 az acr build 区域中创建容器注册表。
ACR_NAME=<registry-name>
填充容器注册表环境变量后,现在应能够复制并粘贴本教程中的其余命令,并且无需编辑任何值。 执行以下命令来创建资源组和容器注册表。
RES_GROUP=$ACR_NAME # Resource Group name

az group create --resource-group $RES_GROUP --location chinaeast2
az acr create --resource-group $RES_GROUP --name $ACR_NAME --sku Standard --location chinaeast2
创建注册表后,使用 ACR 任务从示例代码生成容器映像。 执行 az acr build 命令以执行快速任务。
注意
以下示例中使用的 Dockerfile 依赖于 Docker Hub 中的公共基容器映像。 若要在使用公共内容时提高可靠性,请在专用 Azure 容器注册表中导入和管理映像,并将 Dockerfile 更新为使用专门管理的基础映像。 了解有关使用公共映像的详细信息。
az acr build --registry $ACR_NAME --image helloacrtasks:v1 --file /path/to/Dockerfile /path/to/build/context .
az acr build 命令的输出类似于以下示例。 可以看到源代码(“上下文”)已上传到 Azure,同时可以看到 ACR 任务在云中运行的 docker build 操作的详细信息。 由于 ACR 任务使用 docker build 生成映像,因此无需对 Dockerfile 进行任何更改即可立即开始使用 ACR 任务。
Packing source code into tar file to upload...
Sending build context (4.813 KiB) to ACR...
Queued a build with build ID: da1
Waiting for build agent...
2023/11/18 18:31:42 Using acb_vol_01185991-be5f-42f0-9403-a36bb997ff35 as the home volume
2023/11/18 18:31:42 Setting up Docker configuration...
2023/11/18 18:31:43 Successfully set up Docker configuration
2023/11/18 18:31:43 Logging in to registry: myregistry.azurecr.cn
2023/11/18 18:31:55 Successfully logged in
Sending build context to Docker daemon   21.5kB
Step 1/5 : FROM node:15-alpine
15-alpine: Pulling from library/node
Digest: sha256:8dafc0968fb4d62834d9b826d85a8feecc69bd72cd51723c62c7db67c6dec6fa
Status: Image is up to date for node:15-alpine
 ---> a56170f59699
Step 2/5 : COPY . /src
 ---> 88087d7e709a
Step 3/5 : RUN cd /src && npm install
 ---> Running in e80e1263ce9a
npm notice created a lockfile as package-lock.json. You should commit this file.
npm WARN helloworld@1.0.0 No repository field.

up to date in 0.1s
Removing intermediate container e80e1263ce9a
 ---> 26aac291c02e
Step 4/5 : EXPOSE 80
 ---> Running in 318fb4c124ac
Removing intermediate container 318fb4c124ac
 ---> 113e157d0d5a
Step 5/5 : CMD ["node", "/src/server.js"]
 ---> Running in fe7027a11787
Removing intermediate container fe7027a11787
 ---> 20a27b90eb29
Successfully built 20a27b90eb29
Successfully tagged myregistry.azurecr.cn/helloacrtasks:v1
2023/11/18 18:32:11 Pushing image: myregistry.azurecr.cn/helloacrtasks:v1, attempt 1
The push refers to repository [myregistry.azurecr.cn/helloacrtasks]
6428a18b7034: Preparing
c44b9827df52: Preparing
172ed8ca5e43: Preparing
8c9992f4e5dd: Preparing
8dfad2055603: Preparing
c44b9827df52: Pushed
172ed8ca5e43: Pushed
8dfad2055603: Pushed
6428a18b7034: Pushed
8c9992f4e5dd: Pushed
v1: digest: sha256:b038dcaa72b2889f56deaff7fa675f58c7c666041584f706c783a3958c4ac8d1 size: 1366
2023/11/18 18:32:43 Successfully pushed image: myregistry.azurecr.cn/helloacrtasks:v1
2023/11/18 18:32:43 Step ID acb_step_0 marked as successful (elapsed time in seconds: 15.648945)
The following dependencies were found:
- image:
    registry: myregistry.azurecr.cn
    repository: helloacrtasks
    tag: v1
    digest: sha256:b038dcaa72b2889f56deaff7fa675f58c7c666041584f706c783a3958c4ac8d1
  runtime-dependency:
    registry: registry.hub.docker.com
    repository: library/node
    tag: 15-alpine
    digest: sha256:8dafc0968fb4d62834d9b826d85a8feecc69bd72cd51723c62c7db67c6dec6fa
  git: {}

Run ID: da1 was successful after 1m9.970148252s
在接近输出末尾的位置,ACR 任务显示其为映像找到的依赖项。 这使 ACR 任务可在基础映像更新(如基础映像基于 OS 或框架补丁进行更新)时自动化映像生成。 该系列教程稍后会介绍针对基础映像更新的 ACR 任务支持。
部署到 Azure 容器实例
ACR 任务默认将成功生成的映像自动推送到注册表,这样即可立即从注册表部署这些映像。
本部分将创建 Azure Key Vault 和服务主体,然后使用服务主体的凭据将容器部署到 Azure 容器实例 (ACI)。
配置注册表身份验证
所有生产方案都应使用服务主体访问 Azure 容器注册表。 使用服务主体可以提供对容器映像的基于角色的访问控制。 例如,可将服务主体配置为拥有注册表的仅限提取的访问权限。
创建密钥保管库
如果 Azure Key Vault 中没有保管库,请在 Azure CLI 中使用以下命令创建一个保管库。
AKV_NAME=$ACR_NAME-vault

az keyvault create --resource-group $RES_GROUP --name $AKV_NAME
创建服务主体并存储凭据
现在需要创建服务主体,并将其凭据存储在 Key Vault 中。
请使用 az ad sp create-for-rbac 命令创建服务主体,使用 az keyvault secret set 将服务主体的密码存储在保管库中。 对于以下命令,需要 Azure CLI 版本 2.25.0 或更高版本:
在角色分配中使用的正确角色取决于注册表是否已启用 ABAC。
# Create service principal, store its password in AKV (the registry *password*)
ROLE="Container Registry Repository Reader" # For ABAC-enabled registries. For non-ABAC registries, use AcrPull.
az keyvault secret set \
  --vault-name $AKV_NAME \
  --name $ACR_NAME-pull-pwd \
  --value $(az ad sp create-for-rbac \
                --name $ACR_NAME-pull \
                --scopes $(az acr show --name $ACR_NAME --query id --output tsv) \
                --role "$ROLE" \
                --query password \
                --output tsv)
上述命令中的 --role 自变量为服务主体配置内置角色,以授予对注册表的仅拉取访问权限。 在角色分配中使用的正确角色取决于注册表是否 已启用 ABAC,已启用 ABAC 的注册表需要 Container Registry Repository Reader 角色,并且非 ABAC 注册表需要 AcrPull 角色。
若要授予推送和拉取访问权限,请将 --role 参数更改为适用于 ABAC 已启用的注册表的 Container Registry Repository Writer 角色,或适用于未启用 ABAC 的注册表的 AcrPush 角色。
有关 Microsoft Entra ABAC 的详细信息,请参阅 Microsoft Entra 存储库权限。
接下来,将服务主体的 appId(传递给 Azure 容器注册表用于身份验证的“用户名”)存储在保管库中:
# Store service principal ID in AKV (the registry *username*)
az keyvault secret set \
    --vault-name $AKV_NAME \
    --name $ACR_NAME-pull-usr \
    --value $(az ad sp list --display-name $ACR_NAME-pull --query [].appId --output tsv)
现已创建 Azure Key Vault 并在其中存储了两个机密:
-
$ACR_NAME-pull-usr:用作容器注册表用户名的服务主体 ID。 -
$ACR_NAME-pull-pwd:用作容器注册表密码的服务主体密码。
现在,当你或你的应用程序和服务从注册表提取映像时,可以按名称引用这些机密。
使用 Azure CLI 部署容器
将服务主体凭据作为 Azure Key Vault 机密存储后,应用程序和服务可以使用它们来访问专用注册表。
执行以下 az container create 命令来部署容器实例。 该命令使用 Azure Key Vault 中存储的服务主体凭据对容器注册表进行身份验证。
az container create \
    --resource-group $RES_GROUP \
    --name acr-tasks \
    --image $ACR_NAME.azurecr.cn/helloacrtasks:v1 \
    --registry-login-server $ACR_NAME.azurecr.cn \
    --registry-username $(az keyvault secret show --vault-name $AKV_NAME --name $ACR_NAME-pull-usr --query value -o tsv) \
    --registry-password $(az keyvault secret show --vault-name $AKV_NAME --name $ACR_NAME-pull-pwd --query value -o tsv) \
    --dns-name-label acr-tasks-$ACR_NAME \
    --query "{FQDN:ipAddress.fqdn}" \
    --output table
--dns-name-label 值必须在 Azure 中唯一,因此,上述命令会将容器注册表名称追加到容器的 DNS 名称标签。 该命令的输出显示容器的完全限定域名 (FQDN),例如:
FQDN
----------------------------------------------
acr-tasks-myregistry.chinaeast2.azurecontainer.console.azure.cn
记下容器的 FQDN,后续部分将会用到它。
验证部署
若要查看容器的启动过程,请使用 az container attach 命令:
az container attach --resource-group $RES_GROUP --name acr-tasks
az container attach 输出在拉取映像和启动时会首先显示容器状态,然后将本地控制台的 STDOUT 和 STDERR 绑定到容器的 STDOUT 和 STDERR。
Container 'acr-tasks' is in state 'Running'...
(count: 1) (last timestamp: 2023-11-18 18:39:10+00:00) pulling image "myregistry.azurecr.cn/helloacrtasks:v1"
(count: 1) (last timestamp: 2023-11-18 18:39:15+00:00) Successfully pulled image "myregistry.azurecr.cn/helloacrtasks:v1"
(count: 1) (last timestamp: 2023-11-18 18:39:17+00:00) Created container
(count: 1) (last timestamp: 2023-11-18 18:39:17+00:00) Started container
Start streaming logs:
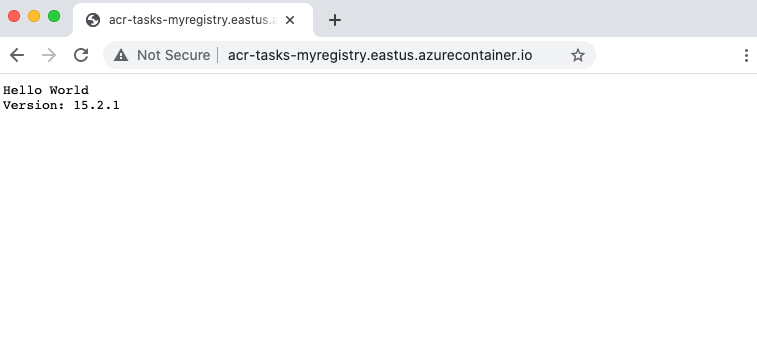
Server running at http://localhost:80
出现 Server running at http://localhost:80 时,在浏览器中导航到容器的 FQDN 以查看正在运行的应用程序。 FQDN 应已在上一部分执行的 az container create 命令的输出中显示。
若要从容器拆离控制台,请按 Control+C。
清理资源
使用 az container delete 命令停止容器实例:
az container delete --resource-group $RES_GROUP --name acr-tasks
若要删除本教程中创建的所有资源,包括容器注册表、密钥保管库和服务主体,请运行以下命令。 但是,本系列的下一个教程也会使用这些资源,因此,如果直接前往下一个教程,则可以保留这些资源。
az group delete --resource-group $RES_GROUP
az ad sp delete --id http://$ACR_NAME-pull
后续步骤
使用快速任务测试内部循环后,请配置一个生成任务,以便在将源代码提交到 Git 存储库时触发容器映像生成: