使用用于 Visual Studio Code 的 Azure IoT 中心扩展创建 IoT 中心
本文介绍了如何使用用于 Visual Studio Code 的 Azure IoT 中心扩展创建 Azure IoT 中心。
备注
建议使用 Azure Az PowerShell 模块与 Azure 交互。 请参阅安装 Azure PowerShell 以开始使用。 若要了解如何迁移到 Az PowerShell 模块,请参阅 将 Azure PowerShell 从 AzureRM 迁移到 Az。
为 Visual Studio Code 安装了 Azure IoT 中心扩展
一个 Azure 订阅:请在开始前创建试用版
一个 Azure 资源组:在 Azure 门户中创建资源组
以下步骤介绍如何在 Visual Studio Code (VS Code) 中创建 IoT 中心:
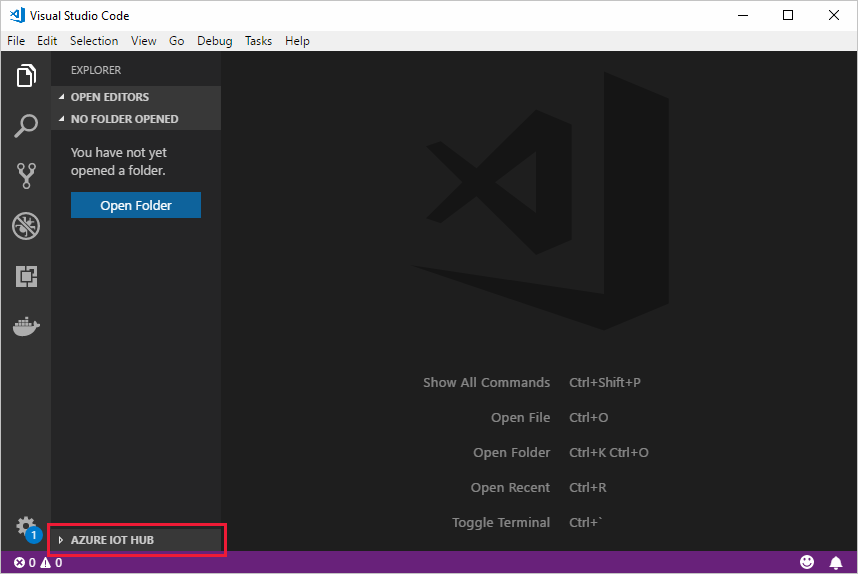
在 VS Code 中,打开“资源管理器”视图。
在资源管理器底部,展开“Azure IoT 中心”部分 。
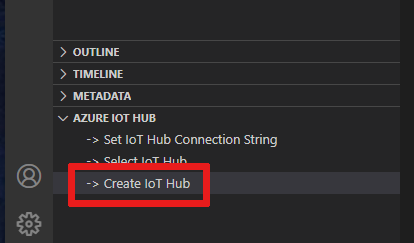
从“Azure IoT 中心”部分的列表中选择“创建 IoT 中心”。
如果未登录到 Azure,右下角会显示一条弹出通知,用于登录 Azure。 选择“登录”,然后按照说明登录到 Azure。
从 VS Code 顶部的命令面板中,选择 Azure 订阅。
选择你的资源组。
选择区域。
选择定价层。
输入 IoT 中心的全局唯一名称,然后选择 Enter 键。
等待几分钟,直到创建好 IoT 中心且“输出”面板中显示确认。
提示
Visual Studio Code 中没有删除 IoT 中心的选项,但你可以在 Azure 门户中删除该中心。
使用用于 Visual Studio Code 的 Azure IoT 中心扩展部署 IoT 中心后,请浏览以下文章:

