Azure IoT 中心是一项完全托管的服务,有助于在数百万台设备和单个解决方案后端之间实现安全可靠的双向通信。
本文介绍如何:
通过 IoT 中心,将云到设备的消息从解决方案后端发送到单个设备
在设备上接收云到设备的消息
注意
本文所述的功能只能用于 IoT 中心的标准层。 有关基本层和标准/免费 IoT 中心层的详细信息,请参阅 为解决方案选择正确的 IoT 中心层和大小。
在本文结束时,请运行两个 Python 控制台应用:
SimulatedDevice.py:将遥测数据从设备发送到 IoT 中心中创建的应用的修改版本,它连接到 IoT 中心并接收云到设备消息。
SendCloudToDeviceMessage.py:将云到设备消息通过 IoT 中心发送到模拟设备应用。
若要详细了解云到设备的消息,请参阅从 IoT 中心发送云到设备的消息。
先决条件
有效的 Azure 帐户。 (如果没有帐户,可以创建一个试用帐户,只需几分钟即可完成。)
已注册的设备。 在 Azure 门户中注册一个。
建议使用 Python 版本 3.7 或更高版本。 请确保根据安装程序的要求,使用 32 位或 64 位安装。 在安装过程中出现提示时,请确保将 Python 添加到特定于平台的环境变量中。
确保已在防火墙中打开端口 8883。 本文中的设备示例使用 MQTT 协议,该协议通过端口 8883 进行通信。 在某些公司和教育网络环境中,此端口可能被阻止。 有关解决此问题的更多信息和方法,请参阅连接到 IoT 中心(MQTT)。
在模拟设备应用上接收消息
在本部分中,将创建一个 Python 控制台应用来模拟设备并从 IoT 中心接收云到设备消息。
在工作目录中的命令提示符下,安装适用于 Python 的 Azure IoT 中心设备 SDK:
pip install azure-iot-device使用文本编辑器,创建一个名为“SimulatedDevice.py” 的文件。
在
import文件的开头添加以下 语句和变量:import time from azure.iot.device import IoTHubDeviceClient RECEIVED_MESSAGES = 0将以下代码添加到 SimulatedDevice.py 文件。 将
{deviceConnectionString}占位符值替换为你在从设备将遥测数据发送到 IoT 中心快速入门中创建的设备的设备连接字符串:CONNECTION_STRING = "{deviceConnectionString}"定义以下函数,用以将接收到的消息打印到控制台:
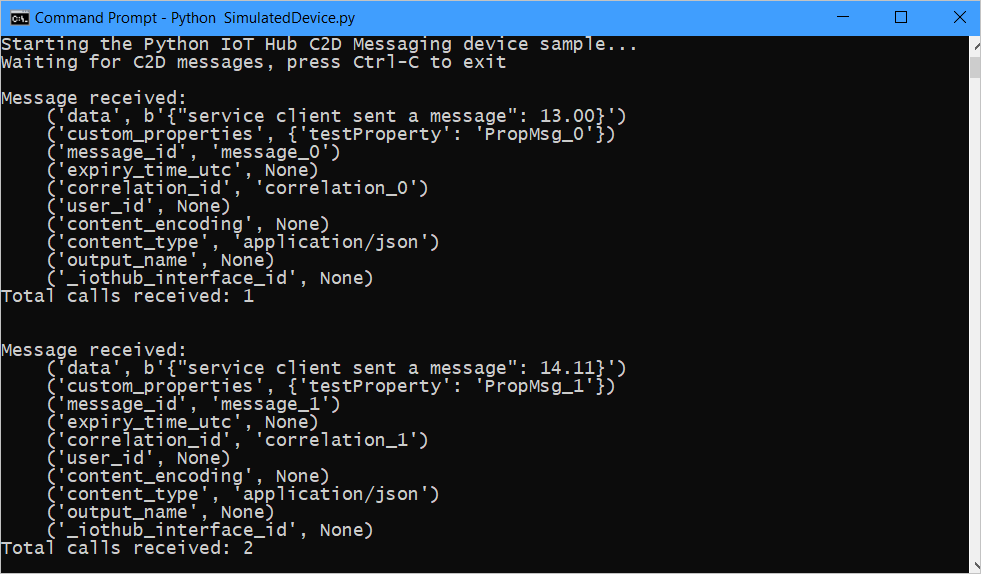
def message_handler(message):
    global RECEIVED_MESSAGES
    RECEIVED_MESSAGES += 1
    print("")
    print("Message received:")

    # print data from both system and application (custom) properties
    for property in vars(message).items():
        print ("    {}".format(property))

    print("Total calls received: {}".format(RECEIVED_MESSAGES))
添加以下代码,用以初始化客户端并等待接收云到设备消息:
def main():
    print ("Starting the Python IoT Hub C2D Messaging device sample...")

    # Instantiate the client
    client = IoTHubDeviceClient.create_from_connection_string(CONNECTION_STRING)

    print ("Waiting for C2D messages, press Ctrl-C to exit")
    try:
        # Attach the handler to the client
        client.on_message_received = message_handler

        while True:
            time.sleep(1000)
    except KeyboardInterrupt:
        print("IoT Hub C2D Messaging device sample stopped")
    finally:
        # Graceful exit
        print("Shutting down IoT Hub Client")
        client.shutdown()
添加以下 main 函数:
if __name__ == '__main__':
    main()
保存并关闭 SimulatedDevice.py 文件。
若要获取有关云到设备消息生命周期以及 IoT 中心如何处理云到设备消息的详细信息,请参阅从 IoT 中心发送云到设备的消息。
获取 IoT 中心连接字符串
本文中,你将创建一个后端服务,用于通过 IoT 中心发送云到设备的消息。 若要发送云到设备消息,服务需要服务连接权限。 默认情况下,每个 IoT 中心都使用名为“服务”的共享访问策略创建,该策略会授予此权限。
若要获取 service策略的 IoT 中心连接字符串,请执行以下步骤:
在 Azure 门户中,选择“资源组”。 选择中心所在的资源组,然后从资源列表中选择中心。
在 IoT 中心的左侧窗格上,选择“共享访问策略”。
在策略列表中,选择“service”策略。
复制“主连接字符串”并保存该值。

有关 IoT 中心共享访问策略和权限的详细信息,请参阅访问控制和权限。
发送云到设备的消息
在本部分中,将创建一个 Python 控制台应用,用于向模拟设备应用发送云到设备消息。 需要设备的设备 ID 和 IoT 中心连接字符串。
在工作目录中,打开命令提示符并安装安装适用于 Python 的 Azure IoT 中心服务 SDK 。
pip install azure-iot-hub使用文本编辑器,创建一个名为“SendCloudToDeviceMessage.py” 的文件。
在
import文件的开头添加以下 语句和变量:import random import sys from azure.iot.hub import IoTHubRegistryManager MESSAGE_COUNT = 2 AVG_WIND_SPEED = 10.0 MSG_TXT = "{\"service client sent a message\": %.2f}"将以下代码添加到 SendCloudToDeviceMessage.py 文件。 将
{iot hub connection string}和{device id}占位符值替换为之前记下的 IoT 中心连接字符串和设备ID:CONNECTION_STRING = "{IoTHubConnectionString}" DEVICE_ID = "{deviceId}"添加以下代码,以便将消息发送到设备:
def iothub_messaging_sample_run():
    try:
        # Create IoTHubRegistryManager
        registry_manager = IoTHubRegistryManager(CONNECTION_STRING)

        for i in range(0, MESSAGE_COUNT):
            print ( 'Sending message: {0}'.format(i) )
            data = MSG_TXT % (AVG_WIND_SPEED + (random.random() * 4 + 2))

            props={}
            # optional: assign system properties
            props.update(messageId = "message_%d" % i)
            props.update(correlationId = "correlation_%d" % i)
            props.update(contentType = "application/json")

            # optional: assign application properties
            prop_text = "PropMsg_%d" % i
            props.update(testProperty = prop_text)

            registry_manager.send_c2d_message(DEVICE_ID, data, properties=props)

        try:
            # Try Python 2.xx first
            raw_input("Press Enter to continue...\n")
        except:
            pass
            # Use Python 3.xx in the case of exception
            input("Press Enter to continue...\n")

    except Exception as ex:
        print ( "Unexpected error {0}" % ex )
        return
    except KeyboardInterrupt:
        print ( "IoT Hub C2D Messaging service sample stopped" )
添加以下 main 函数:
if __name__ == '__main__':
    print ( "Starting the Python IoT Hub C2D Messaging service sample..." )

    iothub_messaging_sample_run()
保存并关闭 SendCloudToDeviceMessage.py 文件。
运行应用程序
现在已准备就绪,可以运行应用程序了。
在工作目录中的命令提示符处,运行以下命令以侦听云到设备消息:
python SimulatedDevice.py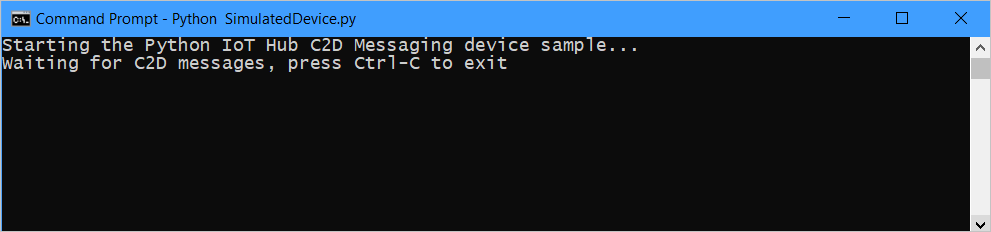
在工作目录中打开一个新的命令提示符,然后运行以下命令以发送云到设备消息:
python SendCloudToDeviceMessage.py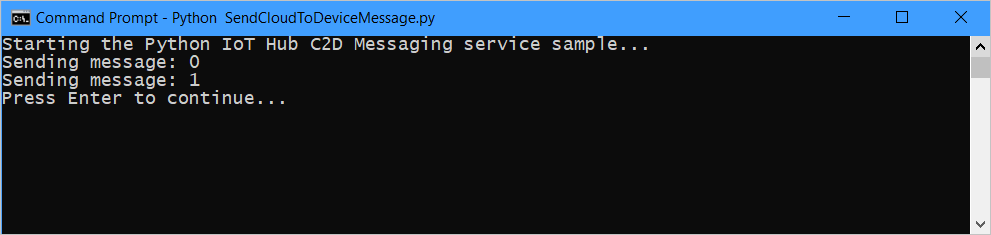
记下设备收到的消息。
后续步骤
本文已介绍了如何发送和接收云到设备的消息。
若要详细了解云到设备的消息,请参阅从 IoT 中心发送云到设备的消息。
若要详细了解 IoT 中心消息格式,请参阅创建和读取 IoT 中心消息。