本教程演示如何使用适用于 Apple 的 Azure 通知中心 SDK,通过 Azure 通知中心向 iOS 应用程序发送推送通知。
本教程涵盖以下步骤:
- 创建示例 iOS 应用。
- 将 iOS 应用连接到 Azure 通知中心。
- 发送测试推送通知。
- 验证应用是否可以接收通知。
可以从 GitHub 下载本教程的完整代码。
先决条件
若要完成本教程,需要满足以下先决条件:
在继续操作之前,请务必完成上一篇教程,了解如何开始使用适用于 iOS 应用的 Azure 通知中心,并在通知中心设置和配置推送凭据。 即使没有 iOS 开发经验,也应该能够按照这些步骤操作。
注释
由于推送通知的配置要求,必须在物理 iOS 设备(iPhone 或 iPad)而不是在 iOS 仿真器上部署和测试推送通知。
将 iOS 应用连接到通知中心
在 Xcode 中创建新的 Xcode 项目,并选择“iOS”选项卡和“应用”模板。

设置新项目的选项时,请务必使用在 Apple 开发人员门户中设置捆绑标识符时使用的同一产品名称和组织标识符。 在新项目窗口中填充的已标识捆绑包应与 Apple 开发者门户中标识的捆绑包相匹配。 需要区分大小写。
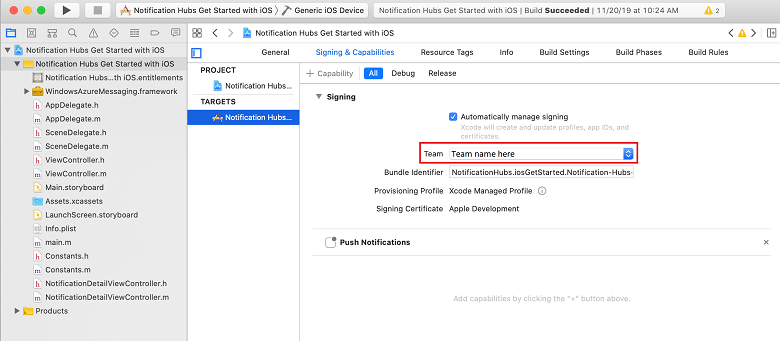
在“项目导航器”的“目标”下选择项目名称,然后选择“签名和功能”选项卡。确保为 Apple 开发人员帐户选择适当的“团队”。 XCode 会根据捆绑标识符自动下拉以前创建的预配配置文件。
如果屏幕未显示在 Xcode 中创建的新预配配置文件,请尝试刷新签名标识的配置文件。 单击菜单栏上的“Xcode”,再依次单击“首选项”、“帐户”选项卡、“查看详细信息”按钮、签名标识,然后单击右下角的刷新按钮。
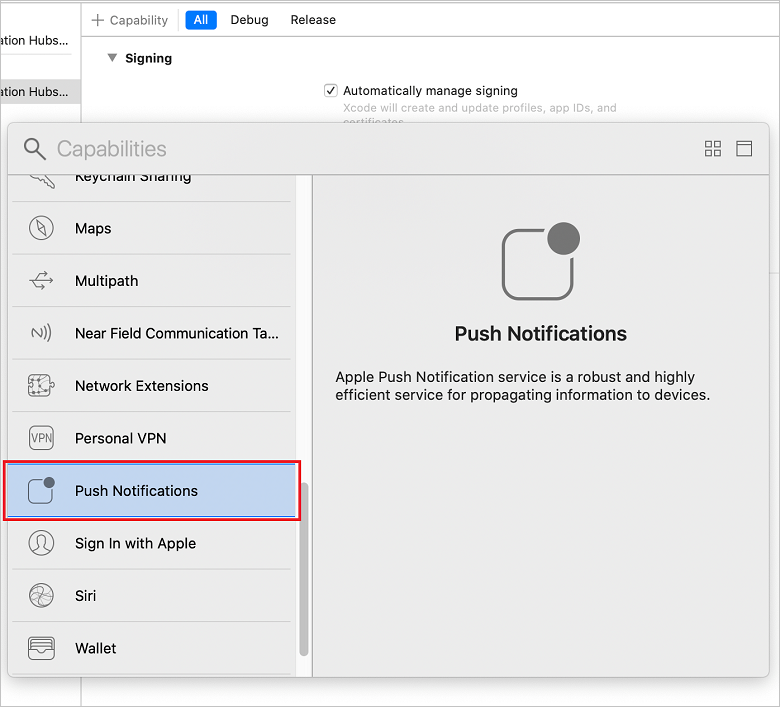
在签名和能力选项卡中,选择+ 能力。 双击“推送通知”以启用它。
添加 Azure 通知中心 SDK 模块。
可以将 Azure 通知中心 SDK 集成到应用,方法是使用 CocoaPod 或者手动将二进制文件添加到项目。
通过 CocoaPod 集成:将以下依赖项添加到 podfile,以便将 Azure 通知中心 SDK 包含到应用中:
pod 'AzureNotificationHubs-iOS'运行 pod install 来安装新定义的 pod,接着打开 .xcworkspace。
如果在运行 pod 安装时看到错误(例如找不到 AzureNotificationHubs-iOS 的规范),请运行 以从 CocoaPod 存储库获取最新的 pod,然后运行 Pod 安装
pod repo update。
通过 Carthage 集成:将以下依赖项添加到 Cartfile,以便将 Azure 通知中心 SDK 包含到应用中:
github "Azure/azure-notificationhubs-ios"- 接下来,更新生成依赖项:
$ carthage update有关使用 Carthage 的详细信息,请参阅 Carthage GitHub 存储库。
通过将二进制文件复制到项目中进行集成:
可以通过将二进制文件复制到项目中来进行集成,如下所示:
下载以 zip 文件形式提供的 Azure 通知中心 SDK 框架,然后将其解压缩。
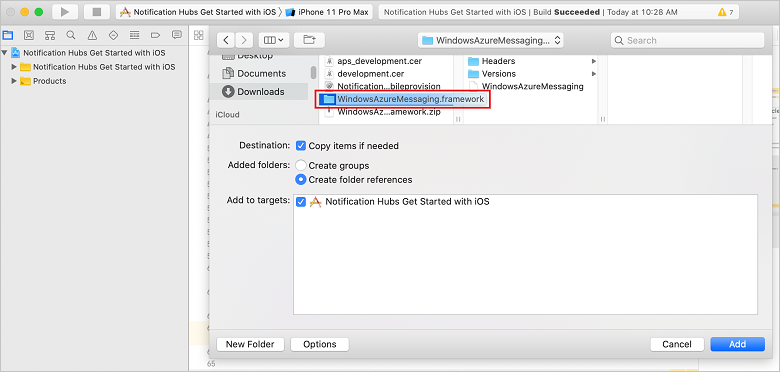
在 Xcode 中,右键单击项目,然后单击“将文件添加到”选项,将 WindowsAzureMessaging.framework 文件夹添加到 Xcode 项目。 选择“选项”,确保选中“根据需要复制项目”,然后单击“添加”。
添加或编辑名为 DevSettings.plist 的文件,其包含两个属性,即 Azure 通知中心的连接字符串 ,和 Azure 通知中心名称
CONNECTION_STRING。在相应的
<string></string>部分中添加连接到 Azure 通知中心的信息。 将字符串字面量占位符--HUB-NAME--和--CONNECTION-STRING--分别替换为之前从门户中获取的中心名称和 DefaultListenSharedAccessSignature:<?xml version="1.0" encoding="UTF-8"?> <!DOCTYPE plist PUBLIC "-//Apple//DTD PLIST 1.0//EN" "http://www.apple.com/DTDs/PropertyList-1.0.dtd"> <plist version="1.0"> <dict> <key>HUB_NAME</key> <string>--HUB-NAME--</string> <key>CONNECTION_STRING</key> <string>--CONNECTION-STRING--</string> </dict> </plist>在同一 AppDelegate.m 文件中,将
didFinishLaunchingWithOptions后面的所有代码替换为以下代码:#import <WindowsAzureMessaging/WindowsAzureMessaging.h> #import <UserNotifications/UserNotifications.h> // Extend the AppDelegate to listen for messages using MSNotificationHubDelegate and User Notification Center @interface AppDelegate () <MSNotificationHubDelegate> @end @implementation AppDelegate @synthesize notificationPresentationCompletionHandler; @synthesize notificationResponseCompletionHandler; - (BOOL)application:(UIApplication *)application didFinishLaunchingWithOptions:(NSDictionary *)launchOptions { NSString *path = [[NSBundle mainBundle] pathForResource:@"DevSettings" ofType:@"plist"]; NSDictionary *configValues = [NSDictionary dictionaryWithContentsOfFile:path]; NSString *connectionString = [configValues objectForKey:@"CONNECTION_STRING"]; NSString *hubName = [configValues objectForKey:@"HUB_NAME"]; if([connectionString length] != 0 && [hubName length] != 0) { [[UNUserNotificationCenter currentNotificationCenter] setDelegate:self]; [MSNotificationHub setDelegate:self]; [MSNotificationHub initWithConnectionString:connectionString withHubName:hubName]; return YES; } NSLog(@"Please setup CONNECTION_STRING and HUB_NAME in DevSettings.plist and restart application"); exit(-1); } - (void)notificationHub:(MSNotificationHub *)notificationHub didReceivePushNotification:(MSNotificationHubMessage *)message { // Send message using NSNotificationCenter with the message NSDictionary *userInfo = [NSDictionary dictionaryWithObject:message forKey:@"message"]; [[NSNotificationCenter defaultCenter] postNotificationName:@"MessageReceived" object:nil userInfo:userInfo]; } @end此代码使用在 DevSettings.plist 中指定的连接信息连接到通知中心。 然后,它向通知中心提供设备令牌,使中心能够发送通知。
创建 NotificationDetailViewController 头文件
与之前的说明类似,添加另一个名为 SetupViewController.h 的头文件。 将新的头文件的内容替换为以下代码:
#import <UIKit/UIKit.h>

NS_ASSUME_NONNULL_BEGIN

@interface SetupViewController : UIViewController

@end

NS_ASSUME_NONNULL_END
添加实现文件 SetupViewController.m。 将该文件的内容替换为以下代码,此代码可实现 UIViewController 方法:
#import "SetupViewController.h"

 static NSString *const kNHMessageReceived = @"MessageReceived";

 @interface SetupViewController ()

 @end

 @implementation SetupViewController

 - (void)viewDidLoad {
     [super viewDidLoad];

     // Listen for messages using NSNotificationCenter
     [[NSNotificationCenter defaultCenter] addObserver:self selector:@selector(didReceivePushNotification:) name:kNHMessageReceived object:nil];
 }

 - (void)dealloc {
     // Clean up subscription to NSNotificationCenter
     [[NSNotificationCenter defaultCenter] removeObserver:self name:kNHMessageReceived object:nil];
 }

 - (void)didReceivePushNotification:(NSNotification *)notification {
     MSNotificationHubMessage *message = [notification.userInfo objectForKey:@"message"];

     // Create UI Alert controller with message title and body
     UIAlertController *alertController = [UIAlertController alertControllerWithTitle:message.title
                          message:message.body
                   preferredStyle:UIAlertControllerStyleAlert];
     [alertController addAction:[UIAlertAction actionWithTitle:@"OK" style:UIAlertActionStyleCancel handler:nil]];
     [self presentViewController:alertController animated:YES completion:nil];

     // Dismiss after 2 seconds
     dispatch_after(dispatch_time(DISPATCH_TIME_NOW, (int64_t)(2.0 * NSEC_PER_SEC)), dispatch_get_main_queue(), ^{
         [alertController dismissViewControllerAnimated:YES completion: nil];
     });

 }

 @end
若要验证是否没有故障,请在设备上生成并运行应用。
发送测试推送通知
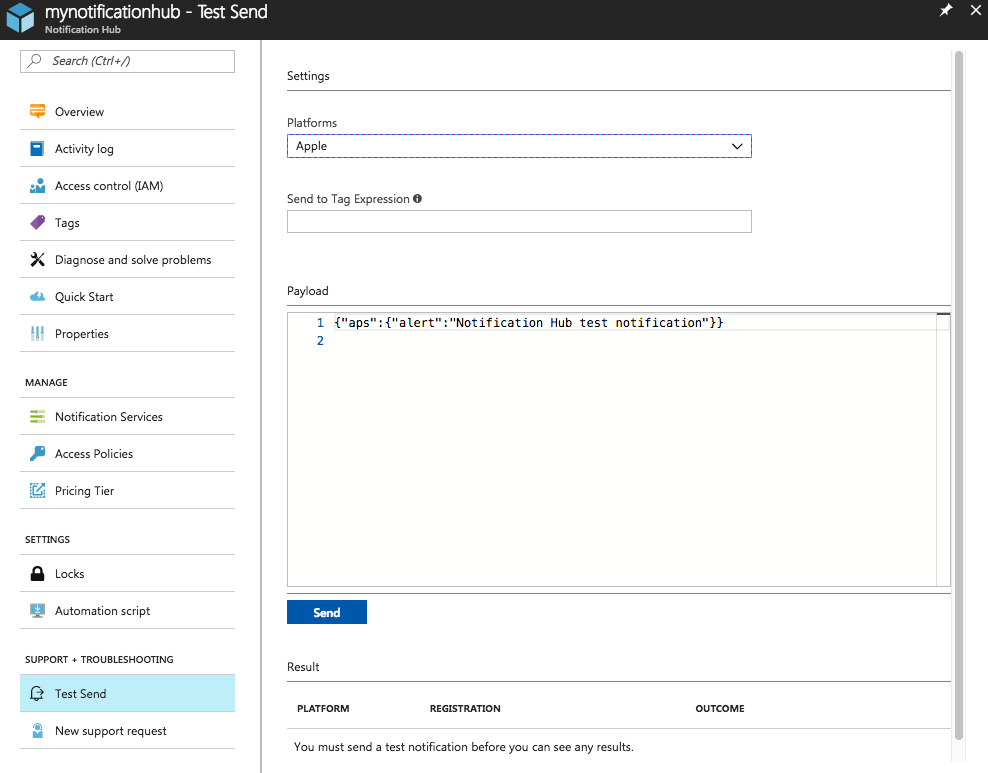
可以在 Azure 门户中使用“测试性发送”选项,在应用中测试通知的发送。 它会向设备发送测试性的推送通知。
通常,推送通知是在后端服务(例如,移动应用,或者使用兼容库的 ASP.NET)中发送的。 如果后端没有可用库,也可使用 REST API 直接发送通知消息。
下面是可能需要查看的有关发送通知的其他教程列表:
- Azure 移动应用:有关如何从通知中心集成的移动应用后端发送通知的示例,请参阅将推送通知添加到 iOS 应用。
- ASP.NET:使用通知中心向用户发送推送通知。
- Azure 通知中心 Java SDK:有关从 Java 发送通知的信息,请参阅 如何通过 Java 使用通知中心 。 这种方法已在 Eclipse for Android 开发环境中进行测试。
- PHP: 如何通过 PHP 使用通知中心。
验证应用可以接收推送通知
要在 iOS 上测试推送通知,必须将应用部署到物理 iOS 设备。 不能使用 iOS 模拟器发送 Apple 推送通知。
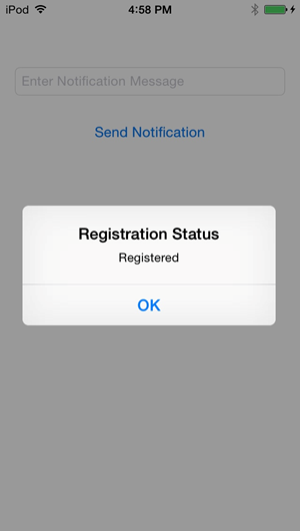
运行应用并验证注册是否成功,并按“确定”。
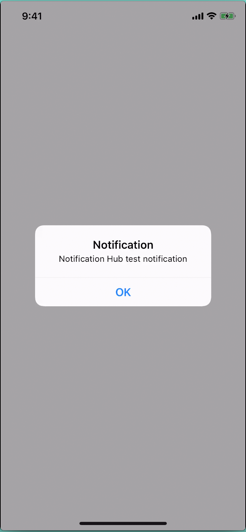
如上一部分所述,接下来可以从 Azure 门户发送测试推送通知。
该推送通知会从给定通知中心发送到所有已注册接收通知的设备。
后续步骤
在这个简单的示例中,已将推送通知广播到所有已注册的 iOS 设备。 要了解如何向特定 iOS 设备发送推送通知,请转到以下教程:
如需了解更多信息,请参阅以下文章: