了解如何使用 Azurite 存储模拟器根据 Azure Blob 存储的专用终结点编写自动测试。
在本地计算机上运行测试
安装最新版 Python
安装并运行 Azurite:
选项 1: 使用 npm 进行安装,然后在本地运行 Azurite
# Install Azurite
npm install -g azurite

# Create an Azurite directory
mkdir c:\azurite

# Launch Azurite locally
azurite --silent --location c:\azurite --debug c:\azurite\debug.log
选项 2: 使用 Docker 运行 Azurite
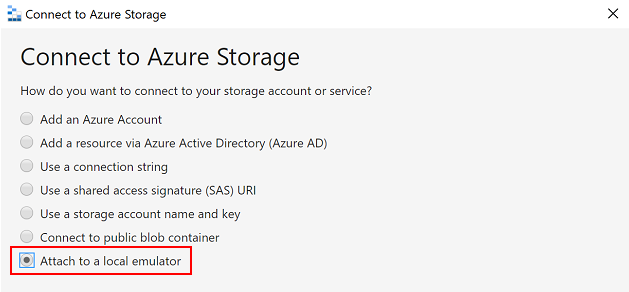
docker run -p 10000:10000 mcr.microsoft.com/azure-storage/azurite azurite-blob --blobHost 0.0.0.0在 Azure 存储资源管理器中,选择“附加到本地模拟器”
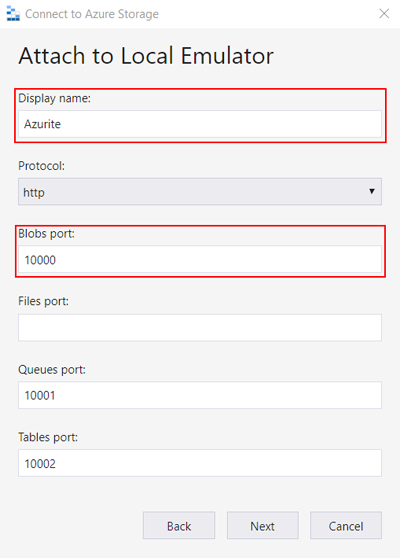
提供用于连接 Azurite 的“显示名称”和“Blob 端口号”,并使用 Azure 存储资源管理器来管理本地 blob 存储 。
创建虚拟 Python 环境
python -m venv .venv创建容器并初始化环境变量。 使用 PyTest conftest.py 文件生成测试。 下面是 conftest.py 文件的示例:
from azure.storage.blob import BlobServiceClient
import os

def pytest_generate_tests(metafunc):
   os.environ['AZURE_STORAGE_CONNECTION_STRING'] = 'DefaultEndpointsProtocol=http;AccountName=devstoreaccount1;AccountKey=Eby8vdM02xNOcqFlqUwJPLlmEtlCDXJ1OUzFT50uSRZ6IFsuFq2UVErCz4I6tq/K1SZFPTOtr/KBHBeksoGMGw==;BlobEndpoint=http://127.0.0.1:10000/devstoreaccount1;'
   os.environ['STORAGE_CONTAINER'] = 'test-container'

   # Create a container for Azurite for the first run
   blob_service_client = BlobServiceClient.from_connection_string(os.environ.get("AZURE_STORAGE_CONNECTION_STRING"))
   try:
      blob_service_client.create_container(os.environ.get("STORAGE_CONTAINER"))
   except Exception as e:
      print(e)
注意
为
AZURE_STORAGE_CONNECTION_STRING显示的值是 Azurite 的默认值,它不是私钥。安装 requirements.txt 文件中列出的依赖项
pip install -r requirements.txt运行测试:
python -m pytest ./tests
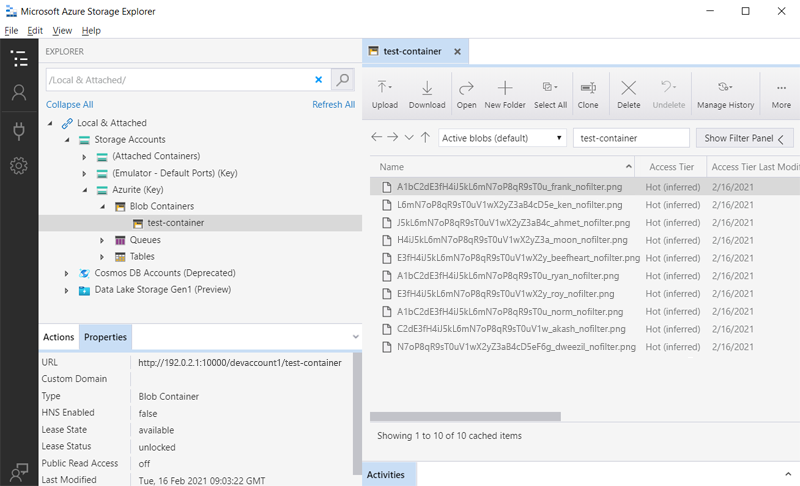
运行测试后,可使用 Azure 存储资源管理器查看 Azurite blob 存储中的文件。
在 Azure Pipelines 上运行测试
在本地运行测试后,确保测试在 Azure Pipelines 上通过。 使用 Docker Azurite 映像作为 Azure 上的托管代理,或使用 npm 安装 Azurite。 以下 Azure Pipelines 示例使用 npm 来安装 Azurite。
trigger:
- master

steps:
- task: UsePythonVersion@0
  displayName: 'Use Python 3.7'
  inputs:
    versionSpec: 3.7

- bash: |
    pip install -r requirements_tests.txt
  displayName: 'Setup requirements for tests'

- bash: |
    sudo npm install -g azurite
    sudo mkdir azurite
    sudo azurite --silent --location azurite --debug azurite\debug.log &
  displayName: 'Install and Run Azurite'

- bash: |
    python -m pytest --junit-xml=unit_tests_report.xml --cov=tests --cov-report=html --cov-report=xml ./tests
  displayName: 'Run Tests'

- task: PublishCodeCoverageResults@1
  inputs:
    codeCoverageTool: Cobertura
    summaryFileLocation: '$(System.DefaultWorkingDirectory)/**/coverage.xml'
    reportDirectory: '$(System.DefaultWorkingDirectory)/**/htmlcov'

- task: PublishTestResults@2
  inputs:
    testResultsFormat: 'JUnit'
    testResultsFiles: '**/*_tests_report.xml'
    failTaskOnFailedTests: true
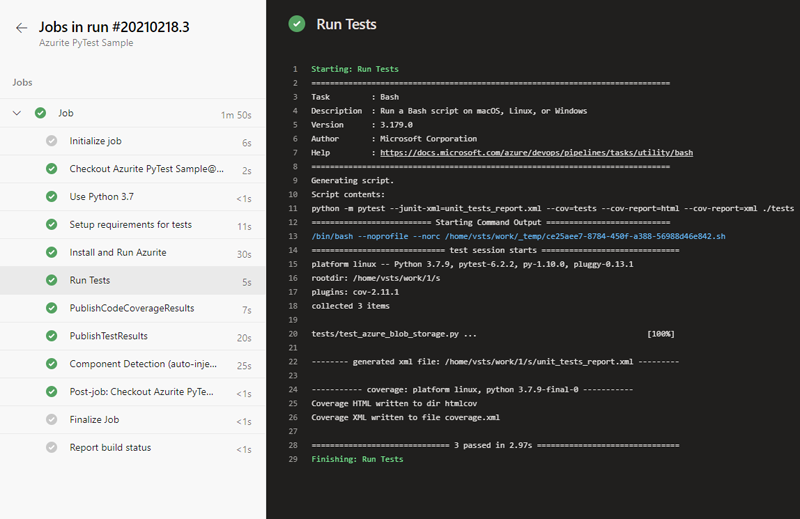
运行 Azure Pipelines 测试后,应看到类似如下的输出: