Note
Access to this page requires authorization. You can try signing in or changing directories.
Access to this page requires authorization. You can try changing directories.
APPLIES TO: All API Management tiers
In this tutorial, you learn about configuring policies to protect or transform your API. Policies are a collection of statements that are run sequentially on the request or response of an API that modify the API's behavior.
For example, you might want to set a custom response header. Or, configure a rate limit policy to protect your backend API, so developers don't overuse the API. These examples are a simple introduction to API Management policies. For more policy options, see API Management policies.
Note
By default, API Management configures a global forward-request policy. The forward-request policy is needed for the gateway to complete a request to a backend service.
In this tutorial, you learn how to:
- Transform an API to set a custom response header
- Protect an API by adding a rate limit policy, or throttling
- Test the transformations

Prerequisites
- Learn the Azure API Management terminology.
- Understand the concept of policies in Azure API Management.
- Complete the following quickstart: Create an Azure API Management instance. For this tutorial, we recommend that you use one of the classic or v2 tiers, for example, the Developer tier or the Basic v2 tier. The Consumption tier doesn't support all policies used in this tutorial.
- Complete the following tutorial: Import and publish your first API.
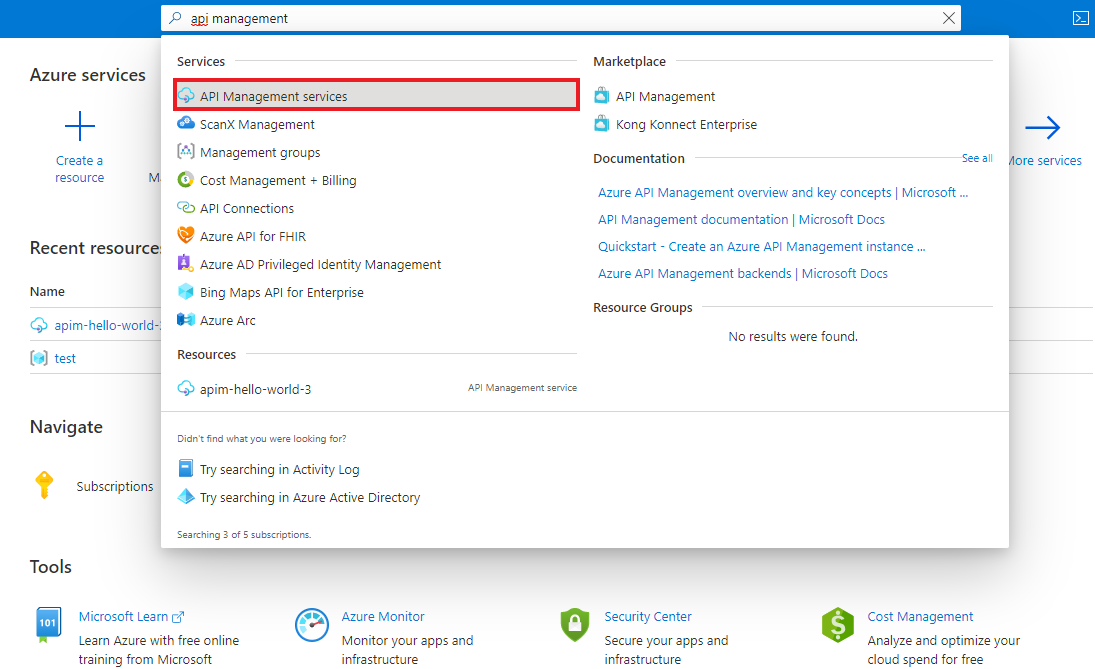
Go to your API Management instance
In the Azure portal, search for and select API Management services:
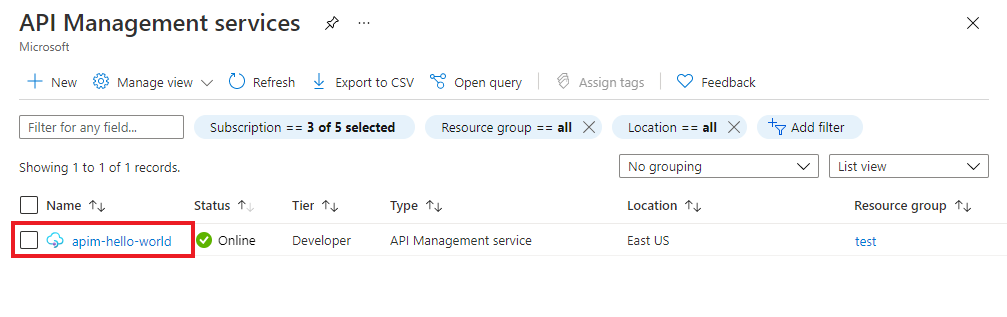
On the API Management services page, select your API Management instance:


Test the original response
To see the original response:
- In your API Management service instance, select APIs > APIs.
- From your API list, select Swagger Petstore.
- At the top of the screen, select Test.
- Select the GET Finds Pets by status operation, and optionally select a different value of the status Query parameter.
- Select Send.
The original API response should look similar to the following response:

Transform an API to add a custom response header
API Management includes several transformation policies that you can use to modify request or response payloads, headers, or status codes. In this example, you set a custom response header in the API response.
Set the transformation policy
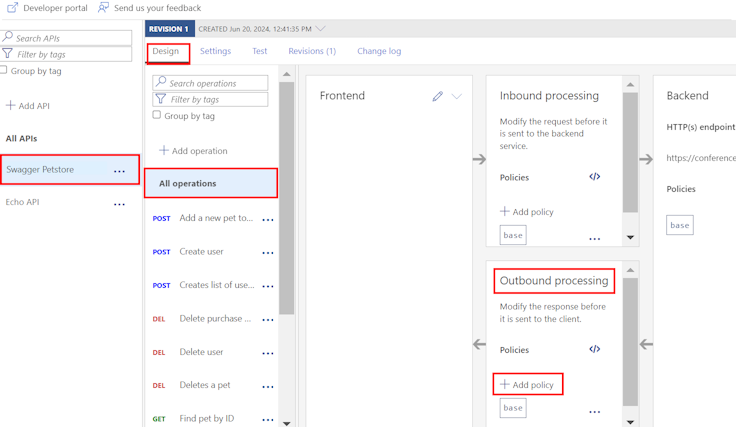
This section shows you how to configure a custom response header using the set-header policy. Here you use a form-based policy editor that simplifies the policy configuration.
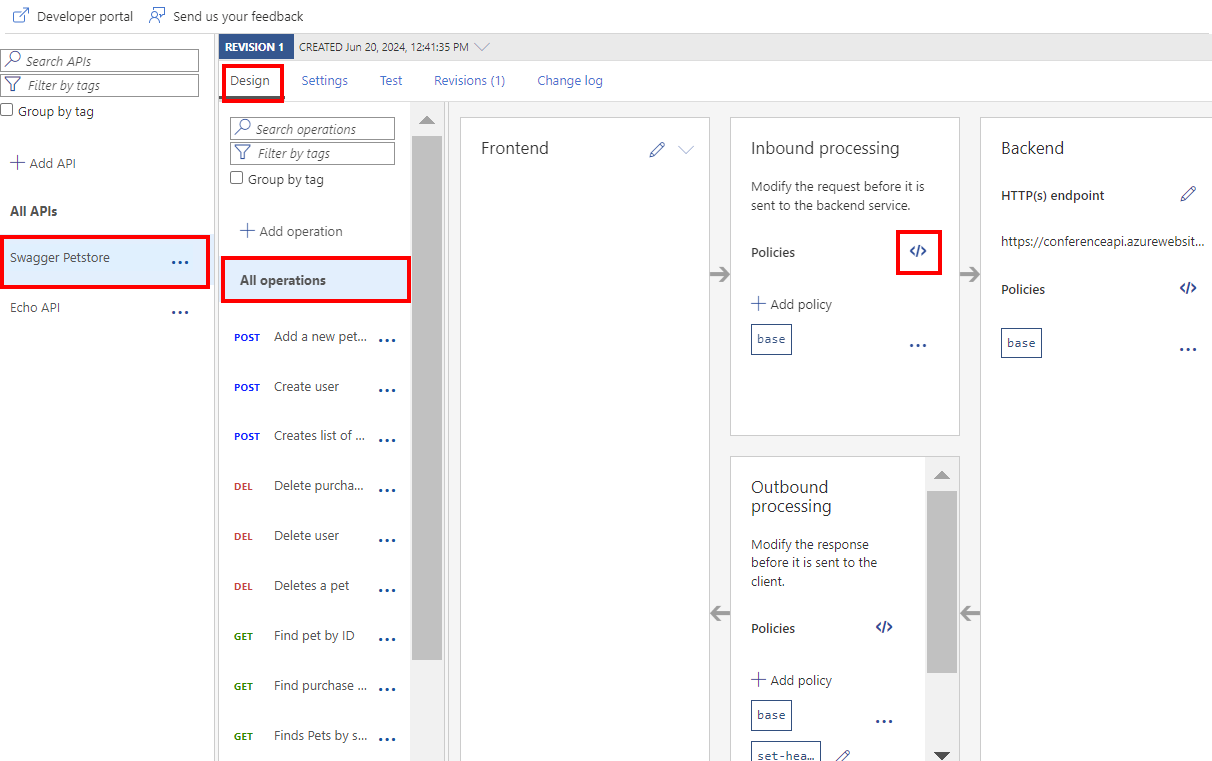
Select Swagger Petstore > Design > All operations.
In the Outbound processing section, select + Add policy.
In the Add outbound policy window, select Set headers.
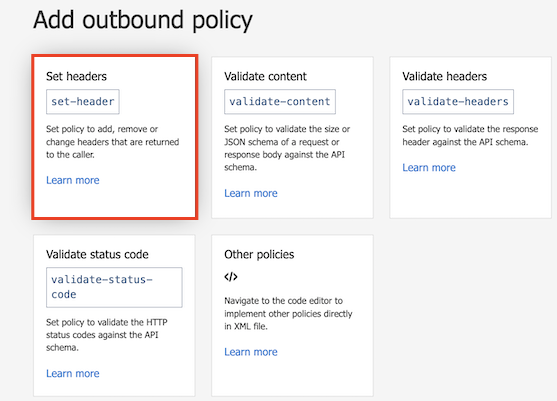
To configure the Set headers policy:
- Under Name, enter Custom.
- Under Value, select + Add value. Enter My custom value.
- Select Save.
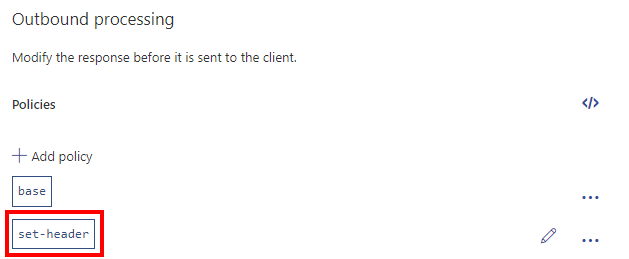
After configuration, a set-header policy element appears in the Outbound processing section.

Protect an API by adding rate limit policy
This section shows how to add protection to your backend API by configuring rate limits, so that developers don't overuse the API. This example shows how to configure the rate-limit-by-key policy using the code editor. In this example, the limit is set to three calls per 15 seconds. After 15 seconds, a developer can retry calling the API.
Note
This policy isn't supported in the Consumption tier.
Select Swagger Petstore > Design > All operations.
In the Inbound processing section, select the code editor (</>) icon.
Position the cursor inside the
<inbound>element on a blank line. Then, select Show snippets at the top-right corner of the screen.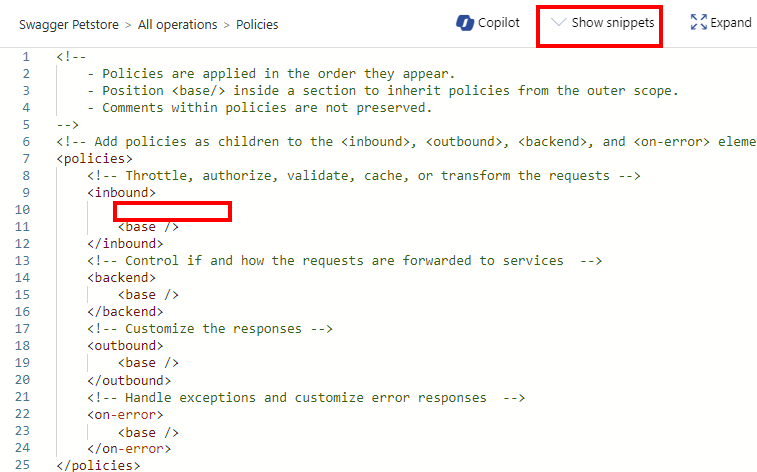
In the right window, under Access restriction policies, select Limit call rate per key.
The
<rate-limit-by-key />element is added at the cursor.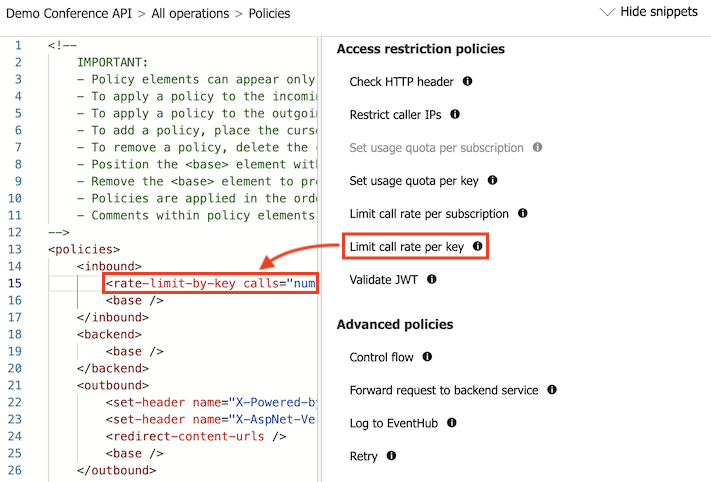
Modify your
<rate-limit-by-key />code in the<inbound>element to the following code. Then select Save.<rate-limit-by-key calls="3" renewal-period="15" counter-key="@(context.Subscription.Id)" />

Test the transformations
At this point, if you look at the code in the code editor, your policies look like the following code:
<policies>
     <inbound>
         <rate-limit calls="3" renewal-period="15" counter-key="@(context.Subscription.Id)" />
         <base />
     </inbound>
     <outbound>
         <set-header name="Custom" exists-action="override">
             <value>"My custom value"</value>
           </set-header>
         <base />
     </outbound>
     <on-error>
         <base />
     </on-error>
 </policies>
The rest of this section tests policy transformations that you set in this article.
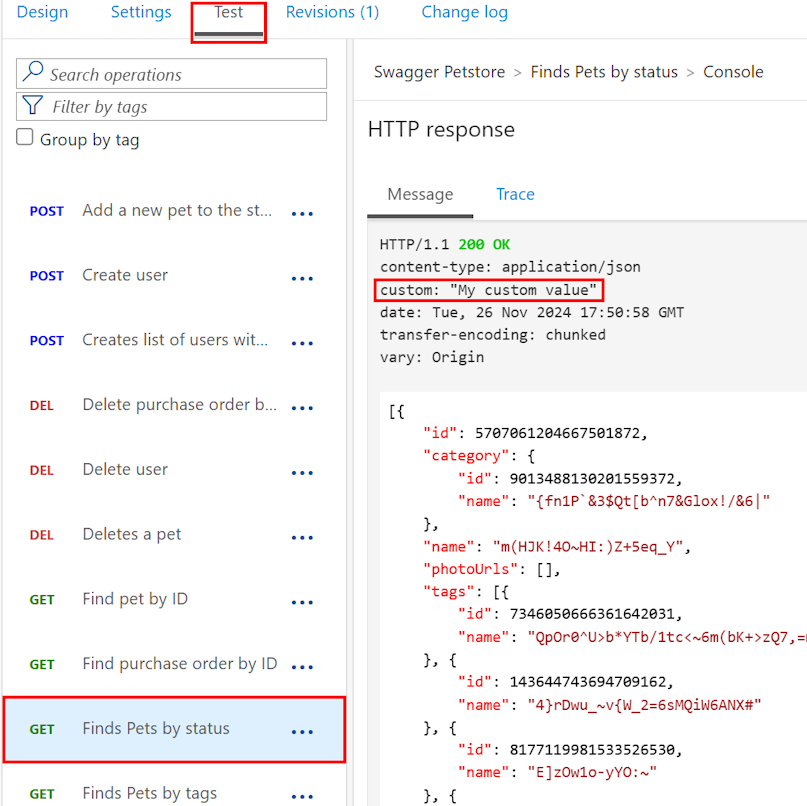
Test the custom response header
Select Swagger Petstore > Test.
Select the GET Finds Pets by status operation, and optionally select a different value of the status Query parameter. Select Send.
As you can see, the custom response header is added:
Test the rate limit
Select Swagger Petstore > Test.
Select the GET Finds Pets by status operation. Select Send several times in a row.
After sending too many requests in the configured period, you get the 429 Too Many Requests response.
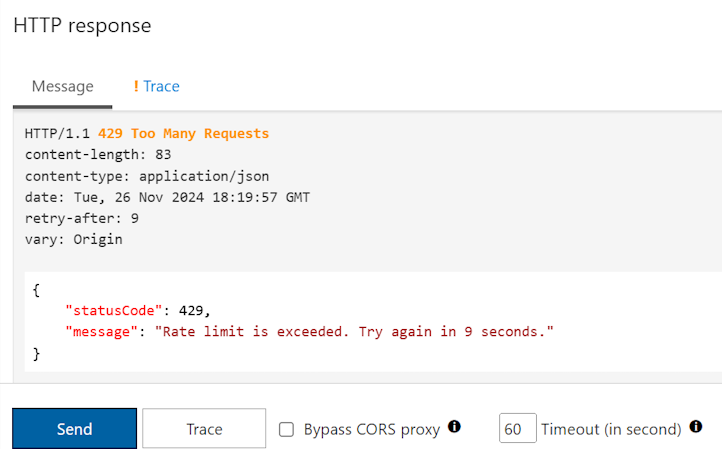
Wait for 15 seconds or more and then select Send again. This time you should get a 200 OK response.
Summary
In this tutorial, you learned how to:
- Transform an API to set a custom response header
- Protect an API by adding a rate limit policy
- Test the transformations
Next step
Advance to the next tutorial: