Note
Access to this page requires authorization. You can try signing in or changing directories.
Access to this page requires authorization. You can try changing directories.
This tutorial introduces you to Azure Resource Manager templates (ARM templates). It shows you how to create a starter template and deploy it to Azure. It teaches you about the template structure and the tools you need to work with templates. This instruction takes 12 minutes to complete, but the actual finish time varies based on how many tools you need to install.
This tutorial is the first of a series. As you progress through the series, you modify the starting template, step by step, until you explore all of the core parts of an ARM template. These elements are the building blocks for more complex templates. We hope by the end of the series you're confident in creating your own templates and ready to automate your deployments with templates.
If you want to learn about the benefits of using templates and why you should automate deployments with templates, see ARM template overview.
If you don't have a Azure subscription, create a Trial before you begin.
Tip
If you're new to ARM templates, you might consider learning Bicep instead. Bicep is a new language that offers the same capabilities as ARM templates but with an easier-to-use syntax. To start learning Bicep, see Quickstart: Create Bicep files with Visual Studio Code.
Get tools
Let's start by making sure you have the tools you need to create and deploy templates. Install these tools on your local machine.
Editor
Templates are JavaScript Object Notation (JSON) files. To create templates, you can use Visual Studio Code.
Command-line deployment
You also need either Azure PowerShell or Azure Command-Line Interface (CLI) to deploy the template. If you use Azure CLI, you need to have version 2.37.0 or later. For the installation instructions, see:
- Install Azure PowerShell
- Install Azure CLI on Windows
- Install Azure CLI on Linux
- Install Azure CLI on macOS
After installing either Azure PowerShell or Azure CLI, make sure you sign in for the first time. For help, see Sign in - PowerShell or Sign in - Azure CLI.
Important
If you're using Azure CLI, make sure you have version 2.37.0 or later. If you're using Azure PowerShell, make sure you have version 7.2.4 or later. The commands shown in this tutorial don't work if you're using earlier versions. To check your installed version, use: az --version.
Okay, you're ready to start learning about templates.
Create your first template
Open Visual Studio Code.
From the File menu, select New File to create a new file.
From the File menu, select Save As.
Name the file azuredeploy and select the json file extension. The complete name of the file is azuredeploy.json.
Save the file to your workstation. Select a path that's easy to remember because you need to provide that path later when deploying the template.
Copy and paste the following JSON into the file:
{
  "$schema": "https://schema.management.azure.com/schemas/2019-04-01/deploymentTemplate.json#",
  "contentVersion": "1.0.0.0",
  "resources": []
}
Here's what your Visual Studio Code environment looks like:
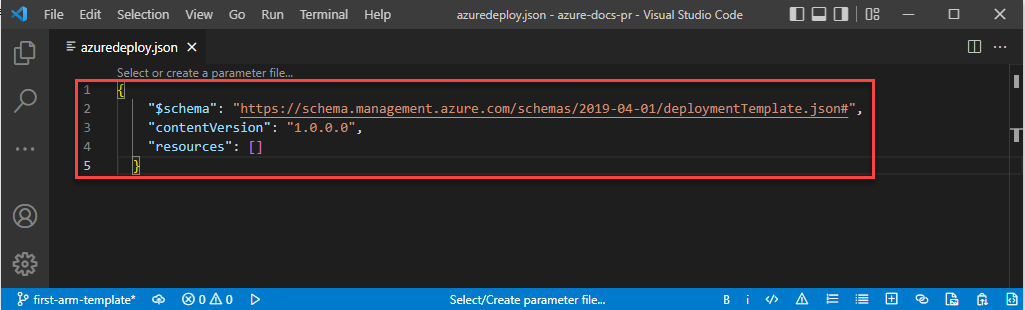
This template doesn't deploy any resources. We're starting with a blank template so you can get familiar with the steps to deploy a template while minimizing the chance of something going wrong.
The JSON file has these elements:
$schema: Specifies the location of the JSON schema file. The schema file describes the properties that are available within a template. The schema, for example, definesresourcesas one of the valid properties for a template. Don't worry that the date for the schema is 2019-04-01. This schema version is up to date and includes all of the latest features. The schema date hasn't been changed because there have been no breaking changes since its introduction.contentVersion: Specifies the version of the template, such as 1.0.0.0. You can provide any value for this element. Use this value to document significant changes in your template. When you deploy resources using the template, you can use this value to make sure you're using the right template.resources: Contains the resources you want to deploy or update. Currently, it's empty, but you can add resources later.
Save the file.
Congratulations, you've created your first template.
Sign in to Azure
To start working with Azure PowerShell or Azure CLI, sign in with your Azure credentials.
Select the tabs in the following code sections to pick between Azure PowerShell and Azure CLI. The CLI examples in this article are written for the Bash shell.
Connect-AzAccount -Environment AzureChinaCloud
If you have multiple Azure subscriptions, choose the subscription you want to use. Replace SubscriptionName with your subscription name. You can also use your subscription ID instead of your subscription name.
Set-AzContext SubscriptionName
Create resource group
When you deploy a template, you can specify a resource group to contain the resources. Before running the deployment command, create the resource group with either the Bash Azure CLI or Azure PowerShell.
Note
Samples for the Azure CLI are written for the bash shell. To run this sample in Windows PowerShell or the Command Prompt, you may need to remove the back slashes and write the command as one line such as:
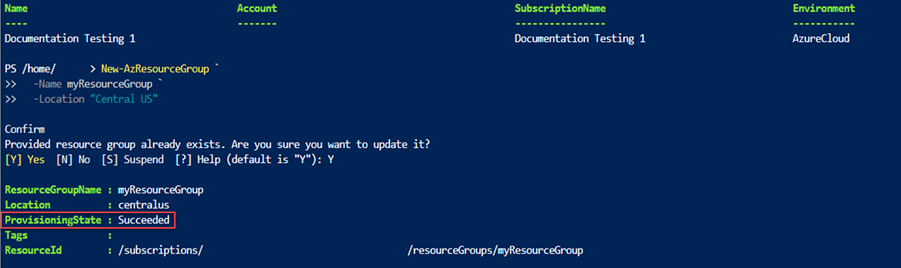
New-AzResourceGroup `
  -Name myResourceGroup `
  -Location "China North 2"
Deploy template
To deploy the template, use either Azure CLI or Azure PowerShell. Use the resource group you created. Give a name to the deployment so you can easily identify it in the deployment history. For convenience, also create a variable that stores the path to the template file. This variable makes it easier for you to run the deployment commands because you don't have to retype the path every time you deploy. Replace {provide-the-path-to-the-template-file} and the curly braces {} with the path to your template file.
$templateFile = "{provide-the-path-to-the-template-file}"
New-AzResourceGroupDeployment `
  -Name blanktemplate `
  -ResourceGroupName myResourceGroup `
  -TemplateFile $templateFile
The deployment command returns results. Look for ProvisioningState to see whether the deployment succeeded.

Note
If the deployment fails, use the verbose switch to get information about the resources being created. Use the debug switch to get more information for debugging.
Verify deployment
You can verify the deployment by exploring the resource group from the Azure portal.
Sign in to the Azure portal.
From the left menu, select Resource groups.
Check the box to the left of myResourceGroup and select myResourceGroup.
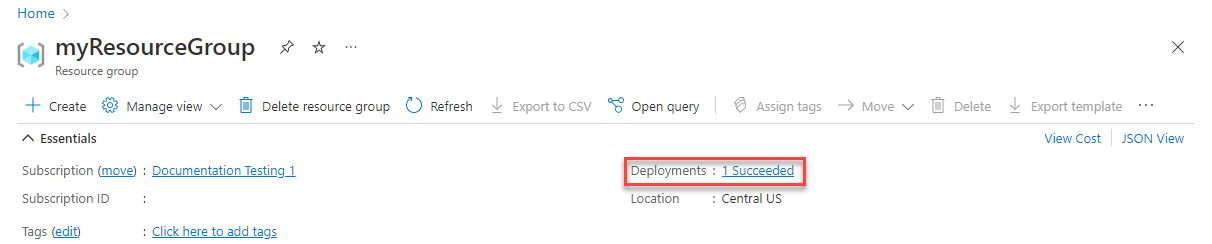
Select the resource group you created in the earlier procedure. The default name is myResourceGroup. The resource group doesn't have any resources yet because you deployed a blank template.
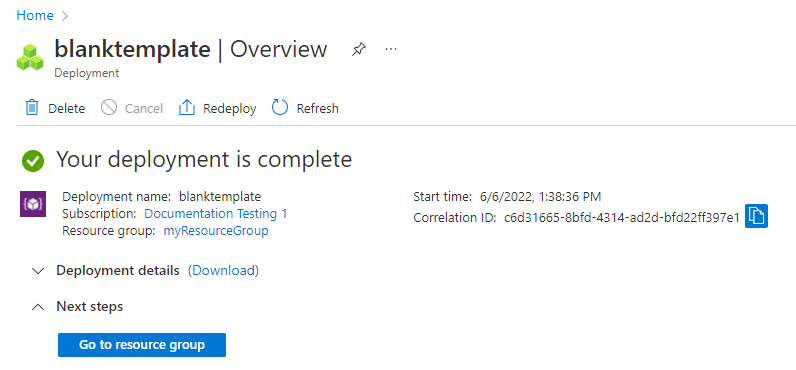
Notice in the middle of the overview, in the Essentials section, the page displays the deployment status next to Deployments. Select 1 Succeeded.
You see a history of deployment for the resource group. Check the box to the left of blanktemplate and select blanktemplate.
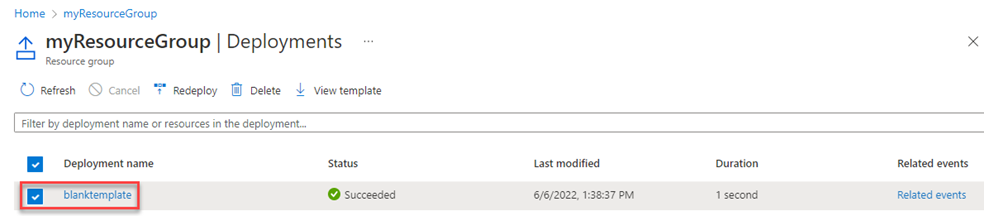
You see a summary of the deployment. In this case, there's not a lot to see because no resources are deployed. Later in this series you might find it helpful to review the summary in the deployment history. Notice on the left you can see inputs, outputs, and the template that the deployment used.
Clean up resources
If you're moving on to the next tutorial, you don't need to delete the resource group.
If you're stopping now, you might want to delete the resource group.
From the Azure portal, select Resource groups from the left menu.
Type the resource group name in the Filter for any field... text field.
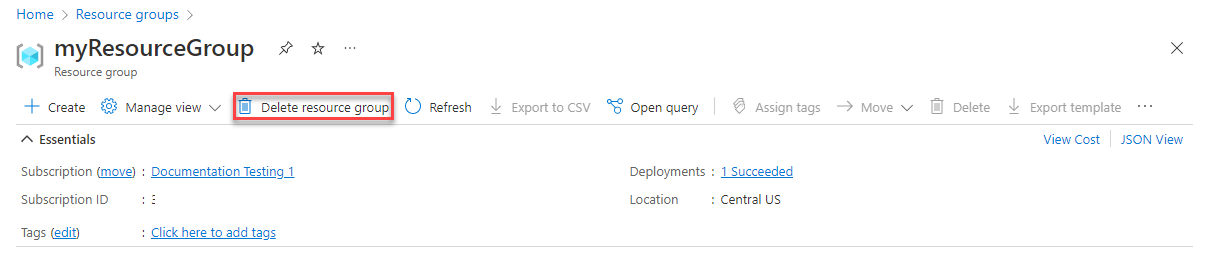
Check the box next to myResourceGroup and select myResourceGroup or your resource group name.
Select Delete resource group from the top menu.
Next steps
You created a simple template to deploy to Azure. In the next tutorial, you can learn how to add a storage account to the template and deploy it to your resource group.