Note
Access to this page requires authorization. You can try signing in or changing directories.
Access to this page requires authorization. You can try changing directories.
Applies to:
Azure SQL Managed Instance
Server trust group (also known as SQL trust group) is a concept used for managing trust between instances in Azure SQL Managed Instance. By creating a group, a certificate-based trust is established between its members. This trust can be used for different cross-instance scenarios. Removing servers from the group or deleting the group removes the trust between the servers. To create or delete a server trust group, the user needs to have write permissions on the managed instance. Server trust group is an Azure Resource Manager object, which has been labeled as SQL trust group in Azure portal.
Set up group
Server trust group can be set up via Azure PowerShell or Azure CLI.
To create a server trust group by using the Azure portal, follow these steps:
Go to the Azure portal.
Navigate to Azure SQL Managed Instance that you plan to add to a server trust group.
On the Security settings, select the SQL trust groups tab.
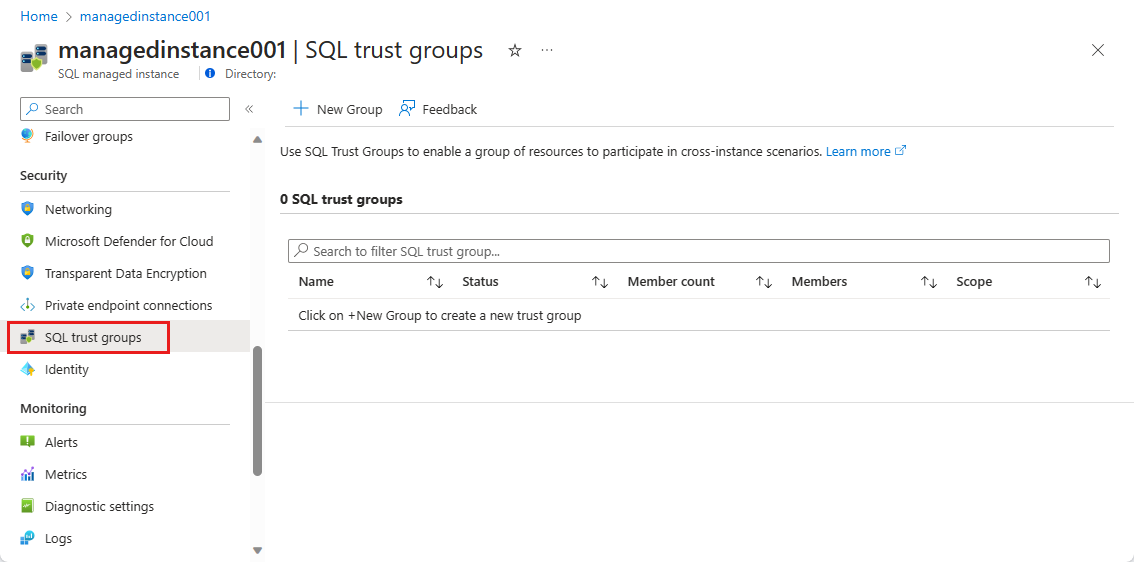
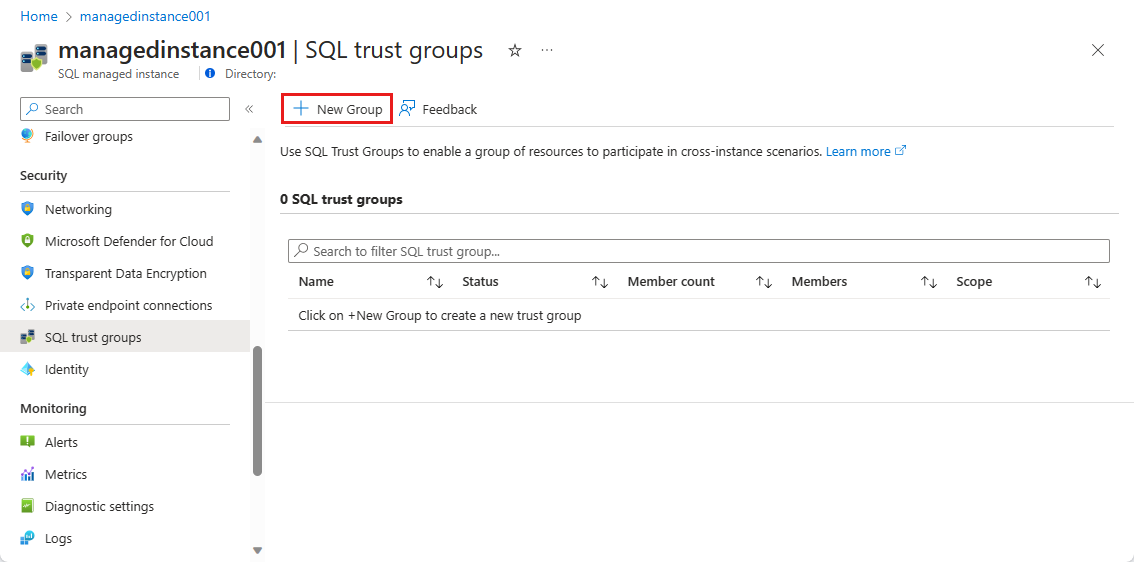
On the SQL trust groups configuration page, select the New Group icon.
On the SQL trust group, create pane set the Group name. It needs to be globally unique in its Azure region. Trust scope defines the type of cross-instance scenario that is enabled with the server trust group. Trust scope is fixed - all available functionalities are preselected and this can't be changed. Select Subscription and Resource group to choose the managed instances that will be members of the group.
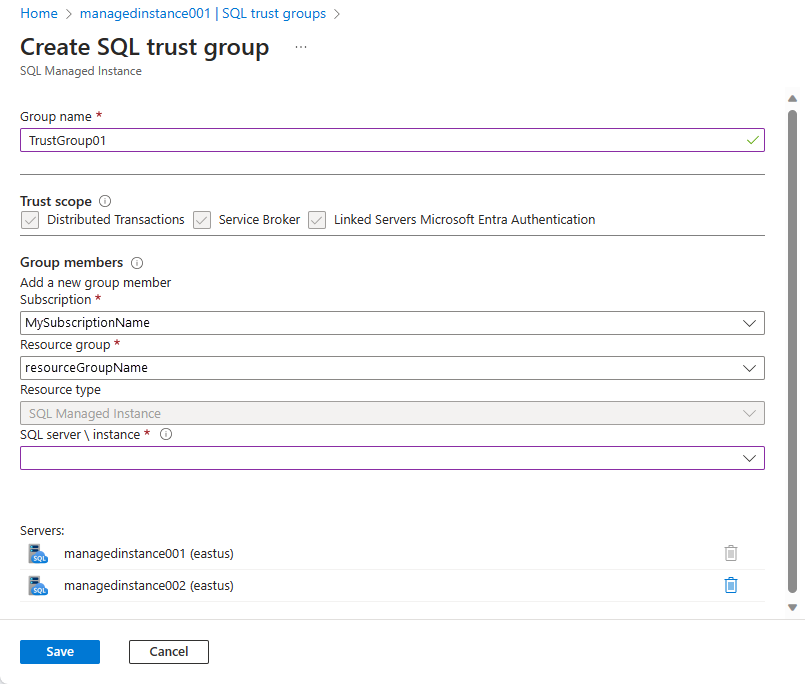
After all required fields are populated, select Save.
Edit group
To edit a server trust group, follow these steps:
Go to Azure portal.
Navigate to a managed instance that belongs to the trust group.
On the Security settings select the SQL trust groups tab.
Select the trust group you want to edit.
Click Configure group.
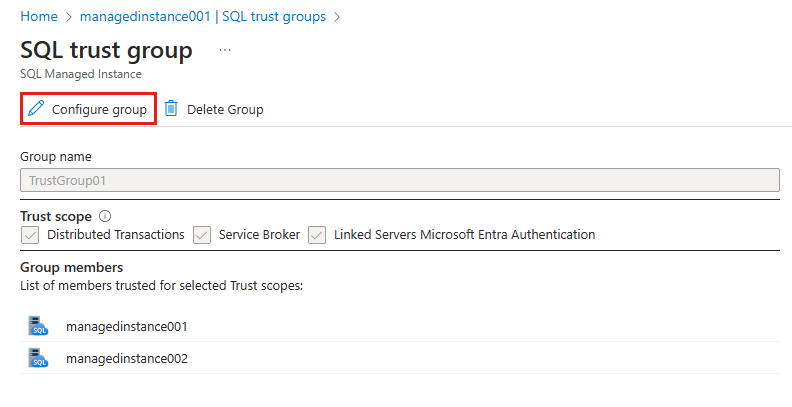
Add or remove managed instances from the group.
Click Save to confirm choice or Cancel to abandon changes.
Delete group
To delete a server trust group, follow these steps:
Go to the Azure portal.
Navigate to a managed instance that belongs to the SQL trust group.
On the Security settings, select the SQL trust groups tab.
Select the trust group you want to delete.
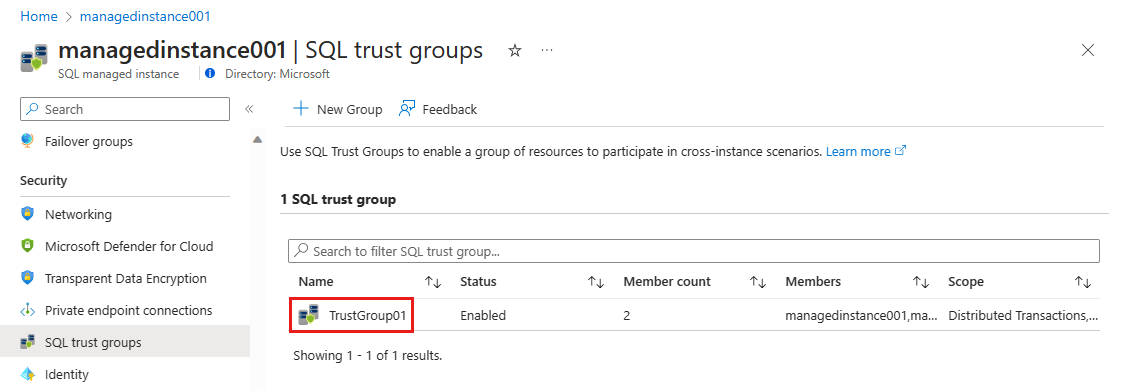
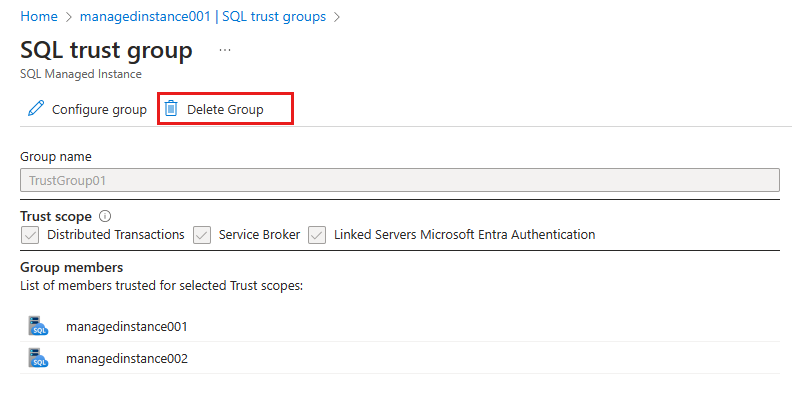
Select Delete group.
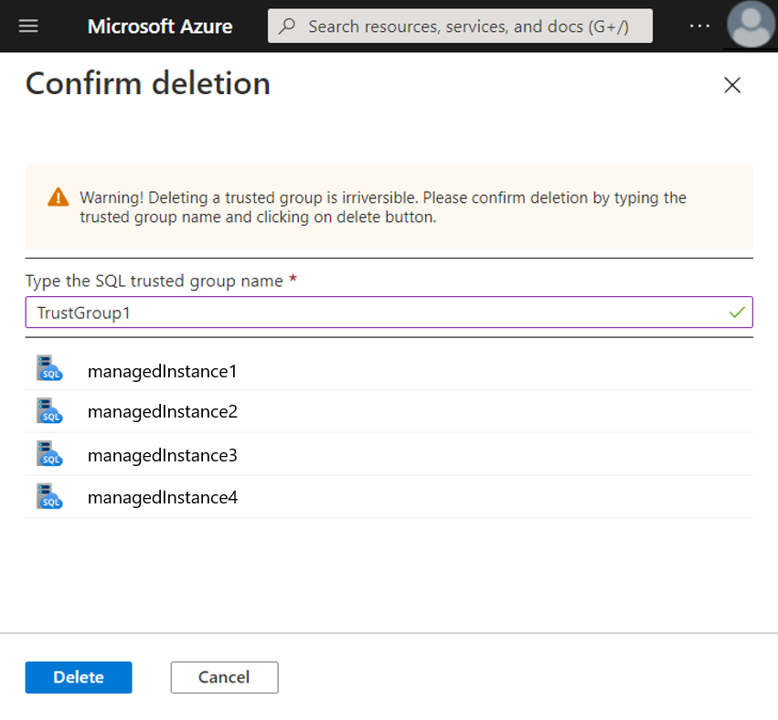
Type in the SQL trust group name to confirm deletion and select Delete.
Note
Deleting the SQL trust group might not immediately remove the trust between the two managed instances. Trust removal can be enforced by invoking a failover of managed instances. Check the Known issues for the latest updates on this.
Limitations
Following limitations apply to Server Trust Groups:
- Group can contain only instances of Azure SQL Managed Instance.
- Trust scope can't be changed when a group is created or modified.
- The name of the server trust group must be unique for its subscription, resource group, and region.
Next steps
- For more information about distributed transactions in Azure SQL Managed Instance, see Distributed transactions.
- For release updates and known issues state, see What's new?.