Note
Access to this page requires authorization. You can try signing in or changing directories.
Access to this page requires authorization. You can try changing directories.
APPLIES TO:
MongoDB
This quickstart demonstrates how to:
- Create an Azure Cosmos DB API for MongoDB account
- Build a product catalog web API using the MongoDB .NET driver
- Import sample data
Prerequisites to run the sample app
Latest Visual Studio with the Azure development workload. You can get started with the free Visual Studio Community IDE. Enable the Azure development workload during Visual Studio setup.
An Azure account with an active subscription. Create an Azure account.
Create a database account
In a new browser window, sign in to the Azure portal.
In the left menu, select Create a resource.

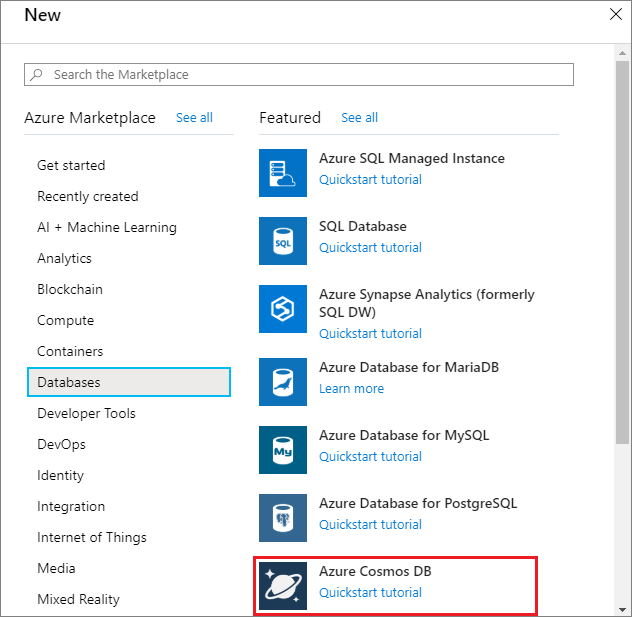
On the New page, select Databases > Azure Cosmos DB.

On the Azure Cosmos DB page, select Create.
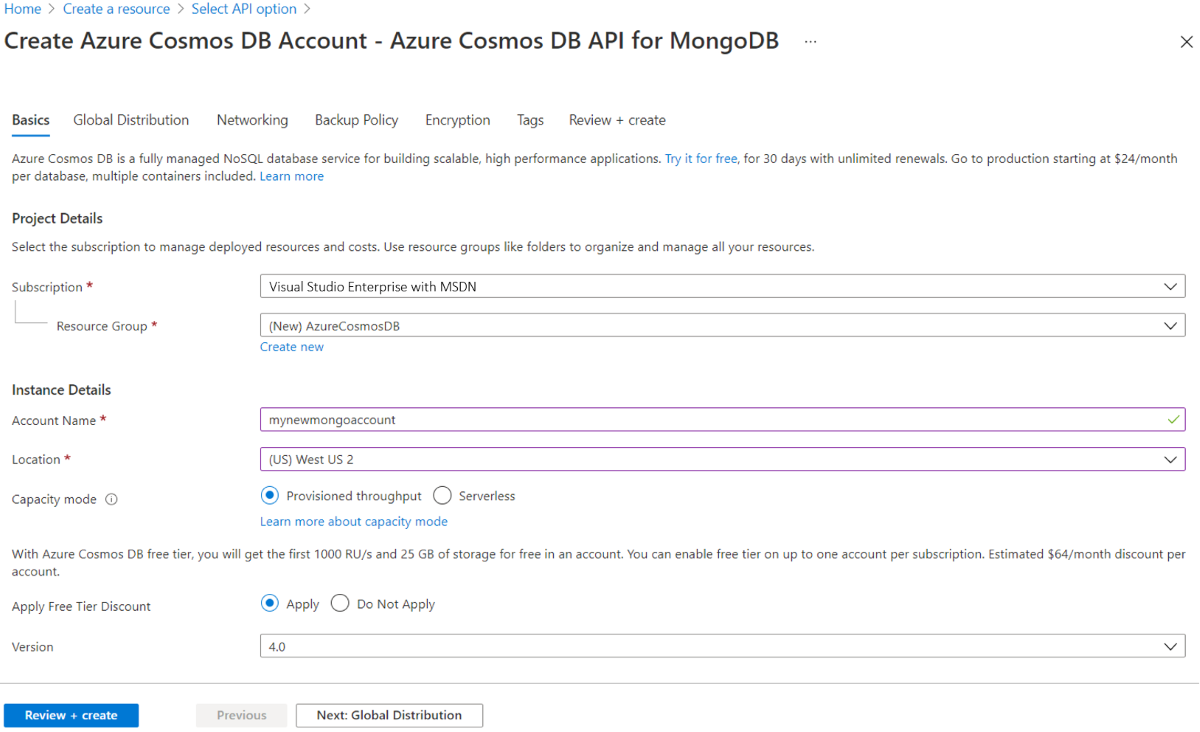
On the Create Azure Cosmos DB Account page, enter the settings for the new Azure Cosmos DB account.
Setting Value Description Subscription Subscription name Select the Azure subscription that you want to use for this Azure Cosmos DB account. Resource Group Resource group name Select a resource group, or select Create new, then enter a unique name for the new resource group. Account Name Enter a unique name Enter a unique name to identify your Azure Cosmos DB account. Your account URI will be mongo.cosmos.azure.cn appended to your unique account name.
The account name can use only lowercase letters, numbers, and hyphens (-), and must be between 3 and 44 characters long.Location The region closest to your users Select a geographic location to host your Azure Cosmos DB account. Use the location that's closest to your users to give them the fastest access to the data. Capacity mode Provisioned throughput or Serverless Select Provisioned throughput to create an account in provisioned throughput mode. Select Serverless to create an account in serverless mode.
Note: Only API for MongoDB versions 4.2, 4.0, and 3.6 are supported by serverless accounts. Choosing 3.2 as the version will force the account in provisioned throughput mode.Apply Azure Cosmos DB free tier discount Apply or Do not apply With Azure Cosmos DB free tier, you'll get the first 1000 RU/s and 25 GB of storage for free in an account. Learn more about free tier. Version Choose the required server version Azure Cosmos DB for MongoDB is compatible with the server version 4.2, 4.0, 3.6, and 3.2. You can upgrade or downgrade an account after it's created. Note
You can have up to one free tier Azure Cosmos DB account per Azure subscription and must opt-in when creating the account. If you don't see the option to apply the free tier discount, this means another account in the subscription has already been enabled with free tier.

In the Global Distribution tab, configure the following details. You can leave the default values for the purpose of this quickstart:
Setting Value Description Geo-Redundancy Disable Enable or disable multiple-region distribution on your account by pairing your region with a pair region. You can add more regions to your account later. Multi-region Writes Disable Multi-region writes capability allows you to take advantage of the provisioned throughput for your databases and containers across China. Note
The following options aren't available if you select Serverless as the Capacity mode:
- Apply Free Tier Discount
- Geo-redundancy
- Multi-region Writes
Optionally you can configure additional details in the following tabs:
- Networking - Configure access from a virtual network.
- Backup Policy - Configure either periodic or continuous backup policy.
- Encryption - Use either service-managed key or a customer-managed key.
- Tags - Tags are name/value pairs that enable you to categorize resources and view consolidated billing by applying the same tag to multiple resources and resource groups.
Select Review + create.
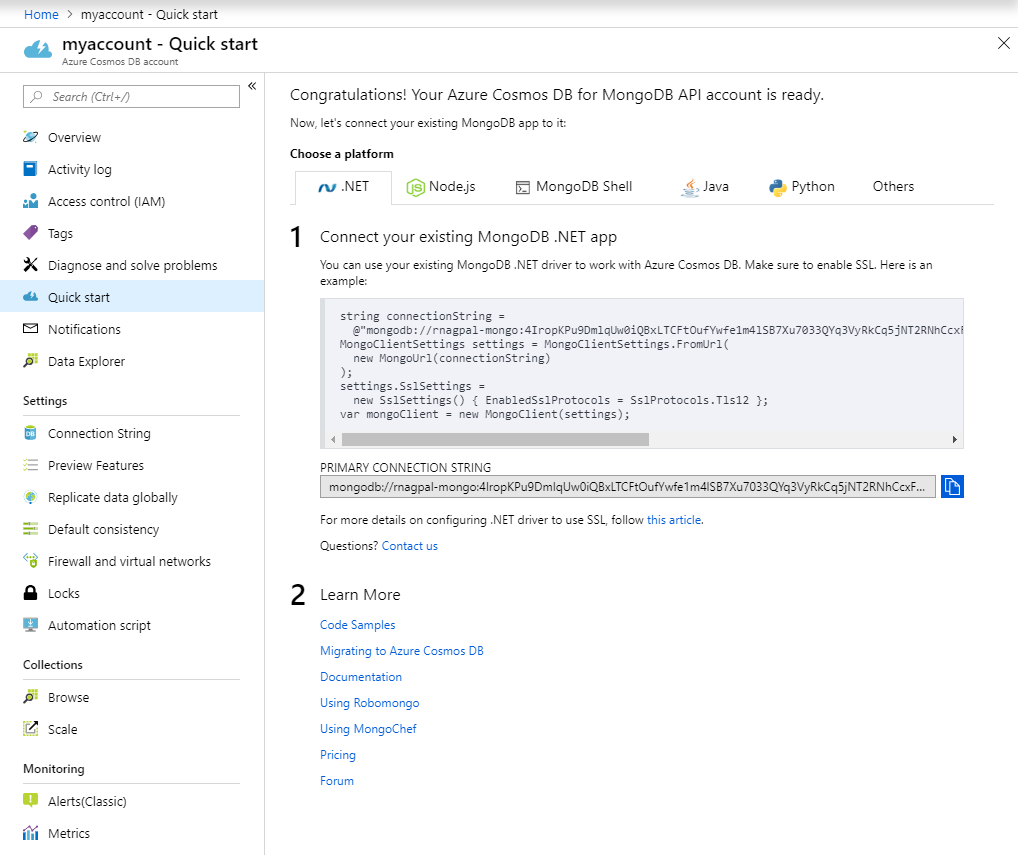
The account creation takes a few minutes. Wait for the portal to display the Congratulations! Your Azure Cosmos DB for MongoDB account is ready page.

Learn the object model
Before you continue building the application, let's look into the hierarchy of resources in the API for MongoDB and the object model that's used to create and access these resources. The API for MongoDB creates resources in the following order:
- Azure Cosmos DB API for MongoDB account
- Databases
- Collections
- Documents
To learn more about the hierarchy of entities, see the Azure Cosmos DB resource model article.
Install the sample app template
This sample is a dotnet project template, which can be installed to create a local copy. Run the following commands in a command window:
mkdir "C:\cosmos-samples"
cd "C:\cosmos-samples"
dotnet new -i Microsoft.Azure.Cosmos.Templates
dotnet new cosmosmongo-webapi
The preceding commands:
- Create the C:\cosmos-samples directory for the sample. Choose a folder appropriate for your operating system.
- Change your current directory to the C:\cosmos-samples folder.
- Install the project template, making it available multiple-regionally from the dotnet CLI.
- Create a local sample app using the project template.
If you don't wish to use the dotnet CLI, you can also download the project templates as a ZIP file. This sample is in the Templates/APIForMongoDBQuickstart-WebAPI folder.
Review the code
The following steps are optional. If you're interested in learning how the database resources are created in the code, review the following snippets. Otherwise, skip ahead to Update the application settings.
Setup connection
The following snippet is from the Services/MongoService.cs file.
The following class represents the client and is injected by the .NET framework into services that consume it:
public class MongoService
{
    private static MongoClient _client;

    public MongoService(IDatabaseSettings settings)
    {
        _client = new MongoClient(settings.MongoConnectionString);
    }

    public MongoClient GetClient()
    {
        return _client;
    }
}
Setup product catalog data service
The following snippets are from the Services/ProductService.cs file.
The following code retrieves the database and the collection and will create them if they don't already exist:
private readonly IMongoCollection<Product> _products;

public ProductService(MongoService mongo, IDatabaseSettings settings)
{
    var db = mongo.GetClient().GetDatabase(settings.DatabaseName);
    _products = db.GetCollection<Product>(settings.ProductCollectionName);
}
The following code retrieves a document by sku, a unique product identifier:
public Task<Product> GetBySkuAsync(string sku)
{
    return _products.Find(p => p.Sku == sku).FirstOrDefaultAsync();
}
The following code creates a product and inserts it into the collection:
public Task CreateAsync(Product product)
{
    _products.InsertOneAsync(product);
}
The following code finds and updates a product:
public Task<Product> UpdateAsync(Product update)
{
    return _products.FindOneAndReplaceAsync(
        Builders<Product>.Filter.Eq(p => p.Sku, update.Sku),
        update,
        new FindOneAndReplaceOptions<Product> { ReturnDocument = ReturnDocument.After });
}
Similarly, you can delete documents by using the collection.DeleteOne() method.
Update the application settings
From the Azure portal, copy the connection string information:
In the Azure portal, select your Cosmos DB account, in the left navigation select Connection String, and then select Read-write Keys. You'll use the copy buttons on the right side of the screen to copy the primary connection string into the appsettings.json file in the next step.
Open the appsettings.json file.
Copy the primary connection string value from the portal (using the copy button) and make it the value of the DatabaseSettings.MongoConnectionString property in the appsettings.json file.
Review the database name value in the DatabaseSettings.DatabaseName property in the appsettings.json file.
Review the collection name value in the DatabaseSettings.ProductCollectionName property in the appsettings.json file.
Warning
Never check passwords or other sensitive data into source code.
You've now updated your app with all the info it needs to communicate with Cosmos DB.
Load sample data
Download mongoimport, a CLI tool that easily imports small amounts of JSON, CSV, or TSV data. We'll use mongoimport to load the sample product data provided in the Data folder of this project.
From the Azure portal, copy the connection information and enter it in the command below:
mongoimport --host <HOST>:<PORT> -u <USERNAME> -p <PASSWORD> --db cosmicworks --collection products --ssl --jsonArray --writeConcern="{w:0}" --file Data/products.json
In the Azure portal, select your Azure Cosmos DB API for MongoDB account, in the left navigation select Connection String, and then select Read-write Keys.
Copy the HOST value from the portal (using the copy button) and enter it in place of <HOST>.
Copy the PORT value from the portal (using the copy button) and enter it in place of <PORT>.
Copy the USERNAME value from the portal (using the copy button) and enter it in place of <USERNAME>.
Copy the PASSWORD value from the portal (using the copy button) and enter it in place of <PASSWORD>.
Review the database name value and update it if you created something other than
cosmicworks.Review the collection name value and update it if you created something other than
products.Note
If you would like to skip this step you can create documents with the correct schema using the POST endpoint provided as part of this web api project.
Run the app
From Visual Studio, select CTRL + F5 to run the app. The default browser is launched with the app.
If you prefer the CLI, run the following command in a command window to start the sample app. This command will also install project dependencies and build the project, but won't automatically launch the browser.
dotnet run
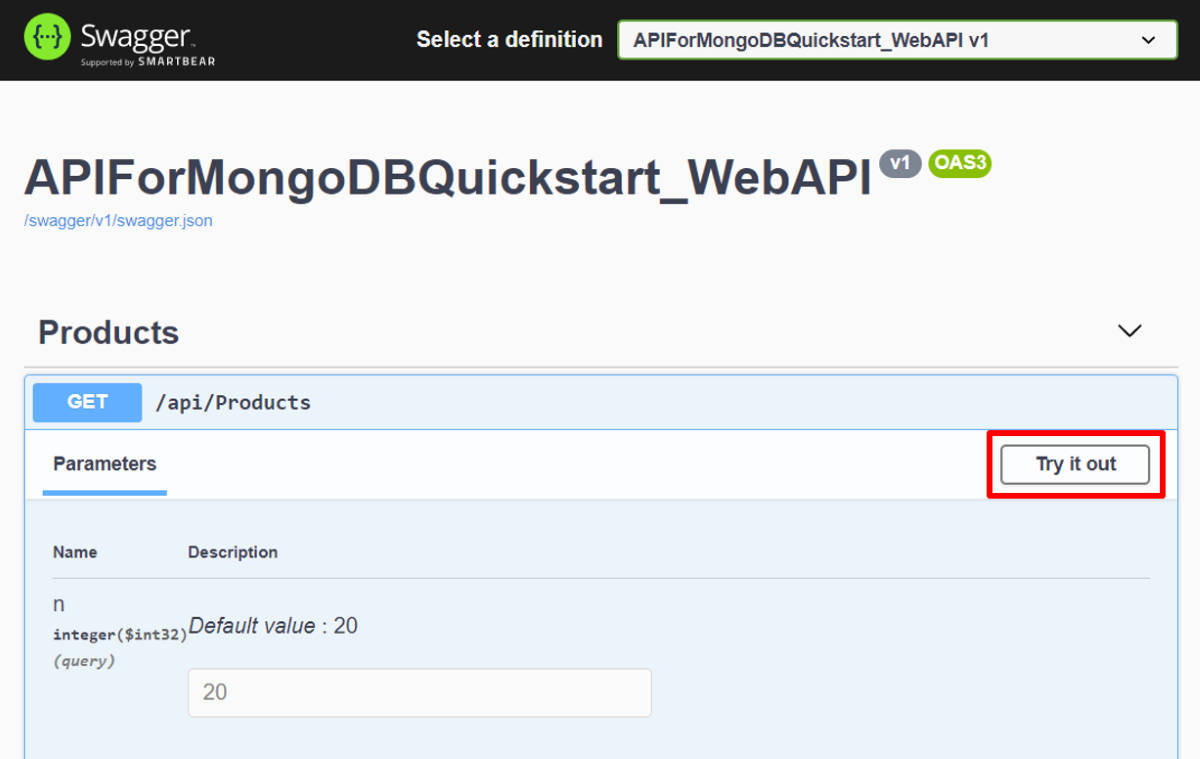
After the application is running, navigate to https://localhost:5001/swagger/index.html to see the swagger documentation for the web api and to submit sample requests.
Select the API you would like to test and select "Try it out".

Enter any necessary parameters and select "Execute."
Clean up resources
When you're done with your app and Azure Cosmos DB account, you can delete the Azure resources you created so you don't incur more charges. To delete the resources:
In the Azure portal Search bar, search for and select Resource groups.
From the list, select the resource group you created for this quickstart.

On the resource group Overview page, select Delete resource group.

In the next window, enter the name of the resource group to delete, and then select Delete.
Next steps
In this quickstart, you've learned how to create an API for MongoDB account, create a database and a collection with code, and run a web API app. You can now import other data to your database.
Trying to do capacity planning for a migration to Azure Cosmos DB? You can use information about your existing database cluster for capacity planning.
- If all you know is the number of vcores and servers in your existing database cluster, read about estimating request units using vCores or vCPUs
- If you know typical request rates for your current database workload, read about estimating request units using Azure Cosmos DB capacity planner