Note
Access to this page requires authorization. You can try signing in or changing directories.
Access to this page requires authorization. You can try changing directories.
Azure Data Explorer is a fast, fully managed, data-analytics service. It offers real-time analysis on large volumes of data that stream from many sources, such as applications, websites, and IoT devices.
To copy data from a database in Oracle Server, Netezza, Teradata, or SQL Server to Azure Data Explorer, you have to load huge amounts of data from multiple tables. Usually, the data has to be partitioned in each table so that you can load rows with multiple threads in parallel from a single table. This article describes a template to use in these scenarios.
Azure Data Factory templates are predefined Data Factory pipelines. These templates can help you get started quickly with Data Factory and reduce development time on data integration projects.
You create the Bulk Copy from Database to Azure Data Explorer template by using Lookup and ForEach activities. For faster data copying, you can use the template to create many pipelines per database or per table.
Important
Be sure to use the tool that's appropriate for the quantity of data you want to copy.
- Use the Bulk Copy from Database to Azure Data Explorer template to copy large amounts of data from databases such as SQL server and Google BigQuery to Azure Data Explorer.
- Use the Data Factory Copy Data tool to copy a few tables with small or moderate amounts of data into Azure Data Explorer.
Prerequisites
- An Azure subscription. Create a Azure account.
- An Azure Data Explorer cluster and database. Create a cluster and database.
- A data factory. Create a data factory.
- A source of data.
Create ControlTableDataset
ControlTableDataset indicates what data will be copied from the source to the destination in the pipeline. The number of rows indicates the total number of pipelines that are needed to copy the data. You should define ControlTableDataset as part of the source database.
An example of the SQL Server source table format is shown in the following code:
CREATE TABLE control_table (
PartitionId int,
SourceQuery varchar(255),
ADXTableName varchar(255)
);
The code elements are described in the following table:
| Property | Description | Example |
|---|---|---|
| PartitionId | The copy order | 1 |
| SourceQuery | The query that indicates which data will be copied during the pipeline runtime | select * from table where lastmodifiedtime LastModifytime >= ''2015-01-01 00:00:00''> |
| ADXTableName | The destination table name | MyAdxTable |
If your ControlTableDataset is in a different format, create a comparable ControlTableDataset for your format.
Use the Bulk Copy from Database to Azure Data Explorer template
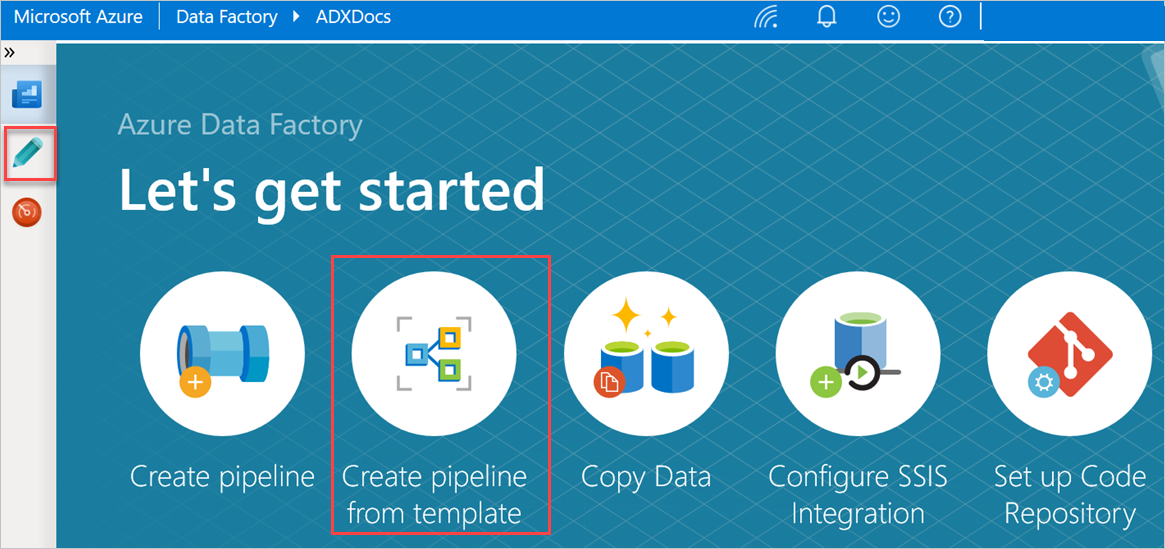
In the Let's get started pane, select Create pipeline from template to open the Template gallery pane.
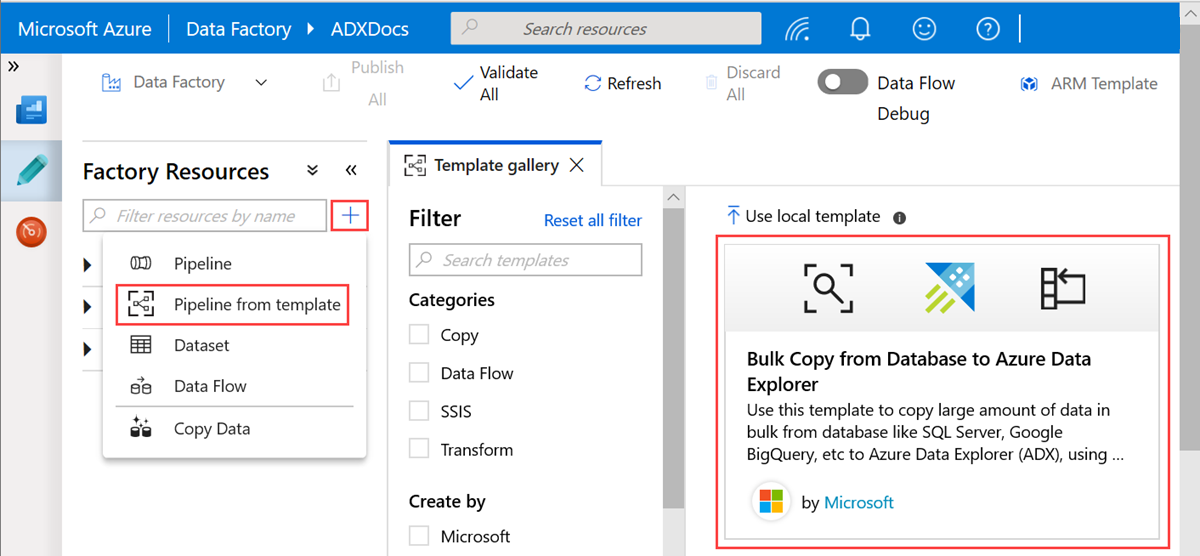
Select the Bulk Copy from Database to Azure Data Explorer template.
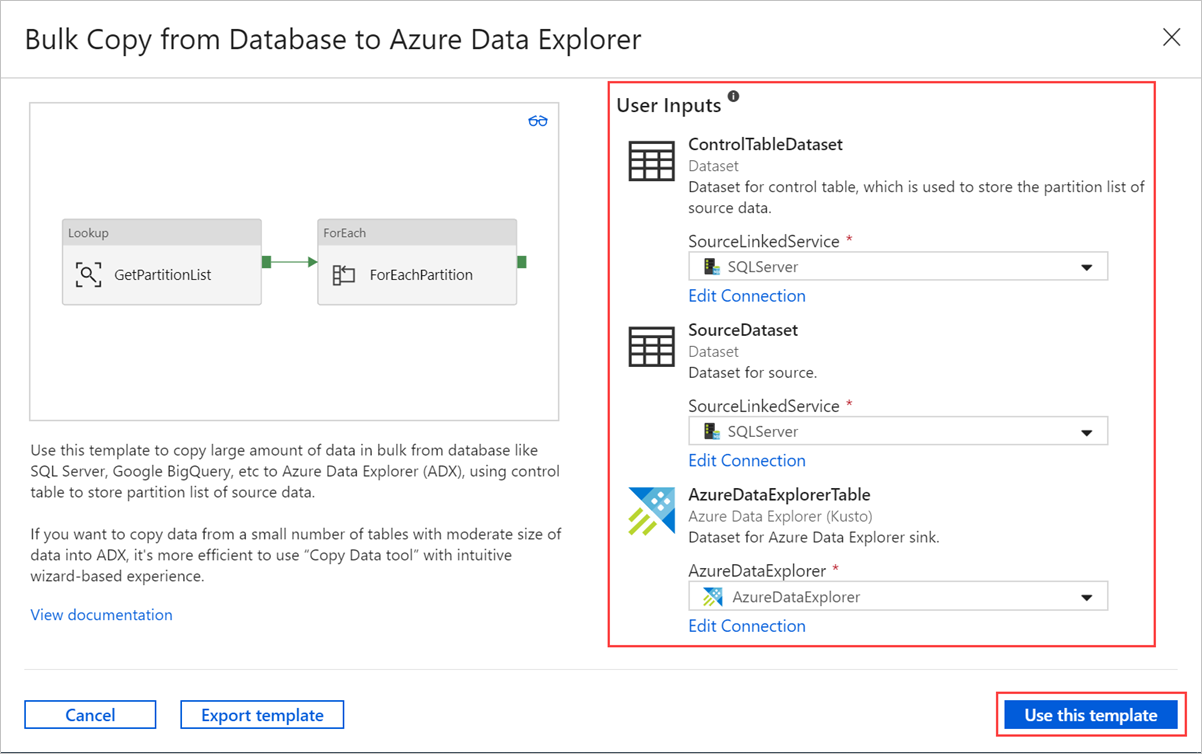
In the Bulk Copy from Database to Azure Data Explorer pane, under User Inputs, specify your datasets by doing the following:
a. In the ControlTableDataset dropdown list, select the linked service to the control table that indicates what data is copied from the source to the destination and where it will be placed in the destination.
b. In the SourceDataset dropdown list, select the linked service to the source database.
c. In the AzureDataExplorerTable dropdown list, select the Azure Data Explorer table. If the dataset doesn't exist, create the Azure Data Explorer linked service to add the dataset.
d. Select Use this template.
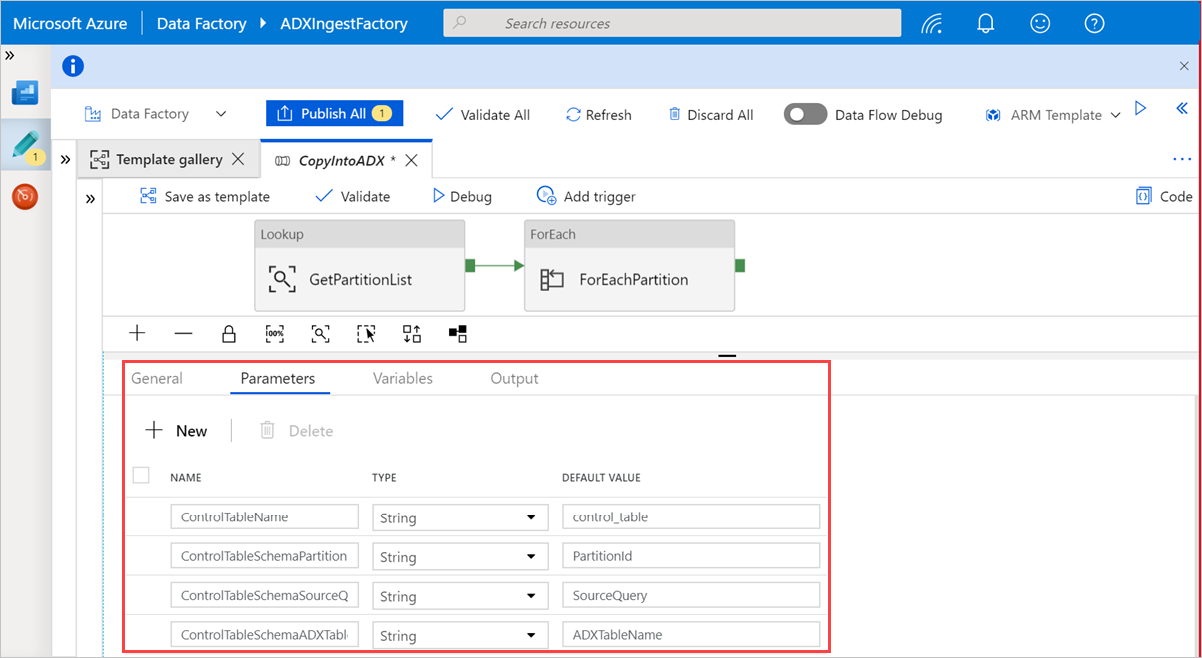
Select an area in the canvas, outside the activities, to access the template pipeline. Select the Parameters tab to enter the parameters for the table, including Name (control table name) and Default value (column names).
Under Lookup, select GetPartitionList to view the default settings. The query is automatically created.
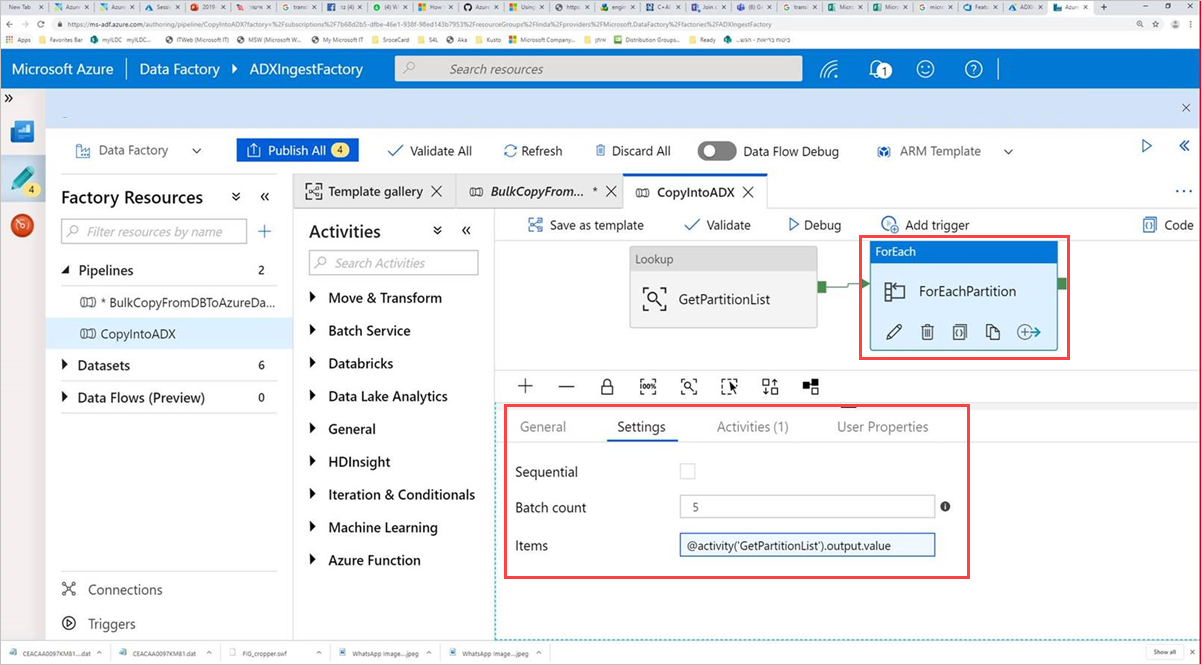
Select the Command activity, ForEachPartition, select the Settings tab, and then do the following:
a. In the Batch count box, enter a number from 1 to 50. This selection determines the number of pipelines that run in parallel until the number of ControlTableDataset rows is reached.
b. To ensure that the pipeline batches run in parallel, do not select the Sequential check box.
Tip
The best practice is to run many pipelines in parallel so that your data can be copied more quickly. To increase efficiency, partition the data in the source table and allocate one partition per pipeline, according to date and table.
Select Validate All to validate the Azure Data Factory pipeline, and then view the result in the Pipeline Validation Output pane.
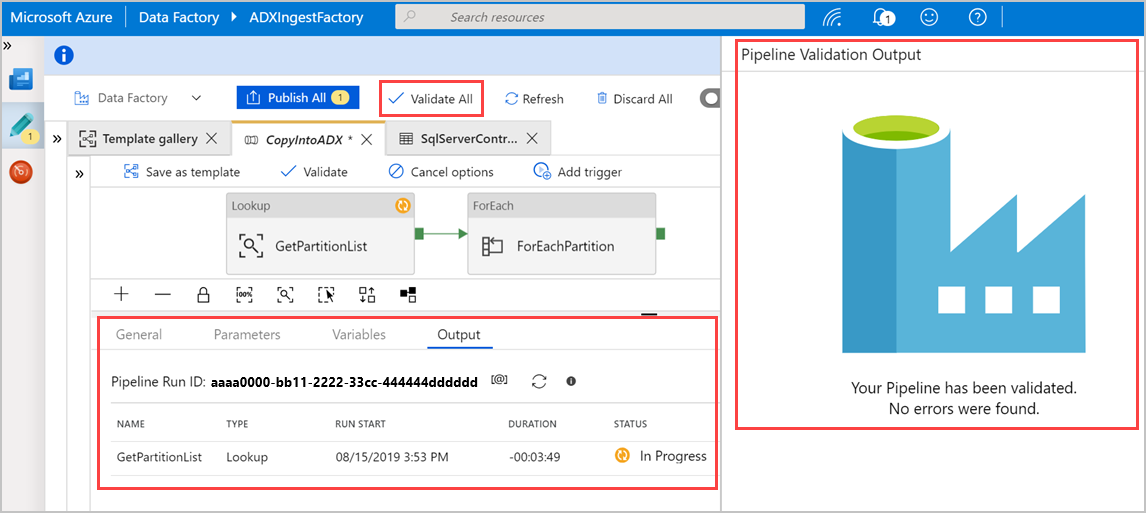
If necessary, select Debug, and then select Add trigger to run the pipeline.

You can now use the template to efficiently copy large amounts of data from your databases and tables.
Related content
- Learn about the Azure Data Explorer connector for Azure Data Factory.
- Edit linked services, datasets, and pipelines in the Data Factory UI.
- Query data in the Azure Data Explorer web UI.