Note
Access to this page requires authorization. You can try signing in or changing directories.
Access to this page requires authorization. You can try changing directories.
Important
This connector can be used in Real-Time Intelligence in Microsoft Fabric. Use the instructions in this article with the following exceptions:
- If required, create databases using the instructions in Create a KQL database.
- If required, create tables using the instructions in Create an empty table.
- Get query or ingestion URIs using the instructions in Copy URI.
- Run queries in a KQL queryset.
Azure Data Explorer is a fast, fully managed, data-analytics service. It offers real-time analysis on large volumes of data that stream from many sources, such as applications, websites, and IoT devices. With Azure Data Explorer, you can iteratively explore data and identify patterns and anomalies to improve products, enhance customer experiences, monitor devices, and boost operations. It helps you explore new questions and get answers in minutes.
Azure Data Factory is a fully managed, cloud-based, data-integration service. You can use it to populate your Azure Data Explorer database with data from your existing system. It can help you save time when you're building analytics solutions.
When you load data into Azure Data Explorer, Data Factory provides the following benefits:
- Easy setup: Get an intuitive, five-step wizard with no scripting required.
- Rich data store support: Get built-in support for a rich set of on-premises and cloud-based data stores. For a detailed list, see the table of Supported data stores.
- Secure and compliant: Data is transferred over HTTPS or Azure ExpressRoute. The global service presence ensures that your data never leaves the geographical boundary.
- High performance: The data-loading speed is up to 1 gigabyte per second (GBps) into Azure Data Explorer. For more information, see Copy activity performance.
In this article, you use the Data Factory Copy Data tool to load data from Amazon Simple Storage Service (S3) into Azure Data Explorer. You can follow a similar process to copy data from other data stores, such as:
Prerequisites
- An Azure subscription. Create a Azure account.
- An Azure Data Explorer cluster and database. Create a cluster and database.
- A source of data.
Create a data factory
Sign in to the Azure portal.
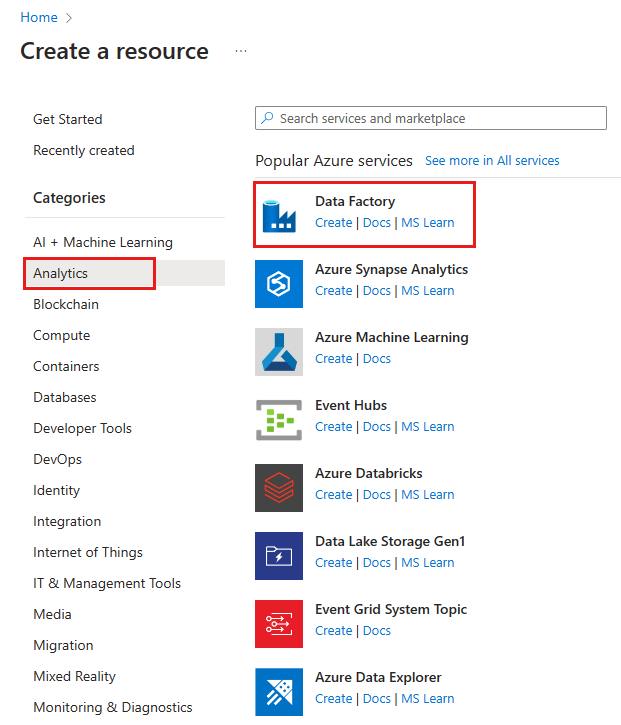
In the left pane, select Create a resource > Analytics > Data Factory.
In the New data factory pane, provide values for the fields in the following table:
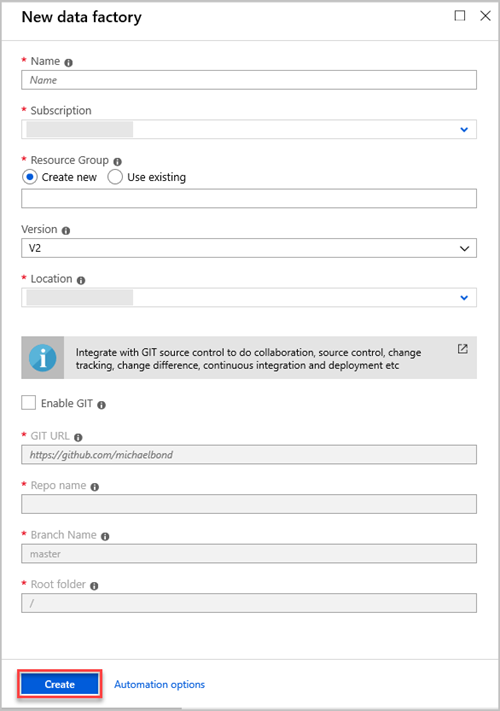
Setting Value to enter Name In the box, enter a globally unique name for your data factory. If you receive an error, Data factory name "LoadADXDemo" is not available, enter a different name for the data factory. For rules about naming Data Factory artifacts, see Data Factory naming rules. Subscription In the dropdown list, select the Azure subscription in which to create the data factory. Resource Group Select Create new, and then enter the name of a new resource group. If you already have a resource group, select Use existing. Version In the dropdown list, select V2. Location In the dropdown list, select the location for the data factory. Only supported locations are displayed in the list. The data stores that are used by the data factory can exist in other locations or regions. Select Create.
To monitor the creation process, select Notifications on the toolbar. After you've created the data factory, select it.
The Data Factory pane opens.
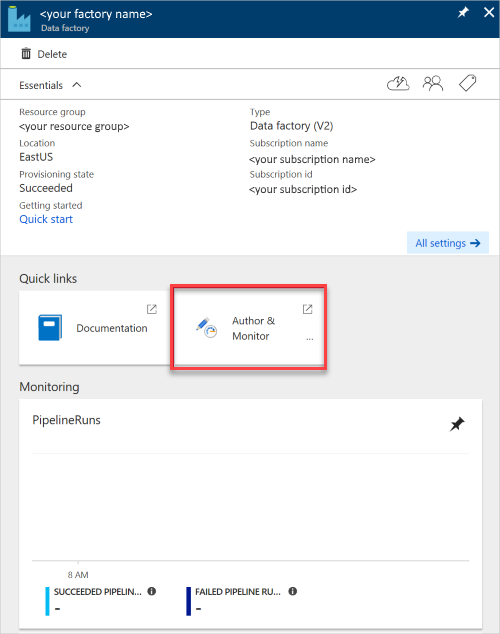
To open the application in a separate pane, select the Author & Monitor tile.
Load data into Azure Data Explorer
You can load data from many types of data stores into Azure Data Explorer. This article discusses how to load data from Amazon S3.
You can load your data in either of the following ways:
- In the Azure Data Factory user interface, in the left pane, select the Author icon. This is shown in the "Create a data factory" section of Create a data factory by using the Azure Data Factory UI.
- In the Azure Data Factory Copy Data tool, as shown in Use the Copy Data tool to copy data.
Copy data from Amazon S3 (source)
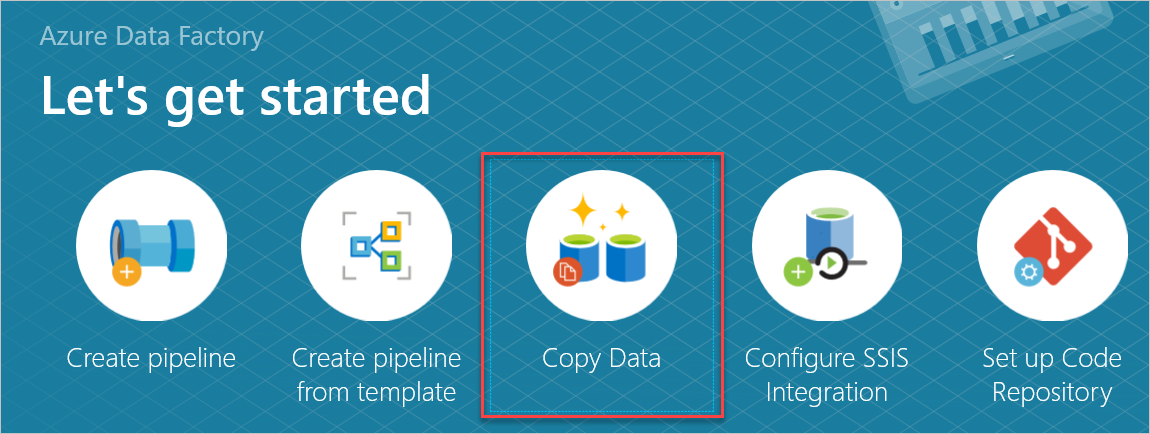
In the Let's get started pane, open the Copy Data tool by selecting Copy Data.
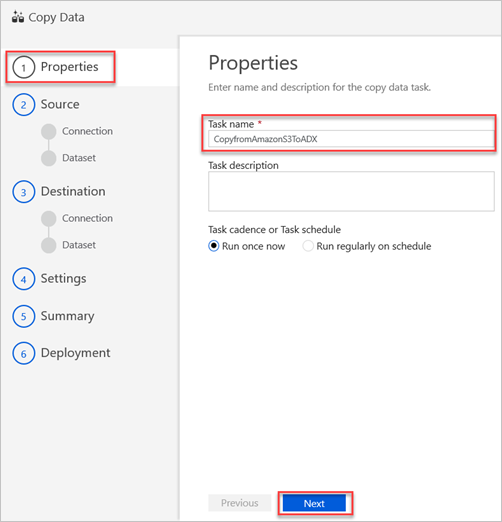
In the Properties pane, in the Task name box, enter a name, and then select Next.
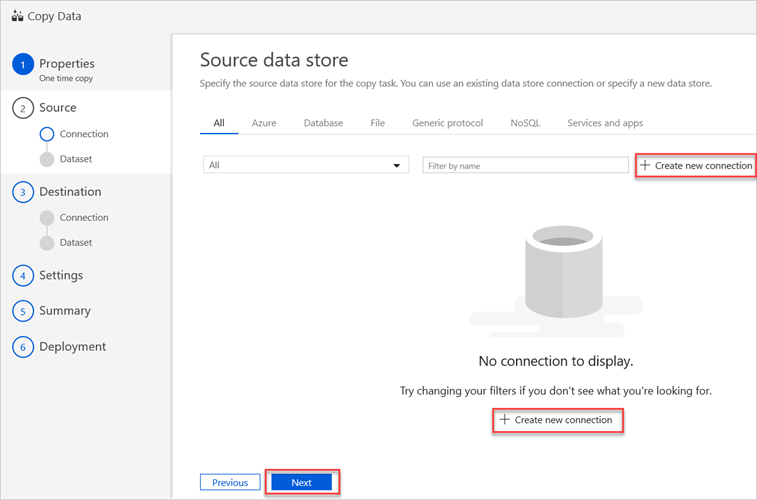
In the Source data store pane, select Create new connection.
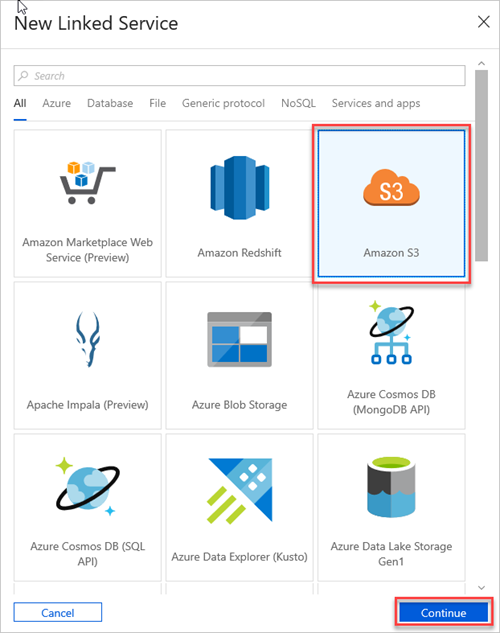
Select Amazon S3, and then select Continue.
In the New Linked Service (Amazon S3) pane, do the following:

a. In the Name box, enter the name of your new linked service.
b. In the Connect via integration runtime dropdown list, select the value.
c. In the Access Key ID box, enter the value.
Note
In Amazon S3, to locate your access key, select your Amazon username on the navigation bar, and then select My Security Credentials.
d. In the Secret Access Key box, enter a value.
e. To test the linked service connection you created, select Test Connection.
f. Select Finish.
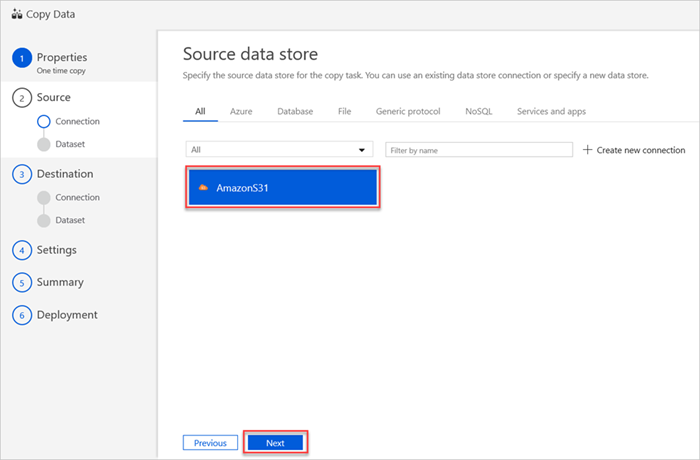
The Source data store pane displays your new AmazonS31 connection.
Select Next.
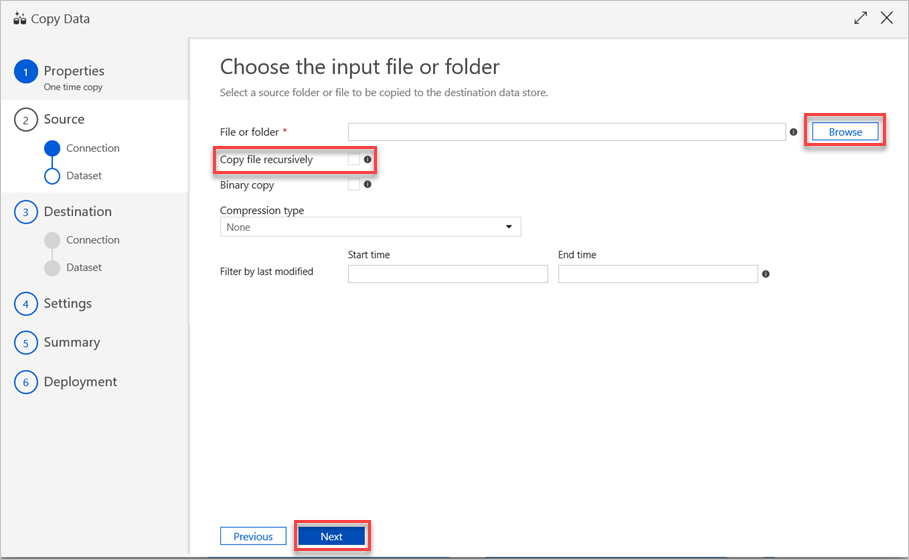
In the Choose the input file or folder pane, do the following steps:
a. Browse to the file or folder that you want to copy, and then select it.
b. Select the copy behavior that you want. Make sure that the Binary copy check box is cleared.
c. Select Next.
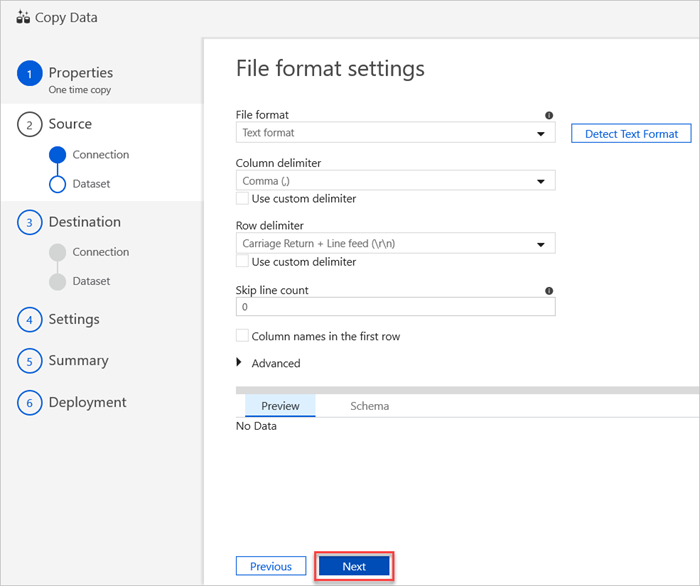
In the File format settings pane, select the relevant settings for your file. and then select Next.
Copy data into Azure Data Explorer (destination)
The new Azure Data Explorer linked service is created to copy the data into the Azure Data Explorer destination table (sink) that's specified in this section.
Note
Use the Azure Data Factory command activity to run Azure Data Explorer management commands and use any of the ingest from query commands, such as .set-or-replace.
Create the Azure Data Explorer linked service
To create the Azure Data Explorer linked service, do the following steps:
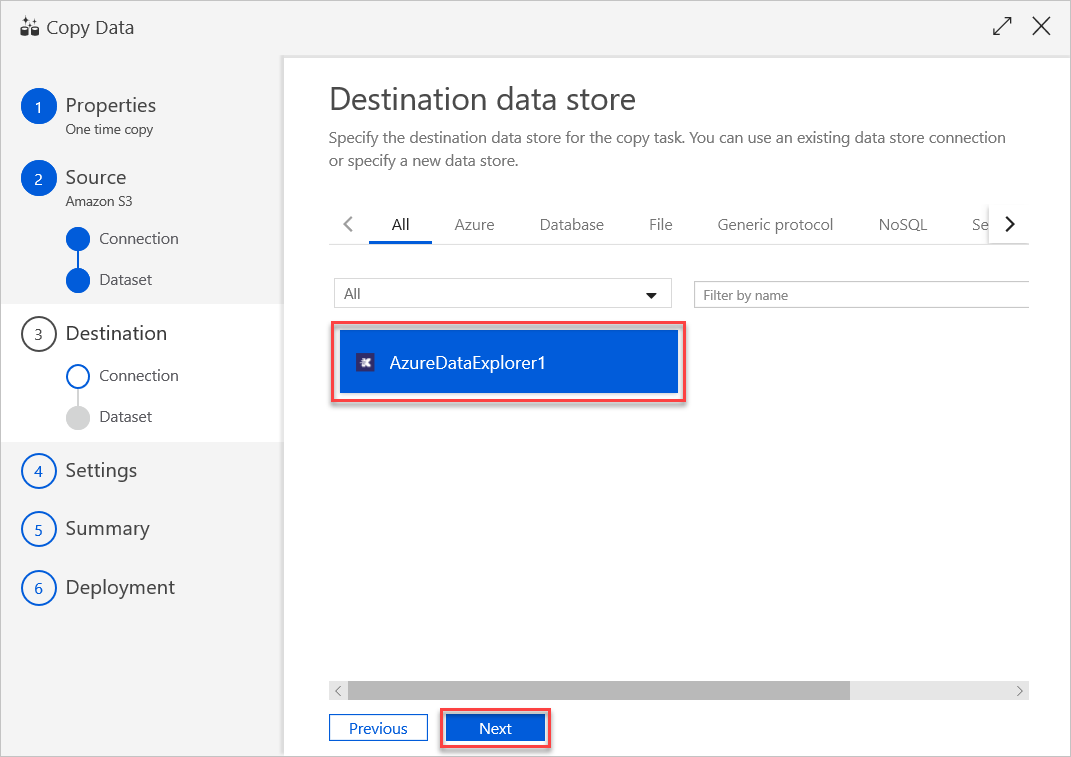
To use an existing data store connection or specify a new data store, in the Destination data store pane, select Create new connection.
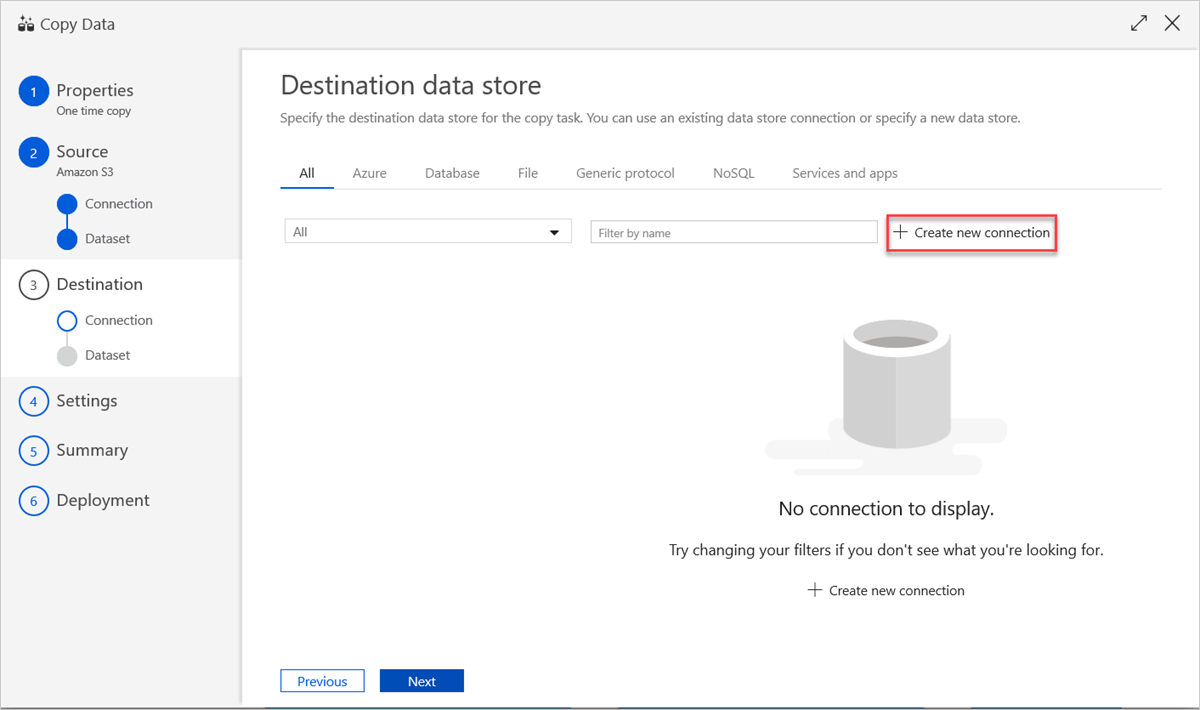
In the New Linked Service pane, select Azure Data Explorer, and then select Continue.

In the New Linked Service (Azure Data Explorer) pane, do the following steps:
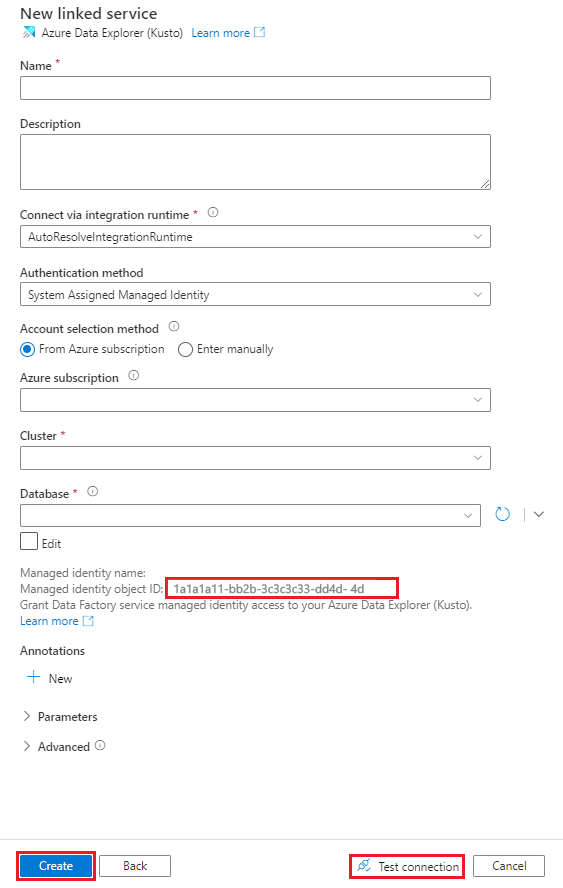
In the Name box, enter a name for the Azure Data Explorer linked service.
Under Authentication method, choose System Assigned Managed Identity or Service Principal.
To Authenticate using a Managed Identity, grant the Managed Identity access to the database by using the Managed identity name or Managed identity object ID.
To Authenticate using a Service Principal:
- In the Tenant box, enter the tenant name.
- In the Service principal ID box, enter the service principal ID.
- Select Service principal key and then, in the Service principal key box, enter the value for the key.
Note
- The service principal is used by Azure Data Factory to access the Azure Data Explorer service.
- To assign permissions to a Managed Identity or a Service Principal or , see manage permissions.
- Do not use the Azure Key Vault method or User Assigned Managed Identity.
Under Account selection method, choose one of the following options:
Select From Azure subscription and then, in the dropdown lists, select your Azure subscription and your Cluster.
Note
- The Cluster dropdown control lists only clusters that are associated with your subscription.
- Your cluster must have the appropriate SKU for best performance.
Select Enter manually, and then enter your Endpoint.
In the Database dropdown list, select your database name. Alternatively, select the Edit check box, and then enter the database name.
To test the linked service connection you created, select Test Connection. If you can connect to your linked service, the pane displays a green checkmark and a Connection successful message.
Select Create to complete the linked service creation.
Configure the Azure Data Explorer data connection
After you've created the linked service connection, the Destination data store pane opens, and the connection you created is available for use. To configure the connection, do the following steps:
Select Next.
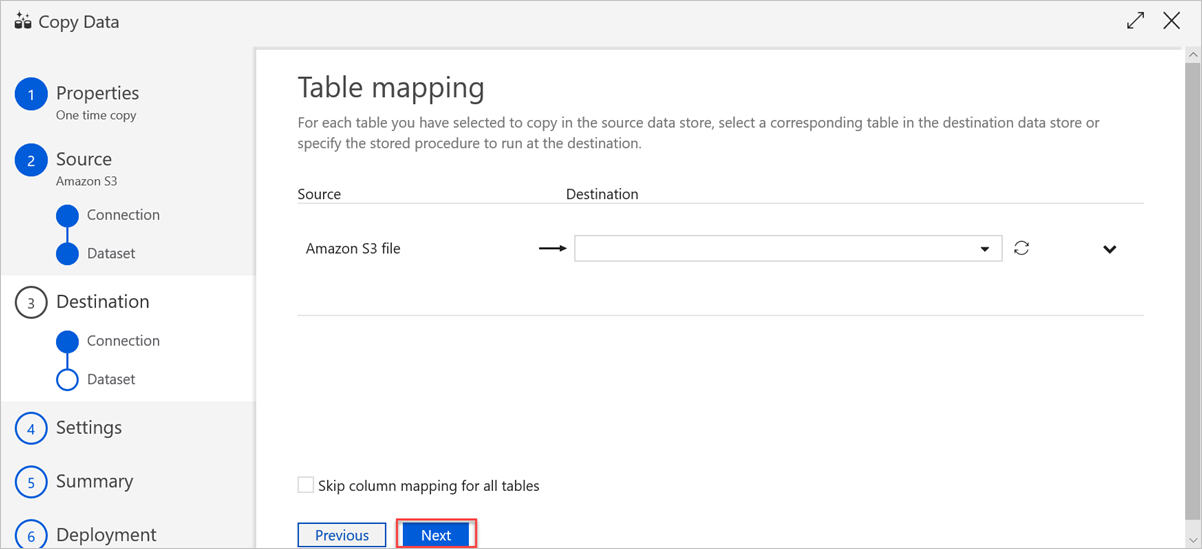
In the Table mapping pane, set the destination table name, and then select Next.
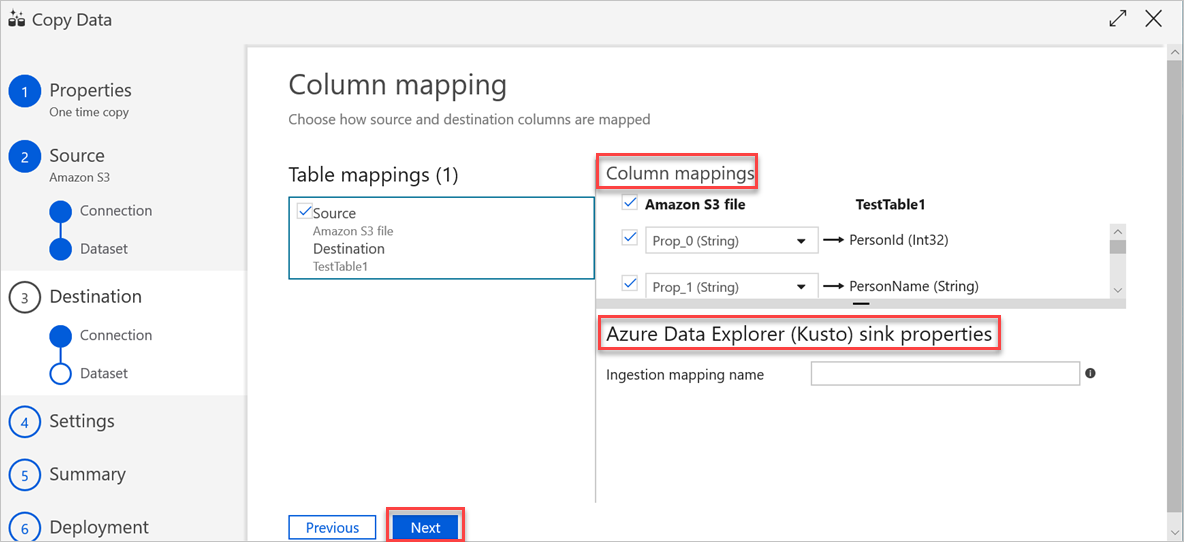
In the Column mapping pane, the following mappings take place:
a. The first mapping is performed by Azure Data Factory according to the Azure Data Factory schema mapping. Do the following:
Set the Column mappings for the Azure Data Factory destination table. The default mapping is displayed from source to the Azure Data Factory destination table.
Cancel the selection of the columns that you don't need to define your column mapping.
b. The second mapping occurs when this tabular data is ingested into Azure Data Explorer. Mapping is performed according to CSV mapping rules. Even if the source data isn't in CSV format, Azure Data Factory converts the data into a tabular format. Therefore, CSV mapping is the only relevant mapping at this stage. Do the following:
(Optional) Under Azure Data Explorer (Kusto) sink properties, add the relevant Ingestion mapping name so that column mapping can be used.
If Ingestion mapping name isn't specified, the by-name mapping order that's defined in the Column mappings section will be used. If by-name mapping fails, Azure Data Explorer tries to ingest the data in a by-column position order (that is, it maps by position as the default).
Select Next.
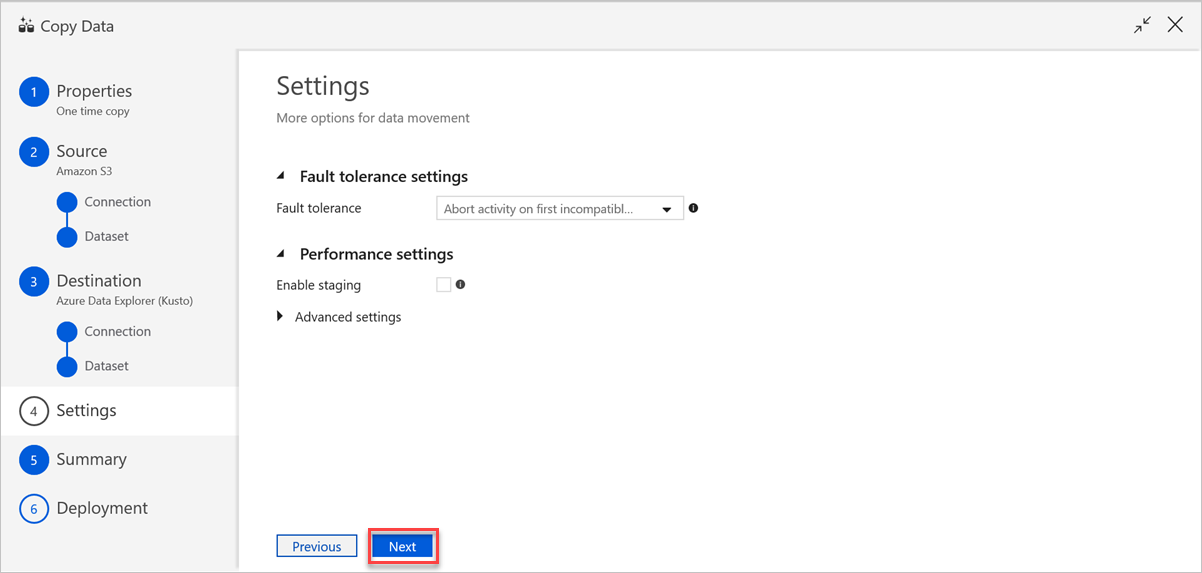
In the Settings pane, do the following steps:
a. Under Fault tolerance settings, enter the relevant settings.
b. Under Performance settings, Enable staging doesn't apply, and Advanced settings includes cost considerations. If you have no specific requirements, leave these settings as is.
c. Select Next.
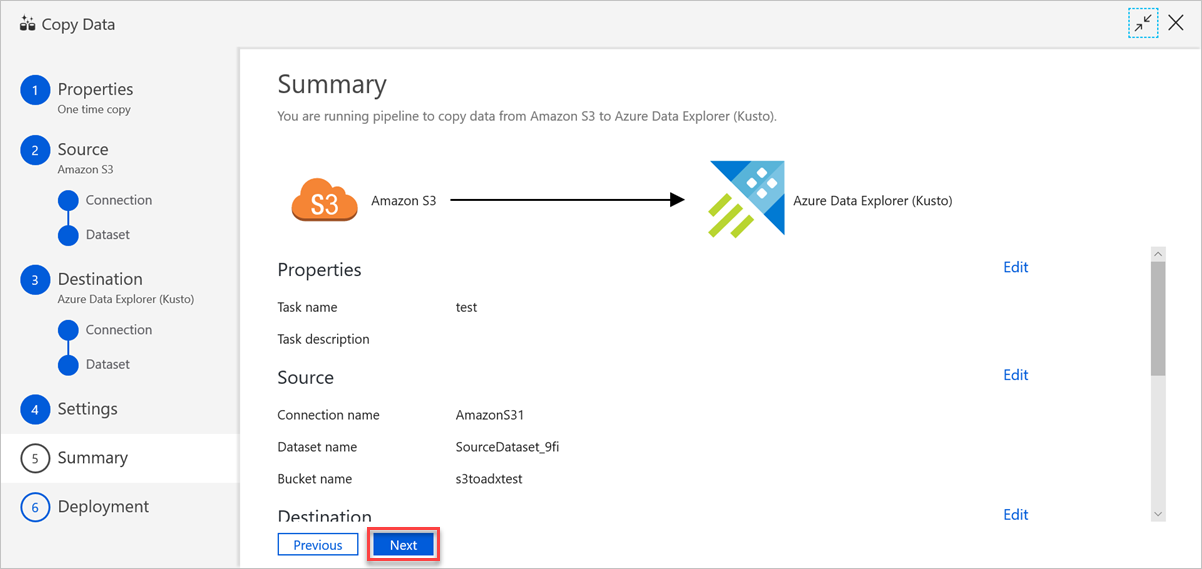
In the Summary pane, review the settings, and then select Next.
In the Deployment complete pane, do the following:
a. To switch to the Monitor tab and view the status of the pipeline (that is, progress, errors, and data flow), select Monitor.
b. To edit linked services, datasets, and pipelines, select Edit Pipeline.
c. Select Finish to complete the copy data task.

Related content
- Learn about the Azure Data Explorer connector for Azure Data Factory.
- Edit linked services, datasets, and pipelines in the Data Factory UI.
- Query data in the Azure Data Explorer web UI.