Note
Access to this page requires authorization. You can try signing in or changing directories.
Access to this page requires authorization. You can try changing directories.
The Azure Stream Analytics service makes it easy to ingest, process, and analyze streaming data from Azure Event Hubs, enabling powerful insights to drive real-time actions. You can use the Azure portal to visualize incoming data and write a Stream Analytics query. Once your query is ready, you can move it into production in only a few clicks.
Key benefits
Here are the key benefits of Azure Event Hubs and Azure Stream Analytics integration:
- Preview data - You can preview incoming data from an event hub in the Azure portal.
- Test your query - Prepare a transformation query and test it directly in the Azure portal. For the query language syntax, see Stream Analytics Query Language documentation.
- Deploy your query to production - You can deploy the query into production by creating and starting an Azure Stream Analytics job.
End-to-end flow
Important
- If you aren't a member of owner or contributor roles at the Azure subscription level, you must be a member of the Stream Analytics Query Tester role at the Azure subscription level to successfully complete steps in this section. This role allows you to perform testing queries without creating a stream analytics job first. For instructions on assigning a role to a user, see Assign AD roles to users.
- If your event hub allows only the private access via private endpoints, you must have the Stream Analytics job joined to the same network so that the job can access events in the event hub.
Sign in to the Azure portal.
Navigate to your Event Hubs namespace and then navigate to the event hub, which has the incoming data.
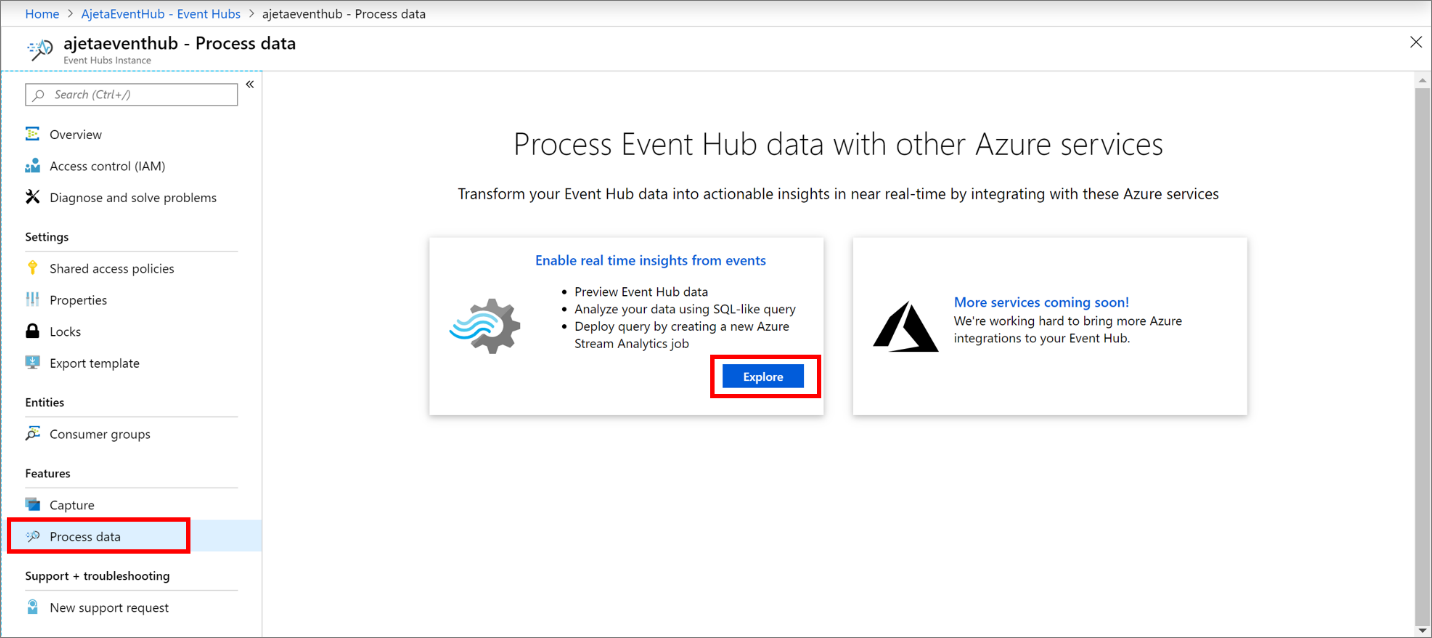
On the left navigation menu, expand Features, and select Process data, and then select Start on the Enable real time insights from events tile.
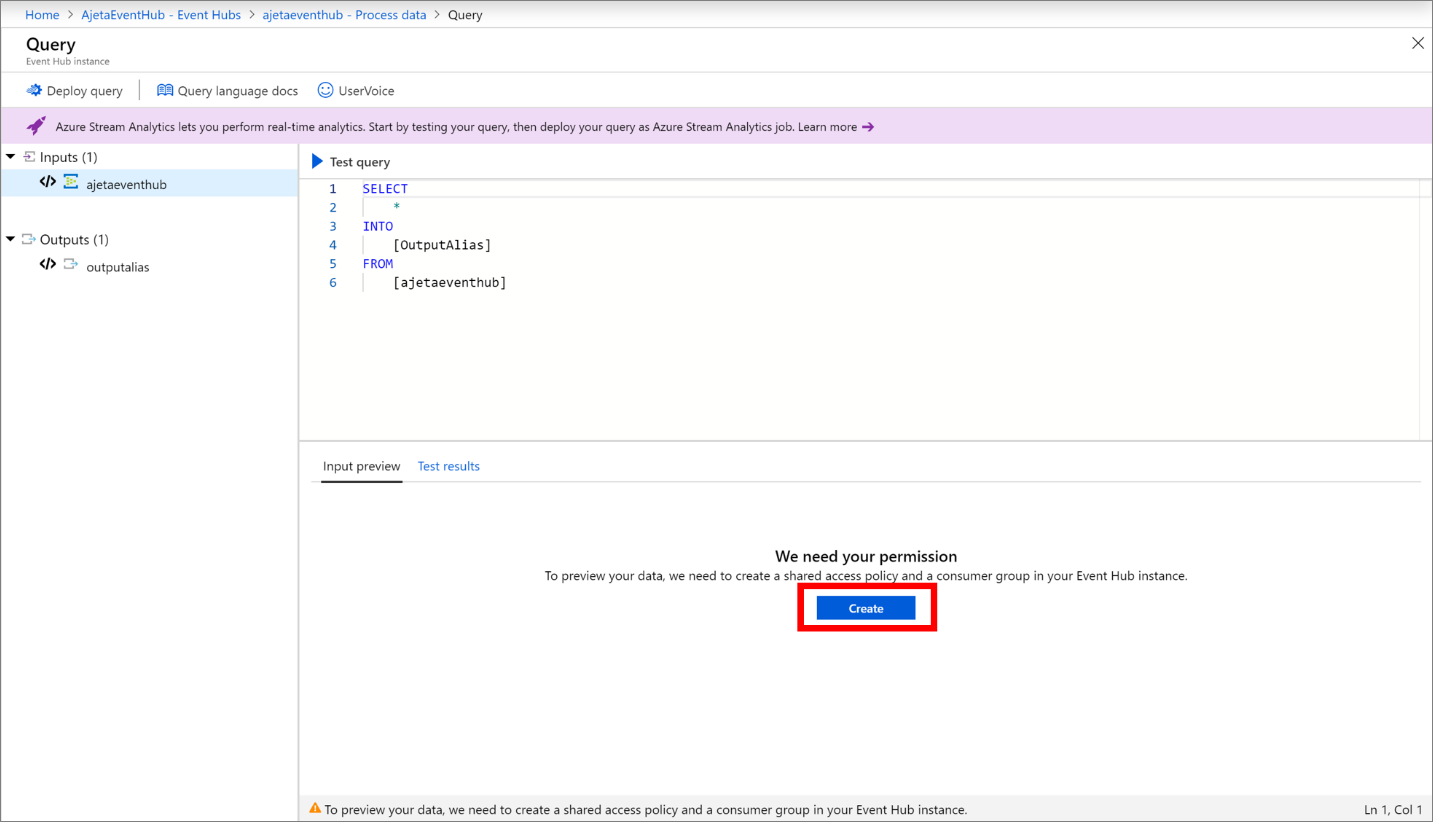
You see a query page with values already set for the following fields. If you see a popup window about a consumer group and a policy being created for you, select OK. You immediately see a snapshot of the latest incoming data in this tab.
Your event hub as an input for the query.
Sample SQL query with SELECT statement.
An output alias to refer to your query test results.
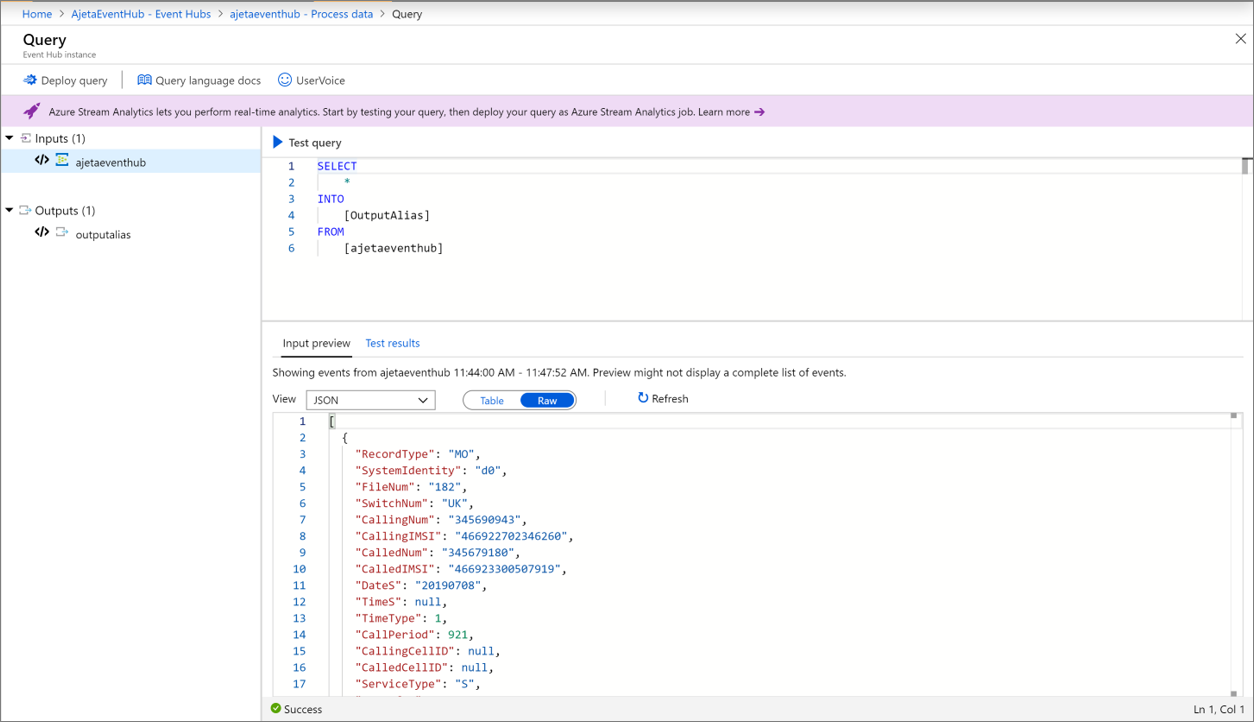
The serialization type in your data is automatically detected (JSON/CSV). You can manually change it as well to JSON/CSV/AVRO.
You can preview incoming data in the table format or raw format.
If your data shown isn't current, select Refresh to see the latest events.
In the preceding image, the results are shown in the table format. To see the raw data, select Raw
Select Test query to see the snapshot of test results of your query in the Test results tab. You can also download the results.

Write your own query to transform the data. See Stream Analytics Query Language reference.
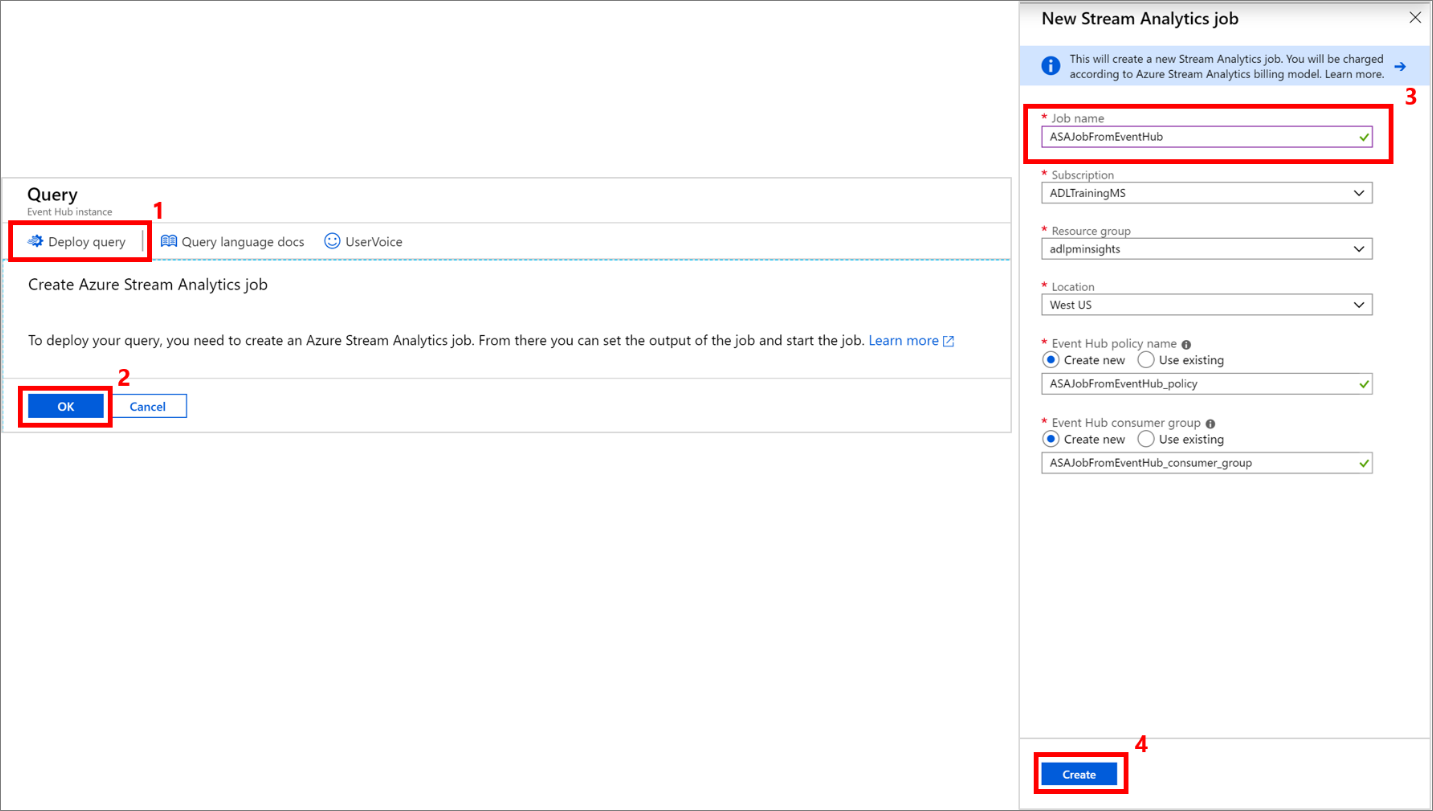
Once you tested the query and you want to move it in to production, select Create Stream Analytics job.
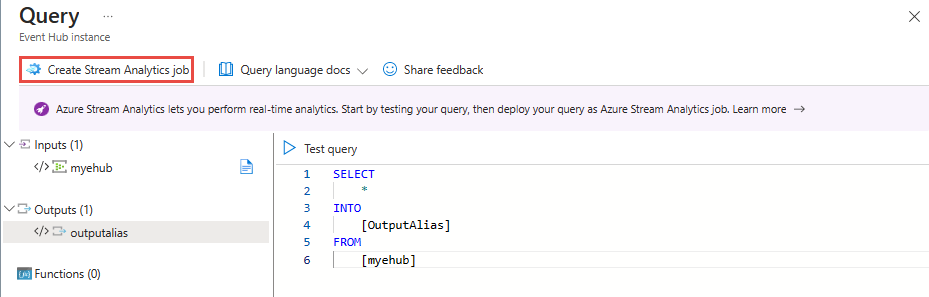
On the New Stream Analytics job page, follow these steps:
Specify a name for the job.
Select your Azure subscription where you want the job to be created.
Select the resource group for the Stream Analytics job resource.
Select the location for the job.
For the Event Hubs policy name, create a new policy or select an existing one.
For the Event Hubs consumer group, create a new consumer group or select an existing consumer group.
Select Create to create the Stream Analytics job.
Note
We recommend that you create a consumer group and a policy for each new Azure Stream Analytics job that you create from the Event Hubs page. Consumer groups allow only five concurrent readers, so providing a dedicated consumer group for each job will avoid any errors that might arise from exceeding that limit. A dedicated policy allows you to rotate your key or revoke permissions without impacting other resources.
Your Stream Analytics job is now created where your query is the same that you tested, and input is your event hub.
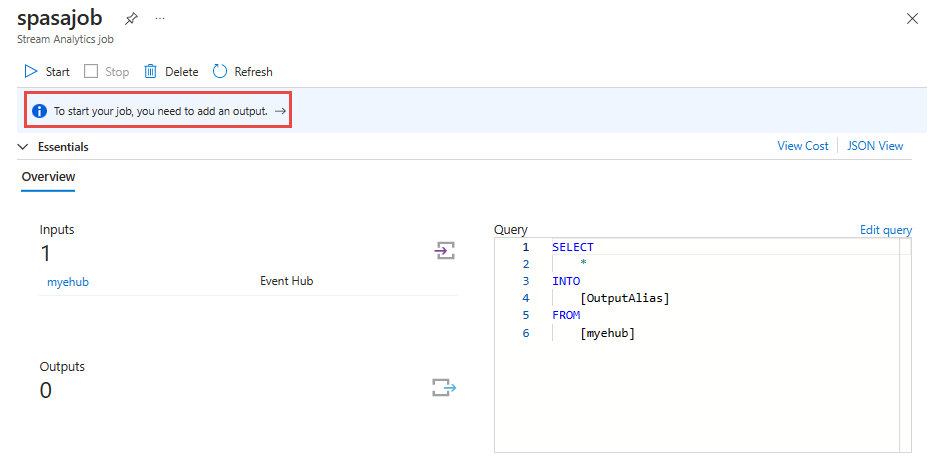
Add an output of your choice.
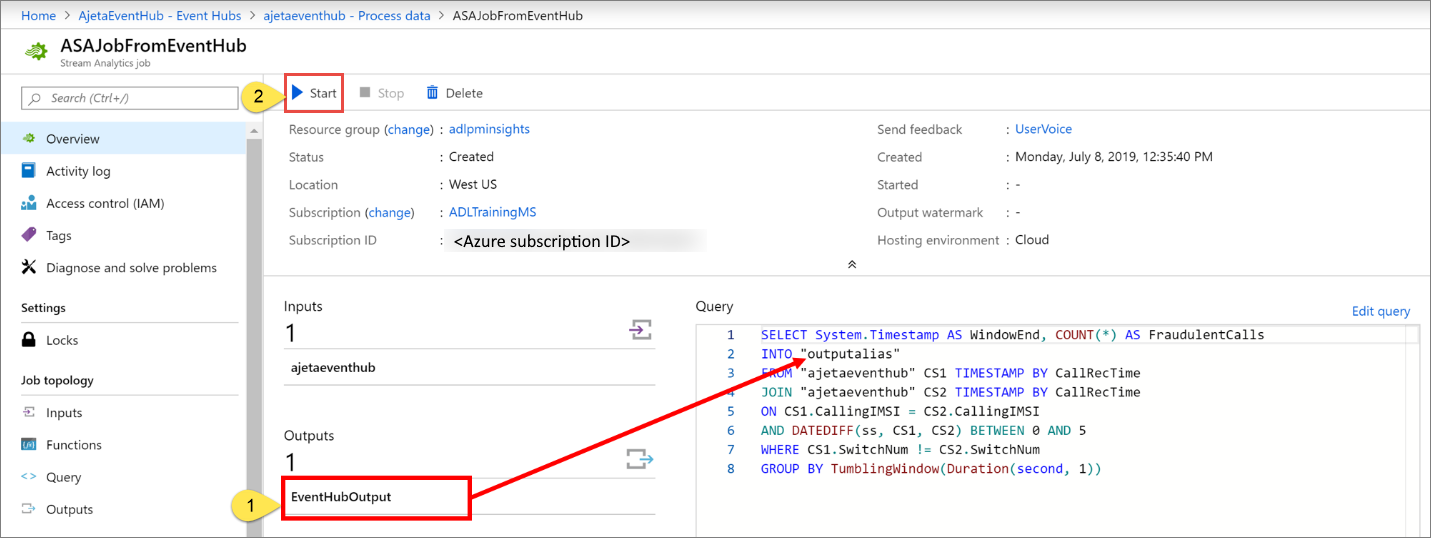
Navigate back to Stream Analytics job page by clicking the name of the job in breadcrumb link.
Select Edit query above the Query window.
Update
[OutputAlias]with your output name, and select Save query link above the query. Close the Query page by selecting X in the top-right corner.Now, on the Stream Analytics job page, select Start on the toolbar to start the job.


Access
Issue : User can't access preview data because they don't have right permissions on the Subscription.
Option 1: The user who wants to preview incoming data needs to be added as a Contributor on Subscription.
Option 2: The user needs to be added as Stream Analytics Query tester role on Subscription. Navigate to Access control for the subscription. Add a new role assignment for the user as "Stream Analytics Query Tester" role.
Option 3: The user can create Azure Stream Analytics job. Set input as this event hub and navigate to "Query" to preview incoming data from this event hub.
Option 4: The admin can create a custom role on the subscription. Add the following permissions to the custom role and then add user to the new custom role.

Streaming units
Your Azure Stream Analytics job defaults to three streaming units (SUs). To adjust this setting, select Scale on the left menu in the Stream Analytics job page in the Azure portal. To learn more about streaming units, see Understand and adjust Streaming Units.

Related content
To learn more about Stream Analytics queries, see Stream Analytics Query Language