Note
Access to this page requires authorization. You can try signing in or changing directories.
Access to this page requires authorization. You can try changing directories.
Get started creating a Private Link service that refers to your service. Give Private Link access to your service or resource deployed behind an Azure Standard Load Balancer. Users of your service have private access from their virtual network.
Prerequisites
- An Azure account with an active subscription. Create a trial subscription.
Sign in to Azure
Sign in to the Azure portal with your Azure account.
Create a virtual network
The following procedure creates a virtual network with a resource subnet.
In the portal, search for and select Virtual networks.
On the Virtual networks page, select + Create.
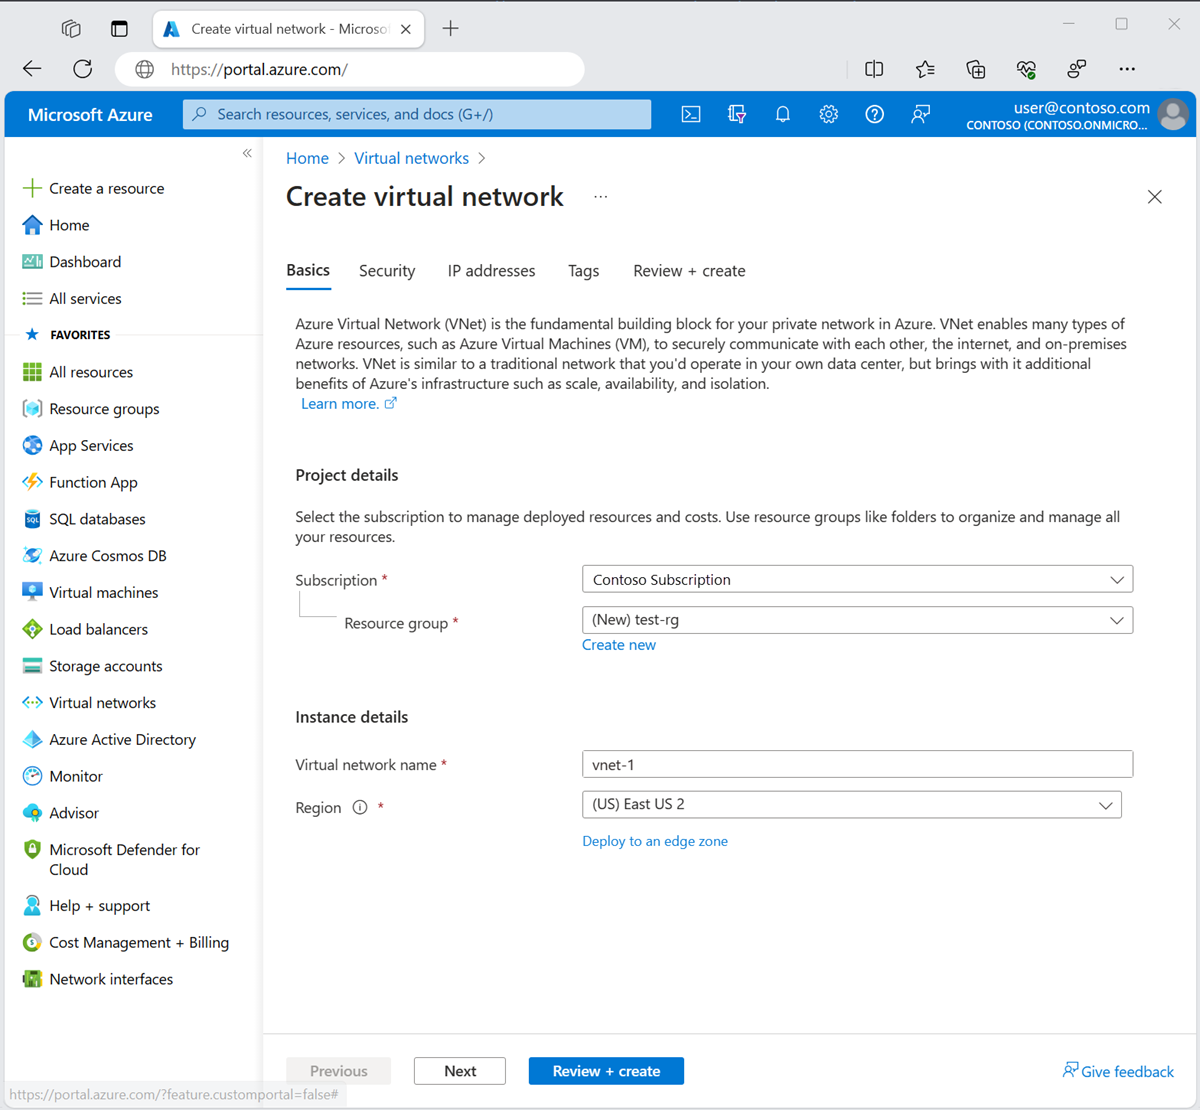
On the Basics tab of Create virtual network, enter or select the following information:
Setting Value Project details Subscription Select your subscription. Resource group Select Create new.
Enter test-rg in Name.
Select OK.Instance details Name Enter vnet-1. Region Select (Asia Pacific) China East 2. Select Next: IP Addresses to proceed to the IP Addresses tab.
In the address space box in Subnets, select the default subnet.
In Edit subnet, enter or select the following information:
Setting Value Subnet name Enter subnet-1. Subnet address range Enter 10.0.0.0/24. 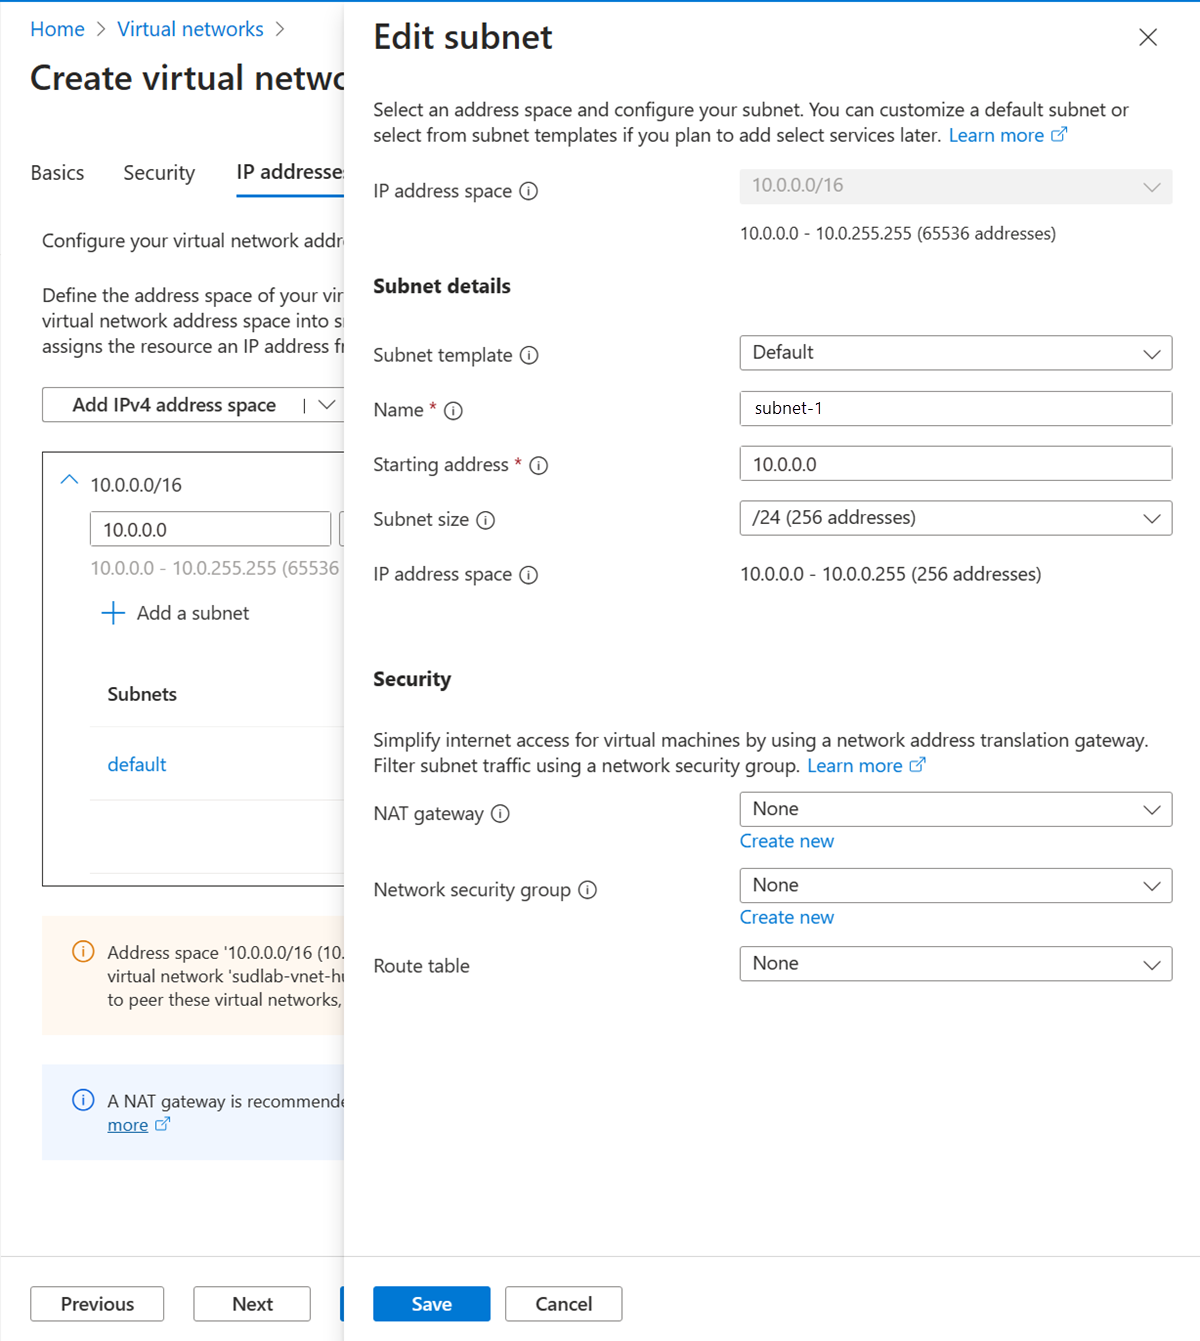
Select Save.
Select Review + create at the bottom of the screen, and when validation passes, select Create.
Create load balancer
Create an internal load balancer that load balances virtual machines.
During the creation of the load balancer, you configure:
Frontend IP address
Backend pool
Inbound load-balancing rules
In the search box at the top of the portal, enter Load balancer. Select Load balancers in the search results.
In the Load balancer page, select + Create.
In the Basics tab of the Create load balancer page, enter, or select the following information:
Setting Value Project details Subscription Select your subscription. Resource group Select test-rg. Instance details Name Enter load-balancer Region Select **(Asia Pacific) China East 2 **. SKU Leave the default Standard. Type Select Internal. Tier Select Regional. Select Next: Frontend IP configuration.
In Frontend IP configuration, select + Add a frontend IP configuration.
Enter or select the following information in Add frontend IP configuration.
Setting Value Name Enter frontend. Virtual network Select vnet-1 (test-rg). Subnet Select subnet-1 (10.0.0.0/24). Assignment Leave the default of Dynamic. Availability zone Leave the default of Zone-redundant. Note
In regions with Availability Zones, you have the option to select no-zone (default option), a specific zone, or zone-redundant. The choice will depend on your specific domain failure requirements. In regions without Availability Zones, this field won't appear.
For more information on availability zones, see Availability zones overview.Select Add.
Select Next: Backend pools.
In Backend pools, select + Add a backend pool.
Enter backend-pool for Name.
Select NIC for Backend Pool Configuration.
Note
Private Link service is supported on Standard Load Balancers with backend pools configured by NICs. It is not supported when backend pools are configured using IP addresses. For more information, see Private Link service limitations.
Select Save.
Select Next: Inbound rules.
In Load balancing rule, select + Add a load balancing rule.
In Add load balancing rule, enter or select the following information:
Setting Value Name Enter http-rule IP Version Select IPv4 or IPv6 depending on your requirements. Frontend IP address Select frontend. Backend pool Select backend-pool. Protocol Select TCP. Port Enter 80. Backend port Enter 80. Health probe Select Create new.
In Name, enter health-probe.
Select HTTP in Protocol.
Leave the rest of the defaults, and select Save.Session persistence Select None. Idle timeout (minutes) Enter or select 15. Enable TCP Reset Select the box. Enable Floating IP Leave the box unchecked. Select Save.
Select the blue Review + create button.
Select Create.
Create a private link service
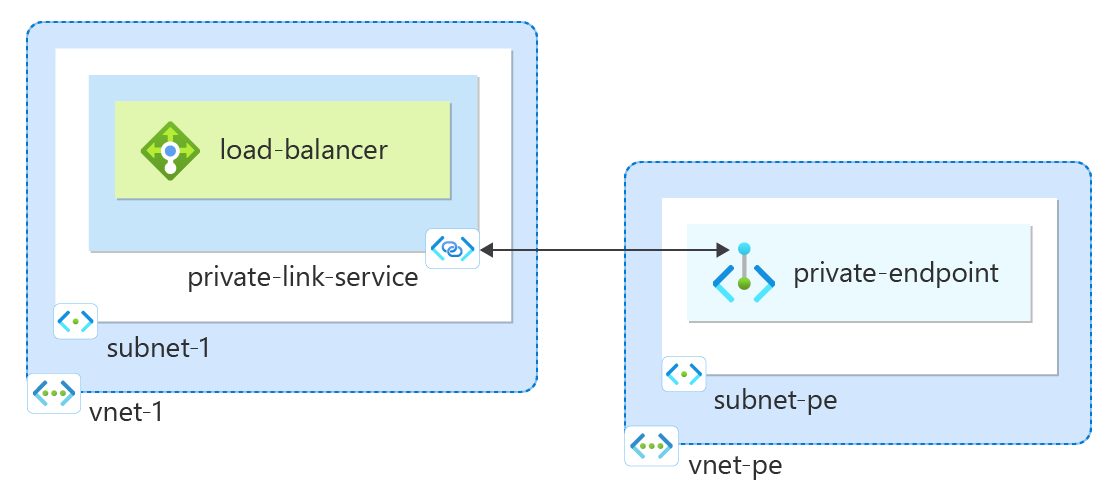
Create a Private Link service behind the load balancer you created in the previous section.
In the search box at the top of the portal, enter Private link. Select Private link services in the search results.
Select + Create.
In the Basics tab, enter or select the following information:
Setting Value Project details Subscription Select your subscription. Resource Group Select test-rg. Instance details Name Enter private-link-service. Region Select (Asia Pacific) China East 2. Select Next: Outbound settings.
In the Outbound settings tab, enter or select the following information:
Setting Value Load balancer Select load-balancer. Load balancer frontend IP address Select frontend (10.0.0.4). Source NAT subnet Select vnet-1/subnet-1 (10.0.0.0/24). Enable TCP proxy V2 Leave the default of No.
If your application expects a TCP proxy v2 header, select Yes.Private IP address settings Leave the default settings Select Next: Access security.
Leave the default of Role-based access control only in the Access security tab.
Select Next: Tags.
Select Next: Review + create.
Select Create.
Your private link service is created and can receive traffic. If you want to see traffic flows, configure your application behind your standard load balancer.
Create private endpoint
In this section, you map the private link service to a private endpoint. A virtual network contains the private endpoint for the private link service. This virtual network contains the resources that access your private link service.
Create private endpoint virtual network
Repeat steps in Create a virtual network to create a virtual network with the following settings:
| Setting | Value |
|---|---|
| Name | vnet-pe |
| Location | **China East 2 ** |
| Address space | 10.1.0.0/16 |
| Subnet name | subnet-pe |
| Subnet address range | 10.1.0.0/24 |
Create private endpoint
In the search box at the top of the portal, enter Private endpoint. Select Private endpoints in the search results.
Select + Create.
In the Basics tab, enter or select the following information:
Setting Value Project details Subscription Select your subscription. Resource group Select test-rg. You created this resource group in the previous section. Instance details Name Enter private-endpoint. Region Select **(Asia Pacific) China East 2 **. Select Next: Resource.
In the Resource tab, enter or select the following information:
Setting Value Connection method Select Connect to an Azure resource in my directory. Subscription Select your subscription. Resource type Select Microsoft.Network/privateLinkServices. Resource Select private-link-service. Select Next: Virtual Network.
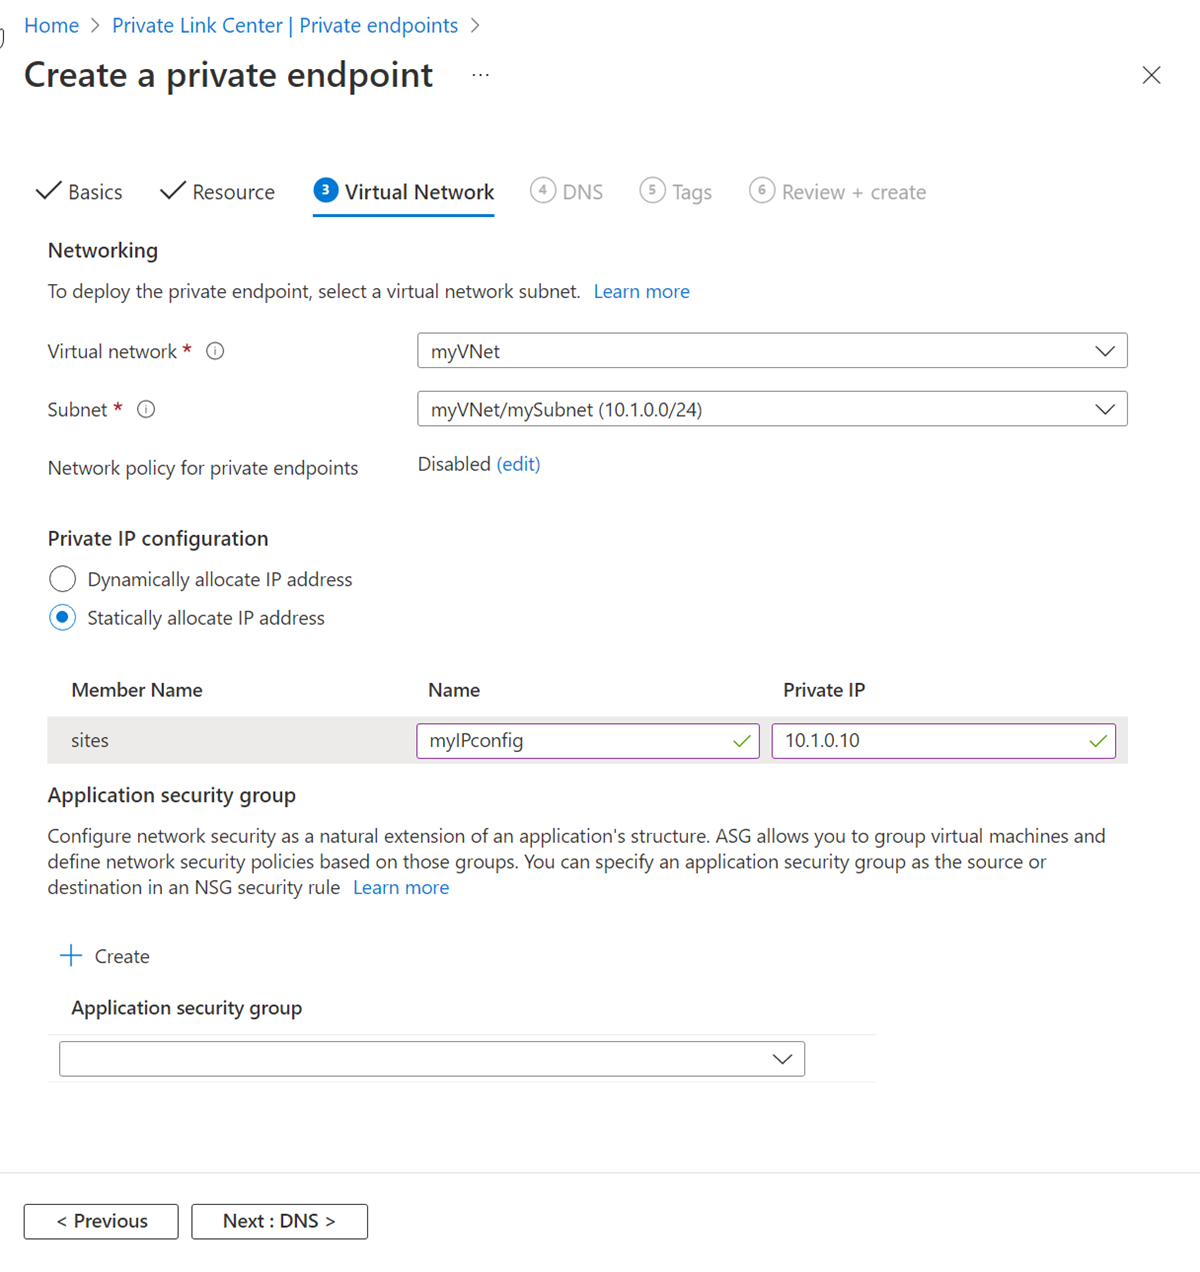
In Virtual Network, enter or select the following information.
Setting Value Networking Virtual network Select vnet-pe (test-rg). Subnet Select subnet-pe. Setting Value Private IP configuration Select Dynamically allocate IP address. 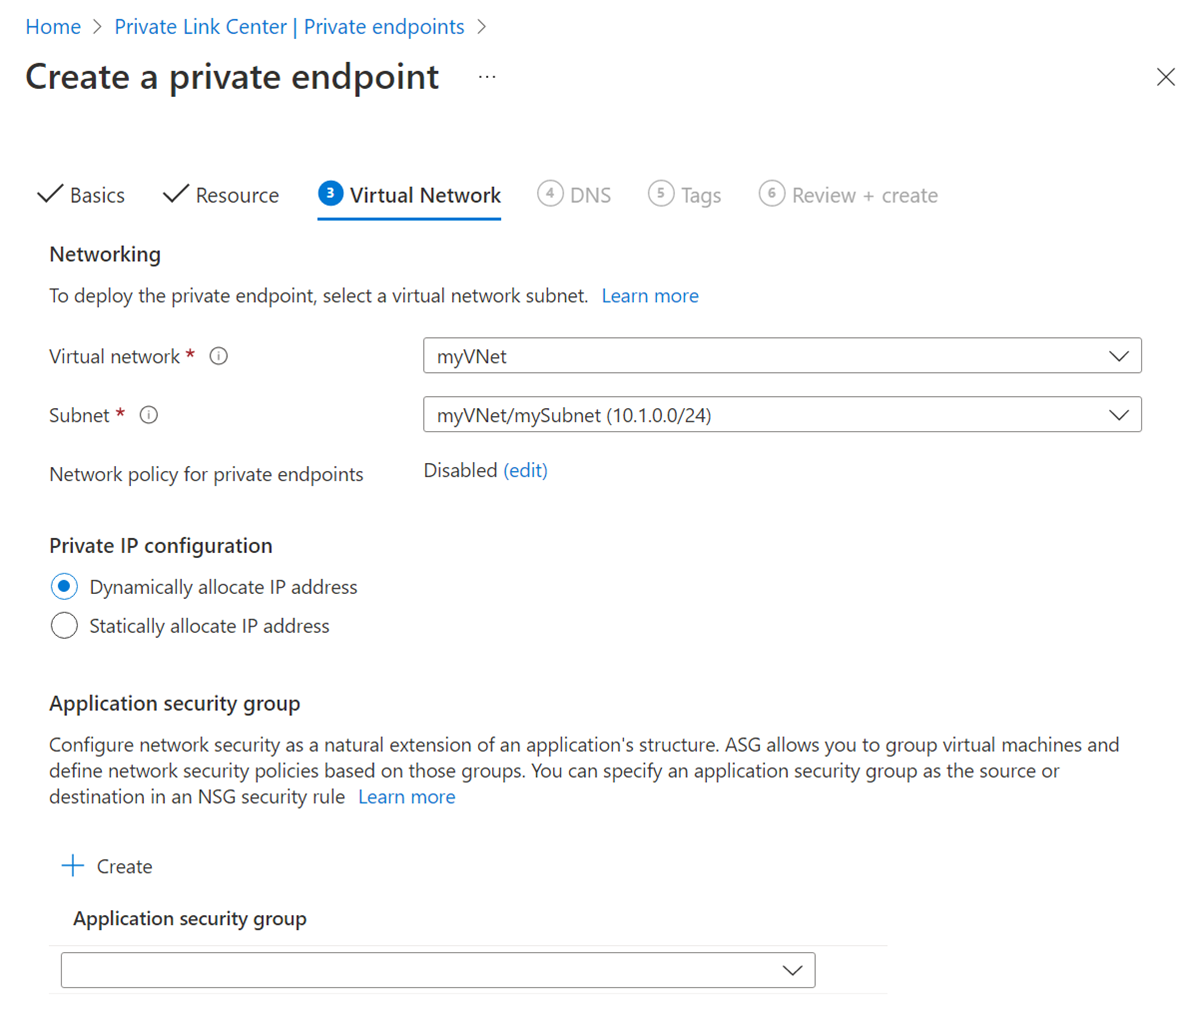
Select Next: DNS.
Select Next: Tags.
Select Next: Review + create.
Select Create.
IP address of private endpoint
In this section, you find the IP address of the private endpoint that corresponds with the load balancer and private link service. The following steps are only necessary if you selected Dynamically allocate IP address in the previous section.
Enter test-rg in the search box at the top of the portal. Select test-rg in the search results in Resource Groups.
In the test-rg resource group, select private-endpoint.
In the Overview page of private-endpoint, select the name of the network interface associated with the private endpoint. The network interface name begins with private-endpoint.nic.
In the Overview page of the private endpoint nic, the IP address of the endpoint is displayed in Private IP address.
Clean up resources
When you finish using the resources that you created, you can delete the resource group and all its resources:
In the Azure portal, search for and select Resource groups.
On the Resource groups page, select the test-rg resource group.
On the test-rg page, select Delete resource group.
Enter test-rg in Enter resource group name to confirm deletion, and then select Delete.
Next steps
In this quickstart, you:
Created a virtual network and internal Azure Load Balancer.
Created a private link service.
Created a virtual network and a private endpoint for the private link service.
To learn more about Azure Private endpoint, continue to:
