Note
Access to this page requires authorization. You can try signing in or changing directories.
Access to this page requires authorization. You can try changing directories.
This tutorial is part four in a series. It shows you how to set up continuous integration and continuous deployment (CI/CD) for an Azure Service Fabric application by using Azure Pipelines. To complete the tutorial, you must have an existing Service Fabric application. This tutorial uses the application that is described in part one of the tutorial series.
In this tutorial, you learn how to:
- Add source control to your project
- Create a build pipeline in Azure Pipelines
- Create a release pipeline in Azure Pipelines
- Automatically deploy and upgrade an application
The tutorial series shows you how to:
- Build a .NET Service Fabric application
- Deploy the application to a remote cluster
- Add an HTTPS endpoint to an ASP.NET Core front-end service
- Configure CI/CD by using Azure Pipelines (this tutorial)
- Set up monitoring and diagnostics for the application
Prerequisites
Before you begin this tutorial:
- If you don't have an Azure subscription, create a trial subscription.
- Install Visual Studio 2019, including the Azure development workload and the ASP.NET and web development workload.
- Install the Service Fabric SDK.
- Create a Windows Service Fabric cluster in Azure, for example, by following this tutorial.
- Create an Azure DevOps organization so that you can create a project in Azure DevOps and use Azure Pipelines.
Download the Voting sample application
If you didn't build the Voting sample application in part one of this series, you can download it. In a command window, run the following command to clone the sample app repository to your local machine.
git clone https://github.com/Azure-Samples/service-fabric-dotnet-quickstart
Prepare a publish profile
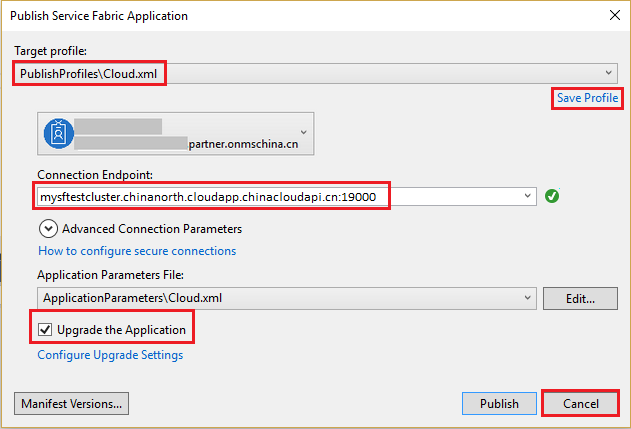
Now that you created an application, you're ready to set up continuous integration. First, prepare a publish profile within your application for use by the deployment process that executes within Azure Pipelines. The publish profile should be configured to target the cluster you previously created. Start Visual Studio and open an existing Service Fabric application project. In Solution Explorer, right-click the application and select Publish.
Choose a target profile in your application project to use for your continuous integration workflow, for example, Cloud. Specify the cluster connection endpoint. Select the Upgrade the Application checkbox so that your application upgrades for each deployment in Azure DevOps. Select the Save Profile link to save the settings to the publish profile, and then select Cancel to close the dialog.
Share your Visual Studio solution to a new Azure DevOps Git repo
Share your application source files to a project in Azure DevOps so that you can generate builds.
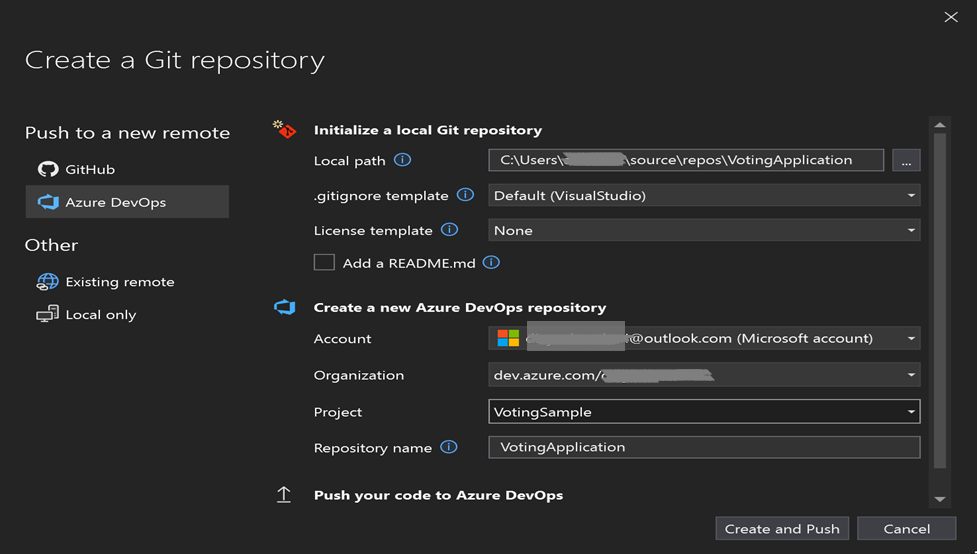
To create a new GitHub repo and Azure DevOps repo in Visual Studio 2022, select Git > Create Git Repository on the Git menu.
Select your account and enter your repository name. Select Create and Push.
Publishing the repo creates a new project in your Azure DevOps Services account that has the same name as the local repo.
To view the newly created repository, go to https://dev.azure.com/><organizationname>. Hover over the name of your project and select the Repos icon.
Configure continuous delivery by using Azure Pipelines
An Azure Pipelines build pipeline describes a workflow that has a set of build steps that are executed sequentially. To deploy to a Service Fabric cluster, create a build pipeline that produces a Service Fabric application package and other artifacts. Learn more about Azure Pipelines build pipelines.
An Azure Pipelines release pipeline describes a workflow that deploys an application package to a cluster. When used together, the build pipeline and release pipeline execute the entire workflow, starting with source files and ending with a running application in your cluster. Learn more about Azure Pipelines release pipelines.
Create a build pipeline
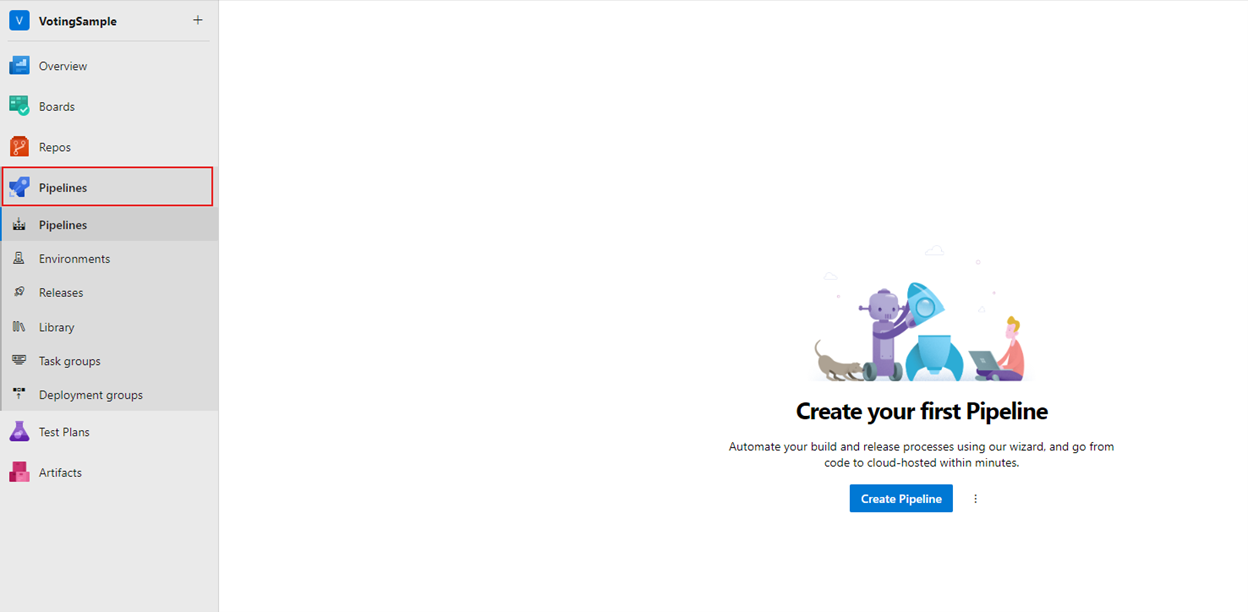
Open a web browser and go to your new project at https://dev.azure.com/<organization-name>/VotingSample.
Select the Pipelines tab, and then select Create Pipeline.
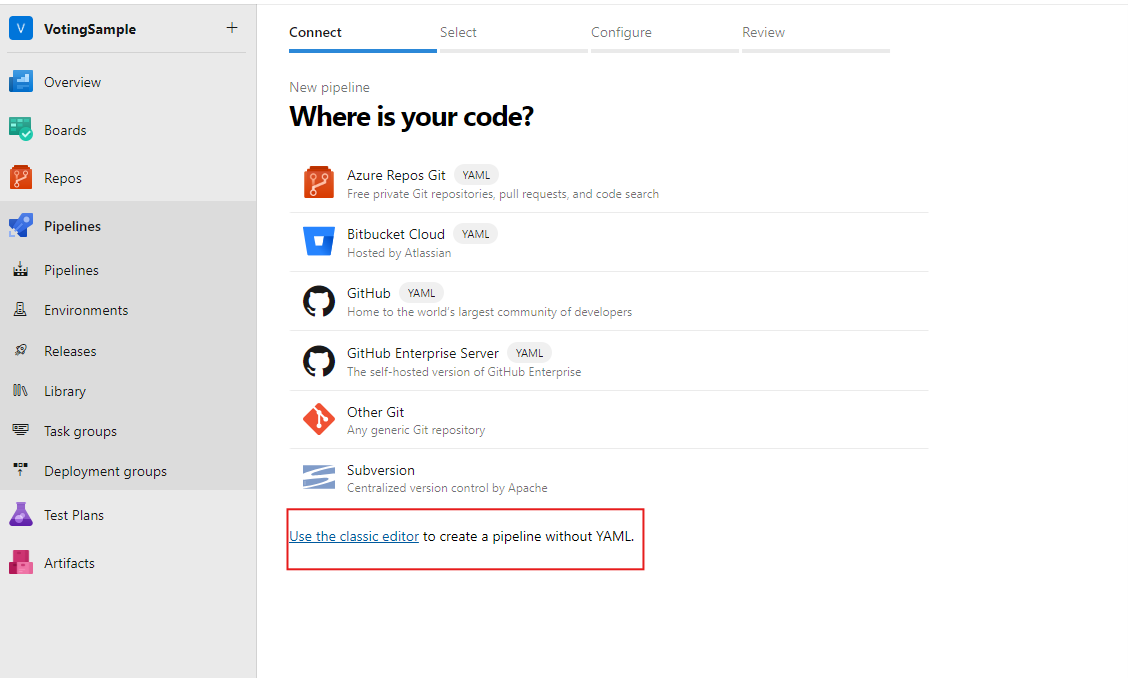
Select Use the classic editor to create a pipeline without using YAML.
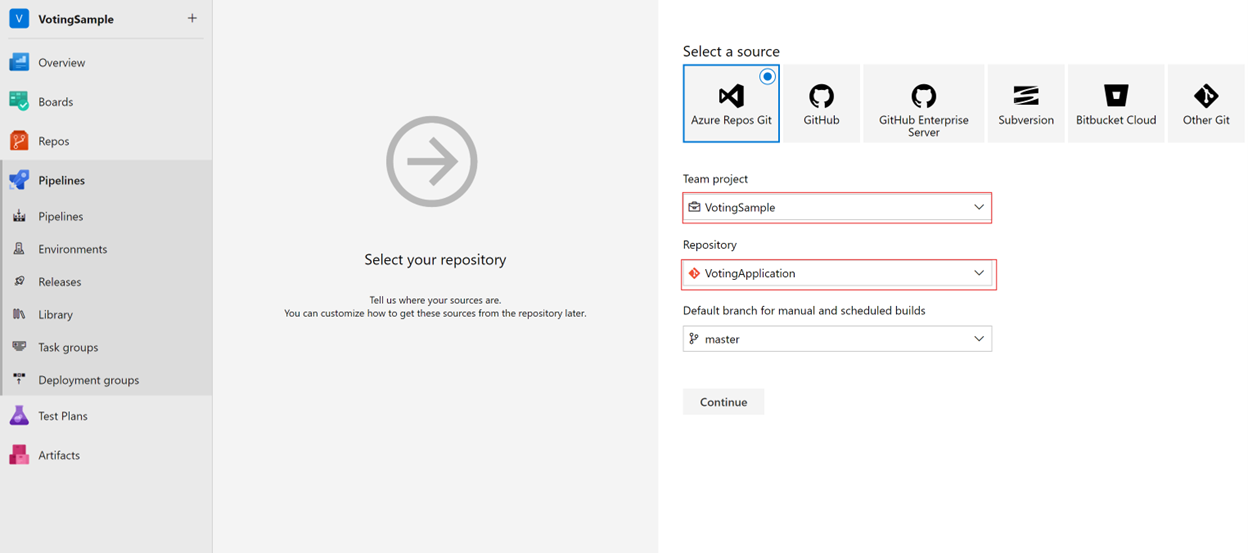
For the source, select Azure Repos Git. For Team project, select VotingSample. For Repository, select VotingApplication. Leave the default branch for manual and scheduled builds. Then select Continue.
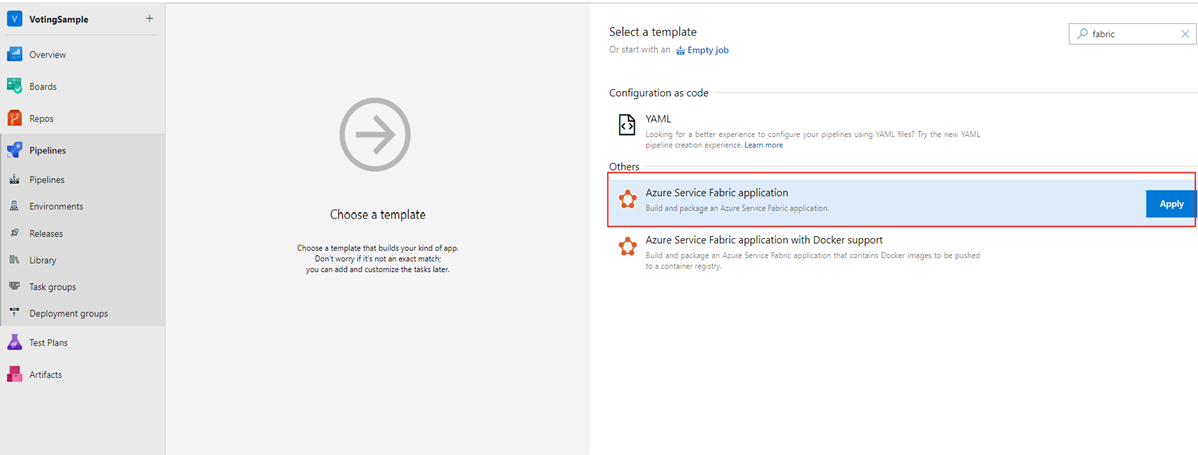
In Select a template, select the Azure Service Fabric application template, and then select Apply.
On Tasks, for Agent pool, enter Azure Pipelines. For Agent Specification, enter windows-2022.

Under Triggers, select the Enable continuous integration checkbox. In Branch filters, the Branch specification defaults to master. Select Save and queue to manually start a build.

Builds also trigger upon push or check-in. To check your build progress, select the Builds tab. After you verify that the build executes successfully, define a release pipeline that deploys your application to a cluster.
Create a release pipeline
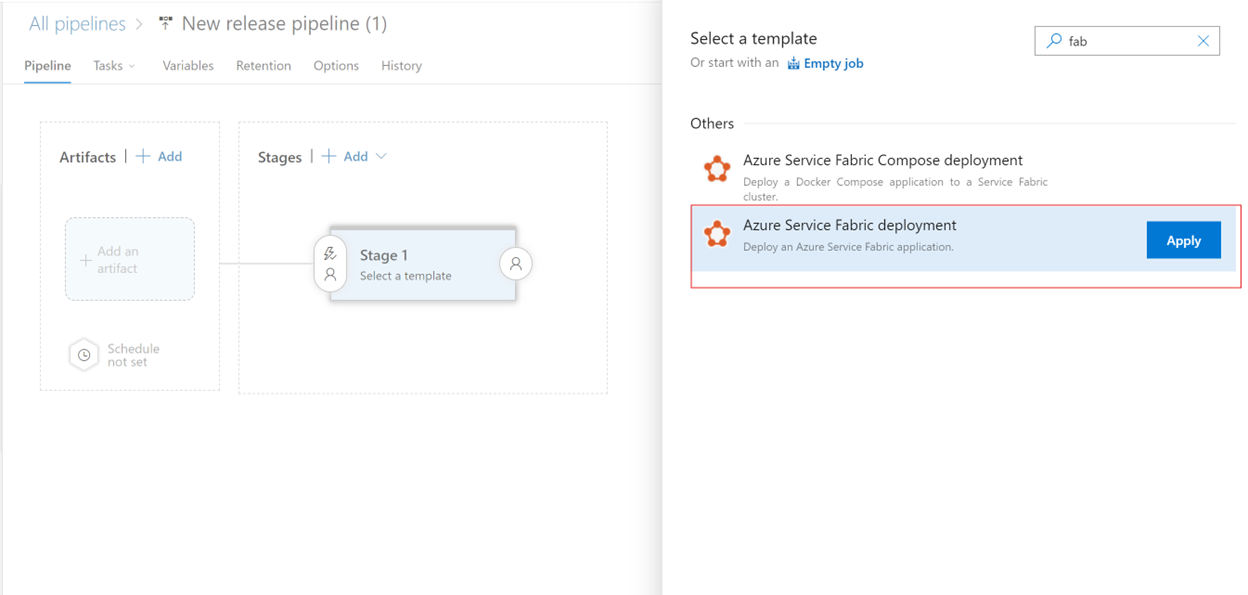
Select the Pipelines tab, and then select Releases > New pipeline. On Select a template, select the Azure Service Fabric Deployment template, and then select Apply.
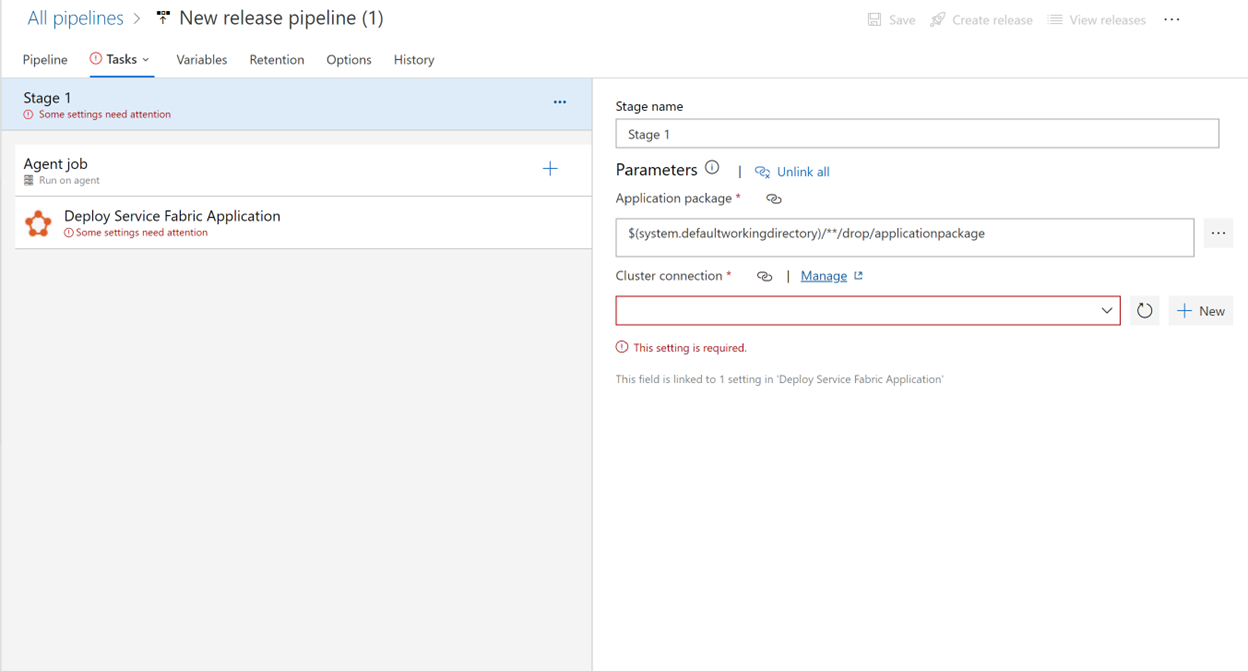
Select Tasks > New to add a new cluster connection.
On New Service Fabric Connection, select Certificate Based or Microsoft Entra credential authentication. Specify a cluster endpoint of tcp://mysftestcluster.chinaeast2.cloudapp.chinacloudapi.cn:19000 (or the endpoint of the cluster you're deploying to).
For certificate-based authentication, add the server certificate thumbprint of the server certificate used to create the cluster. In Client certificate, add the base-64 encoding of the client certificate file. See the help information for that field to learn how to get that base-64 encoded representation of the certificate. Also, add the password for the certificate. You can use the cluster certificate or the server certificate if you don't have a separate client certificate.
For Microsoft Entra credentials, add a value for Server certificate thumbprint. Use the server certificate that you used to create the cluster and the credentials that you want to use to connect to the cluster in Username and Password.
Select Save.
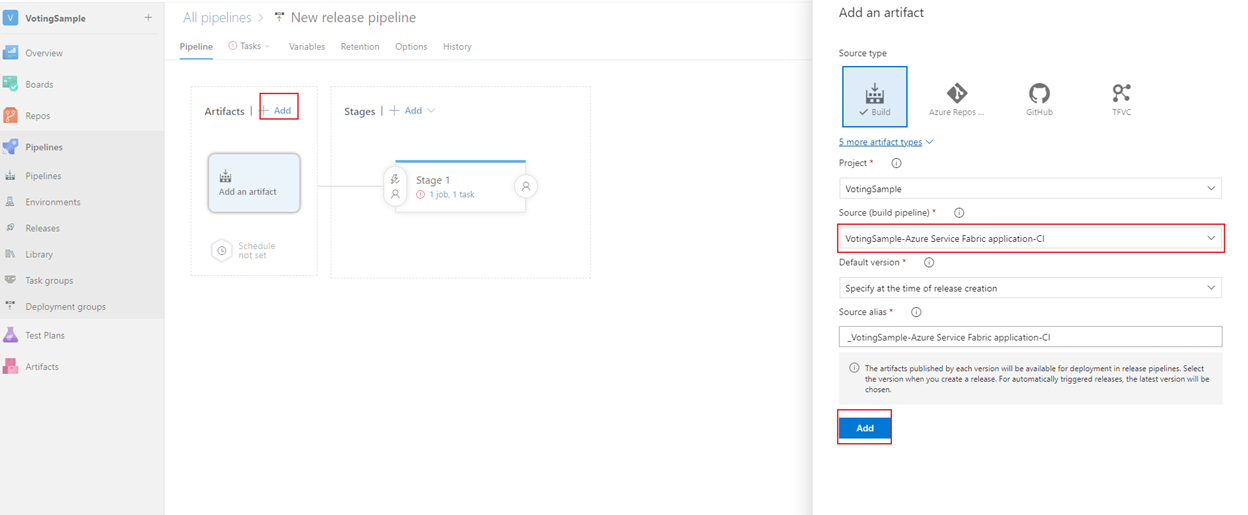
Next, add a build artifact to the pipeline so that the release pipeline can find the output from the build. Select Pipeline > Artifacts > Add. In Source (Build definition), select the build pipeline that you created earlier. Select Add to save the build artifact.
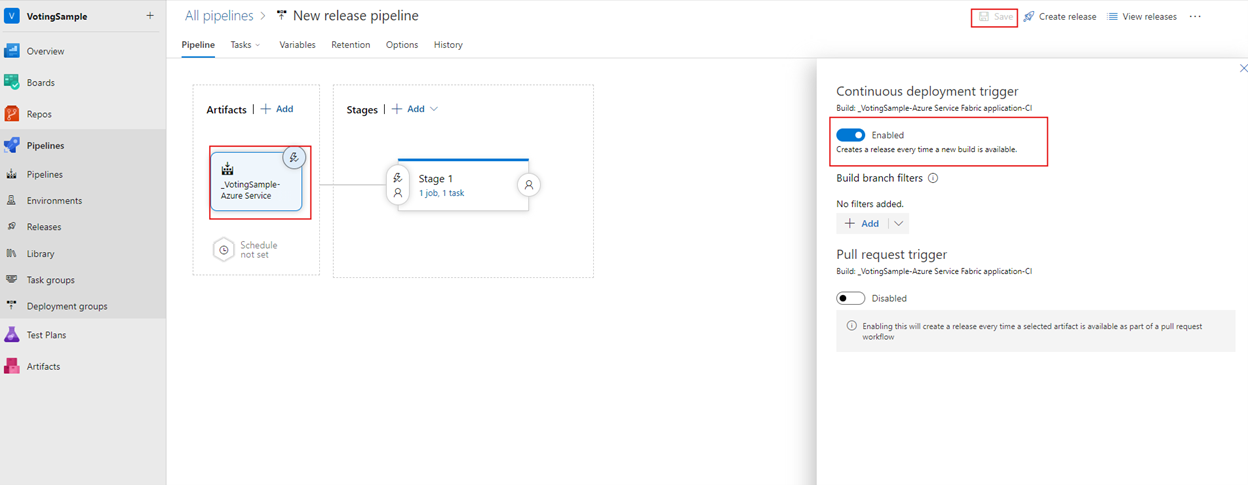
Enable a continuous deployment trigger so that a release is automatically created when the build finishes. Select the lightning icon in the artifact, enable the trigger, and select Save to save the release pipeline.
Select Create Release > Create to manually create a release. To monitor the release progress, select the Releases tab.
Verify that the deployment succeeded and that the application is running in the cluster. Open a web browser and go to https://mysftestcluster.chinaeast2.cloudapp.chinacloudapi.cn:19080/Explorer/. Note the application version. In this example, it's 1.0.0.20170616.3.
Commit and push changes to trigger a release
To verify that the continuous integration pipeline is functioning, check in some code changes to Azure DevOps.
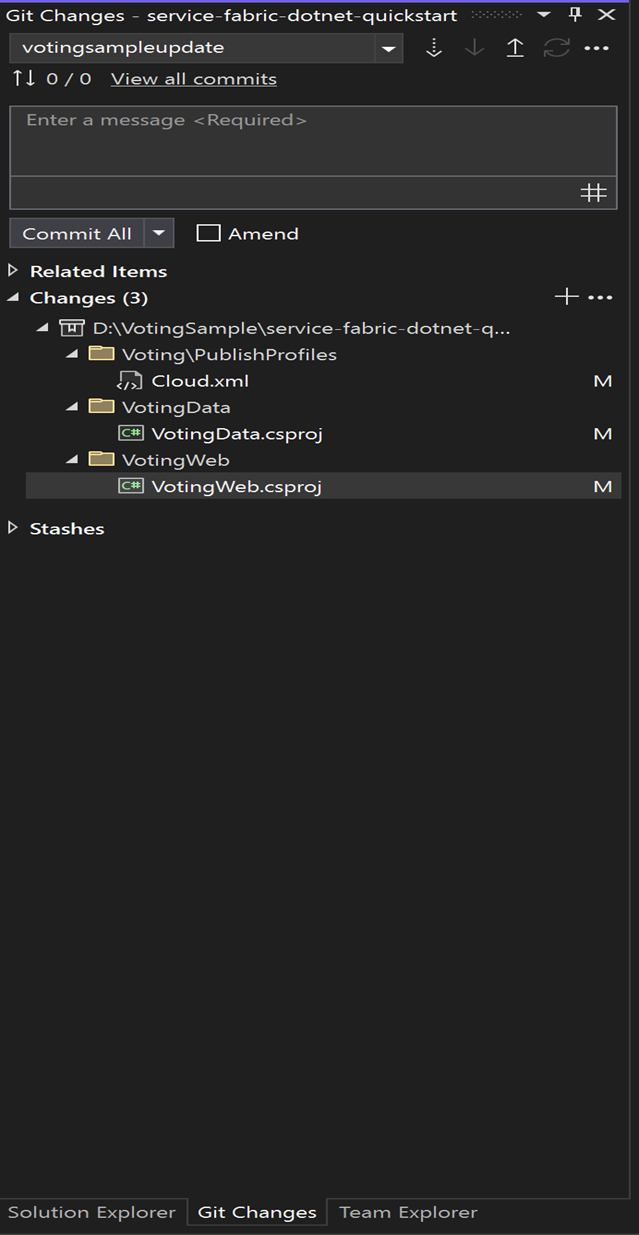
As you write your code, Visual Studio keeps track of the file changes to your project in the Changes section of the Git Changes pane.
On Changes, enter a message to describe your update, and then commit your changes.
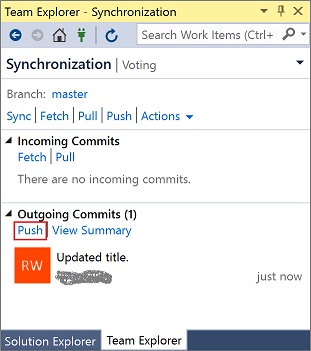
On Git Changes, select Push (the up arrow) to update your code in Azure Pipelines.
Pushing the changes to Azure Pipelines triggers a build. To check your build progress, select the Pipelines tab in the application on https://dev.azure.com/organizationname/VotingSample.
When the build finishes, a release is automatically created and starts upgrading the application on the cluster.
Verify that the deployment succeeded and that the application is running in the cluster. Open a web browser and go to https://mysftestcluster.chinaeast2.cloudapp.chinacloudapi.cn:19080/Explorer/. Note the application version. In this example, it's 1.0.0.20170815.3.

Update the application
Make code changes in the application. Save and commit the changes.
When the application upgrade begins, you can track the upgrade progress in Service Fabric Explorer:
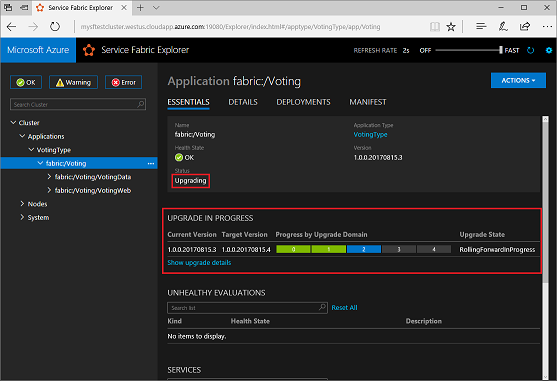
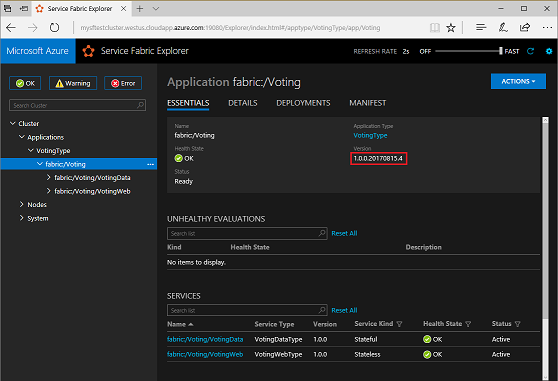
The application upgrade might take several minutes. When the upgrade is finished, the application is running the next version. In this example, it's running version 1.0.0.20170815.4.
Next step
Advance to the next tutorial: