本教程演示如何构建和修改 Blazor Server 应用。 学习如何:
- 使用 Blazor Server 应用模板构建简单的聊天室。
- 使用 Razor 组件。
- 使用 Razor 组件中的事件处理和数据绑定。
- 使用 Visual Studio 快速部署到 Azure 应用服务。
- 从本地 SignalR 迁移到 Azure SignalR 服务。
重要
本文中出现的原始连接字符串仅用于演示目的。
连接字符串包括应用程序访问 Azure SignalR 服务所需的授权信息。 连接字符串中的访问密钥类似于服务的根密码。 在生产环境中,请始终保护访问密钥。 使用 Azure 密钥保管库安全地管理和轮换密钥,使用 Microsoft Entra ID 保护连接字符串,并使用 Microsoft Entra ID 授权访问。
避免将访问密钥分发给其他用户、对其进行硬编码或将其以纯文本形式保存在其他人可以访问的任何位置。 如果你认为访问密钥可能已泄露,请轮换密钥。
准备好开始了吗?
- 安装 .NET Core 3.0 SDK(版本 >= 3.0.100)
- 安装 Visual Studio 2019(版本 >= 16.3)
从 Visual Studio 2019 版本 16.2.0 开始,Azure SignalR 服务内置于 Web 应用程序的发布过程中,以更加方便地管理 Web 应用和 SignalR 服务之间的依赖项。 在以下条件下,可以在不进行任何代码更改的情况下同时工作:
- 在本地 SignalR 实例的本地开发环境中。
- 在 Azure 应用服务的 Azure SignalR 服务中。
创建 Blazor 聊天应用:
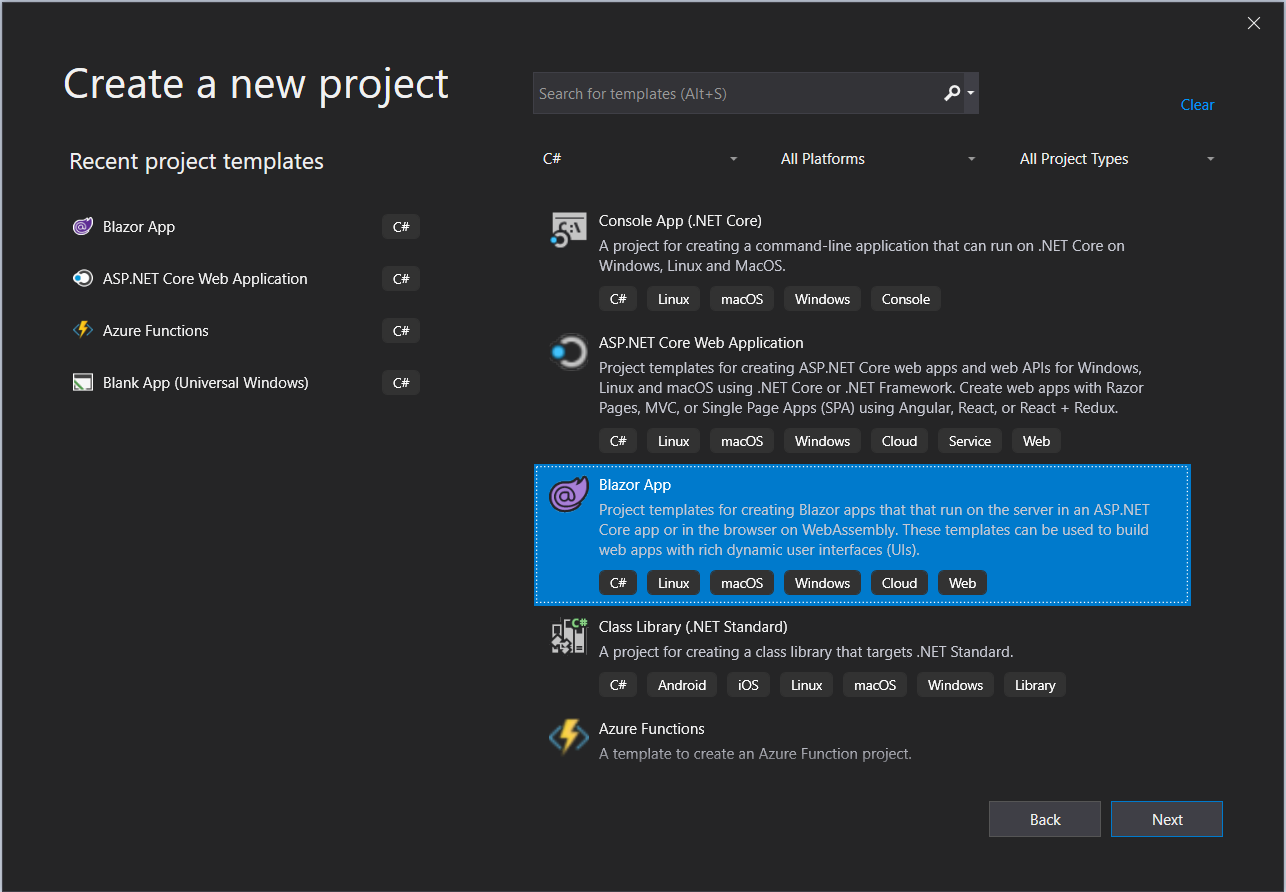
在 Visual Studio 中,选择“创建新项目”。
选择“Blazor 应用” 。
命名应用程序并选择一个文件夹。
选择“Blazor Server 应用”模板 。
备注
确保已安装 .NET Core SDK 3.0+,使 Visual Studio 可正确识别目标框架。
还可通过在 .NET CLI 中运行
dotnet new命令来创建项目:dotnet new blazorserver -o BlazorChat
添加一个名为
BlazorChatSampleHub.cs的新 C# 文件,并创建一个派生于聊天应用的Hub类的新类BlazorChatSampleHub。 有关创建中心的详细信息,请参阅创建并使用中心。using System; using System.Threading.Tasks; using Microsoft.AspNetCore.SignalR; namespace BlazorChat { public class BlazorChatSampleHub : Hub { public const string HubUrl = "/chat"; public async Task Broadcast(string username, string message) { await Clients.All.SendAsync("Broadcast", username, message); } public override Task OnConnectedAsync() { Console.WriteLine($"{Context.ConnectionId} connected"); return base.OnConnectedAsync(); } public override async Task OnDisconnectedAsync(Exception e) { Console.WriteLine($"Disconnected {e?.Message} {Context.ConnectionId}"); await base.OnDisconnectedAsync(e); } } }在
Startup.Configure()方法中为中心添加一个终结点。app.UseEndpoints(endpoints => { endpoints.MapBlazorHub(); endpoints.MapFallbackToPage("/_Host"); endpoints.MapHub<BlazorChatSampleHub>(BlazorChatSampleHub.HubUrl); });安装
Microsoft.AspNetCore.SignalR.Client包以使用 SignalR 客户端。dotnet add package Microsoft.AspNetCore.SignalR.Client --version 3.1.7要实现 SignalR 客户端,请在
Pages文件夹下新建名为ChatRoom.razor的 Razor 组件。 使用 ChatRoom.razor 文件或执行以下步骤:添加
@page指令和 using 语句。 使用@inject指令插入NavigationManager服务。@page "/chatroom" @inject NavigationManager navigationManager @using Microsoft.AspNetCore.SignalR.Client;在
@code部分中,将以下成员添加到新的 SignalR 客户端,以发送和接收消息。@code { // flag to indicate chat status private bool _isChatting = false; // name of the user who will be chatting private string _username; // on-screen message private string _message; // new message input private string _newMessage; // list of messages in chat private List<Message> _messages = new List<Message>(); private string _hubUrl; private HubConnection _hubConnection; public async Task Chat() { // check username is valid if (string.IsNullOrWhiteSpace(_username)) { _message = "Please enter a name"; return; }; try { // Start chatting and force refresh UI. _isChatting = true; await Task.Delay(1); // remove old messages if any _messages.Clear(); // Create the chat client string baseUrl = navigationManager.BaseUri; _hubUrl = baseUrl.TrimEnd('/') + BlazorChatSampleHub.HubUrl; _hubConnection = new HubConnectionBuilder() .WithUrl(_hubUrl) .Build(); _hubConnection.On<string, string>("Broadcast", BroadcastMessage); await _hubConnection.StartAsync(); await SendAsync($"[Notice] {_username} joined chat room."); } catch (Exception e) { _message = $"ERROR: Failed to start chat client: {e.Message}"; _isChatting = false; } } private void BroadcastMessage(string name, string message) { bool isMine = name.Equals(_username, StringComparison.OrdinalIgnoreCase); _messages.Add(new Message(name, message, isMine)); // Inform blazor the UI needs updating InvokeAsync(StateHasChanged); } private async Task DisconnectAsync() { if (_isChatting) { await SendAsync($"[Notice] {_username} left chat room."); await _hubConnection.StopAsync(); await _hubConnection.DisposeAsync(); _hubConnection = null; _isChatting = false; } } private async Task SendAsync(string message) { if (_isChatting && !string.IsNullOrWhiteSpace(message)) { await _hubConnection.SendAsync("Broadcast", _username, message); _newMessage = string.Empty; } } private class Message { public Message(string username, string body, bool mine) { Username = username; Body = body; Mine = mine; } public string Username { get; set; } public string Body { get; set; } public bool Mine { get; set; } public bool IsNotice => Body.StartsWith("[Notice]"); public string CSS => Mine ? "sent" : "received"; } }在
@code部分前添加 UI 标记,以与 SignalR 客户端进行交互。<h1>Blazor SignalR Chat Sample</h1> <hr /> @if (!_isChatting) { <p> Enter your name to start chatting: </p> <input type="text" maxlength="32" @bind="@_username" /> <button type="button" @onclick="@Chat"><span class="oi oi-chat" aria-hidden="true"></span> Chat!</button> // Error messages @if (_message != null) { <div class="invalid-feedback">@_message</div> <small id="emailHelp" class="form-text text-muted">@_message</small> } } else { // banner to show current user <div class="alert alert-secondary mt-4" role="alert"> <span class="oi oi-person mr-2" aria-hidden="true"></span> <span>You are connected as <b>@_username</b></span> <button class="btn btn-sm btn-warning ml-md-auto" @onclick="@DisconnectAsync">Disconnect</button> </div> // display messages <div id="scrollbox"> @foreach (var item in _messages) { @if (item.IsNotice) { <div class="alert alert-info">@item.Body</div> } else { <div class="@item.CSS"> <div class="user">@item.Username</div> <div class="msg">@item.Body</div> </div> } } <hr /> <textarea class="input-lg" placeholder="enter your comment" @bind="@_newMessage"></textarea> <button class="btn btn-default" @onclick="@(() => SendAsync(_newMessage))">Send</button> </div> }
更新
NavMenu.razor组件以插入新的NavLink组件,链接到NavMenuCssClass下的聊天室。<li class="nav-item px-3"> <NavLink class="nav-link" href="chatroom"> <span class="oi oi-chat" aria-hidden="true"></span> Chat room </NavLink> </li>向
site.css文件添加一些 CSS 类,对聊天页中的 UI 元素设置样式。/* improved for chat text box */ textarea { border: 1px dashed #888; border-radius: 5px; width: 80%; overflow: auto; background: #f7f7f7 } /* improved for speech bubbles */ .received, .sent { position: relative; font-family: arial; font-size: 1.1em; border-radius: 10px; padding: 20px; margin-bottom: 20px; } .received:after, .sent:after { content: ''; border: 20px solid transparent; position: absolute; margin-top: -30px; } .sent { background: #03a9f4; color: #fff; margin-left: 10%; top: 50%; text-align: right; } .received { background: #4CAF50; color: #fff; margin-left: 10px; margin-right: 10%; } .sent:after { border-left-color: #03a9f4; border-right: 0; right: -20px; } .received:after { border-right-color: #4CAF50; border-left: 0; left: -20px; } /* div within bubble for name */ .user { font-size: 0.8em; font-weight: bold; color: #000; } .msg { /*display: inline;*/ }要运行应用,请按 F5。 现在可以开始聊天:


将 Blazor 应用部署到 Azure 应用服务时,建议使用 Azure SignalR 服务。 Azure SignalR 服务允许将 Blazor Server 应用扩展到大量并发 SignalR 连接。 此外,SignalR 服务的全球覆盖和高性能数据中心可帮助显著减少由于地理位置造成的延迟。
重要
在 Blazor Server 应用中,用户界面状态在服务器端进行维护,这意味着需要一个粘性服务器会话来保持状态。 如果存在单个应用服务器,就可通过设计确保粘性会话。 但如果正在使用多台应用服务器,则系统可能会将客户端协商和连接重定向到不同的服务器,这可能会导致 Blazor 应用中出现不一致的 UI 状态管理。 因此,建议启用粘性服务器会话,如 appsettings.json 中所示:
"Azure:SignalR:ServerStickyMode": "Required"
右键单击项目,转到“发布”。 使用以下设置:
- 目标:Azure
- 特定目标:支持所有类型的 Azure 应用服务。
- 应用服务:创建或选择应用服务实例。
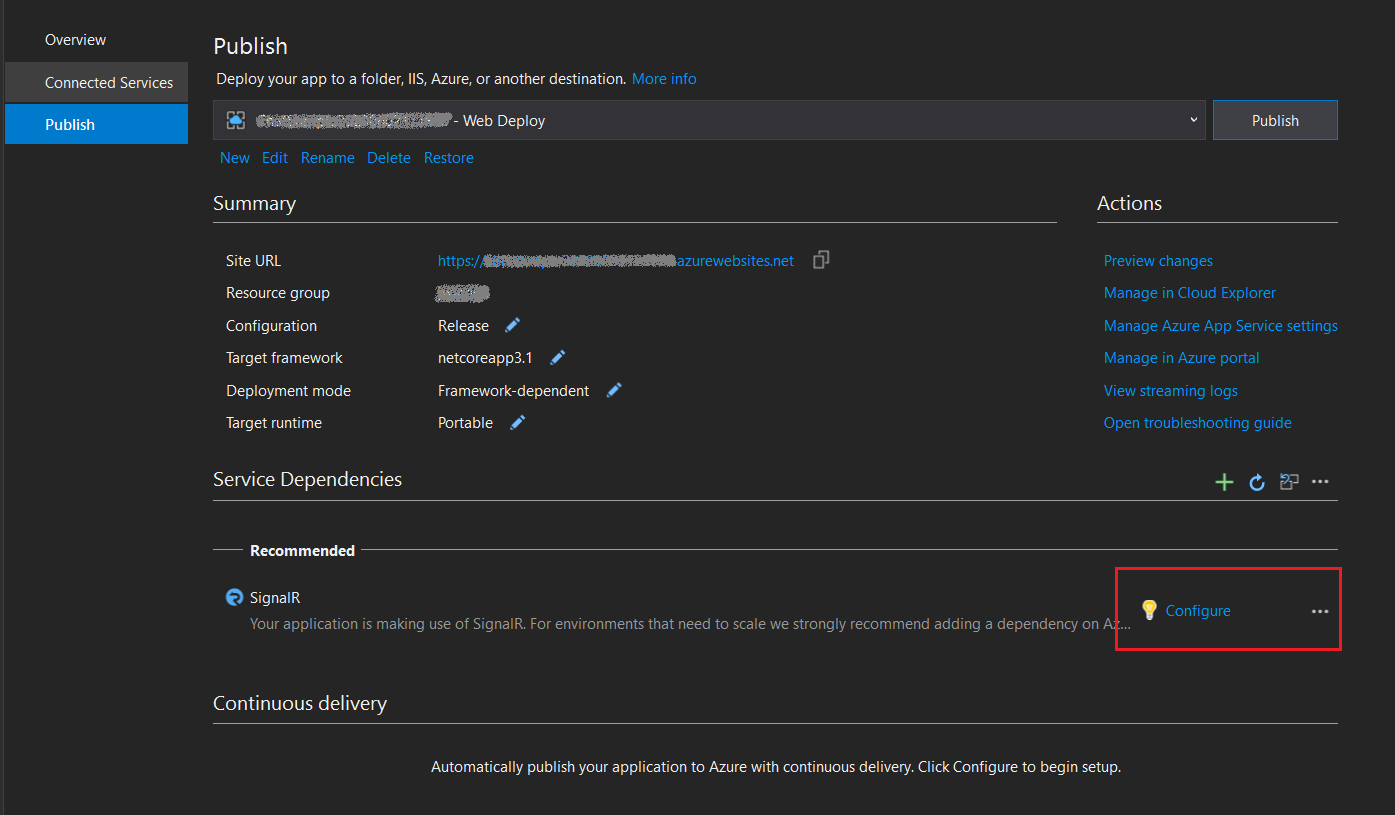
添加 Azure SignalR 服务依赖项。
创建发布配置文件后,可以在“服务依赖项”下看到添加 Azure SignalR 服务的建议消息。 选择“配置”以在面板中新建或选择现有的 Azure SignalR 服务。
服务依赖项将执行以下活动,以支持应用在 Azure 上时自动切换到 Azure SignalR 服务:
- 更新
HostingStartupAssembly以使用 Azure SignalR 服务。 - 添加 Azure SignalR 服务 NuGet 包引用。
- 更新配置文件属性以保存依赖项设置。
- 根据你的选择配置机密存储。
- 在 appsettings.json 中添加配置,使应用面向 Azure SignalR 服务。
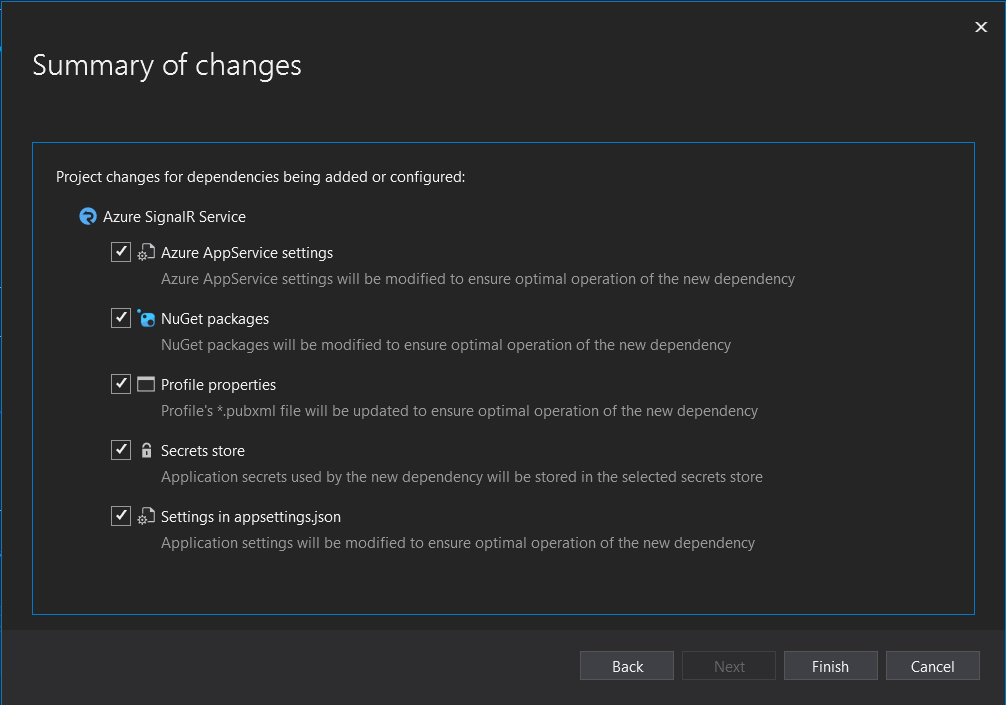
- 更新
发布应用。
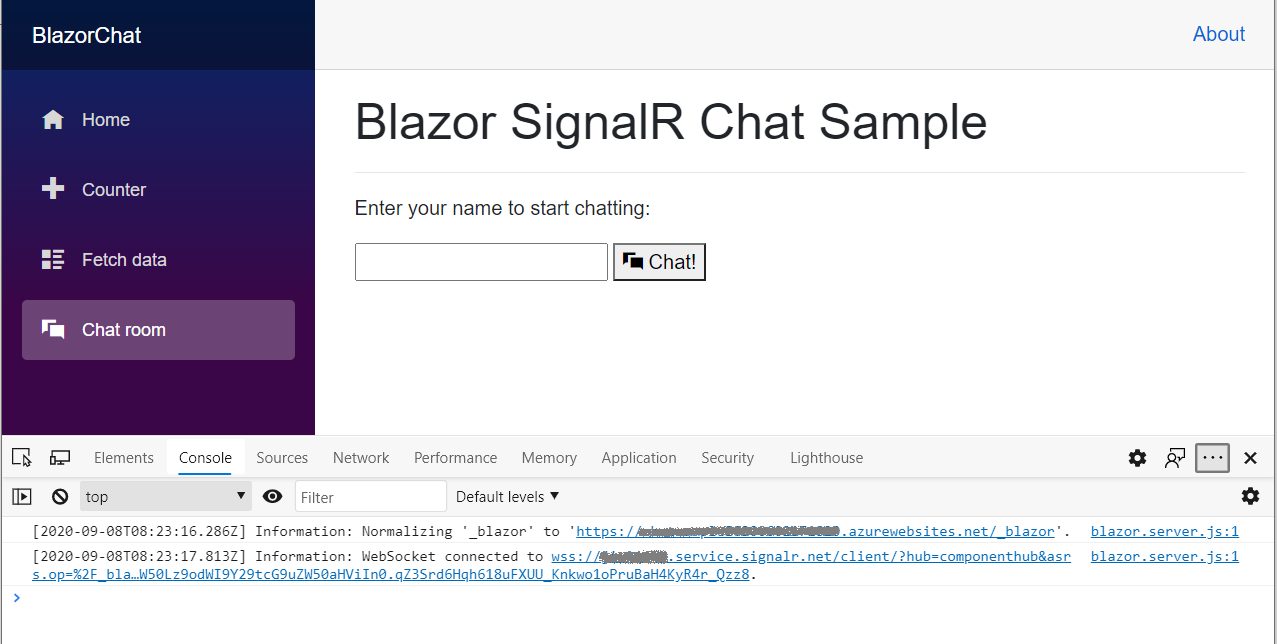
现在即可发布此应用。 完成发布过程后,应用会自动在浏览器中启动。
备注
由于 Azure 应用服务的启动延迟,应用可能需要一些时间才能启动。 可使用浏览器调试工具(通常是按 F12)来确保流量已重定向到 Azure SignalR 服务。


使用以下命令添加对 Azure SignalR SDK 的引用。
dotnet add package Microsoft.Azure.SignalR在
Startup.ConfigureServices()中添加对AddAzureSignalR()的调用,如以下示例所示:public void ConfigureServices(IServiceCollection services) { ... services.AddSignalR().AddAzureSignalR(); ... }在 appsettings.json 中或使用机密管理器工具配置 Azure SignalR 服务连接字符串。
备注
第 2 步可以替换为将托管启动程序集配置为使用 SignalR SDK。
添加配置以启用 appsettings.json 中的 Azure SignalR 服务。
本文中出现的原始连接字符串仅用于演示目的。 在生产环境中,请始终保护访问密钥。 使用 Azure Key Vault 安全地管理和轮换密钥,使用 Microsoft Entra ID 保护连接字符串,并使用 Microsoft Entra ID 授权访问。
"Azure": {
  "SignalR": {
    "Enabled": true,
    "ConnectionString": <your-connection-string>
  }
}
将托管启动程序集配置为使用 Azure SignalR SDK。 编辑 launchSettings.json,并在
environmentVariables中添加以下示例:"environmentVariables": { ..., "ASPNETCORE_HOSTINGSTARTUPASSEMBLIES": "Microsoft.Azure.SignalR" }
若要清理本教程创建的资源,请使用 Azure 门户删除相应的资源组。
在本教程中,你了解了如何执行以下操作:
- 使用 Blazor Server 应用模板构建简单的聊天室。
- 使用 Razor 组件。
- 使用 Razor 组件中的事件处理和数据绑定。
- 使用 Visual Studio 快速部署到 Azure 应用服务。
- 从本地 SignalR 迁移到 Azure SignalR 服务。
深入了解高可用性: