资源所有者可以通过 Azure 资源管理器模板(ARM 模板)以编程方式创建和管理其工作簿。
此功能在如下所述的方案中很有用:
- 连同资源部署一起部署特定于组织或域的分析报表。 例如,可为新的应用或虚拟机部署特定于组织的性能和故障工作簿。
- 使用工作簿为现有资源部署标准报告或仪表板。
将使用 ARM 模板中指定的内容,在所需的子组/资源组中创建工作簿。
可通过编程方式管理两种类型的工作簿资源:
用于部署工作簿模板的 ARM 模板
打开要以编程方式部署的工作簿。
选择“编辑”,将工作簿切换到编辑模式。
使用工具栏上的 /< 按钮打开“高级编辑器”。
确保在“库模板”选项卡上操作。
将库模板中的 JSON 复制到剪贴板。
以下示例 ARM 模板将工作簿模板部署到 Azure Monitor 工作簿库。 粘贴复制的 JSON 并替代
<PASTE-COPIED-WORKBOOK_TEMPLATE_HERE>。 有关创建工作簿模板的参考 ARM 模板,请参阅此 GitHub 存储库。{ "$schema": "http://schema.management.azure.com/schemas/2015-01-01/deploymentTemplate.json#", "contentVersion": "1.0.0.0", "parameters": { "resourceName": { "type": "string", "defaultValue": "my-workbook-template", "metadata": { "description": "The unique name for this workbook template instance" } } }, "resources": [ { "name": "[parameters('resourceName')]", "type": "microsoft.insights/workbooktemplates", "location": "[resourceGroup().location]", "apiVersion": "2019-10-17-preview", "dependsOn": [], "properties": { "galleries": [ { "name": "A Workbook Template", "category": "Deployed Templates", "order": 100, "type": "workbook", "resourceType": "Azure Monitor" } ], "templateData": <PASTE-COPIED-WORKBOOK_TEMPLATE_HERE> } } ] }在
galleries对象中,使用你自己的值填充name和category键。 在下一部分详细了解参数。使用 Azure 门户、命令行接口或 PowerShell 部署此 ARM 模板。
打开 Azure 门户并转到在 ARM 模板中选择的工作簿库。 在示例模板中,转到 Azure Monitor 工作簿库:
- 打开 Azure 门户并转到 Azure Monitor。
- 从目录中打开
Workbooks。 - 在类别
Deployed Templates下的库中找到你的模板。 (它是以紫色显示的项之一。)

参数
| 参数 | 说明 |
|---|---|
name |
Azure 资源管理器中的工作簿模板资源的名称。 |
type |
始终是 microsoft.insights/workbooktemplates。 |
location |
要在其中创建工作簿的 Azure 位置。 |
apiVersion |
2019-10-17 preview。 |
type |
始终是 microsoft.insights/workbooktemplates。 |
galleries |
要在其中显示此工作簿模板的库集。 |
gallery.name |
库中工作簿模板的易记名称。 |
gallery.category |
库中的要将该模板放入到其中的组。 |
gallery.order |
一个编号,用于确定模板在库中某个类别中的显示顺序。 顺序越低,优先级越高。 |
gallery.resourceType |
与库对应的资源类型。 此类型通常是一个对应于资源的资源类型字符串(例如 microsoft.operationalinsights/workspaces)。 |
gallery.type |
称为工作簿类型。 此唯一键区分资源类型中的库。 例如,Application Insights 具有对应于不同工作簿库的类型 workbook 和 tsg。 |
库
| 库 | 资源类型 | 工作簿类型 |
|---|---|---|
| Azure Monitor 中的工作簿 | Azure Monitor |
workbook |
| Azure Monitor 中的 VM Insights | Azure Monitor |
vm-insights |
| Log Analytics 工作区中的工作簿 | microsoft.operationalinsights/workspaces |
workbook |
| Application Insights 中的工作簿 | microsoft.insights/components |
workbook |
| Application Insights 中的故障排除指南 | microsoft.insights/components |
tsg |
| Application Insights 中的使用情况 | microsoft.insights/components |
usage |
| Kubernetes 服务中的工作簿 | Microsoft.ContainerService/managedClusters |
workbook |
| 资源组中的工作簿 | microsoft.resources/subscriptions/resourcegroups |
workbook |
| Microsoft Entra ID 中的工作簿 | microsoft.aadiam/tenant |
workbook |
| 虚拟机中的 VM 见解 | microsoft.compute/virtualmachines |
insights |
| 虚拟机规模集中的 VM Insights | microsoft.compute/virtualmachinescalesets |
insights |
用于部署工作簿实例的 ARM 模板
- 打开要以编程方式部署的工作簿。
- 选择“编辑”,将工作簿切换到编辑模式。
- 通过选择 /< 打开“高级编辑器”。
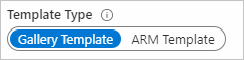
- 在编辑器中,将“模板类型”切换为“ARM 模板”。
- 用于创建的 ARM 模板显示在编辑器中。 复制内容并按原样使用,或将其与一个更大的也用于部署目标资源的模板合并。


ARM 模板示例
此模板显示如何部署显示 Hello World! 的工作簿。
{
    "$schema": "http://schema.management.azure.com/schemas/2015-01-01/deploymentTemplate.json#",
    "contentVersion": "1.0.0.0",
    "parameters": {
        "workbookDisplayName":  {
            "type":"string",
            "defaultValue": "My Workbook",
            "metadata": {
                "description": "The friendly name for the workbook that is used in the Gallery or Saved List. Needs to be unique in the scope of the resource group and source"
            }
        },
        "workbookType":  {
            "type":"string",
            "defaultValue": "tsg",
            "metadata": {
                "description": "The gallery that the workbook will be shown under. Supported values include workbook, `tsg`, Azure Monitor, etc."
            }
        },
        "workbookSourceId":  {
            "type":"string",
            "defaultValue": "<insert-your-resource-id-here>",
            "metadata": {
                "description": "The id of resource instance to which the workbook will be associated"
            }
        },
        "workbookId": {
            "type":"string",
            "defaultValue": "[newGuid()]",
            "metadata": {
                "description": "The unique guid for this workbook instance"
            }
        }
    },
    "resources": [
        {
            "name": "[parameters('workbookId')]",
            "type": "Microsoft.Insights/workbooks",
            "location": "[resourceGroup().location]",
            "kind": "shared",
            "apiVersion": "2018-06-17-preview",
            "dependsOn": [],
            "properties": {
                "displayName": "[parameters('workbookDisplayName')]",
                "serializedData": "{\"version\":\"Notebook/1.0\",\"items\":[{\"type\":1,\"content\":\"{\\\"json\\\":\\\"Hello World!\\\"}\",\"conditionalVisibility\":null}],\"isLocked\":false}",
                "version": "1.0",
                "sourceId": "[parameters('workbookSourceId')]",
                "category": "[parameters('workbookType')]"
            }
        }
    ],
    "outputs": {
        "workbookId": {
            "type": "string",
            "value": "[resourceId( 'Microsoft.Insights/workbooks', parameters('workbookId'))]"
        }
    }
}
模板参数
| 参数 | DESCRIPTION |
|---|---|
workbookDisplayName |
在“库”或“保存的列表”中使用的工作簿的易记名称。 在资源组和源范围内需保持唯一。 |
workbookType |
显示工作簿的库。 支持的值包括 workbook、tsg 和 Azure Monitor。 |
workbookSourceId |
将要与该工作簿关联的资源实例的 ID。 新工作簿会显示它与此资源实例相关,例如,它会显示在资源目录中的“工作簿”下。 如果你希望工作簿在 Azure Monitor 中的工作簿库内显示,请使用字符串 Azure Monitor 而不是资源 ID。 |
workbookId |
此工作簿实例的唯一 GUID。 使用 [newGuid()] 自动创建新的 GUID。 |
kind |
用于指定是否共享创建的工作簿。 所有新工作簿都将使用值“shared”。 |
location |
要在其中创建工作簿的 Azure 位置。 使用 [resourceGroup().location] 在资源组所在的位置创建工作簿。 |
serializedData |
包含要在工作簿中使用的内容或有效负载。 使用工作簿 UI 中的 ARM 模板获取该值。 |
工作簿类型
工作簿类型指定显示新工作簿实例的工作簿库类型。 选项包括:
| 类型 | 库位置 |
|---|---|
workbook |
大多数报告中使用的默认值,包括 Application Insights 的工作簿库和 Azure Monitor。 |
tsg |
Application Insights 中的故障排除指南库。 |
usage |
Application Insights 中“使用情况”下的“更多”库。 |
在 serializedData 模板参数中使用 JSON 格式的工作簿数据
导出 Azure 工作簿的 ARM 模板时,通常会在导出的 serializedData 模板参数中嵌入固定的资源链接。 这些链接包括可能比较敏感的值,如订阅 ID、资源组名称和其他类型的资源 ID。
以下示例演示如何在不使用字符串操作的情况下对导出的工作簿 ARM 模板进行自定义。 此示例中的模式用于处理从 Azure 门户导出的未修改数据。 此外,在以编程方式管理工作簿时,最好是将所有嵌入的敏感值掩码。 出于此原因,此处已将订阅 ID 和资源组掩码。 未对原始传入的 serializedData 值进行任何其他修改。
{
  "contentVersion": "1.0.0.0",
  "parameters": {
    "workbookDisplayName": {
      "type": "string"
    },
    "workbookSourceId": {
      "type": "string",
      "defaultValue": "[resourceGroup().id]"
    },
    "workbookId": {
      "type": "string",
      "defaultValue": "[newGuid()]"
    }
  },
  "variables": {
    // serializedData from original exported Azure Resource Manager template
    "serializedData": "{\"version\":\"Notebook/1.0\",\"items\":[{\"type\":1,\"content\":{\"json\":\"Replace with Title\"},\"name\":\"text - 0\"},{\"type\":3,\"content\":{\"version\":\"KqlItem/1.0\",\"query\":\"{\\\"version\\\":\\\"ARMEndpoint/1.0\\\",\\\"data\\\":null,\\\"headers\\\":[],\\\"method\\\":\\\"GET\\\",\\\"path\\\":\\\"/subscriptions/XXXXXXXX-XXXX-XXXX-XXXX-XXXXXXXXXXXX/resourceGroups\\\",\\\"urlParams\\\":[{\\\"key\\\":\\\"api-version\\\",\\\"value\\\":\\\"2019-06-01\\\"}],\\\"batchDisabled\\\":false,\\\"transformers\\\":[{\\\"type\\\":\\\"jsonpath\\\",\\\"settings\\\":{\\\"tablePath\\\":\\\"$..*\\\",\\\"columns\\\":[]}}]}\",\"size\":0,\"queryType\":12,\"visualization\":\"map\",\"tileSettings\":{\"showBorder\":false},\"graphSettings\":{\"type\":0},\"mapSettings\":{\"locInfo\":\"AzureLoc\",\"locInfoColumn\":\"location\",\"sizeSettings\":\"location\",\"sizeAggregation\":\"Count\",\"opacity\":0.5,\"legendAggregation\":\"Count\",\"itemColorSettings\":null}},\"name\":\"query - 1\"}],\"isLocked\":false,\"fallbackResourceIds\":[\"/subscriptions/XXXXXXXX-XXXX-XXXX-XXXX-XXXXXXXXXXXX/resourceGroups/XXXXXXX\"]}",

    // parse the original into a JSON object, so that it can be manipulated
    "parsedData": "[json(variables('serializedData'))]",

    // create new JSON objects that represent only the items/properties to be modified
    "updatedTitle": {
      "content":{
        "json": "[concat('Resource Group Regions in subscription \"', subscription().displayName, '\"')]"
      }
    },
    "updatedMap": {
      "content": {
        "path": "[concat('/subscriptions/', subscription().subscriptionId, '/resourceGroups')]"
      }
    },

    // the union function applies the updates to the original data
    "updatedItems": [
      "[union(variables('parsedData')['items'][0], variables('updatedTitle'))]",
      "[union(variables('parsedData')['items'][1], variables('updatedMap'))]"
    ],

    // copy to a new workbook object, with the updated items
    "updatedWorkbookData": {
      "version": "[variables('parsedData')['version']]",
      "items": "[variables('updatedItems')]",
      "isLocked": "[variables('parsedData')['isLocked']]",
      "fallbackResourceIds": ["[parameters('workbookSourceId')]"]
    },

    // convert back to an encoded string
    "reserializedData": "[string(variables('updatedWorkbookData'))]"
  },
  "resources": [
    {
      "name": "[parameters('workbookId')]",
      "type": "microsoft.insights/workbooks",
      "location": "[resourceGroup().location]",
      "apiVersion": "2018-06-17-preview",
      "dependsOn": [],
      "kind": "shared",
      "properties": {
        "displayName": "[parameters('workbookDisplayName')]",
        "serializedData": "[variables('reserializedData')]",
        "version": "1.0",
        "sourceId": "[parameters('workbookSourceId')]",
        "category": "workbook"
      }
    }
  ],
  "outputs": {
    "workbookId": {
      "type": "string",
      "value": "[resourceId( 'microsoft.insights/workbooks', parameters('workbookId'))]"
    }
  },
  "$schema": "https://schema.management.azure.com/schemas/2019-04-01/deploymentTemplate.json#"
}
在此示例中,以下步骤有助于对导出的 ARM 模板进行自定义:
- 如上一部分所述,将工作簿导出为 ARM 模板。
- 在模板的
variables部分中:- 将
serializedData值分析为 JSON 对象变量,该变量将创建一个 JSON 结构,其中包含表示工作簿内容的项数组。 - 创建新的 JSON 对象,这些对象只表示要修改的项/属性。
- 投影一组新的 JSON 内容项 (
updatedItems),并使用union()函数应用对原始 JSON 项所做的修改。 - 创建一个新的工作簿对象
updatedWorkbookData,其中包含来自原始解析数据的updatedItems和version/isLocked数据,以及一组已更正的fallbackResourceIds。 - 将新的 JSON 内容序列化回一个新的字符串变量
reserializedData。
- 将
- 使用新的
reserializedData属性代替原始的serializedData属性。 - 使用更新的 ARM 模板部署新的工作簿资源。
后续步骤
了解如何使用工作簿来支持新的存储见解体验。