本教程介绍 Azure 资源管理器模板(ARM 模板)。 其中将会说明如何创建初学者模板并将其部署到 Azure。 它还介绍了模板结构和使用模板所需的工具。 完成此说明需要 12 分钟,但实际完成时间会因需要安装的工具数量而异。
本文是相关教学系列的第一篇教程。 在学习该教学系列的过程中,你将逐步修改入门模板,直到了解了 ARM 模板的所有核心部分。 这些元素是更复杂的模板的构建基块。 我们希望在本教学系列结束时,你能够自信地创建自己的模板,并准备好使用这些模板自动完成部署。
若要了解使用模板的好处,以及为何要使用模板自动完成部署,请参阅 ARM 模板概述。
如果没有 Azure 订阅,请在开始之前创建试用版。
提示
如果不熟悉 ARM 模板,则可以考虑改为学习 Bicep。 Bicep 是一种新语言,它的功能与 ARM 模板相同,但语法更易于使用。 若要开始学习 Bicep,请参阅快速入门:使用 Visual Studio Code 创建 Bicep 文件。
获取工具
首先,请确保已获取创建和部署模板所需的工具。 在本地计算机上安装这些工具。
编辑器
模板是 JavaScript 对象表示法 (JSON) 文件。 若要创建模板,可以使用 Visual Studio Code。
命令行部署
还需要使用 Azure PowerShell 或 Azure 命令行接口 (CLI) 来部署模板。 如果使用 Azure CLI,则需要具有 2.37.0 或更高版本。 有关安装说明,请参阅:
安装 Azure PowerShell 或 Azure CLI 后,请务必完成首次登录。 有关帮助,请参阅登录 - PowerShell 或登录 - Azure CLI。
重要
如果使用的是 Azure CLI,请确保安装 2.37.0 或更高版本。 如果使用的是 Azure PowerShell,请确保安装 7.2.4 或更高版本。 如果使用的是较低版本,本教程中所示的命令不起作用。 要查看已安装版本,请使用 az --version。
好了,现在可以开始了解模板。
创建第一个模板
打开 Visual Studio Code。
在“文件”菜单中,选择“新建文件”以创建新的文件。
在“文件”菜单中选择“另存为”。
将该文件命名为 azuredeploy,然后选择“json”文件扩展名 。 完整的文件名为 azuredeploy.json。
将该文件保存到工作站。 选择容易记住的路径,因为稍后在部署模板时需要提供该路径。
将以下 JSON 内容复制并粘贴到该文件中:
{
  "$schema": "https://schema.management.azure.com/schemas/2019-04-01/deploymentTemplate.json#",
  "contentVersion": "1.0.0.0",
  "resources": []
}
Visual Studio Code 环境如下所示:
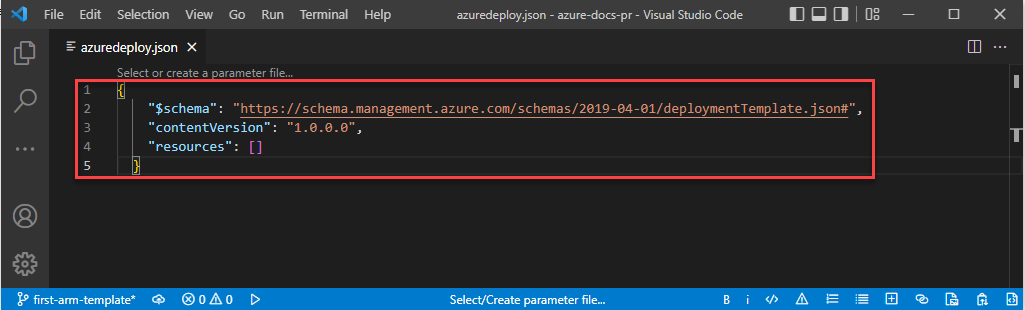
此模板不部署任何资源。 我们从一个空白模板开始,以便可以熟悉模板的部署步骤,同时尽量减少出错的可能性。
JSON 文件包含以下元素:
-
$schema:指定 JSON 架构文件的位置。 架构文件描述模板中可用的属性。 例如,架构将resources定义为模板的有效属性之一。 不要担心架构的日期为 2019-04-01。 此架构版本是最新的,其中包含所有最新功能。 之所以未更改架构日期,是因为自从推出以来,它尚未发生重大更改。 -
contentVersion:指定模板的版本,例如 1.0.0.0。 可为此元素提供任意值。 使用此值记录模板中的重要更改。 使用模板部署资源时,可以使用此值来确保使用的是正确的模板。 -
resources:包含要部署或更新的资源。 此元素目前是空的,但稍后可以添加资源。
-
保存文件。
祝贺你,现已创建第一个模板。
登录 Azure
若要开始使用 Azure PowerShell 或 Azure CLI,请使用你的 Azure 凭据登录。
使用以下代码部分中的选项卡在 Azure PowerShell 与 Azure CLI 之间进行选择。 本文中的 CLI 示例针对 Bash shell 编写。
Connect-AzAccount -Environment AzureChinaCloud
如果你有多个 Azure 订阅,请选择要使用的订阅。 使用你的订阅名称替换 SubscriptionName。 也可以使用订阅 ID 替换订阅名称。
Set-AzContext SubscriptionName
创建资源组
部署模板时,可以指定一个资源组来包含资源。 在运行部署命令之前,请使用 Bash Azure CLI 或 Azure PowerShell 创建该资源组。
注意
适用于 Azure CLI 的示例是针对 Bash Shell 编写的。 若要在 Windows PowerShell 或命令提示符中运行此示例,可能需要删除反斜杠,并将命令编写为一行,例如:
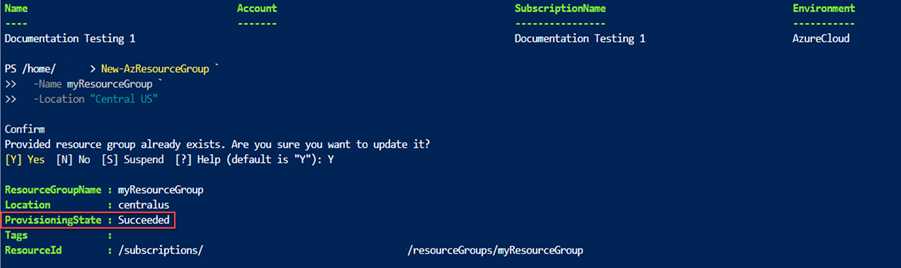
New-AzResourceGroup `
  -Name myResourceGroup `
  -Location "China North 2"
部署模板
若要部署模板,请使用 Azure CLI 或 Azure PowerShell。 使用创建的资源组。 为部署指定一个适当的名称,以便可以在部署历史记录中轻松识别该部署。 为方便起见,另请创建一个用于存储模板文件路径的变量。 使用此变量可以更轻松地运行部署命令,因为无需在每次部署时重新键入路径。 将 {provide-the-path-to-the-template-file} 和花括号 {} 替换为模板文件的路径。
$templateFile = "{provide-the-path-to-the-template-file}"
New-AzResourceGroupDeployment `
  -Name blanktemplate `
  -ResourceGroupName myResourceGroup `
  -TemplateFile $templateFile
部署命令将返回结果。 查看 ProvisioningState 以确定部署是否成功。

注意
如果部署失败,请使用 verbose 开关获取有关正在创建的资源的信息。 使用 debug 开关获取调试的详细信息。
验证部署
可以通过在 Azure 门户中浏览资源组来验证部署。
登录 Azure 门户。
在左侧菜单中选择“资源组”。
选中“myResourceGroup”左侧的框,然后选择“myResourceGroup”。
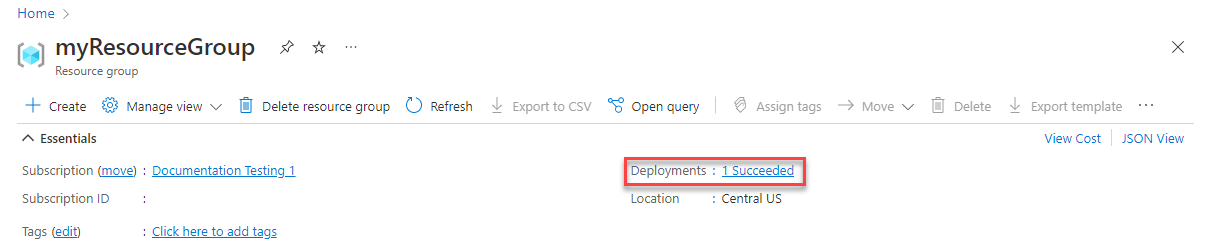
选择在上述过程中创建的资源组。 默认名称为 myResourceGroup。 资源组尚没有任何资源,因为你部署了一个空白模板。
请注意,在概述中间的“概要”部分,页面会在“部署”旁边显示部署状态。 选择“1 成功”。
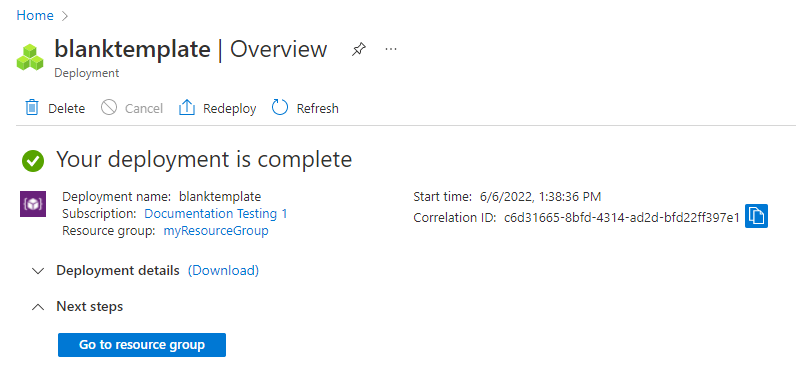
将会看到该资源组的部署历史记录。 选中“blanktemplate”左侧的框,然后选择“blanktemplate”。
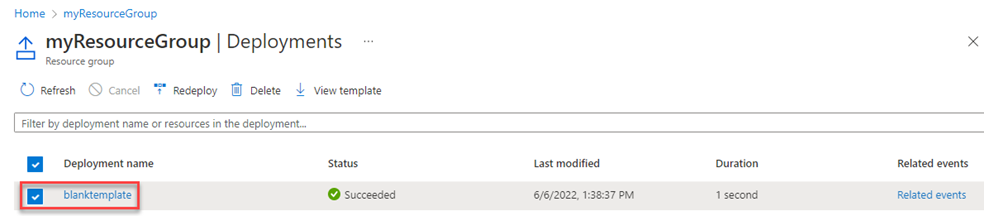
将会看到部署摘要。 在本例中,显示的信息不是很多,因为尚未部署任何资源。 在本教学系列的后续教程中,你可能会发现,查看部署历史记录中的摘要非常有用。 请注意,在左侧可以查看部署使用的输入、输出和模板。
清理资源
若要继续学习下一篇教程,则不需删除该资源组。
如果就此停止学习,请删除该资源组。
在 Azure 门户上的左侧菜单中选择“资源组” 。
在“筛选任何字段…”文本字段中键入资源组名称。
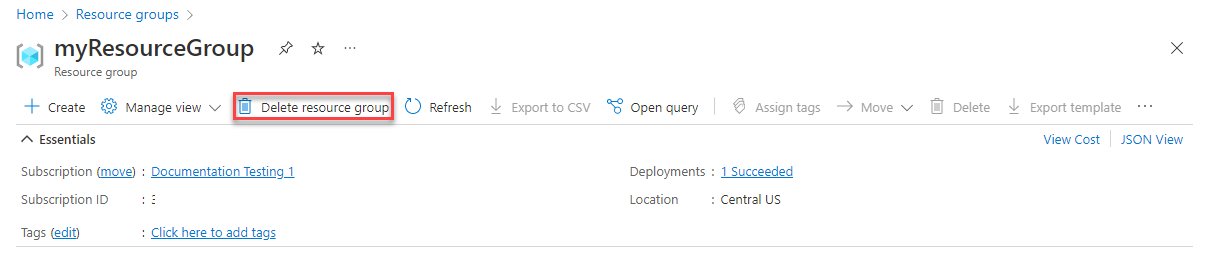
选中“myResourceGroup”旁边的框,然后选择“myResourceGroup”或资源组名称。
在顶部菜单中选择“删除资源组”。
后续步骤
现已创建一个要部署到 Azure 的简单模板。 在下一篇教程中,你可以了解如何将一个存储帐户添加到该模板,然后将其部署到资源组。