Important
These features and functionality support connections to other Microsoft services and third-party services. Use of these services is subject to their respective terms and might result in data processing or storage outside of the Azure compliance boundary, as well as data flowing into the Azure compliance boundary.
It's your responsibility to manage whether your data will flow outside of your organization's compliance and geographic boundaries and any related implications, and that appropriate permissions, boundaries, and approvals are provisioned.
You're responsible for carefully reviewing and testing applications you build in the context of your specific use cases and making all appropriate decisions and customizations. This includes implementing your own responsible AI mitigations, such as metaprompts, content filters, or other safety systems, and ensuring your applications meet appropriate quality, reliability, security, and trustworthiness standards.
In this article, you learn how to use a skillset to chunk and vectorize content from a supported data source. The skillset calls the Document Layout skill for chunking and an embedding skill that's attached to a supported embedding model for chunk vectorization. You also learn how to store the chunked and vectorized content in a vector index.
This article describes the end-to-end workflow for integrated vectorization using REST. For portal-based instructions, see Quickstart: Vectorize text and images in the Azure portal.
Prerequisites
Supported data sources
Integrated vectorization works with all supported data sources. However, this article focuses on the most commonly used data sources, which are described in the following table.
| Data source |
Description |
| Azure Blob Storage |
This data source works with blobs and tables. You must use a standard performance (general-purpose v2) account. Access tiers can be hot, cool, or cold. |
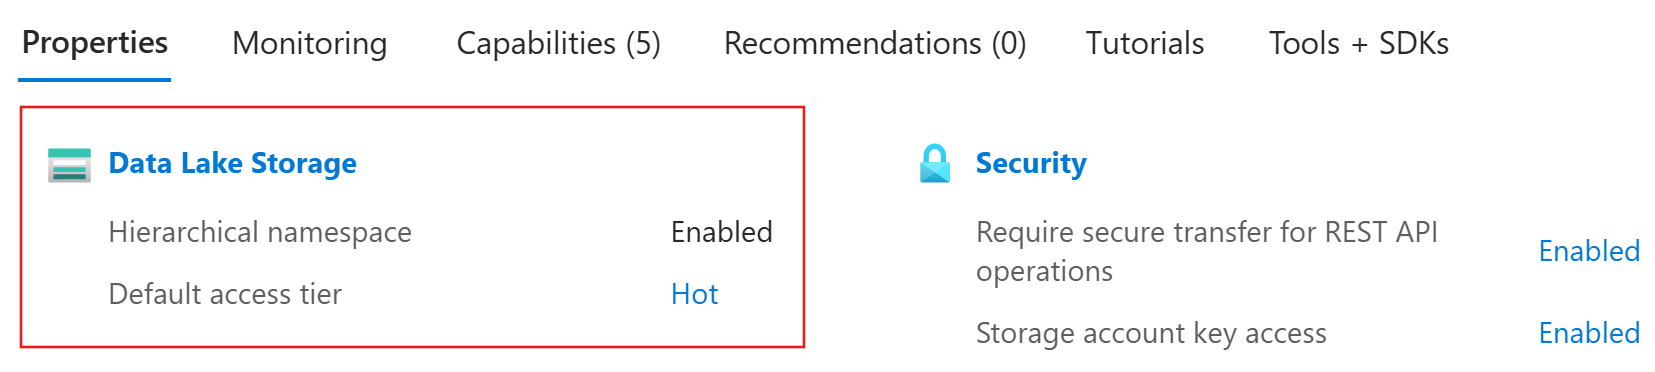
| Azure Data Lake Storage (ADLS) Gen2 |
This is an Azure Storage account with a hierarchical namespace enabled. To confirm that you have Data Lake Storage, check the Properties tab on the Overview page.
|
Supported embedding models
Use one of the following embedding models for integrated vectorization. Deployment instructions are provided in a later section.
2 For billing purposes, you must attach your Azure AI multi-service resource to the skillset in your Azure AI Search service. Unless you use a keyless connection (preview) to create the skillset, both resources must be in the same region.
3 The Azure AI Vision multimodal embedding model is available in select regions.
Role-based access
You can use Microsoft Entra ID with role assignments or key-based authentication with full-access connection strings. For Azure AI Search connections to other resources, we recommend role assignments.
To configure role-based access for integrated vectorization:
On your search service, enable roles and configure a system-assigned managed identity.
On your data source platform and embedding model provider, create role assignments that allow your search service to access data and models. See Prepare your data and Prepare your embedding model.
Note
Free search services support role-based connections to Azure AI Search. However, they don't support managed identities on outbound connections to Azure Storage or Azure Vision. This behavior requires that you use key-based authentication on connections between free search services and other Azure resources.
For more secure connections, use the Basic tier or higher. You can then enable roles and configure a managed identity for authorized access.
In this section, you retrieve the endpoint and Microsoft Entra token for your Azure AI Search service. Both values are necessary to establish connections in REST requests.
Go to your search service in the Azure portal.
To obtain your search endpoint, copy the URL on the Overview page. An example search endpoint is https://my-service.search.azure.cn.
To obtain your Microsoft Entra token, run the following command on your local system. This step requires completion of Quickstart: Connect without keys.
az account get-access-token --scope https://search.azure.cn/.default --query accessToken --output tsv
Prepare your data
In this section, you prepare your data for integrated vectorization by uploading files to a supported data source, assigning roles, and obtaining connection information.
Go to your Azure Storage account in the Azure portal.
From the left pane, select Data storage > Containers.
Create a container or select an existing container, and then upload your files to the container.
To assign roles:
From the left pane, select Access Control (IAM).
Select Add > Add role assignment.
Under Job function roles, select Storage Blob Data Reader, and then select Next.
Under Members, select Managed identity, and then select Select members.
Select your subscription and the managed identity of your search service.
To obtain a connection string:
From the left pane, select Security + networking > Access keys.
Copy either connection string, which you specify later in Set variables.
(Optional) Synchronize deletions in your container with deletions in the search index. To configure your indexer for deletion detection:
Enable soft delete on your storage account. If you're using native soft delete, the next step isn't required.
Add custom metadata that an indexer can scan to determine which blobs are marked for deletion. Give your custom property a descriptive name. For example, you can name the property "IsDeleted" and set it to false. Repeat this step for every blob in the container. When you want to delete the blob, change the property to true. For more information, see Change and delete detection when indexing from Azure Storage.
Go to your Azure Storage account in the Azure portal.
From the left pane, select Data storage > Containers.
Create a container or select an existing container, and then upload your files to the container.
To assign roles:
From the left pane, select Access Control (IAM).
Select Add > Add role assignment.
Under Job function roles, select Storage Blob Data Reader, and then select Next.
Under Members, select Managed identity, and then select Select members.
Select your subscription and the managed identity of your search service.
To obtain a connection string:
From the left pane, select Security + networking > Access keys.
Copy either connection string, which you specify later in Set variables.
(Optional) Synchronize deletions in your container with deletions in the search index. To configure your indexer for deletion detection:
Enable soft delete on your storage account.
Add custom metadata that an indexer can scan to determine which blobs are deleted. Give your custom property a descriptive name. For example, you can name the property "IsDeleted" and set it to false. Repeat this step for every blob in the container. When you want to delete the blob, change the property to true. For more information, see Change and delete detection when indexing from Azure Storage.
Prepare your embedding model
In this section, you prepare your Azure AI resource for integrated vectorization by assigning roles, obtaining an endpoint, and deploying a supported embedding model.
Azure AI Search supports Azure Vision image retrieval through multimodal embeddings (version 4.0). Internally, Azure AI Search calls the multimodal embeddings skill to connect to Azure Vision.
Go to your Azure AI services resource in the Azure portal.
To assign roles:
From the left pane, select Access control (IAM).
Select Add > Add role assignment.
Under Job function roles, select Cognitive Services User, and then select Next.
Under Members, select Managed identity, and then select Select members.
Select your subscription and the managed identity of your search service.
To obtain an endpoint:
From the left pane, select Resource Management > Keys and Endpoint.
Copy the endpoint for your Azure AI multi-service resource. You specify this URL later in Set variables.
Note
The multimodal embeddings are built into your Azure AI multi-service resource, so there's no model deployment step.
Set variables
In this section, you specify the connection information for your Azure AI Search service, your supported data source, and your supported embedding model.
In Visual Studio Code, paste the following placeholders into your .rest or .http file.
@baseUrl = PUT-YOUR-SEARCH-SERVICE-URL-HERE
@token = PUT-YOUR-MICROSOFT-ENTRA-TOKEN-HERE
Replace @baseUrl with the search endpoint and @token with the Microsoft Entra token you obtained in Get connection information for Azure AI Search.
Depending on your data source, add the following variables.
| Data source |
Variables |
Enter this information |
| Azure Blob Storage |
@storageConnectionString and @blobContainer |
The connection string and the name of the container you created in Prepare your data. |
| ADLS Gen2 |
@storageConnectionString and @blobContainer |
The connection string and the name of the container you created in Prepare your data. |
Depending on your embedding model provider, add the following variables.
| Embedding model provider |
Variables |
Enter this information |
| Azure AI Vision |
@aiMultiServiceEndpoint |
The endpoint you obtained in Prepare your embedding model. |
To verify the variables, send the following request.
### List existing indexes by name
GET {{baseUrl}}/indexes?api-version=2026-04-01  HTTP/1.1
  Content-Type: application/json
  Authorization: Bearer {{token}}
A response should appear in an adjacent pane. If you have existing indexes, they're listed. Otherwise, the list is empty. If the HTTP code is 200 OK, you're ready to proceed.
Connect to your data
In this section, you connect to a supported data source for indexer-based indexing. An indexer in Azure AI Search requires a data source that specifies the type, credentials, and container.
Use Create Data Source to define a data source that provides connection information during indexing.
### Create a data source
POST {{baseUrl}}/datasources?api-version=2026-04-01  HTTP/1.1
  Content-Type: application/json
  Authorization: Bearer {{token}}

  {
    "name": "my-data-source",
    "type": "azureblob",
    "subtype": null,
    "credentials": {
        "connectionString": "{{storageConnectionString}}"
    },
    "container": {
        "name": "{{blobContainer}}",
        "query": null
    },
    "dataChangeDetectionPolicy": null,
    "dataDeletionDetectionPolicy": null
  }
Set type to your data source: azureblob or adlsgen2.
To create the data source, select Send request.
If you're using OneLake, set credentials.connectionString to ResourceId={{workspaceId}} and container.name to {{lakehouseId}}.
Create a skillset
In this section, you create a skillset that calls a built-in skill to chunk your content and an embedding skill to create vector representations of the chunks. The skillset is executed during indexing in a later section.
Call a built-in skill to chunk your content
Partitioning your content into chunks helps you meet the requirements of your embedding model and prevents data loss due to truncation. For more information about chunking, see Chunk large documents for vector search solutions.
For built-in data chunking, Azure AI Search offers the Text Split skill and Document Layout skill. The Text Split skill breaks text into sentences or pages of a particular length, while the Document Layout skill breaks content based on paragraph boundaries.
Use Create Skillset to define a skillset.
### Create a skillset
POST {{baseUrl}}/skillsets?api-version=2026-04-01  HTTP/1.1
  Content-Type: application/json
  Authorization: Bearer {{token}}

  {
    "name": "my-skillset",
    "skills": []
  }
In the skills array, call the Text Split skill or Azure Content Understanding skill. You can paste one of the following definitions.
    "skills": [
     {
       "@odata.type": "#Microsoft.Skills.Text.SplitSkill",
       "name": "my-text-split-skill",
       "textSplitMode": "pages",
       "maximumPageLength": 2000,
       "pageOverlapLength": 500,
       "maximumPagesToTake": 0,
       "unit": "characters",
       "defaultLanguageCode": "en",
       "inputs": [
        {
          "name": "text",
          "source": "/document/text",
          "inputs": []
        }
       ],
       "outputs": [
        {
          "name": "textItems"
        }
       ]
     },
     {
       "@odata.type": "#Microsoft.Skills.Util.ContentUnderstandingSkill",
       "name": "my-content-understanding-skill",
       "context": "/document",
       "chunkingProperties": {
         "method": "semantic",
         "unit": "tokens",
         "maximumLength": 500
       },
       "inputs": [
        {
          "name": "file_data",
          "source": "/document/file_data"
        }
       ],
       "outputs": [
        {
          "name": "text_sections",
          "targetName": "text_sections"
        }
       ]
     }
    ]
Call an embedding skill to vectorize the chunks
To vectorize your chunked content, the skillset needs an embedding skill that points to a supported embedding model.
After the built-in chunking skill in the skills array, call the Azure AI Vision skill. You can paste one of the following definitions.
     {
       "@odata.type": "#Microsoft.Skills.Vision.VectorizeSkill",
       "context": "/document",
       "modelVersion": "2023-04-15",
       "inputs": [
         {
           "name": "url",
           "source": "/document/metadata_storage_path"
         },
         {
           "name": "queryString",
           "source": "/document/metadata_storage_sas_token"
         }
       ],
       "outputs": [
         {
           "name": "vector"
         }
       ]
     }
Note
The Azure Vision multimodal embeddings skill is in preview. If you want to call this skill, use the latest preview API version.
If you're using the Azure Vision multimodal embeddings skill, attach your AI service resource after the skills array. This attachment is for billing purposes.
    "skills": [ ... ],
    "cognitiveServices": {
      "@odata.type": "#Microsoft.Azure.Search.AIServicesByIdentity",
      "subdomainUrl": "{{Ai servicesEndpoint}}"
     }
To create the skillset, select Send request.
Create a vector index
In this section, you set up physical data structures on your Azure AI Search service by creating a vector index. The schema of a vector index requires the following:
- Name
- Key field (string)
- One or more vector fields
- Vector configuration
Vector fields store numerical representations of your chunked data. They must be searchable and retrievable, but they can't be filterable, facetable, or sortable. They also can't have analyzers, normalizers, or synonym map assignments.
In addition to vector fields, the sample index in the following steps contains nonvector fields for human-readable content. It's common to include plain-text equivalents of the content you want to vectorize. For more information, see Create a vector index.
Use Create Index to define the schema of a vector index.
### Create a vector index
POST {{baseUrl}}/indexes?api-version=2026-04-01  HTTP/1.1
  Content-Type: application/json
  Authorization: Bearer {{token}}

  {
    "name": "my-vector-index",
    "fields": [],
    "vectorSearch": []
  }
Add a vector search configuration to the vectorSearch section.
    "vectorSearch": {
      "algorithms": [
        {
          "name": "hnsw-algorithm",
          "kind": "hnsw",
          "hnswParameters": {
            "m": 4,
            "efConstruction": 400,
            "efSearch": 100,
            "metric": "cosine"
          }
        }
      ],
      "profiles": [
        {
          "name": "vector-profile-hnsw",
          "algorithm": "hnsw-algorithm",
        }
      ]
    }
vectorSearch.algorithms specifies the algorithm used for indexing and querying vector fields, while vectorSearch.profiles links the algorithm configuration to a profile you can assign to vector fields.
Depending on your embedding model, update vectorSearch.algorithms.metric. Valid values for distance metrics are cosine, dotproduct, euclidean, and hamming.
Add fields to the fields arrays. Include a key field for document identification, nonvector fields for human-readable content, and vector fields for embeddings.
    "fields": [
      {
        "name": "id",
        "type": "Edm.String",
        "key": true,
        "filterable": true
      },
      {
        "name": "title",
        "type": "Edm.String",
         "searchable": true,
         "filterable": true,
         "sortable": true,
         "retrievable": true
      },
      {
        "name": "titleVector",
        "type": "Collection(Edm.Single)",
         "searchable": true,
         "retrievable": false,
         "stored": true,
         "dimensions": 1536,
         "vectorSearchProfile": "vector-profile-hnsw"
      },
      {
        "name": "content",
        "type": "Edm.String",
         "searchable": true,
         "retrievable": true
      },
      {
        "name": "contentVector",
        "type": "Collection(Edm.Single)",
         "searchable": true,
         "retrievable": false,
         "stored": false,
         "dimensions": 1536,
         "vectorSearchProfile": "vector-profile-hnsw"
      }
    ]
Depending on your embedding skill, set dimensions for each vector field to the following value.
| Embedding skill |
Enter this value |
| Azure Vision |
1024 |
Add a vectorizer to the index
In this section, you enable vectorization at query time by defining a vectorizer in your index. The vectorizer uses the embedding model that indexes your data to decode a search string or image into a vector for vector search.
Add the Azure AI Vision vectorizer after vectorSearch.profiles. You can paste one of the following definitions.
      "profiles": [ ... ],
      "vectorizers": [
        {
          "name": "my-ai-services-vision-vectorizer",
          "kind": "aiServicesVision",
          "aiServicesVisionParameters": {
            "resourceUri": "{{AI servicesEndpoint}}",
            "modelVersion": "2023-04-15"
          }
        }
      ]
Note
The Azure Vision vectorizer is in preview. If you want to call this vectorizer, use the latest preview API version.
Specify your vectorizer in vectorSearch.profiles.
      "profiles": [
        {
          "name": "vector-profile-hnsw",
          "algorithm": "hnsw-algorithm",
          "vectorizer": "my-ai-services-vision-vectorizer"
        }
      ]
Create an indexer
In this section, you create an indexer to drive the entire vectorization pipeline, from data retrieval to skillset execution to indexing. We recommend that you run the indexer on a schedule to process changes or documents that were missed due to throttling.
Use Create Indexer to define an indexer that executes the vectorization pipeline.
### Create an indexer
POST {{baseUrl}}/indexers?api-version=2026-04-01  HTTP/1.1
  Content-Type: application/json
  Authorization: Bearer {{token}}

  {
    "name": "my-indexer",
    "dataSourceName": "my-data-source",
    "targetIndexName": "my-vector-index",
    "skillsetName": "my-skillset",
    "schedule": {
      "interval": "PT2H"
    },
    "parameters": {
      "batchSize": null,
      "maxFailedItems": null,
      "maxFailedItemsPerBatch": null
    }
  }
To create the indexer, select Send request.
Run a vector query to confirm indexing
In this section, you verify that your content was successfully indexed by creating a vector query. Because you configured a vectorizer in a previous section, the search engine can decode plain text or an image into a vector for query execution.
Use Documents - Search Post to define a query that's vectorized at query time.
### Run a vector query
POST {{baseUrl}}/indexes('my-vector-index')/docs/search.post.search?api-version=2026-04-01  HTTP/1.1
  Content-Type: application/json
  Authorization: Bearer {{token}}

  {
    "count": true,
    "select": "title, content",
    "vectorQueries": [
        {
          "kind": "text",
          "text": "a sample text string for integrated vectorization",
          "fields": "titleVector, contentVector",
          "k": "3"
        }
    ]
  }
Note
The Azure Vision vectorizer is in preview. If you want to call this vectorizer, use the latest preview API version.
For queries that invoke integrated vectorization, kind must be set to text, and text must specify a text string. This string is passed to the vectorizer assigned to the vector field. For more information, see Query with integrated vectorization.
To run the vector query, select Send request.
Related content
