Applies to: ✔️ AKS Automatic (preview)
Azure Kubernetes Service (AKS) Automatic (preview) provides the easiest managed Kubernetes experience for developers, DevOps engineers, and platform engineers. Ideal for modern and AI applications, AKS Automatic automates AKS cluster setup and operations and embeds best practice configurations. Users of any skill level can benefit from the security, performance, and dependability of AKS Automatic for their applications.
In this quickstart, you learn to:
- Deploy an AKS Automatic cluster.
- Run a sample multi-container application with a group of microservices and web front ends simulating a retail scenario.
Before you begin
This quickstart assumes a basic understanding of Kubernetes concepts. For more information, see Kubernetes core concepts for Azure Kubernetes Service (AKS).
You can use the local Azure CLI.
If you prefer, install the Azure CLI to run CLI reference commands.
Local Azure CLI, see how to install the Azure CLI. If you're running on Windows or macOS, consider running Azure CLI in a Docker container. For more information, see How to run the Azure CLI in a Docker container.
Sign in to the Azure CLI by using the az login command. To finish the authentication process, follow the steps displayed in your terminal. For other sign-in options, see Sign in with the Azure CLI.
When you're prompted, install the Azure CLI extension on first use. For more information about extensions, see Use extensions with the Azure CLI.
Run az version to find the version and dependent libraries that are installed. To upgrade to the latest version, run az upgrade.
- This article requires version 2.57.0 or later of the Azure CLI.
- This article requires the
aks-previewAzure CLI extension version 9.0.0b4 or later. - If you have multiple Azure subscriptions, select the appropriate subscription ID in which the resources should be billed using the az account set command.
- Register the
AutomaticSKUPreviewfeature in your Azure subscription. - The identity creating the cluster should also have the following permissions on the resource group:
Microsoft.Authorization/policyAssignments/writeMicrosoft.Authorization/policyAssignments/read
- AKS Automatic clusters require deployment in Azure regions that support at least 3 availability zones.
- To deploy a Bicep file, you need to write access on the resources you create and access to all operations on the
Microsoft.Resources/deploymentsresource type. For example, to create a virtual machine, you needMicrosoft.Compute/virtualMachines/writeandMicrosoft.Resources/deployments/*permissions. For a list of roles and permissions, see Azure built-in roles.
Important
AKS Automatic tries to dynamically select a virtual machine size for the system node pool based on the capacity available in the subscription. Make sure your subscription has quota for 16 vCPUs of any of the following sizes in the region you're deploying the cluster to: Standard_D4pds_v5, Standard_D4lds_v5, Standard_D4ads_v5, Standard_D4ds_v5, Standard_D4d_v5, Standard_D4d_v4, Standard_DS3_v2, Standard_DS12_v2. You can view quotas for specific VM-families and submit quota increase requests through the Azure portal.
Install the aks-preview Azure CLI extension
Important
AKS preview features are available on a self-service, opt-in basis. Previews are provided "as is" and "as available," and they're excluded from the service-level agreements and limited warranty. AKS previews are partially covered by customer support on a best-effort basis. As such, these features aren't meant for production use. For more information, see the following support articles:
To install the aks-preview extension, run the following command:
az extension add --name aks-preview
Run the following command to update to the latest version of the extension released:
az extension update --name aks-preview
Register the feature flags
To use AKS Automatic in preview, register the following flag using the az feature register command.
az feature register --namespace Microsoft.ContainerService --name AutomaticSKUPreview
Verify the registration status by using the az feature show command. It takes a few minutes for the status to show Registered:
az feature show --namespace Microsoft.ContainerService --name AutomaticSKUPreview
When the status reflects Registered, refresh the registration of the Microsoft.ContainerService resource provider by using the az provider register command:
az provider register --namespace Microsoft.ContainerService
Create a resource group
An Azure resource group is a logical group in which Azure resources are deployed and managed.
The following example creates a resource group named myResourceGroup in the chinanorth3 location.
Create a resource group using the az group create command.
az group create --name myResourceGroup --location chinanorth3
The following sample output resembles successful creation of the resource group:
{
  "id": "/subscriptions/<guid>/resourceGroups/myResourceGroup",
  "location": "chinanorth3",
  "managedBy": null,
  "name": "myResourceGroup",
  "properties": {
    "provisioningState": "Succeeded"
  },
  "tags": null
}
Create an AKS Automatic cluster
To create an AKS Automatic cluster, use the az aks create command. The following example creates a cluster named myAKSAutomaticCluster with Managed Prometheus and Container Insights integration enabled.
az aks create \
    --resource-group myResourceGroup \
    --name myAKSAutomaticCluster \
    --sku automatic
After a few minutes, the command completes and returns JSON-formatted information about the cluster.
Connect to the cluster
To manage a Kubernetes cluster, use the Kubernetes command-line client, kubectl. To install kubectl locally, run the az aks install-cli command. AKS Automatic clusters are configured with Microsoft Entra ID for Kubernetes role-based access control (RBAC).
Note
When you create a cluster using the Azure CLI, your user is assigned built-in roles for Azure Kubernetes Service RBAC Cluster Admin.
Configure kubectl to connect to your Kubernetes cluster using the az aks get-credentials command. This command downloads credentials and configures the Kubernetes CLI to use them.
az aks get-credentials --resource-group myResourceGroup --name myAKSAutomaticCluster
Verify the connection to your cluster using the kubectl get command. This command returns a list of the cluster nodes.
kubectl get nodes
The following sample output shows how you're asked to log in.
To sign in, use a web browser to open the page https://microsoft.com/devicelogin and enter the code AAAAAAAAA to authenticate.
After you log in, the following sample output shows the managed system node pools. Make sure the node status is Ready.
NAME                                STATUS   ROLES   AGE     VERSION
aks-nodepool1-13213685-vmss000000   Ready    agent   2m26s   v1.28.5
aks-nodepool1-13213685-vmss000001   Ready    agent   2m26s   v1.28.5
aks-nodepool1-13213685-vmss000002   Ready    agent   2m26s   v1.28.5
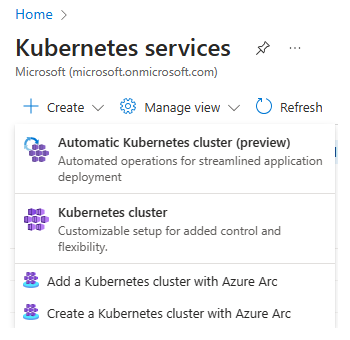
Create Automatic Kubernetes Cluster
To create an AKS Automatic cluster, search for Kubernetes Services, and select Automatic Kubernetes cluster from the drop-down options.
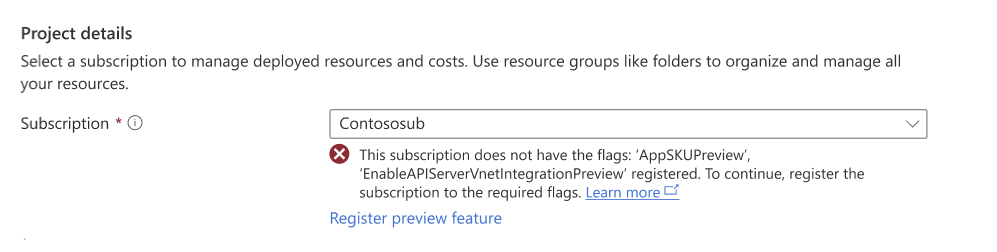
On the Basics tab, fill in all the mandatory fields required to get started: Subscription, Resource Group, Cluster name, and Region

If the prerequisites aren't met and the subscription requires registration of the preview flags, there will be an error shown under the Subscription field:
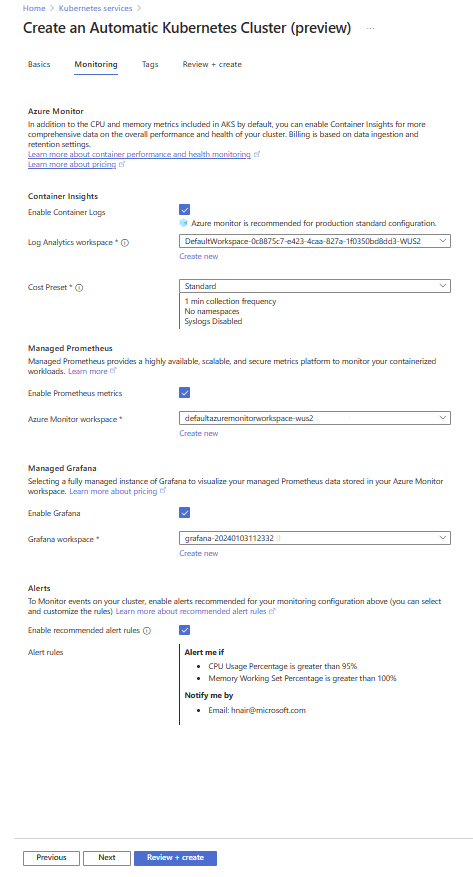
On the Monitoring tab, choose your monitoring configurations from Azure Monitor, Managed Prometheus, Managed Grafana, and/or configure alerts. Add tags (optional), and proceed to create the cluster.
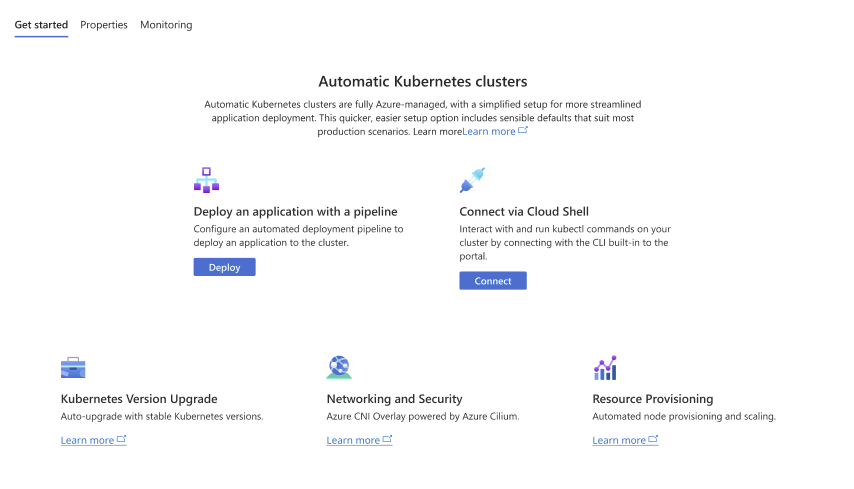
Get started with configuring your first application from GitHub and set up an automated deployment pipeline.
Connect to the cluster
To manage a Kubernetes cluster, use the Kubernetes command-line client, kubectl. To install kubectl locally, run the az aks install-cli command. AKS Automatic clusters are configured with Microsoft Entra ID for Kubernetes role-based access control (RBAC). When you create a cluster using the Azure portal, your user is assigned built-in roles for Azure Kubernetes Service RBAC Cluster Admin.
Configure kubectl to connect to your Kubernetes cluster using the az aks get-credentials command. This command downloads credentials and configures the Kubernetes CLI to use them.
az aks get-credentials --resource-group myResourceGroup --name myAKSAutomaticCluster
Verify the connection to your cluster using the kubectl get command. This command returns a list of the cluster nodes.
kubectl get nodes
The following sample output shows how you're asked to log in.
To sign in, use a web browser to open the page https://microsoft.com/devicelogin and enter the code AAAAAAAAA to authenticate.
After you log in, the following sample output shows the managed system node pools. Make sure the node status is Ready.
NAME                                STATUS   ROLES   AGE     VERSION
aks-nodepool1-13213685-vmss000000   Ready    agent   2m26s   v1.28.5
aks-nodepool1-13213685-vmss000001   Ready    agent   2m26s   v1.28.5
aks-nodepool1-13213685-vmss000002   Ready    agent   2m26s   v1.28.5
Create a resource group
An Azure resource group is a logical group in which Azure resources are deployed and managed. When you create a resource group, you're prompted to specify a location. This location is the storage location of your resource group metadata and where your resources run in Azure if you don't specify another region during resource creation.
The following example creates a resource group named myResourceGroup in the chinanorth3 location.
Create a resource group using the az group create command.
az group create --name myResourceGroup --location chinanorth3
The following sample output resembles successful creation of the resource group:
{
  "id": "/subscriptions/<guid>/resourceGroups/myResourceGroup",
  "location": "chinanorth3",
  "managedBy": null,
  "name": "myResourceGroup",
  "properties": {
    "provisioningState": "Succeeded"
  },
  "tags": null
}
Review the Bicep file
This Bicep file defines an AKS Automatic cluster. While in preview, you need to specify the system nodepool agent pool profile.
@description('The name of the managed cluster resource.')
param clusterName string = 'myAKSAutomaticCluster'

@description('The location of the managed cluster resource.')
param location string = resourceGroup().location

resource aks 'Microsoft.ContainerService/managedClusters@2024-03-02-preview' = {
  name: clusterName
  location: location
  sku: {
	name: 'Automatic'
  }
  properties: {
    agentPoolProfiles: [
      {
        name: 'systempool'
        mode: 'System'
	count: 3
      }
    ]
  }
  identity: {
    type: 'SystemAssigned'
  }
}
For more information about the resource defined in the Bicep file, see the Microsoft.ContainerService/managedClusters reference.
Deploy the Bicep file
Save the Bicep file as main.bicep to your local computer.
Important
The Bicep file sets the
clusterNameparam to the string myAKSAutomaticCluster. If you want to use a different cluster name, make sure to update the string to your preferred cluster name before saving the file to your computer.Deploy the Bicep file using the Azure CLI.
az deployment group create --resource-group myResourceGroup --template-file main.bicepIt takes a few minutes to create the AKS cluster. Wait for the cluster to be successfully deployed before you move on to the next step.
Connect to the cluster
To manage a Kubernetes cluster, use the Kubernetes command-line client, kubectl. To install kubectl locally, run the az aks install-cli command. AKS Automatic clusters are configured with Microsoft Entra ID for Kubernetes role-based access control (RBAC).
Important
When you create a cluster using Bicep, you need to assign one of the built-in roles such as Azure Kubernetes Service RBAC Reader, Azure Kubernetes Service RBAC Writer, Azure Kubernetes Service RBAC Admin, or Azure Kubernetes Service RBAC Cluster Admin to your users, scoped to the cluster or a specific namespace, example using az role assignment create --role "Azure Kubernetes Service RBAC Cluster Admin" --scope <AKS cluster resource id> --assignee user@contoso.com. Also make sure your users have the Azure Kubernetes Service Cluster User built-in role to be able to do run az aks get-credentials, and then get the kubeconfig of your AKS cluster using the az aks get-credentials command.
Configure kubectl to connect to your Kubernetes cluster using the az aks get-credentials command. This command downloads credentials and configures the Kubernetes CLI to use them.
az aks get-credentials --resource-group myResourceGroup --name
Verify the connection to your cluster using the kubectl get command. This command returns a list of the cluster nodes.
kubectl get nodes
The following sample output shows how you're asked to log in.
To sign in, use a web browser to open the page https://microsoft.com/devicelogin and enter the code AAAAAAAAA to authenticate.
After you log in, the following sample output shows the managed system node pools. Make sure the node status is Ready.
NAME                                STATUS   ROLES   AGE     VERSION
aks-nodepool1-13213685-vmss000000   Ready    agent   2m26s   v1.28.5
aks-nodepool1-13213685-vmss000001   Ready    agent   2m26s   v1.28.5
aks-nodepool1-13213685-vmss000002   Ready    agent   2m26s   v1.28.5
Deploy the application
To deploy the application, you use a manifest file to create all the objects required to run the AKS Store application. A Kubernetes manifest file defines a cluster's desired state, such as which container images to run. The manifest includes the following Kubernetes deployments and services:

- Store front: Web application for customers to view products and place orders.
- Product service: Shows product information.
- Order service: Places orders.
- Rabbit MQ: Message queue for an order queue.
Note
We don't recommend running stateful containers, such as Rabbit MQ, without persistent storage for production. These are used here for simplicity, but we recommend using managed services, such as Azure Cosmos DB or Azure Service Bus.
Create a namespace
aks-store-demoto deploy the Kubernetes resources into.kubectl create ns aks-store-demoDeploy the application using the kubectl apply command into the
aks-store-demonamespace. The YAML file defining the deployment is on GitHub.kubectl apply -n aks-store-demo -f https://raw.githubusercontent.com/Azure-Samples/aks-store-demo/main/aks-store-ingress-quickstart.yamlThe following sample output shows the deployments and services:
statefulset.apps/rabbitmq created
configmap/rabbitmq-enabled-plugins created
service/rabbitmq created
deployment.apps/order-service created
service/order-service created
deployment.apps/product-service created
service/product-service created
deployment.apps/store-front created
service/store-front created
ingress/store-front created
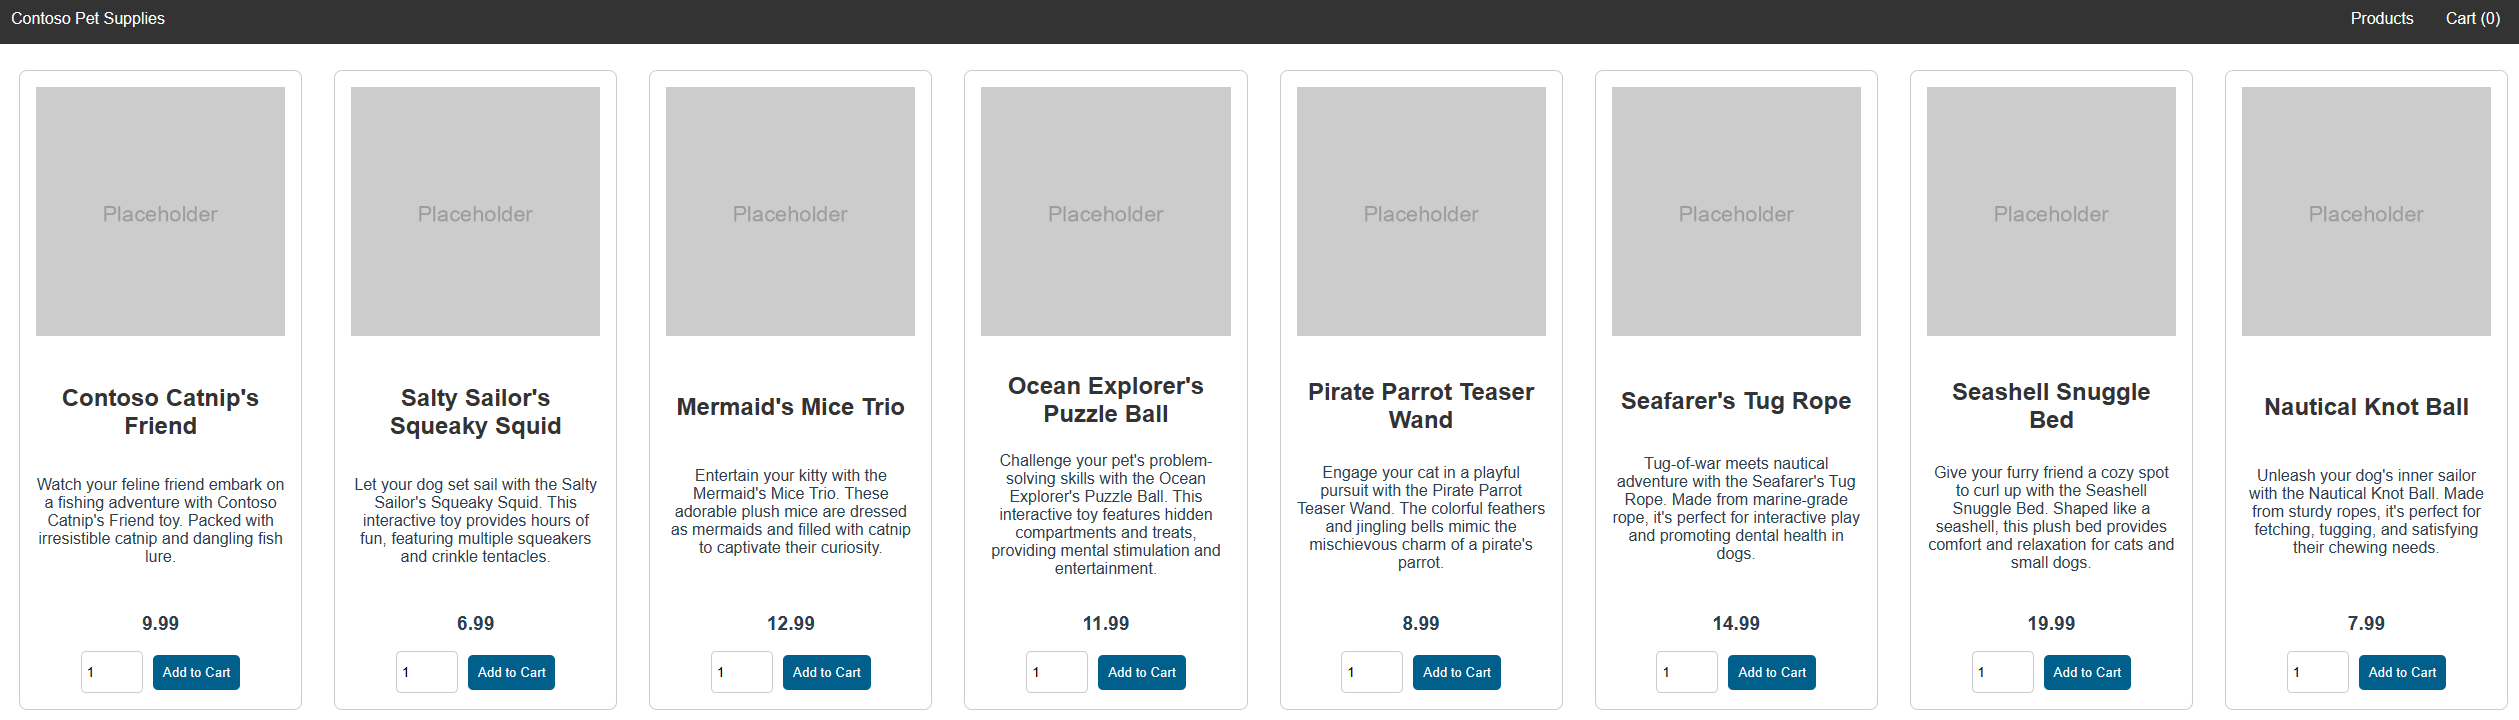
Test the application
When the application runs, a Kubernetes service exposes the application front end to the internet. This process can take a few minutes to complete.
Check the status of the deployed pods using the kubectl get pods command. Make sure all pods are
Runningbefore proceeding. If this is the first workload you deploy, it may take a few minutes for node auto provisioning to create a node pool to run the pods.kubectl get pods -n aks-store-demoCheck for a public IP address for the store-front application. Monitor progress using the kubectl get service command with the
--watchargument.kubectl get ingress store-front -n aks-store-demo --watchThe ADDRESS output for the
store-frontservice initially shows empty:NAME CLASS HOSTS ADDRESS PORTS AGE store-front webapprouting.kubernetes.azure.com * 80 12mOnce the ADDRESS changes from blank to an actual public IP address, use
CTRL-Cto stop thekubectlwatch process.The following sample output shows a valid public IP address assigned to the service:
NAME          CLASS                                HOSTS   ADDRESS        PORTS   AGE
store-front   webapprouting.kubernetes.azure.com   *       4.255.22.196   80      12m
Open a web browser to the external IP address of your ingress to see the Azure Store app in action.

Delete the cluster
If you don't plan on going through the AKS tutorial, clean up unnecessary resources to avoid Azure charges. Run the az group delete command to remove the resource group, container service, and all related resources.
az group delete --name myResourceGroup --yes --no-wait
Note
The AKS cluster was created with a system-assigned managed identity, which is the default identity option used in this quickstart. The platform manages this identity, so you don't need to manually remove it.
Next steps
In this quickstart, you deployed a Kubernetes cluster using AKS Automatic and then deployed a simple multi-container application to it. This sample application is for demo purposes only and doesn't represent all the best practices for Kubernetes applications.
To learn more about AKS Automatic, continue to the introduction.