适用范围:![]() NoSQL
NoSQL
作为开发人员,你可能有使用 NoSQL 文件数据的应用程序。 可以在 Azure Cosmos DB 中使用 API for NoSQL 帐户以存储和访问此文档数据。 本 Node.js 教程展示了如何在 Azure Cosmos DB 中存储和访问 API for NoSQL 帐户中的数据。 本教程使用托管在 Azure 应用服务的 Web 应用功能中的 Node.js Express 应用程序。 在本教程中,你会生成基于 Web 的应用程序(待办事项应用)以创建、检索和完成任务。 任务存储为 Azure Cosmos DB 中的 JSON 文档。
本教程演示了如何使用 Azure 门户在 Azure Cosmos DB 中创建 API for NoSQL 帐户。 如果没有信用卡或 Azure 订阅,可以:
- 设置免费的 试用 Azure Cosmos DB 帐户。
- 生成并运行基于 Node.js SDK 的 Web 应用以创建数据库和容器。
- 向容器添加项。
本教程使用 JavaScript SDK 版本 3.0 并涵盖以下任务:
- 创建 Azure Cosmos DB 帐户
- 创建新的 Node.js 应用程序
- 将应用程序连接到 Azure Cosmos DB
- 运行应用程序并将其部署到 Azure
在按照本文中的说明操作之前,请确保具备以下资源:
可以创建一个 Azure Cosmos DB 免费层帐户,你将在帐户中获得前 1000 RU/s 的免费吞吐量和 25 GB 的免费存储。 还可以使用 URI 为 https://localhost:8081 的 Azure Cosmos DB 模拟器。 有关在模拟器中使用的密钥,请参阅对请求进行身份验证。
- Node.js 6.10 或更高版本。
- Express 生成器(可以通过
npm install express-generator -g安装 Express) - 在本地工作站上安装 Git。
首先创建 Azure Cosmos DB 帐户。 如果已有帐户,或者在本教程中使用 Azure Cosmos DB 模拟器,可以跳到 新建 Node.js 应用程序。
在 Azure 门户菜单或主页中,选择“创建资源” 。
搜索 Azure Cosmos DB。 选择“创建”>“Azure Cosmos DB”。
在“创建 Azure Cosmos DB 帐户”页中,输入新 Azure Cosmos DB 帐户的基本设置。
设置 值 说明 订阅 订阅名称 选择要用于此 Azure Cosmos DB 帐户的 Azure 订阅。 资源组 资源组名称 选择一个资源组,或者选择“新建”,然后输入新资源组的唯一名称。 帐户名 唯一的名称 输入标识 Azure Cosmos 帐户的名称。 由于 documents.azure.cn 将追加到所提供的名称以创建 URI,因此,请使用唯一的名称。 名称只能包含小写字母、数字和连字符 (-)。 它必须是 3-44 个字符。 API NoSQL API 确定要创建的帐户的类型。 Azure Cosmos DB 提供五种 API:适用于文档数据库的 NoSQL、适用于图形数据库的 Gremlin、适用于文档数据库的 MongoDB、Azure 表和 Cassandra。 若要详细了解 API for NoSQL,请参阅欢迎使用 Azure Cosmos DB。 位置 离用户最近的区域 选择用于托管 Azure Cosmos DB 帐户的地理位置。 使用离用户最近的位置,使他们能够以最快的速度访问数据。 容量模式 预配吞吐量或无服务器 选择“预配吞吐量”以在预配吞吐量模式下创建帐户。 选择“无服务器”以在无服务器模式下创建帐户。 应用 Azure Cosmos DB 免费层折扣 “应用”或“不应用” 如果使用 Azure Cosmos DB 免费层,在帐户中使用的前 1000 RU/s 和 25 GB 存储空间是免费的。 了解免费层的详细信息。 限制总帐户吞吐量 已选中或未选中 限制可在此帐户上预配的总吞吐量。 此限制可防止与预配吞吐量相关的意外费用。 创建帐户后,可以更新或删除此限制。 每个 Azure 订阅最多可以有一个免费层 Azure Cosmos DB 帐户,并且你必须在创建帐户时选择加入。 如果看不到用于应用免费层折扣的选项,那么订阅中的另一个帐户已启用免费层。

备注
如果选择“无服务器”作为“容量模式”,则以下选项不可用:
- 应用免费层折扣
- 限制总帐户吞吐量
在“全局分发”选项卡中,配置以下详细信息。 在本快速入门中,你可以保留默认值:
设置 值 说明 异地冗余 禁用 通过将你的区域与某个配对区域进行配对来启用或禁用帐户的多区域分发。 稍后可以将更多区域添加到帐户。 多区域写入 禁用 借助多区域写入功能,可以利用全中国的数据库和容器的预配吞吐量。 可用性区域 禁用 可用性区域有助于进一步提高应用程序的可用性和复原能力。 备注
如果在前面的“基本信息”页中选择“无服务器”作为“容量模式”,则以下选项不可用:
- 异地冗余
- 多区域写入
(可选)可以在以下选项卡中配置更多详细信息:
选择“查看 + 创建”。
检查帐户设置,然后选择“创建”。 创建帐户需要几分钟时间。 等待门户页显示“你的部署已完成”消息。
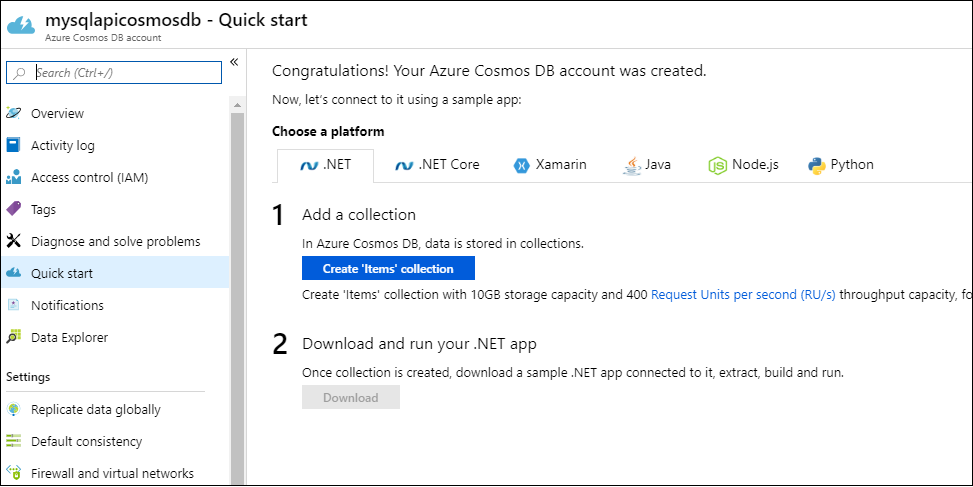
选择“转到资源”,转到 Azure Cosmos DB 帐户页。


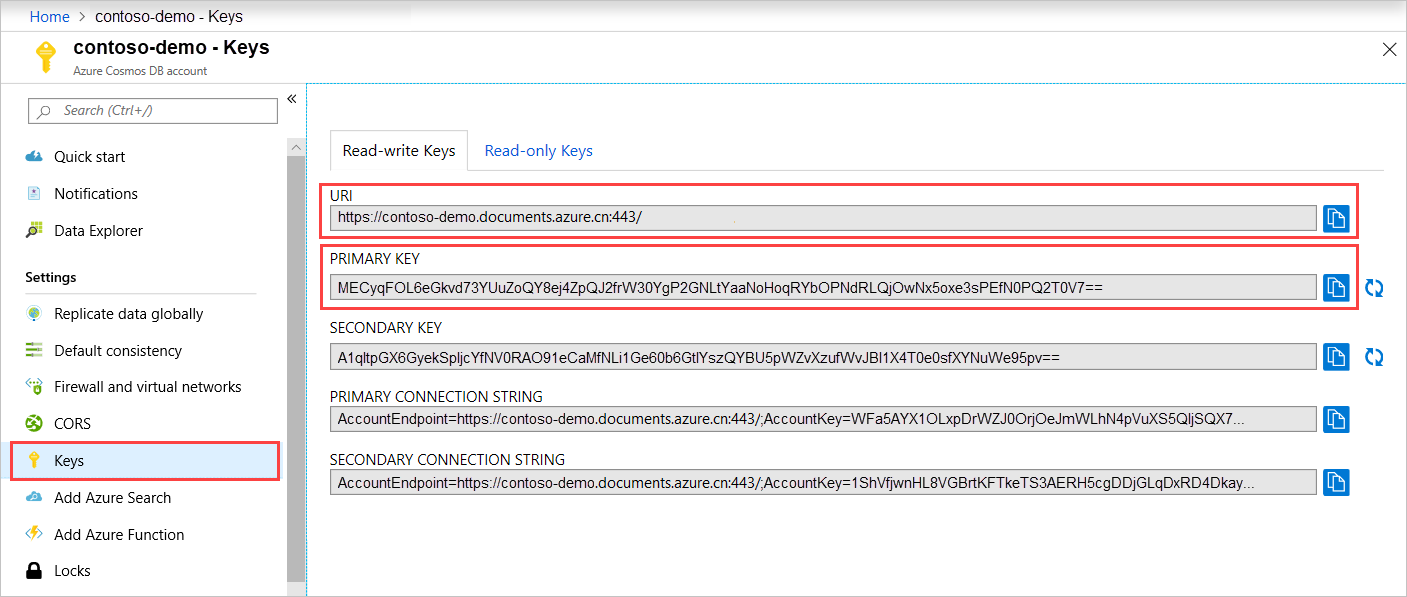
转到 Azure Cosmos DB 帐户页,并选择“密钥”。 复制要在下一步创建的 Web 应用程序中使用的值。
现在,了解如何使用 Express 框架创建基本的 Hello World Node.js 项目。
打开首选终端,例如 Node.js 命令提示符。
导航到要在其中存储新应用程序的目录。
使用 Express 生成器生成名叫 todo的新应用程序。
express todo打开 todo 目录并安装依赖项。
cd todo
npm install
运行新应用程序。
npm start要在浏览器中查看新的应用程序,请转到
http://localhost:3000。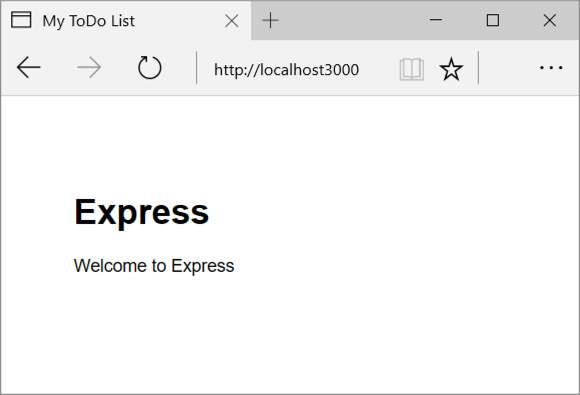
停止应用程序的方法是先在终端窗口中按 CTRL+C,然后选择“y”终止批处理作业。
package.json 文件是在项目的根目录中创建的文件之一。 此文件包含一系列其他模块,它们是 Node.js 应用程序必需的。 在将此应用程序部署到 Azure 时,请使用此文件以确定应该在 Azure 上安装哪些模块来支持应用程序。 为本教程再安装两个包。
通过 npm 安装 @azure/cosmos 模板。
npm install @azure/cosmos
完成初始设置和配置后,了解如何编写待办事项应用程序与 Azure Cosmos DB 通信所需的代码。
在项目的根目录中,创建名为 models的新目录。
在 models 目录中,创建一个名为 taskDao.js 的新文件。 此文件包含创建数据库和容器所需的代码, 并定义在 Azure Cosmos DB 中读取、更新、创建和查找任务所需的方法。
将以下代码复制到“taskDao.js”文件中:
 // @ts-check
 const CosmosClient = require('@azure/cosmos').CosmosClient
 const debug = require('debug')('todo:taskDao')

 // For simplicity we'll set a constant partition key
 const partitionKey = undefined
 class TaskDao {
   /**
    * Manages reading, adding, and updating Tasks in Azure Cosmos DB
    * @param {CosmosClient} cosmosClient
    * @param {string} databaseId
    * @param {string} containerId
    */
   constructor(cosmosClient, databaseId, containerId) {
     this.client = cosmosClient
     this.databaseId = databaseId
     this.collectionId = containerId

     this.database = null
     this.container = null
   }

   async init() {
     debug('Setting up the database...')
     const dbResponse = await this.client.databases.createIfNotExists({
       id: this.databaseId
     })
     this.database = dbResponse.database
     debug('Setting up the database...done!')
     debug('Setting up the container...')
     const coResponse = await this.database.containers.createIfNotExists({
       id: this.collectionId
     })
     this.container = coResponse.container
     debug('Setting up the container...done!')
   }

   async find(querySpec) {
     debug('Querying for items from the database')
     if (!this.container) {
       throw new Error('Collection is not initialized.')
     }
     const { resources } = await this.container.items.query(querySpec).fetchAll()
     return resources
   }

   async addItem(item) {
     debug('Adding an item to the database')
     item.date = Date.now()
     item.completed = false
     const { resource: doc } = await this.container.items.create(item)
     return doc
   }

   async updateItem(itemId) {
     debug('Update an item in the database')
     const doc = await this.getItem(itemId)
     doc.completed = true

     const { resource: replaced } = await this.container
       .item(itemId, partitionKey)
       .replace(doc)
     return replaced
   }

   async getItem(itemId) {
     debug('Getting an item from the database')
     const { resource } = await this.container.item(itemId, partitionKey).read()
     return resource
   }
 }

 module.exports = TaskDao
保存并关闭 taskDao.js 文件。
在项目的 routes 目录中,创建一个名为 tasklist.js 的新文件。
将以下代码添加到 tasklist.js。 此代码会加载 tasklist.js 使用的 CosmosClient 和 async 模块, 并定义 TaskList 类,该类作为我们之前定义的 TaskDao 对象的一个实例来传递:
 const TaskDao = require("../models/TaskDao");

 class TaskList {
   /**
    * Handles the various APIs for displaying and managing tasks
    * @param {TaskDao} taskDao
    */
   constructor(taskDao) {
     this.taskDao = taskDao;
   }
   async showTasks(req, res) {
     const querySpec = {
       query: "SELECT * FROM root r WHERE r.completed=@completed",
       parameters: [
         {
           name: "@completed",
           value: false
         }
       ]
     };

     const items = await this.taskDao.find(querySpec);
     res.render("index", {
       title: "My ToDo List ",
       tasks: items
     });
   }

   async addTask(req, res) {
     const item = req.body;

     await this.taskDao.addItem(item);
     res.redirect("/");
   }

   async completeTask(req, res) {
     const completedTasks = Object.keys(req.body);
     const tasks = [];

     completedTasks.forEach(task => {
       tasks.push(this.taskDao.updateItem(task));
     });

     await Promise.all(tasks);

     res.redirect("/");
   }
 }

 module.exports = TaskList;
保存并关闭 tasklist.js 文件。
在项目根目录中创建一个名为 config.js 的新文件。
将以下代码添加到 config.js 文件。 此代码会定义应用程序所需的配置设置和值。
const config = {};

config.host = process.env.HOST || "[the endpoint URI of your Azure Cosmos DB account]";
config.authKey =
  process.env.AUTH_KEY || "[the PRIMARY KEY value of your Azure Cosmos DB account";
config.databaseId = "ToDoList";
config.containerId = "Items";

if (config.host.includes("https://localhost:")) {
  console.log("Local environment detected");
  console.log("WARNING: Disabled checking of self-signed certs. Do not have this code in production.");
  process.env.NODE_TLS_REJECT_UNAUTHORIZED = "0";
  console.log(`Go to http://localhost:${process.env.PORT || '3000'} to try the sample.`);
}

module.exports = config;
在 config.js 文件中,使用 Azure 门户 上 Azure Cosmos DB 帐户 密钥 页面中的值更新 HOST 和 AUTH_KEY 的值。
保存并关闭 config.js 文件。
在项目目录中,打开 app.js 文件。 此文件早于 Express Web 应用程序创建。
将以下代码添加到 app.js 文件。 此代码定义要使用的配置文件,并将值加载到将在后续部分使用的一些变量中。
 const CosmosClient = require('@azure/cosmos').CosmosClient
 const config = require('./config')
 const TaskList = require('./routes/tasklist')
 const TaskDao = require('./models/taskDao')

 const express = require('express')
 const path = require('path')
 const logger = require('morgan')
 const cookieParser = require('cookie-parser')
 const bodyParser = require('body-parser')

 const app = express()

 // view engine setup
 app.set('views', path.join(__dirname, 'views'))
 app.set('view engine', 'jade')

 // uncomment after placing your favicon in /public
 //app.use(favicon(path.join(__dirname, 'public', 'favicon.ico')));
 app.use(logger('dev'))
 app.use(bodyParser.json())
 app.use(bodyParser.urlencoded({ extended: false }))
 app.use(cookieParser())
 app.use(express.static(path.join(__dirname, 'public')))

 //Todo App:
 const cosmosClient = new CosmosClient({
   endpoint: config.host,
   key: config.authKey
 })
 const taskDao = new TaskDao(cosmosClient, config.databaseId, config.containerId)
 const taskList = new TaskList(taskDao)
 taskDao
   .init(err => {
     console.error(err)
   })
   .catch(err => {
     console.error(err)
     console.error(
       'Shutting down because there was an error settinig up the database.'
     )
     process.exit(1)
   })

 app.get('/', (req, res, next) => taskList.showTasks(req, res).catch(next))
 app.post('/addtask', (req, res, next) => taskList.addTask(req, res).catch(next))
 app.post('/completetask', (req, res, next) =>
   taskList.completeTask(req, res).catch(next)
 )
 app.set('view engine', 'jade')

 // catch 404 and forward to error handler
 app.use(function(req, res, next) {
   const err = new Error('Not Found')
   err.status = 404
   next(err)
 })

 // error handler
 app.use(function(err, req, res, next) {
   // set locals, only providing error in development
   res.locals.message = err.message
   res.locals.error = req.app.get('env') === 'development' ? err : {}

   // render the error page
   res.status(err.status || 500)
   res.render('error')
 })

 module.exports = app
最后,保存并关闭 app.js 文件。
现在,生成用户界面,以便用户可以与应用程序交互。 你在前面部分创建的 Express 应用程序将 Jade 用作视图引擎。
views 目录中的 layout.jade 文件用作其他 .jade 文件的多区域模板。 在此步骤中,你会对其进行修改以使用 Twitter Bootstrap(用于设计网站的工具包)。
打开 views 文件夹中的 layout.jade 文件,将内容替换为以下代码:
doctype html
html
  head
    title= title
    link(rel='stylesheet', href='//ajax.aspnetcdn.com/ajax/bootstrap/3.3.2/css/bootstrap.min.css')
    link(rel='stylesheet', href='/stylesheets/style.css')
  body
    nav.navbar.navbar-inverse.navbar-fixed-top
      div.navbar-header
        a.navbar-brand(href='#') My Tasks
    block content
    script(src='//ajax.aspnetcdn.com/ajax/jQuery/jquery-1.11.2.min.js')
    script(src='//ajax.aspnetcdn.com/ajax/bootstrap/3.3.2/bootstrap.min.js')
此代码会告知 Jade 引擎为应用程序呈现一些 HTML,并创建名为 content 的 块,可以在其中提供内容页面的布局。 保存并关闭 layout.jade 文件。
打开 index.jade 文件,即应用程序使用的视图。 将文件内容替换为以下代码:
extends layout
block content
     h1 #{title}
     br

     form(action="/completetask", method="post")
      table.table.table-striped.table-bordered
         tr
           td Name
           td Category
           td Date
           td Complete
         if (typeof tasks === "undefined")
           tr
             td
         else
           each task in tasks
             tr
               td #{task.name}
               td #{task.category}
               - var date  = new Date(task.date);
               - var day   = date.getDate();
               - var month = date.getMonth() + 1;
               - var year  = date.getFullYear();
               td #{month + "/" + day + "/" + year}
               td
                if(task.completed)
                 input(type="checkbox", name="#{task.id}", value="#{!task.completed}", checked=task.completed)
                else
                 input(type="checkbox", name="#{task.id}", value="#{!task.completed}", checked=task.completed)
       button.btn.btn-primary(type="submit") Update tasks
     hr
     form.well(action="/addtask", method="post")
       label Item Name:
       input(name="name", type="textbox")
       label Item Category:
       input(name="category", type="textbox")
       br
       button.btn(type="submit") Add item
此代码会扩展布局,并为你曾在 layout.jade 文件中看到的 content 占位符提供内容。 在该布局中,你创建了两个 HTML 窗体。
第一个窗体包含一份数据表和一个按钮,允许发布到控制器的 /completeTask 方法,从而更新项。
第二个窗体包含两个输入字段和一个按钮,允许发布到控制器的 /addtask 方法以创建新项,这是应用程序正常运行所需的全部内容。
生成应用程序后,可以执行以下步骤以在本地运行该程序:
要在本地计算机上测试应用程序,请在终端中运行
npm start以启动应用程序,然后刷新http://localhost:3000页面。 页面现在应如以下屏幕截图所示: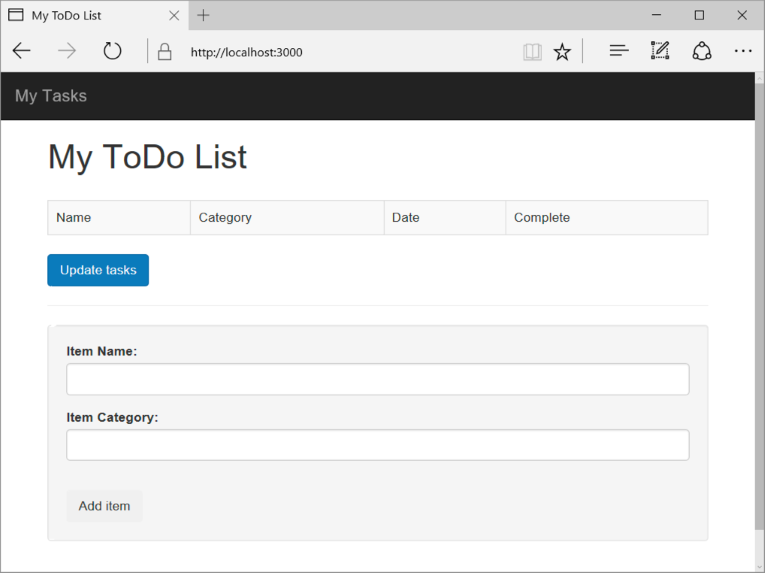
提示
如果收到有关 layout.jade 文件或 index.jade 文件中缩进的错误,请确保这两个文件中的头两行都已左对齐,且没有空格。 如果头两行之前留有空格,请删除这些空格,将这两个文件保存,然后刷新浏览器窗口。
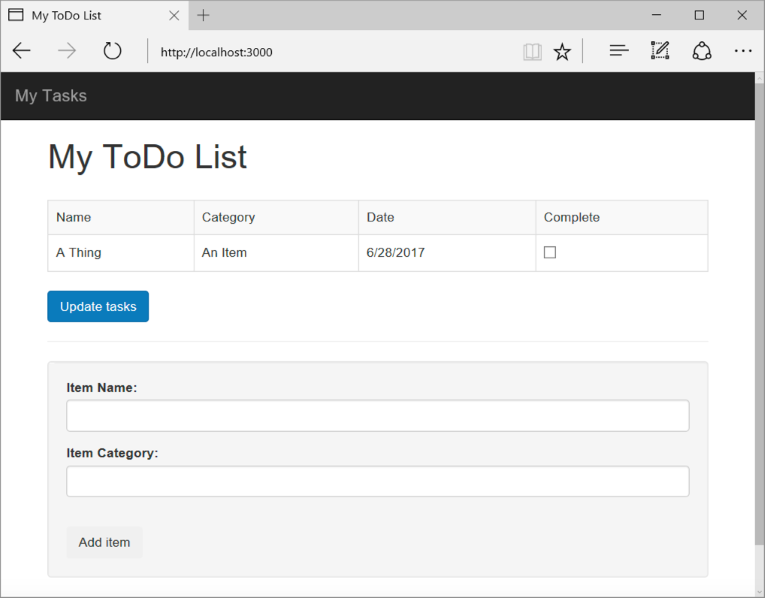
使用“项名称”和“项类别”字段输入新任务,然后选择“添加项”以在 Azure Cosmos DB 中创建具有这些属性的文档。
页面会更新以在待办事项列表中显示新建项。
要完成任务,请依次选择“完成”列中的复选框、“更新任务”以更新已创建的文档并将其从视图中删除。
要停止应用程序,请在终端窗口中按 CTRL+C,然后选择“y”以终止批处理作业。
应用程序在本地成功以后,即可将其部署到 Azure 应用服务。 转到终端后,确保位于 todo 应用目录中。 使用以下 az webapp up 命令在本地文件夹(待办事项)中部署代码:
az webapp up --sku F1 --name <app-name>
将 <app_name> 替换为在整个 Azure 中均唯一的名称(有效字符为 a-z、0-9 和 -)。 良好的模式是结合使用公司名称和应用标识符。 要详细了解应用部署,请参阅 Azure 中的 Node.js 应用部署。
该命令可能需要几分钟时间才能完成。 该命令提供有关创建资源组、应用服务计划、应用资源、配置日志记录以及执行 ZIP 部署的消息。 该命令在运行时提供这些消息。 然后,它会提供一个 URL,用于在 http://<app-name>.chinacloudsites.cn 处启动应用,这是应用在 Azure 上的 URL。
不再需要这些资源时,可以删除资源组、Azure Cosmos DB 帐户和所有相关资源时。 为此,请选择用于 Azure Cosmos DB 帐户的资源组,接着选择“删除”,然后确认要删除的资源组的名称。
可以使用有关现有数据库群集的信息进行容量规划。