在执行管道期间或之后,通常需要发送通知。 通知提供主动警报并降低为发现问题所需的反应监视。 可了解如何使用数据工厂或 Synapse 管道可以调用的逻辑应用发送电子邮件通知。 许多企业也越来越多地使用 Microsoft Teams 进行协作。 本文介绍如何将来自管道警报的通知配置到 Microsoft Teams 中。
先决条件
在可以从管道向 Teams 发送通知之前,必须为 Teams 通道创建传入 Webhook。 如果需要为此目的创建新的 Teams 通道,请参阅 Teams 文档。
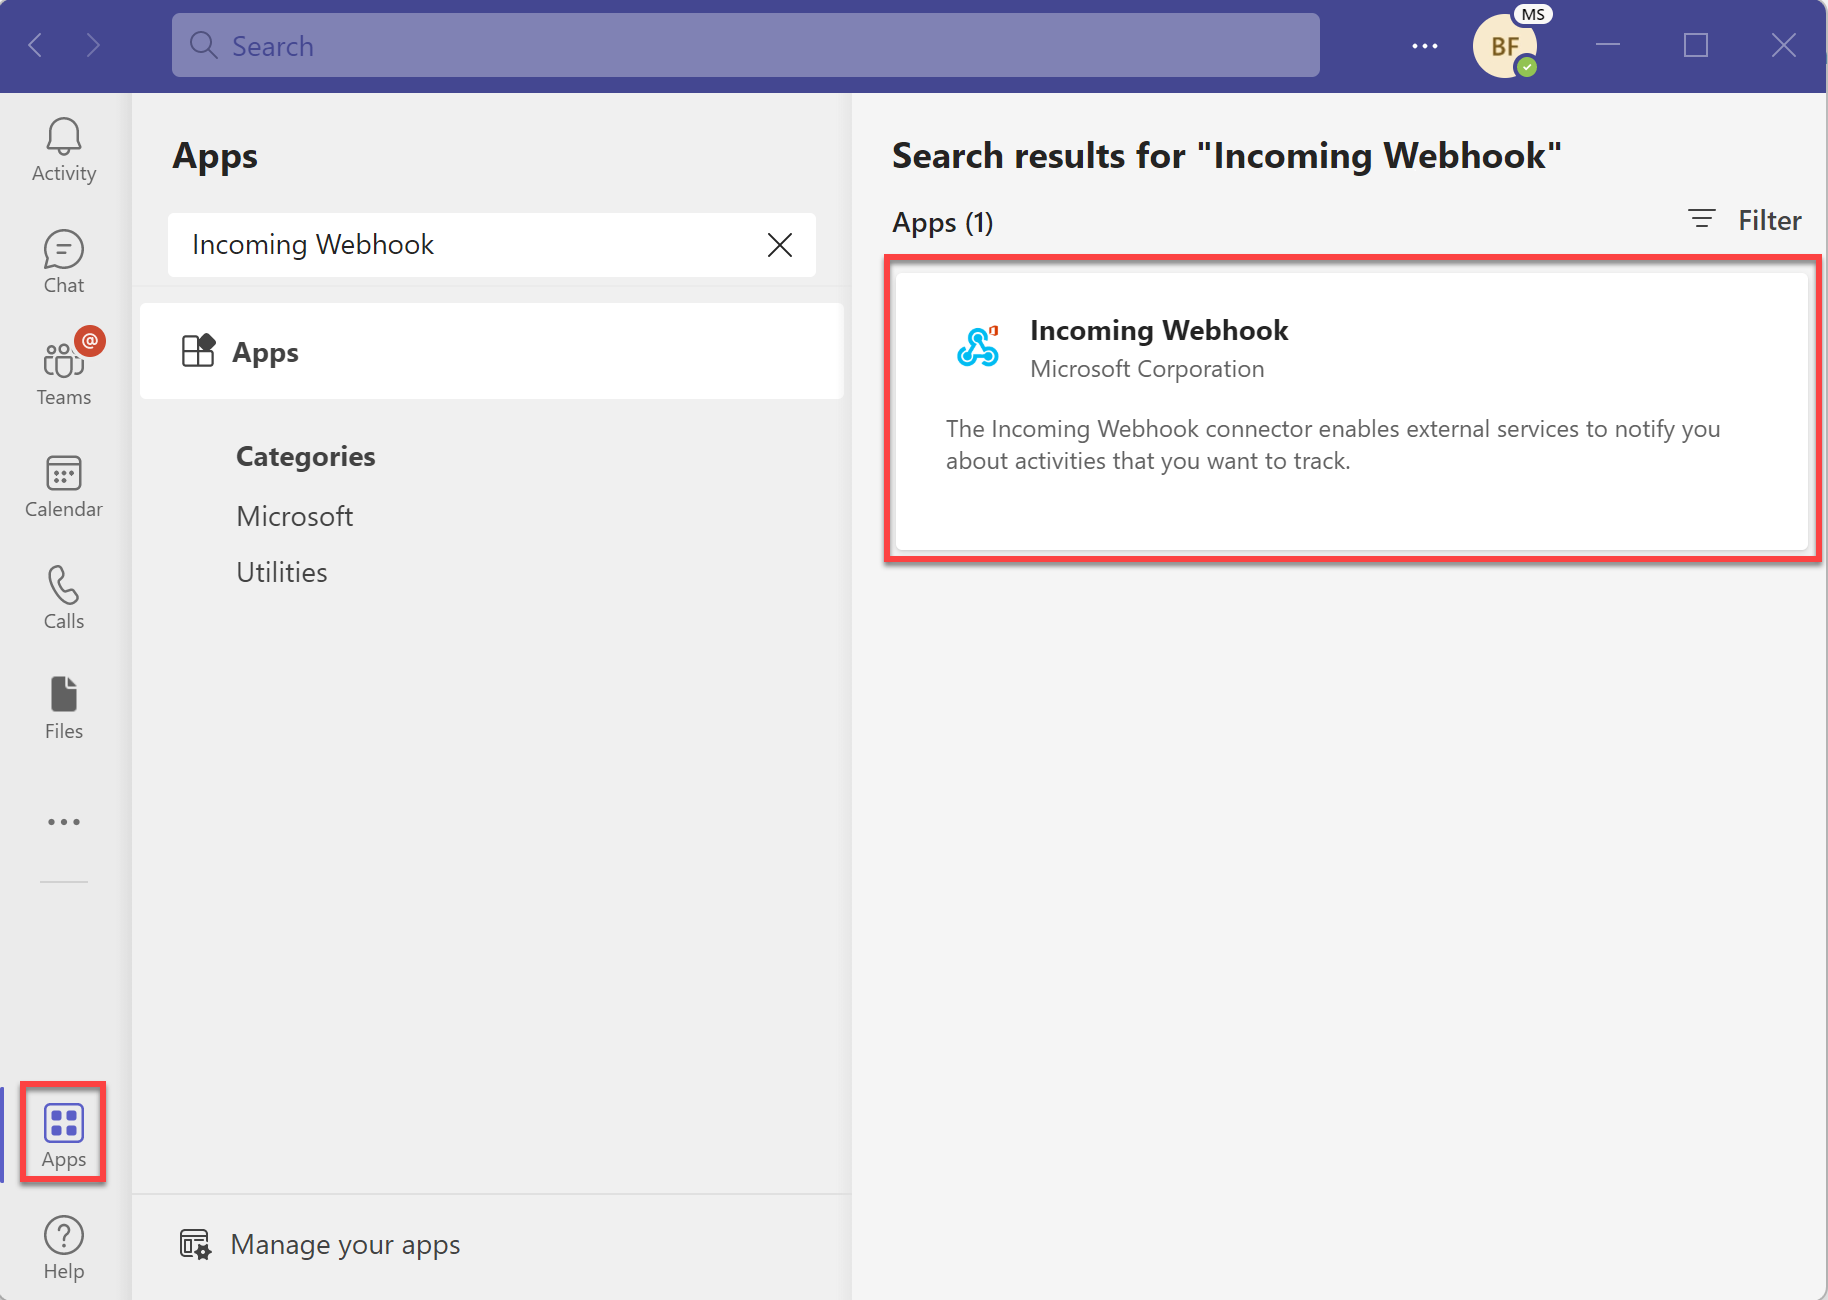
打开 Microsoft Teams 并转到“应用”选项卡。搜索“传入 Webhook”并选择传入 Webhook 连接器。
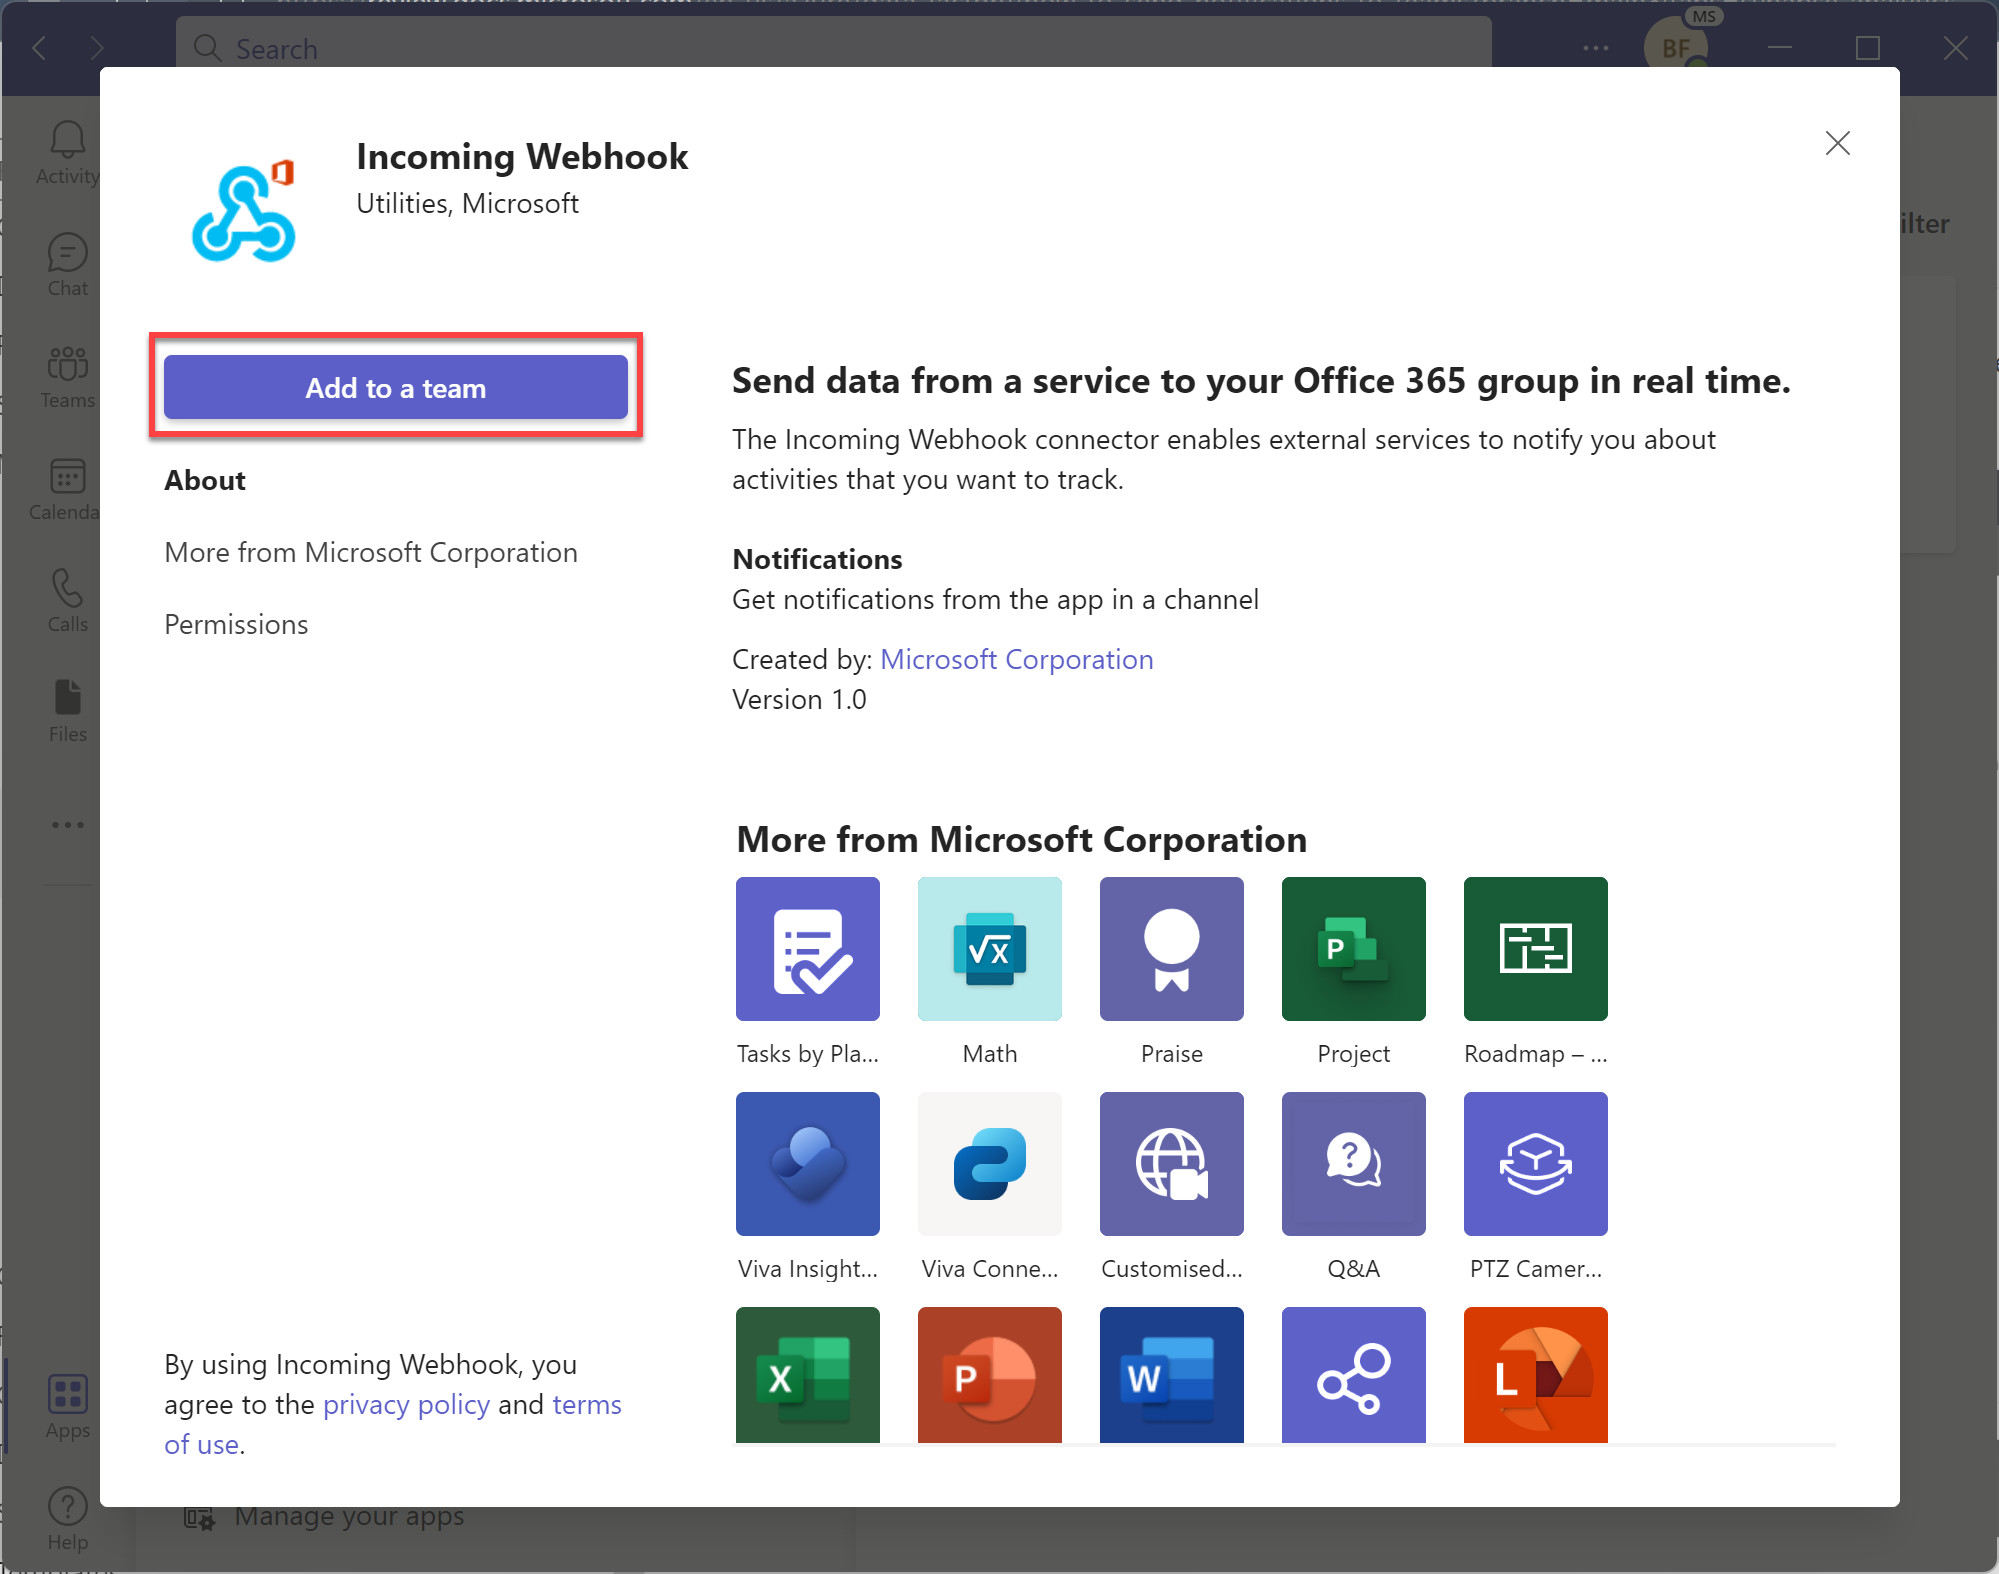
选择“添加到团队”按钮以将连接器添加到要在其中发送通知的团队或团队通道名称站点。
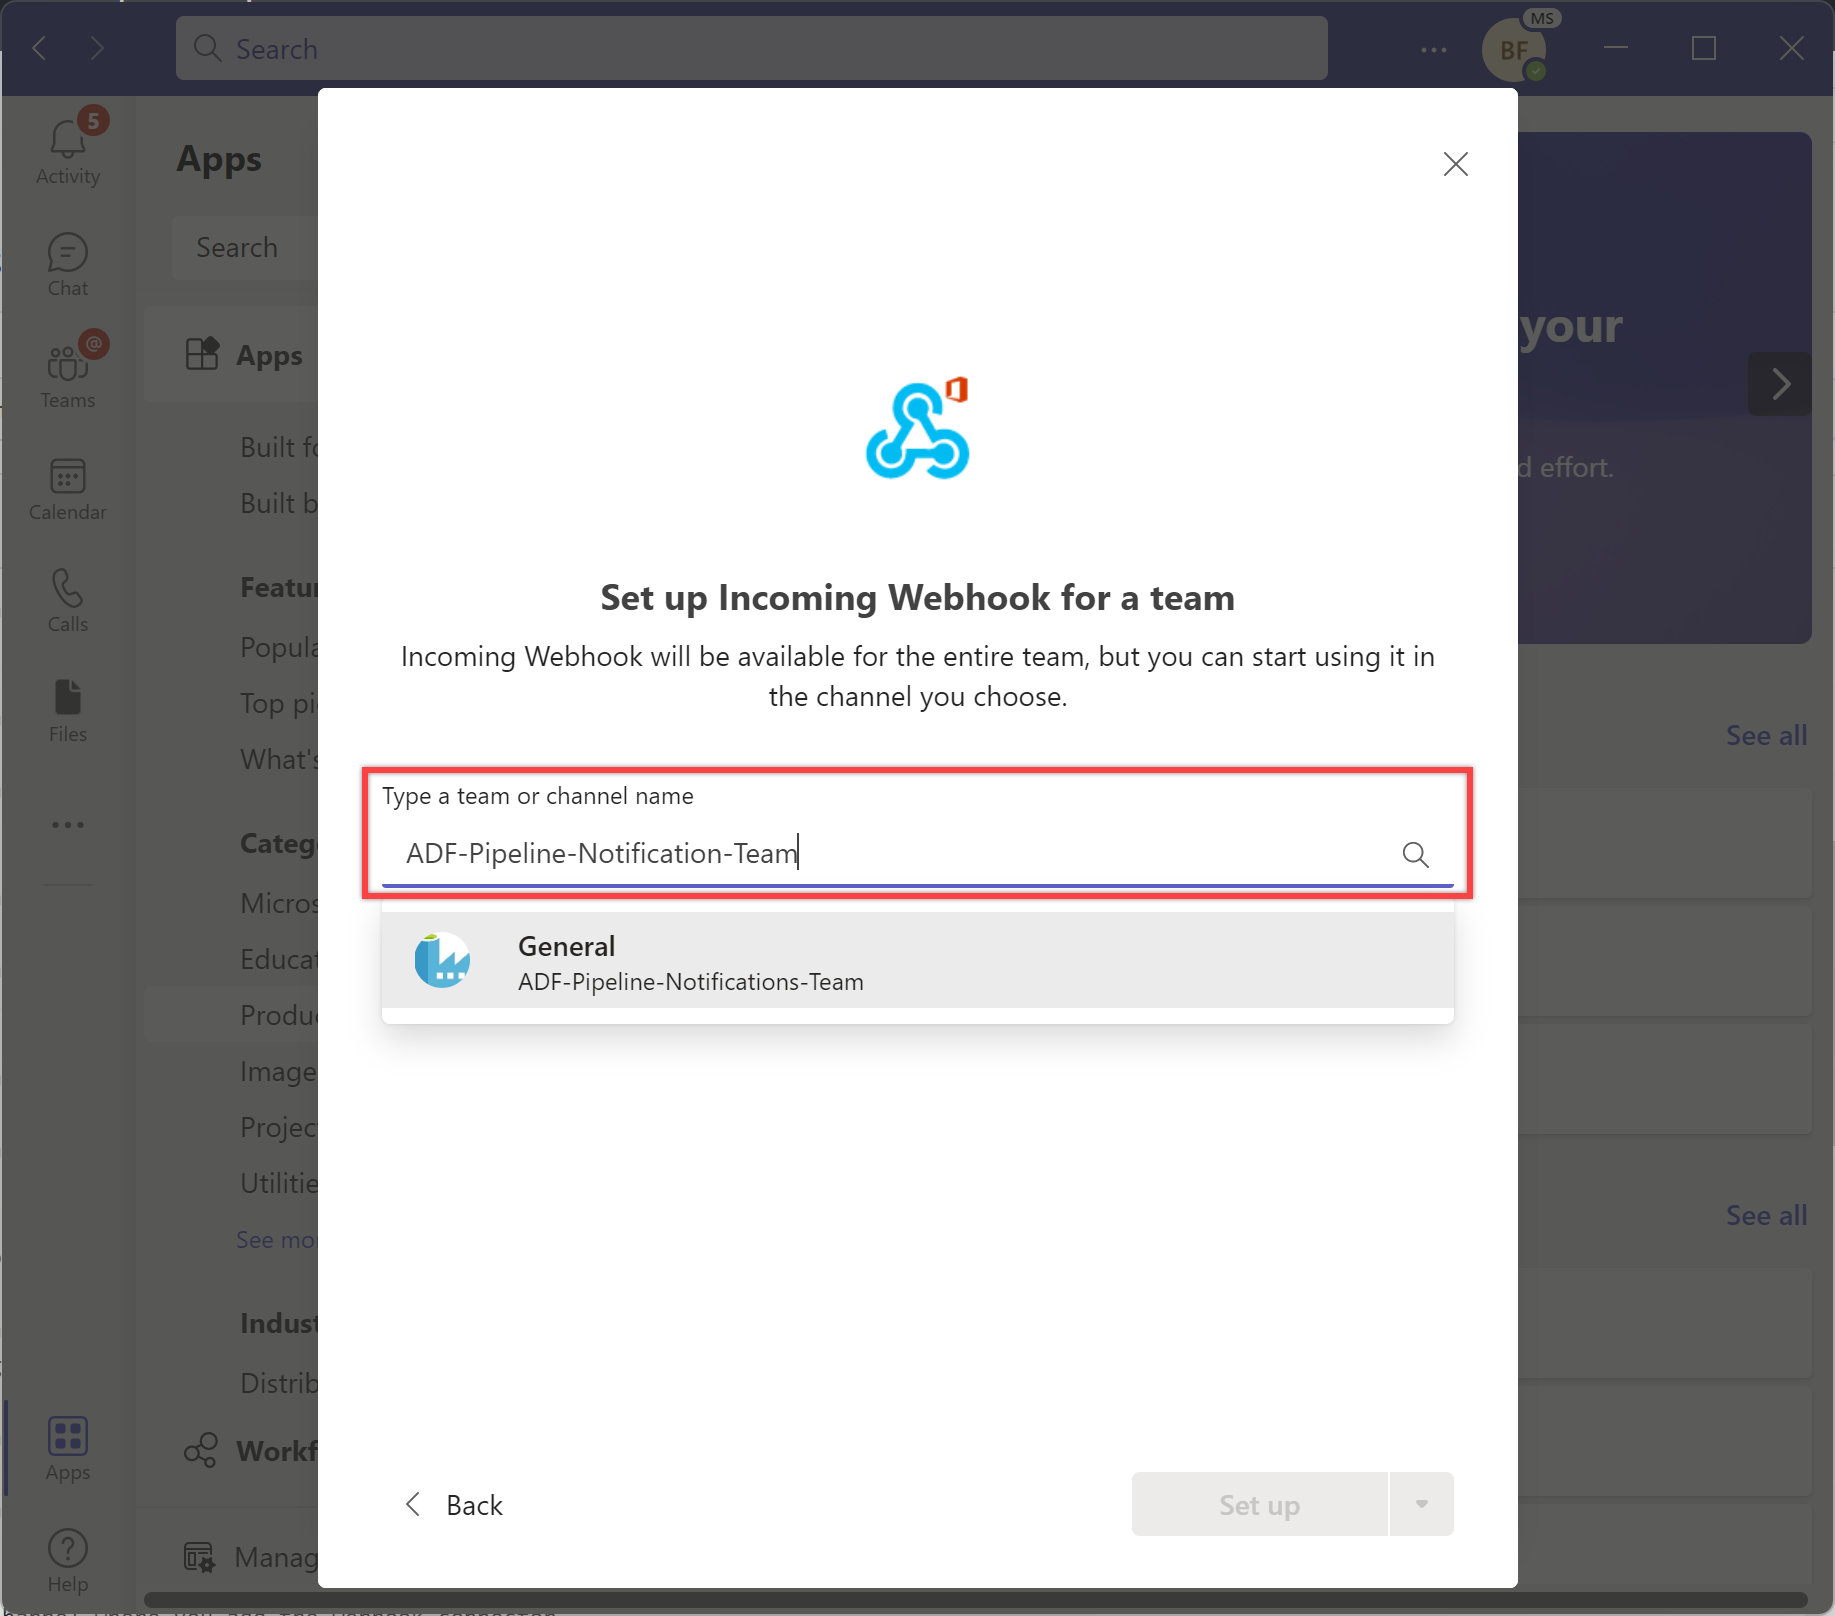
键入或选择要在其中发送通知的团队或团队通道名称。
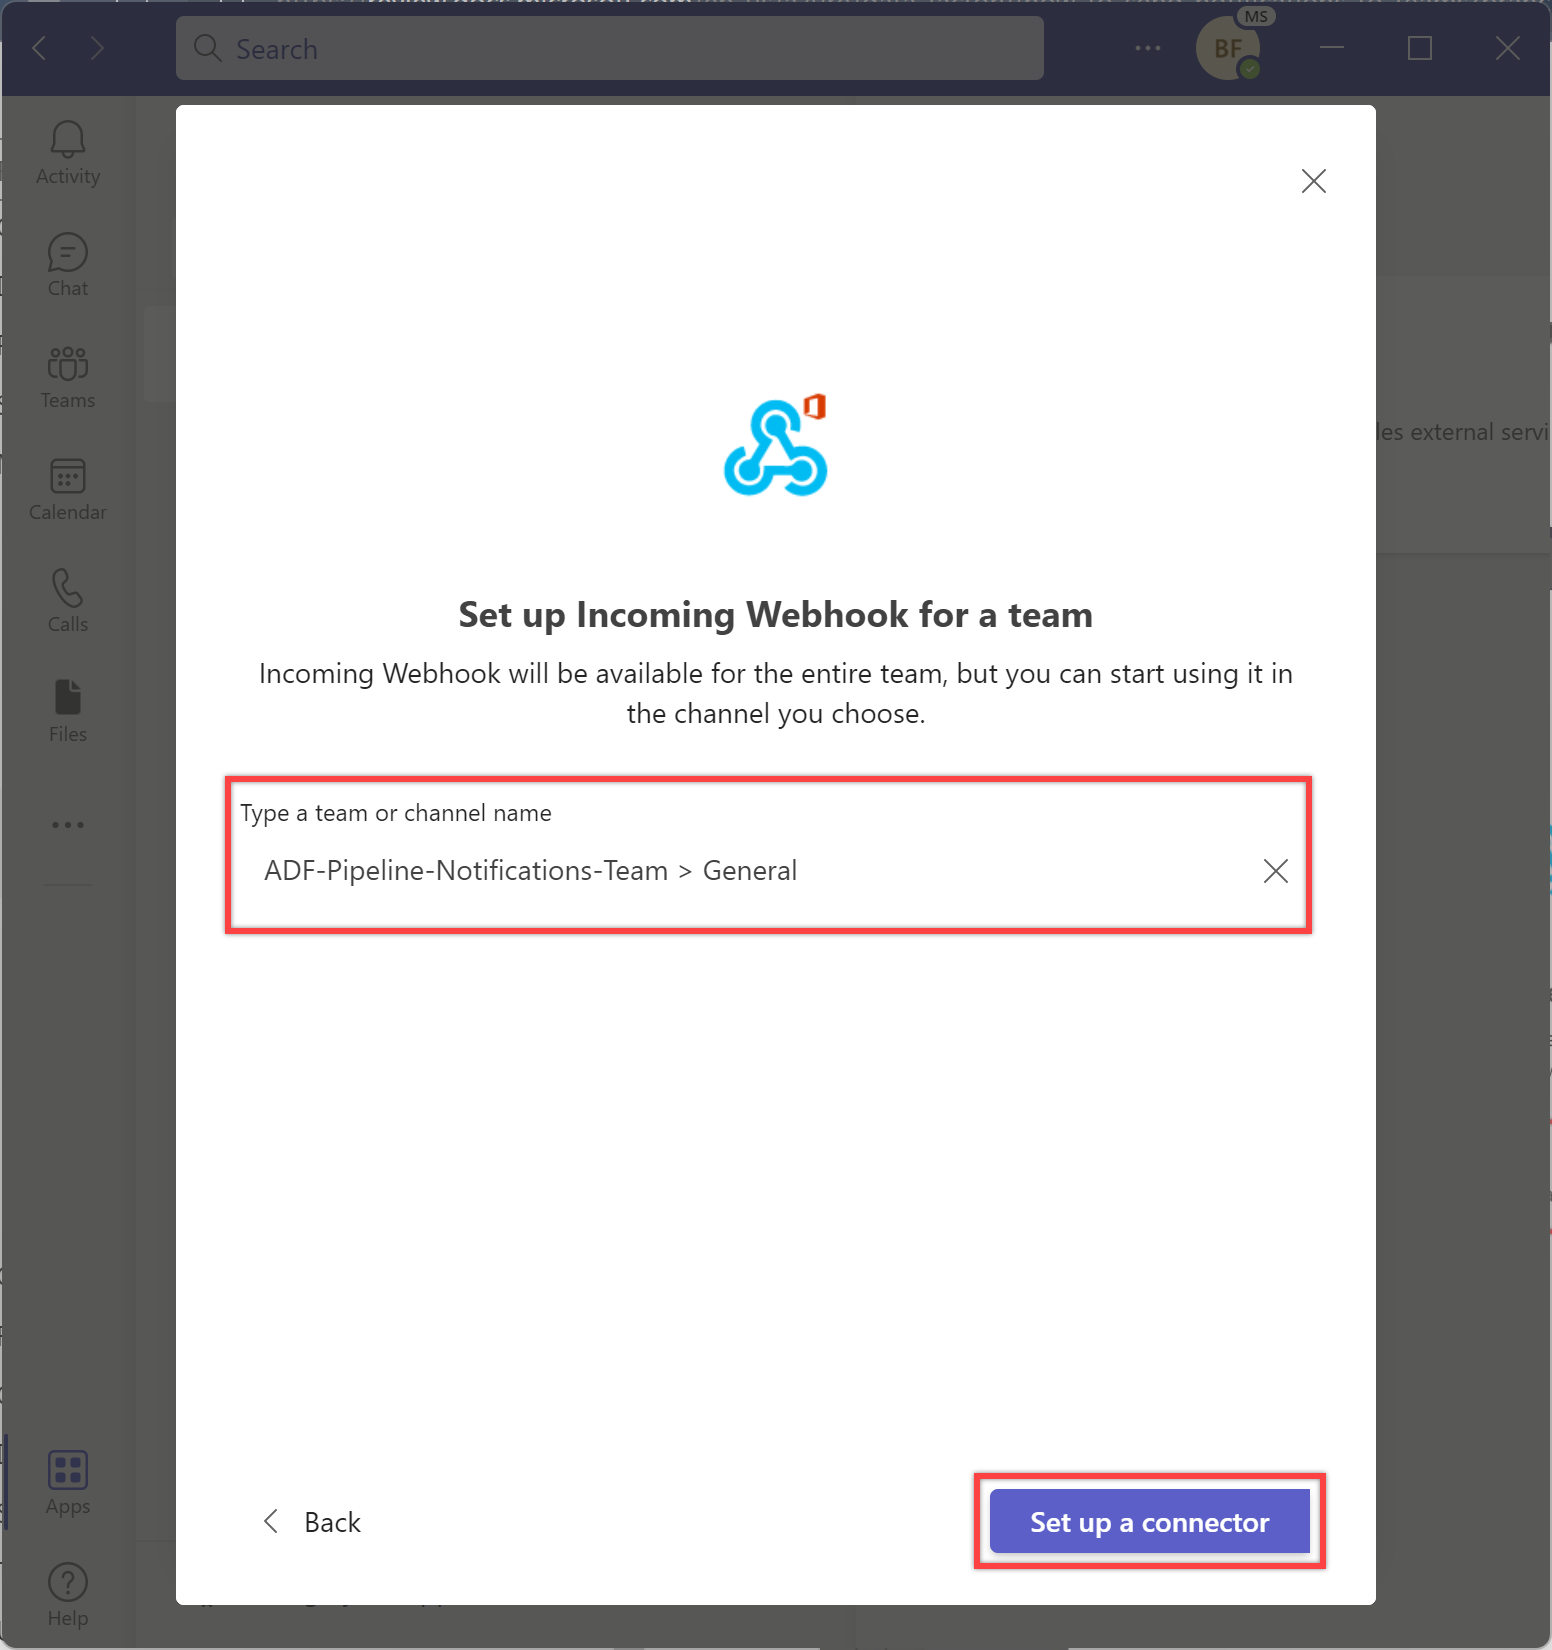
选择“设置连接器”按钮,为在上一步骤中选择的团队或团队通道名称设置传入 Webhook。
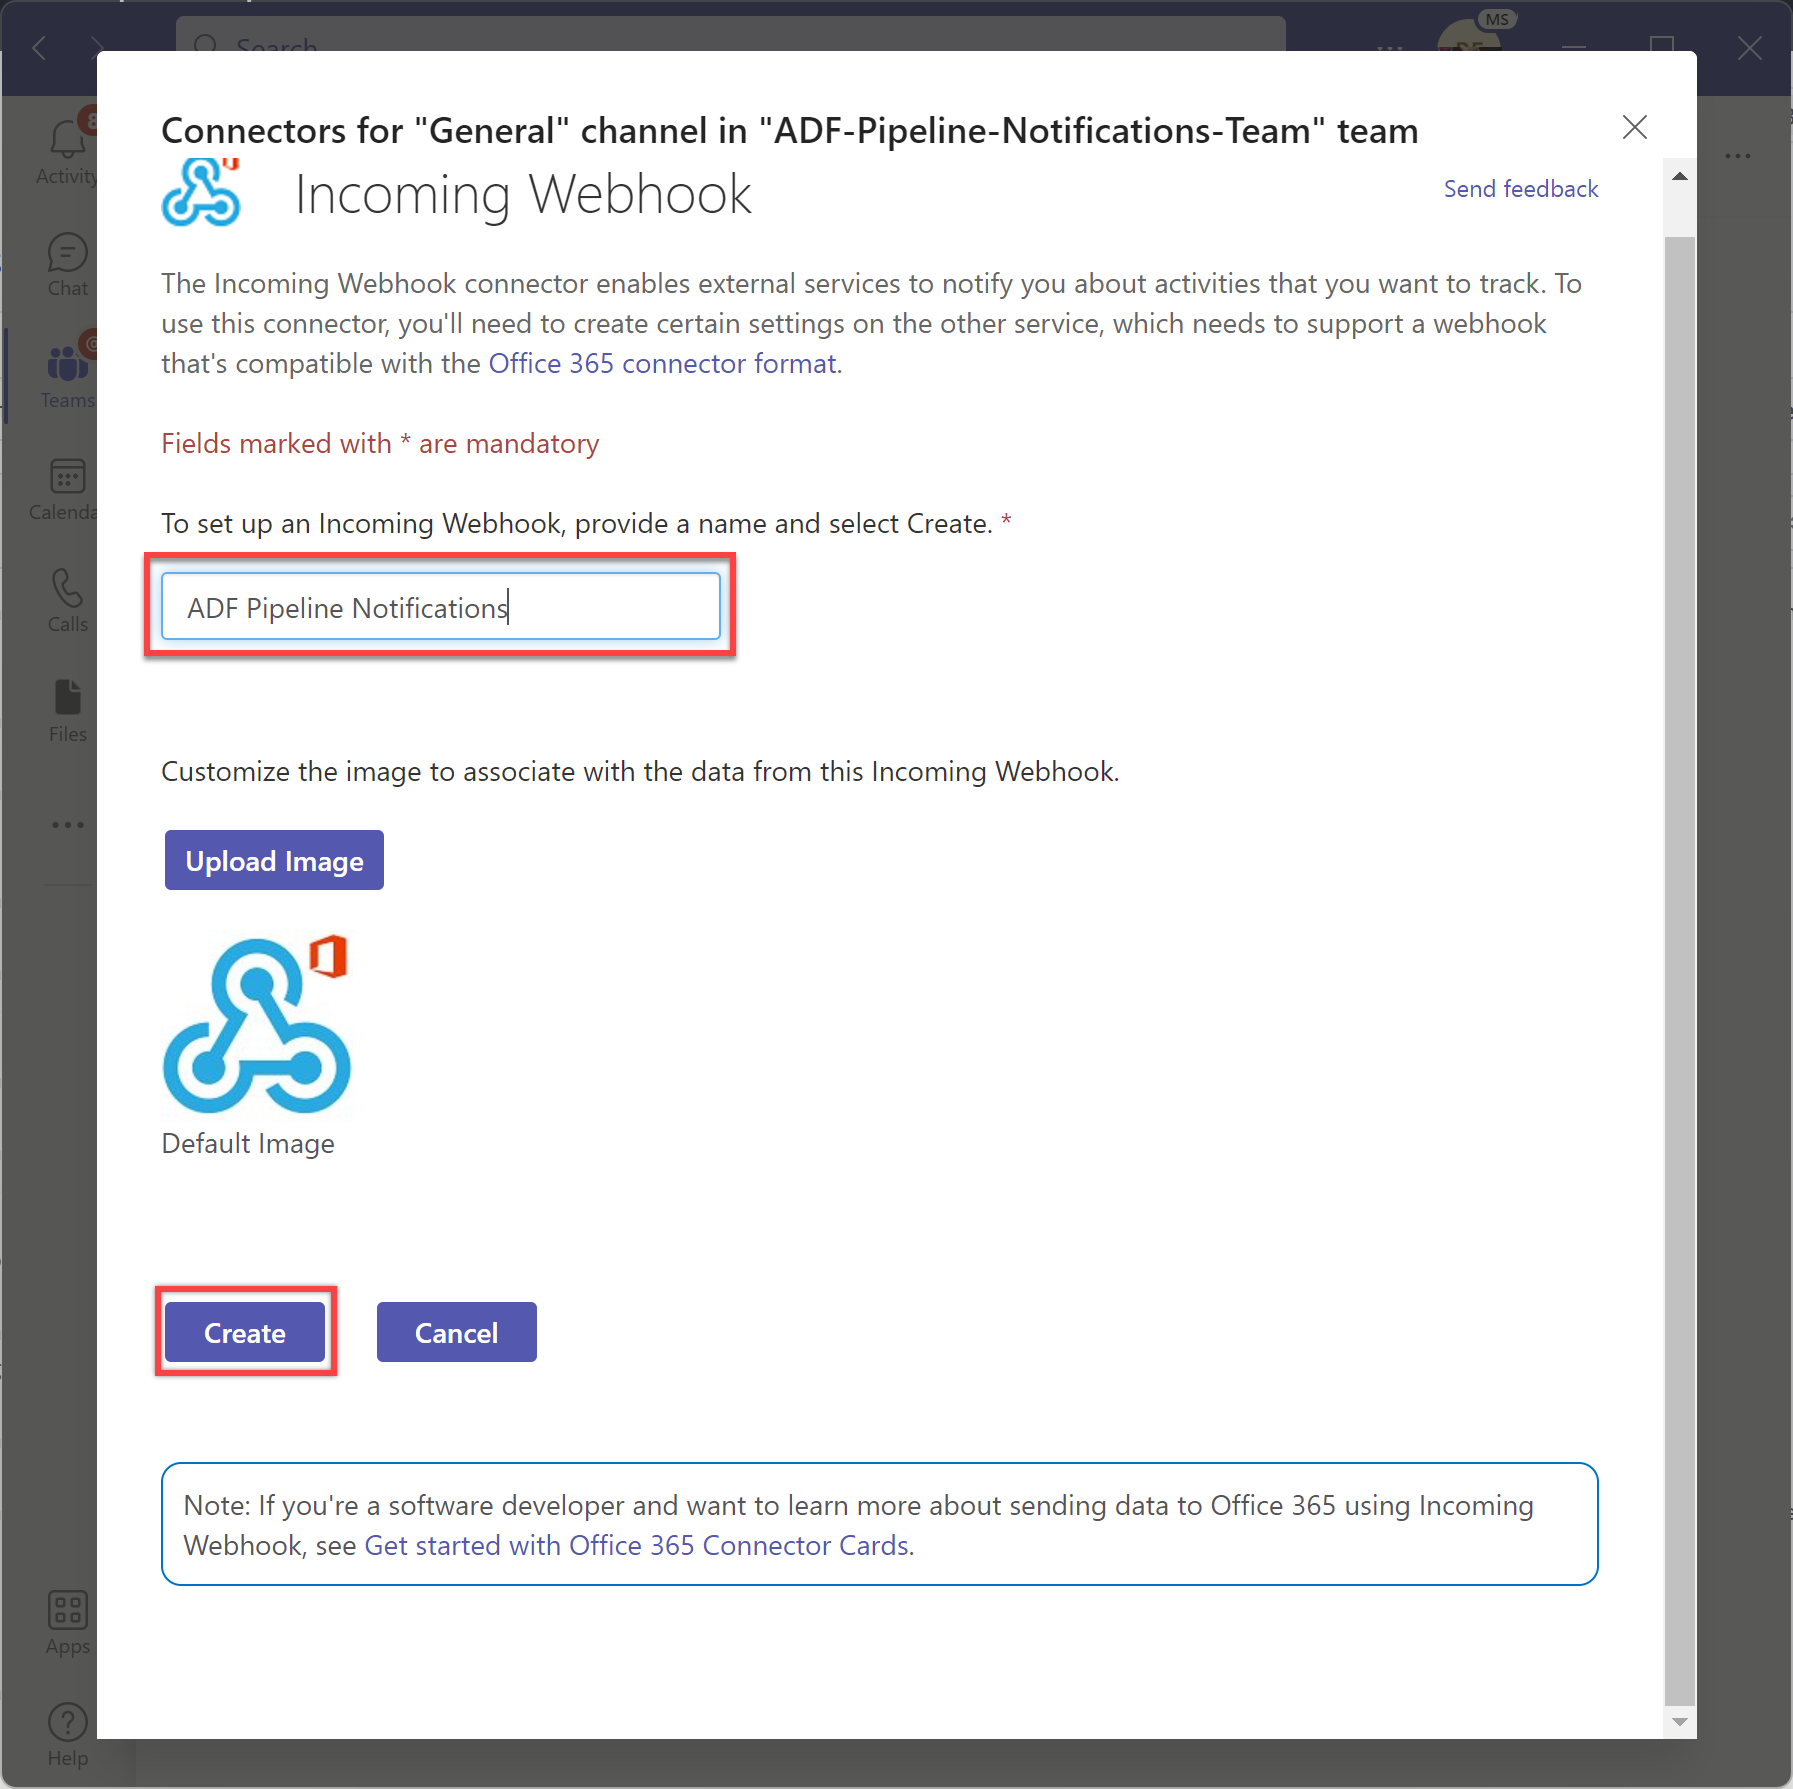
根据情况为 Webhook 命名,并可选择上传图标来标识消息。 然后,选择“创建”按钮以创建传入 Webhook。
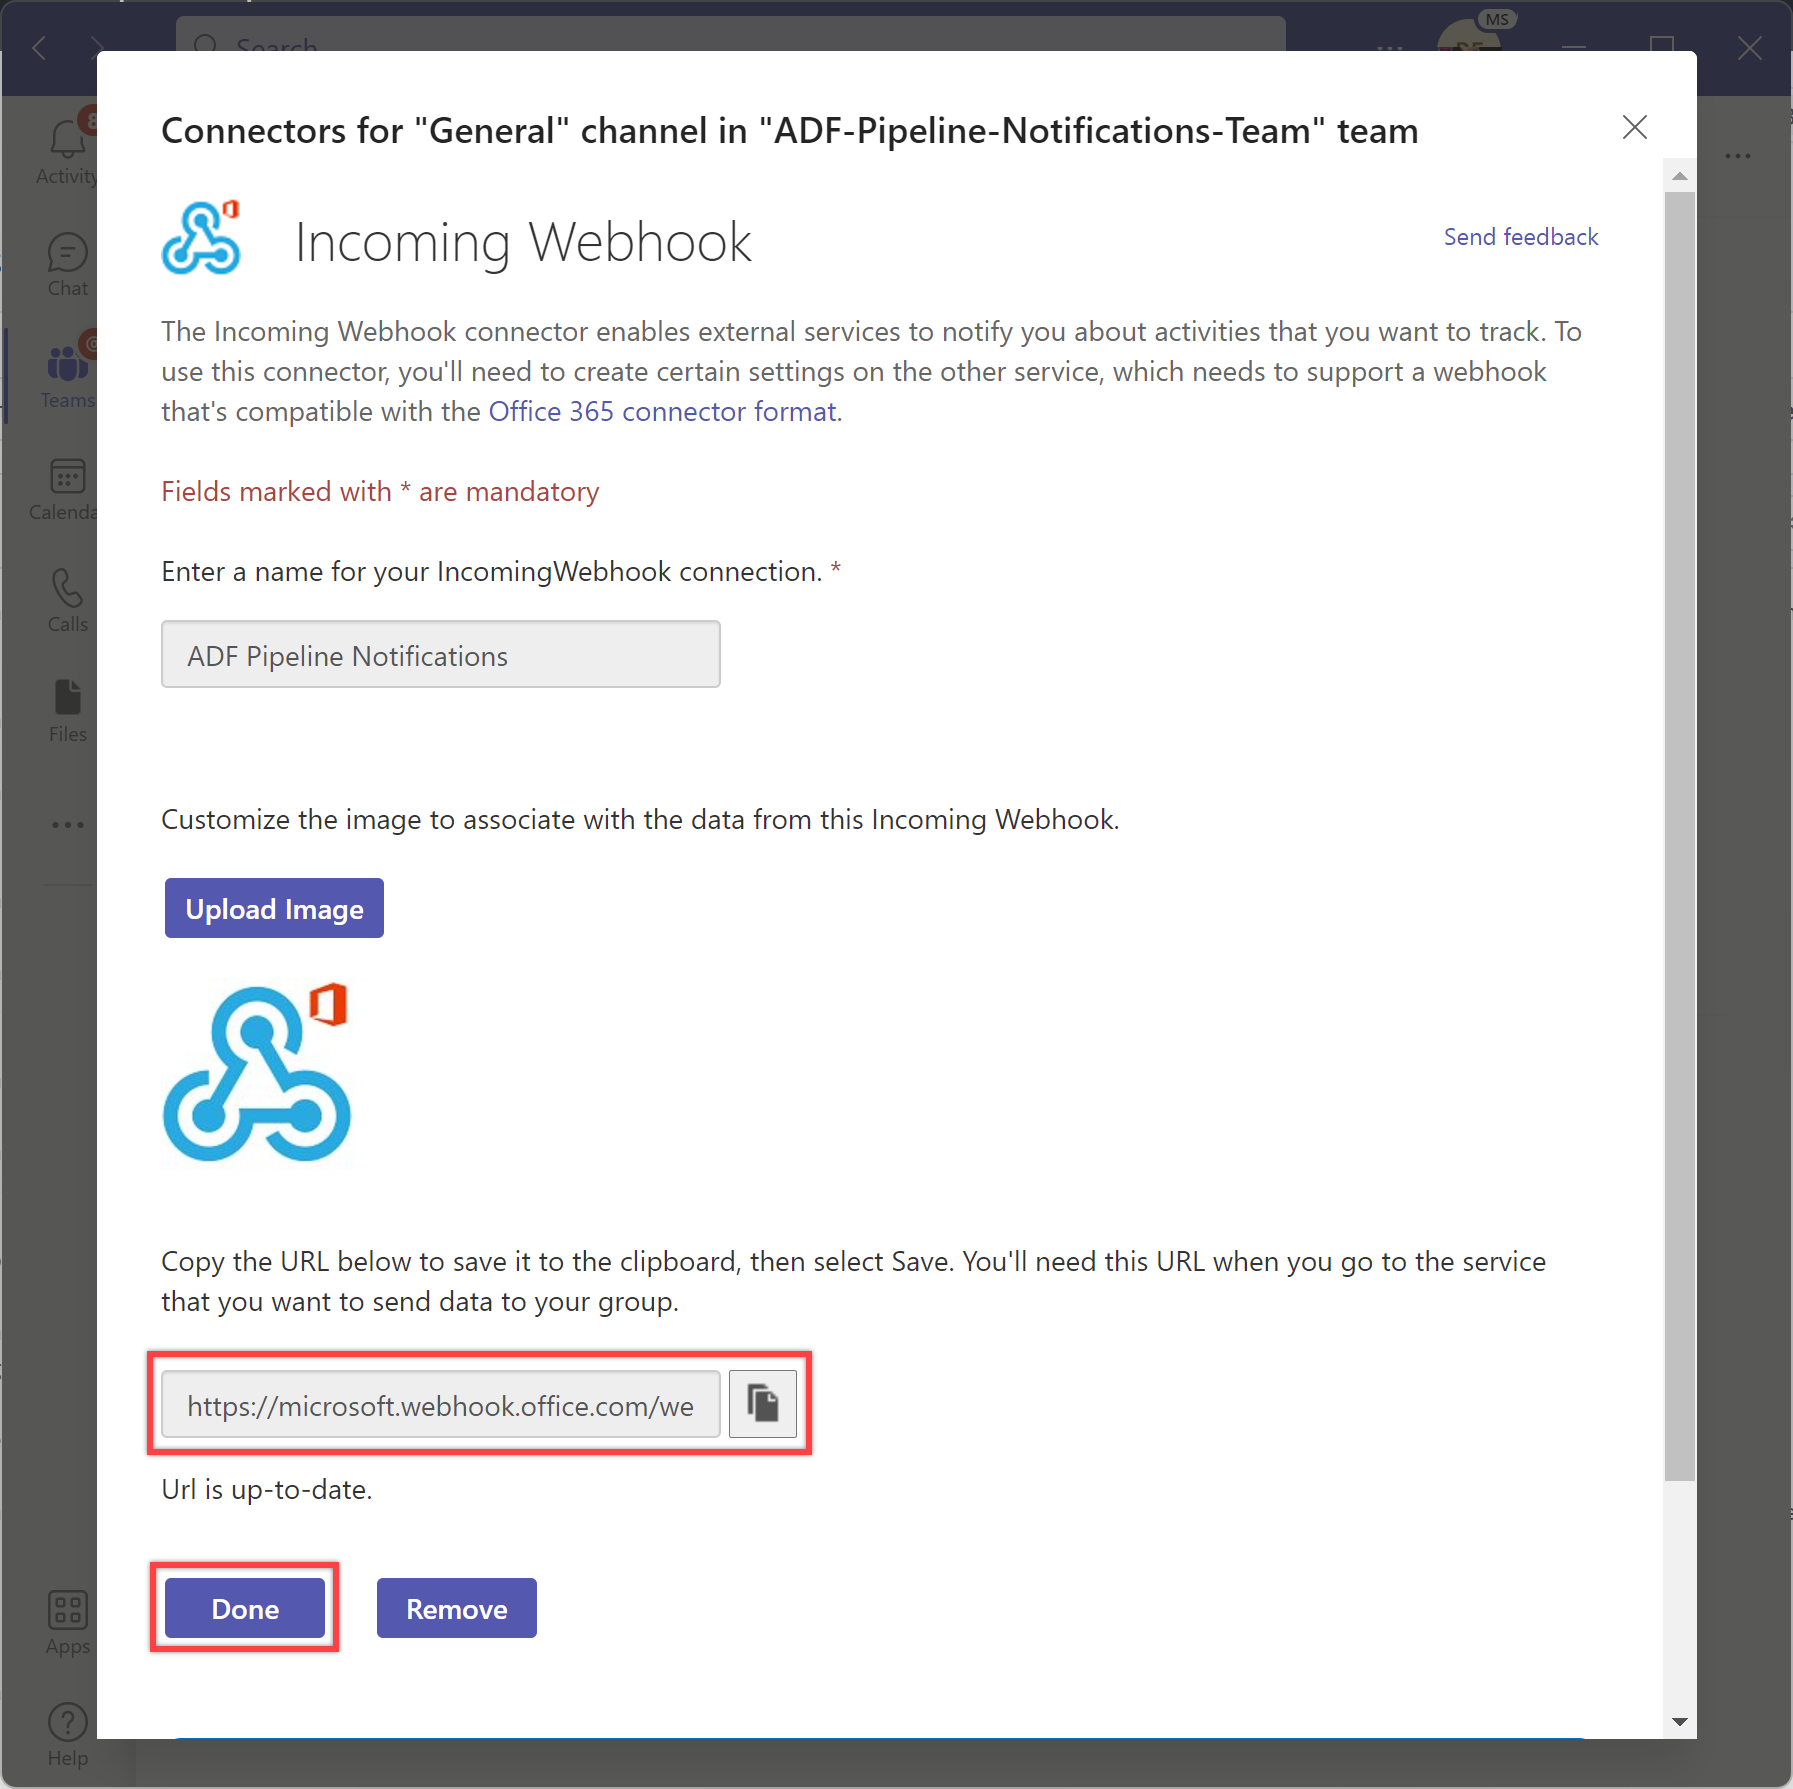
复制创建时生成的 Webhook URL 并将其保存,供稍后在管道中使用。 然后,选择“完成”按钮以完成设置。
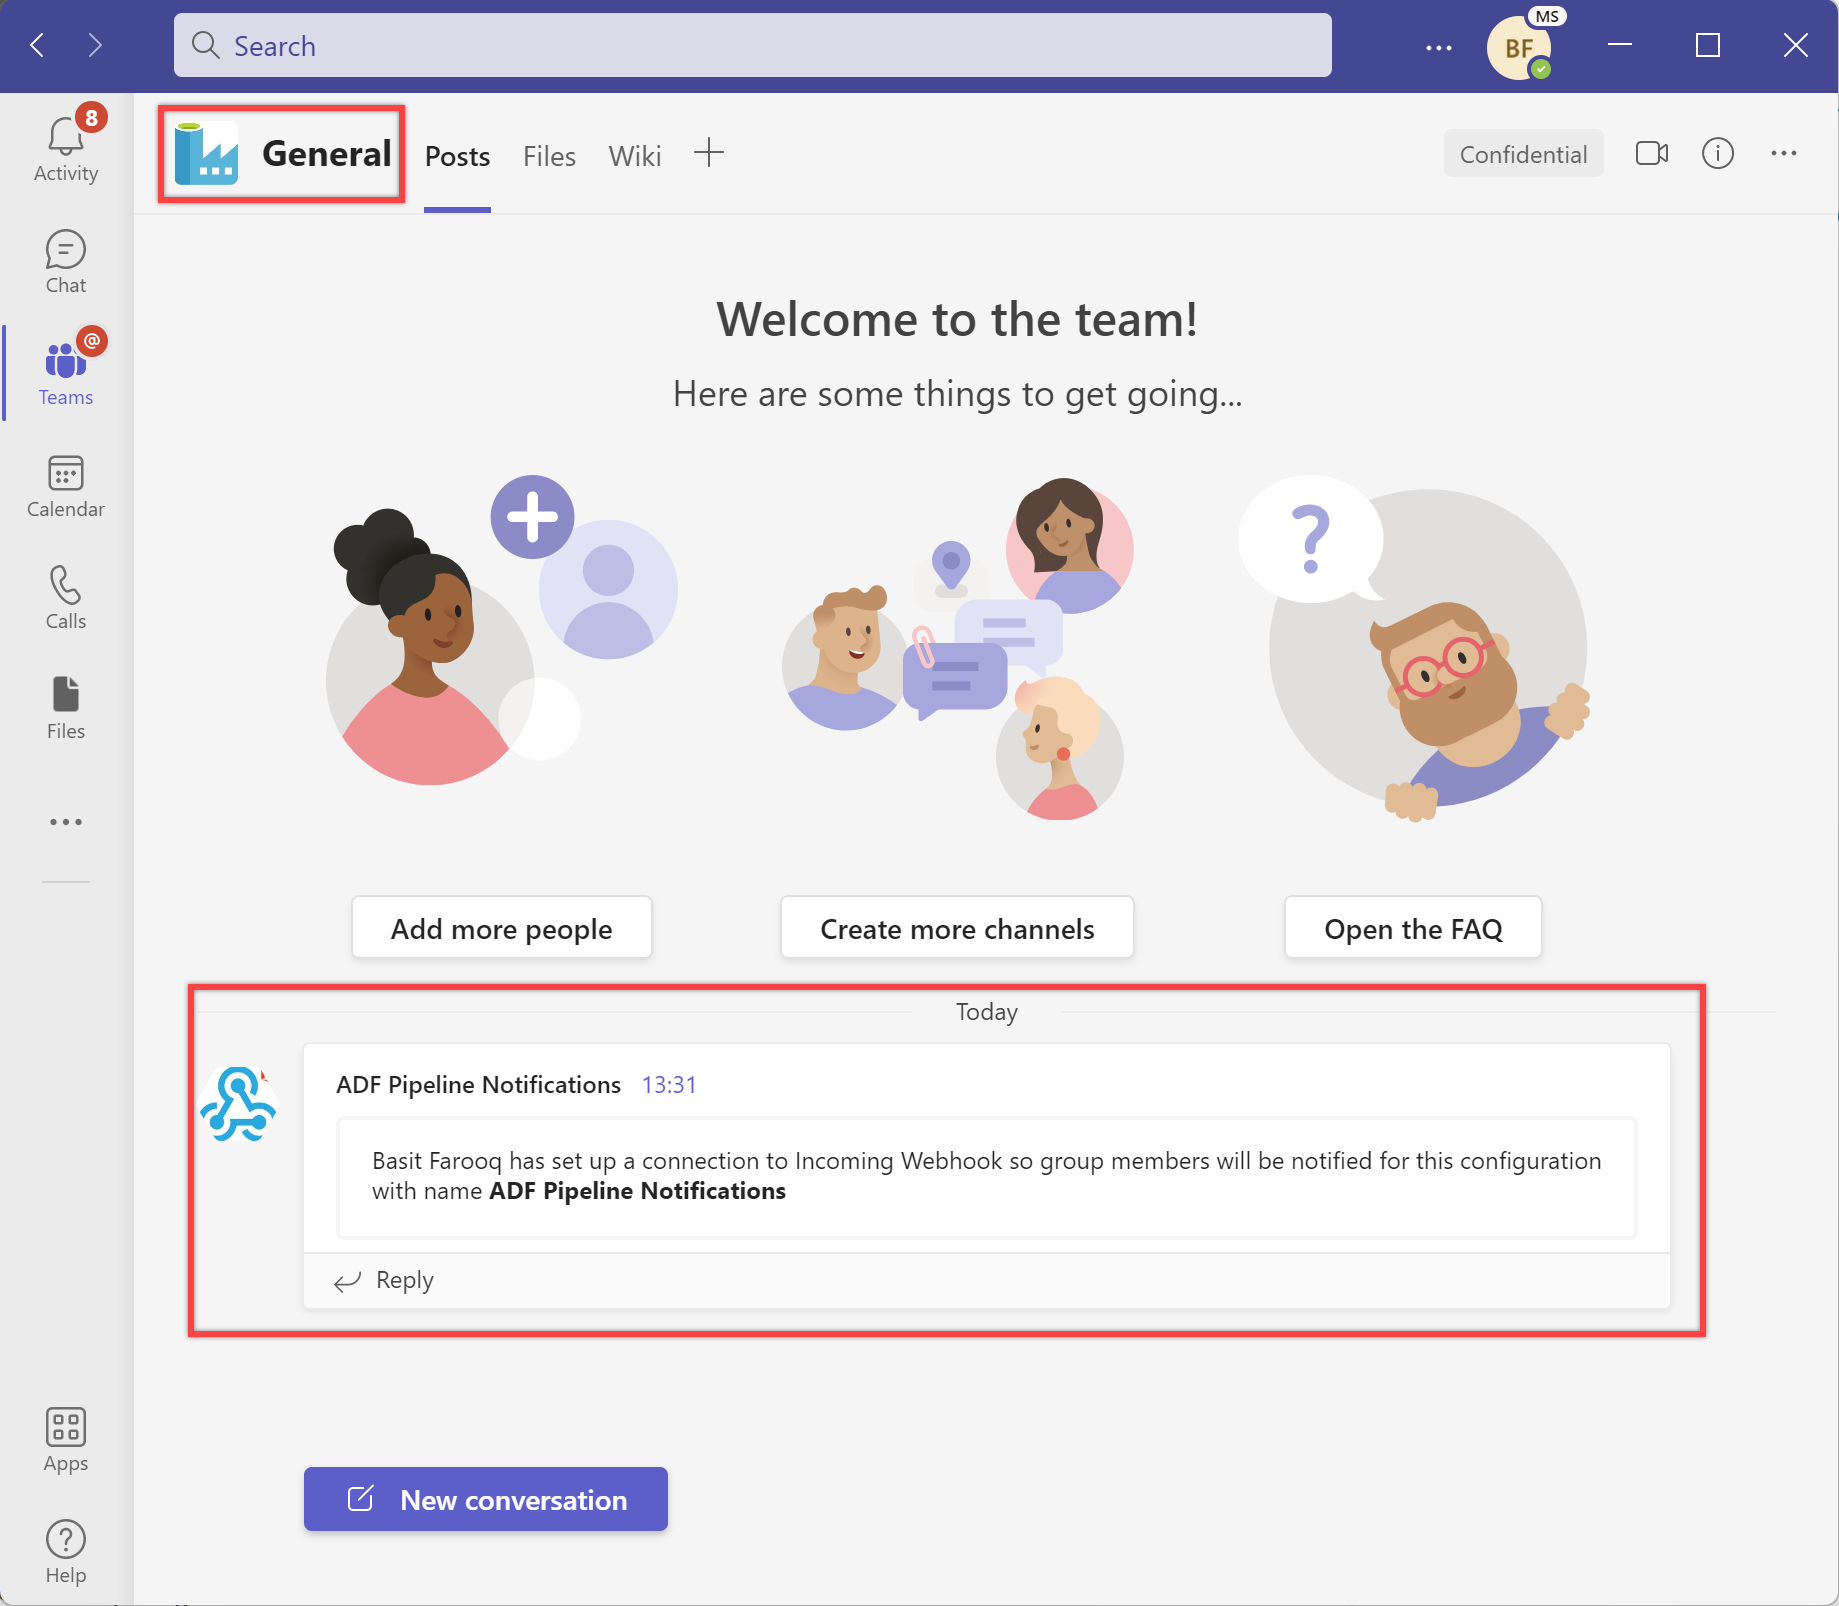
可在添加 Webhook 连接器的通道中查看通知。
在 Teams 通道上从管道发送通知的步骤:
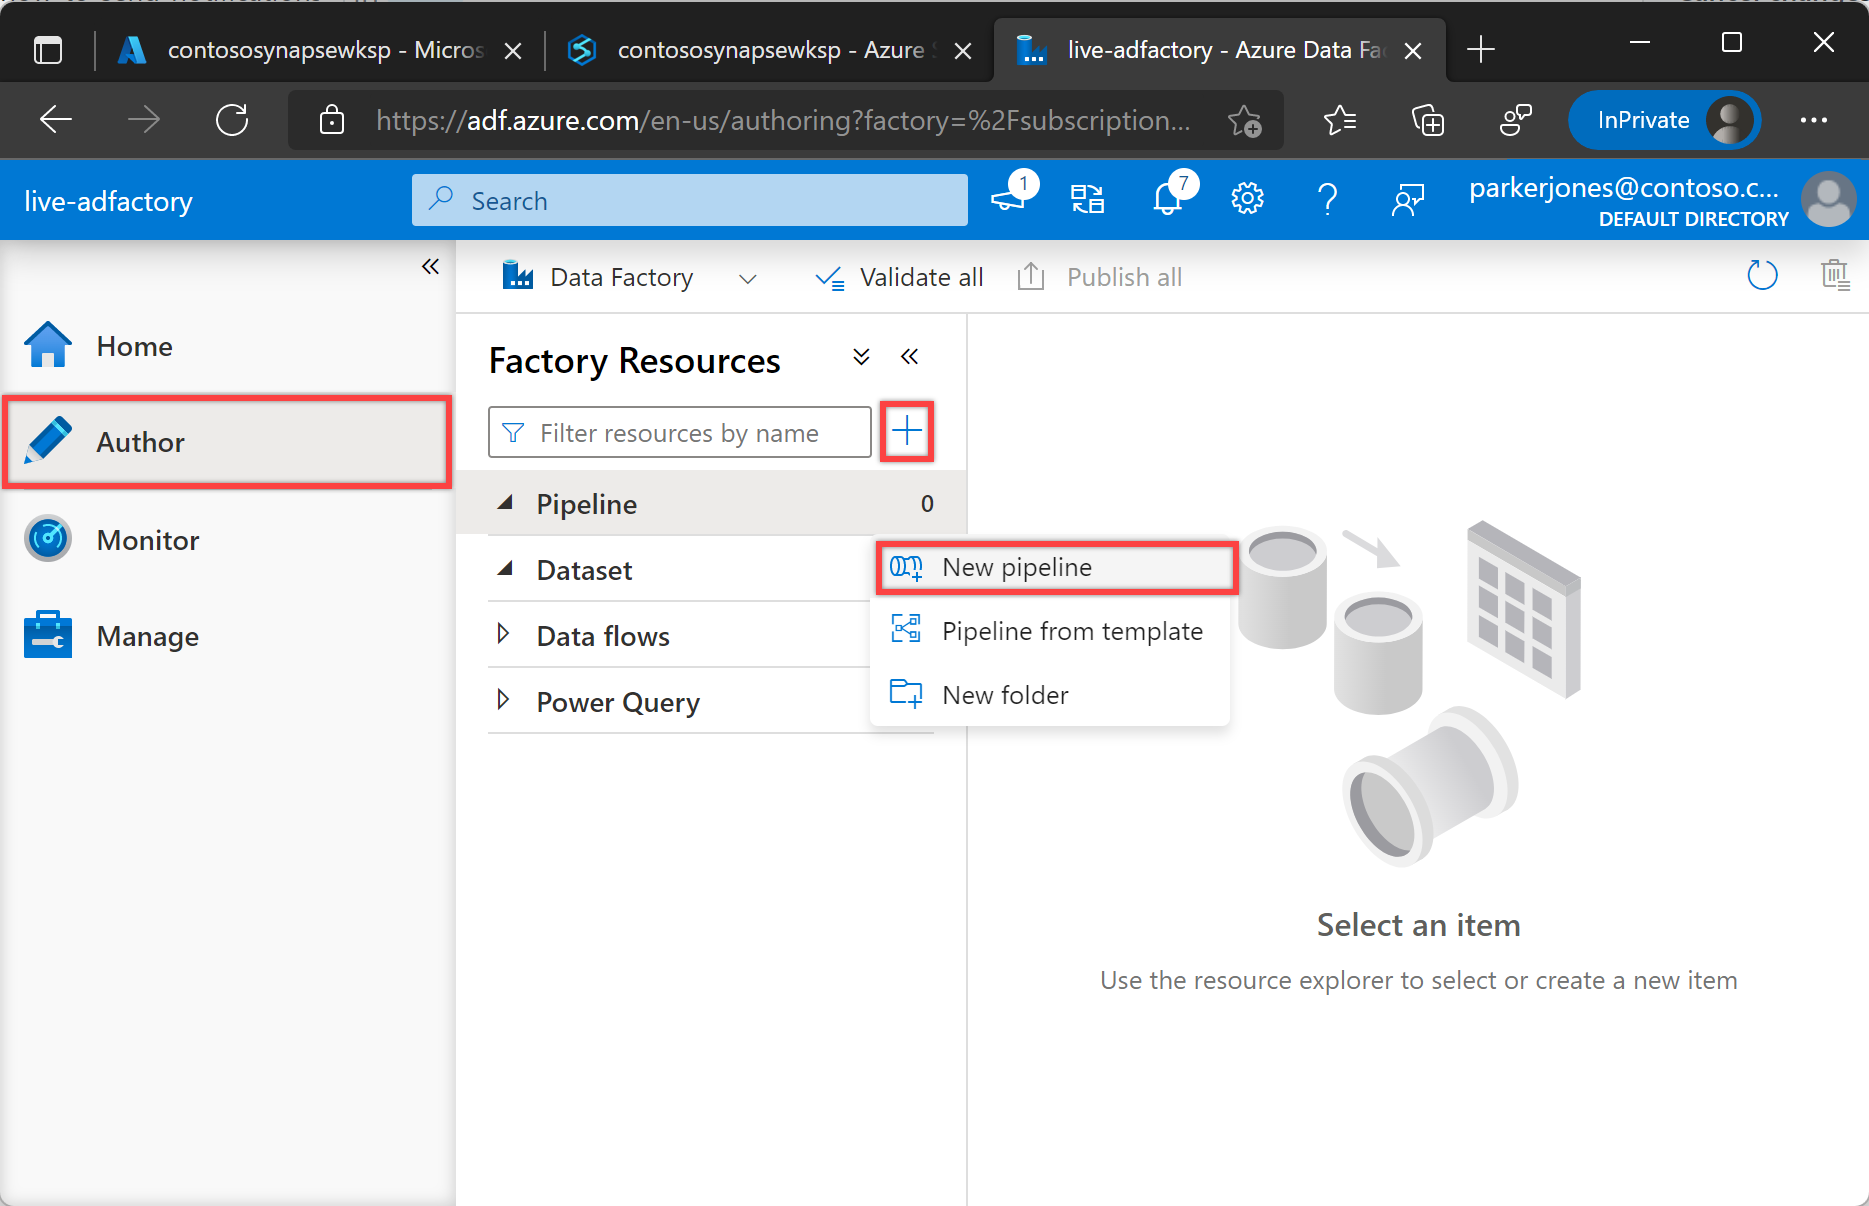
从左侧窗格中选择“创作”选项卡。
选择“+”(加号)按钮,然后选择“新建管道”。
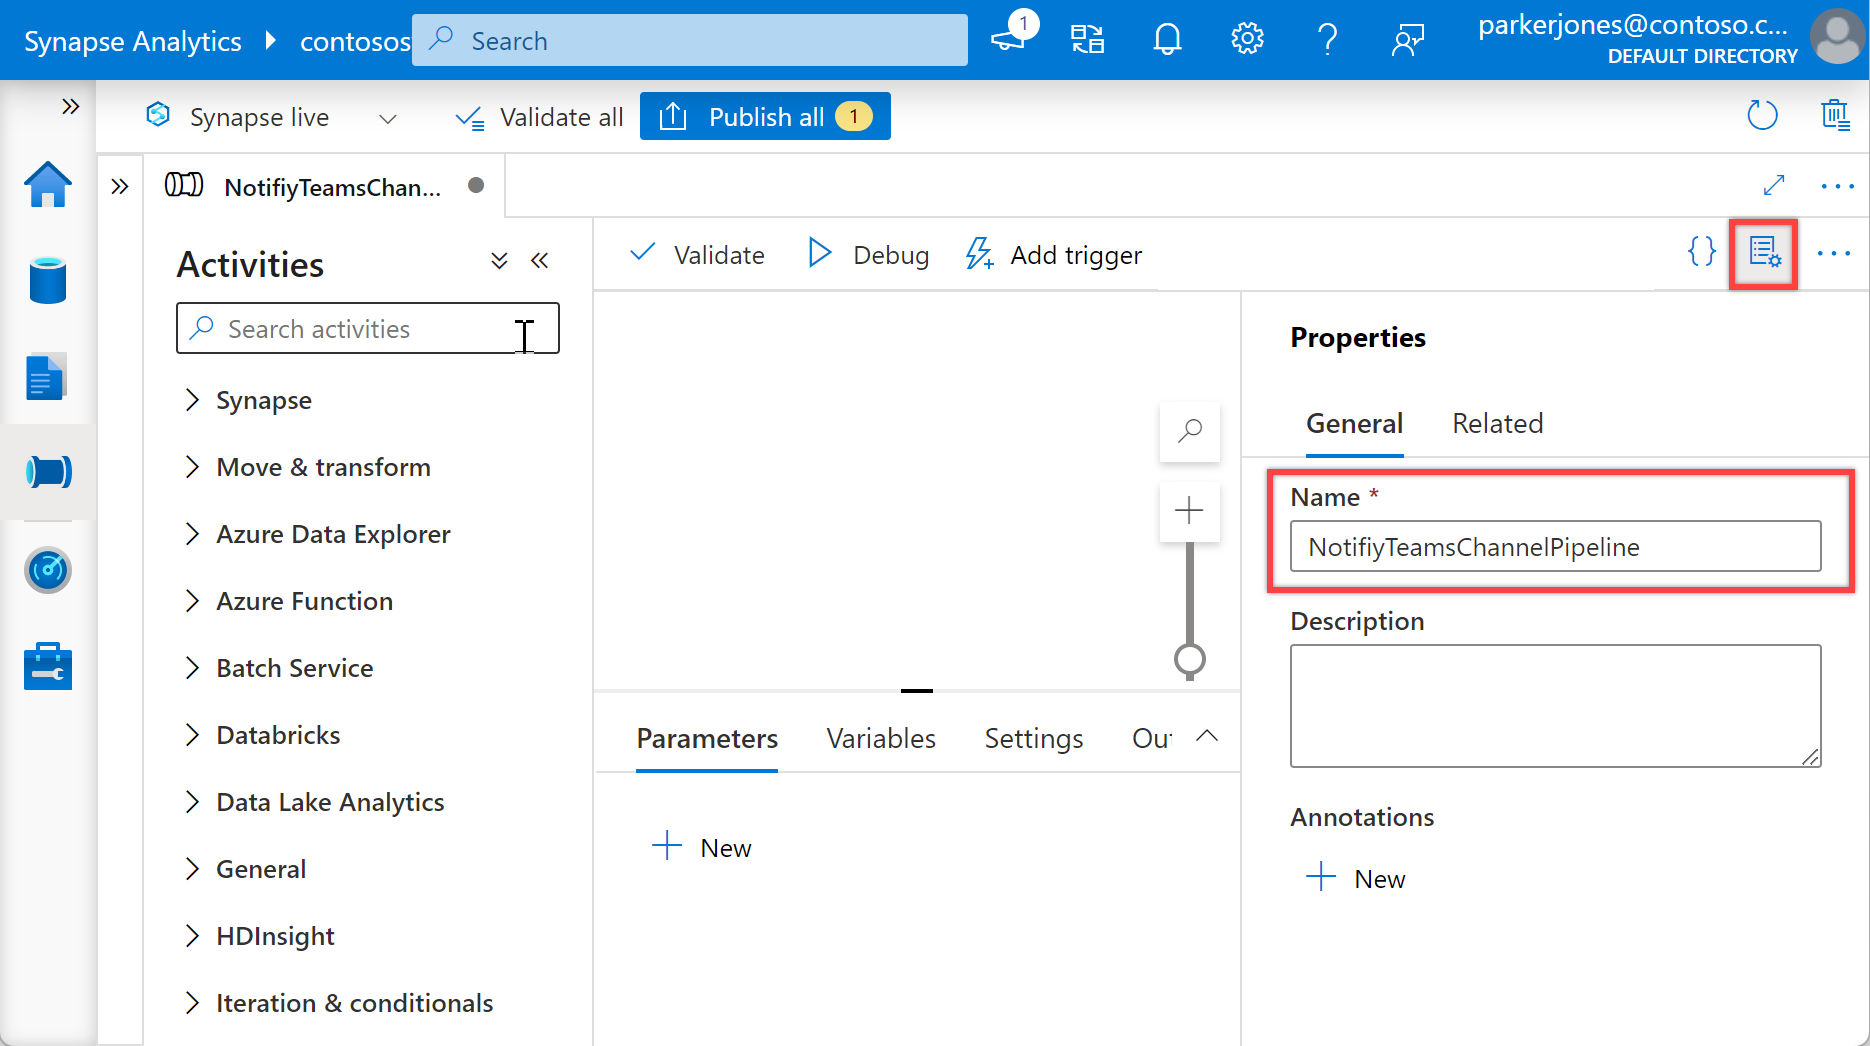
在“常规”下的“属性”窗格中,为“名称”指定“NotifyTeamsChannelPipeline”。 然后单击右上角的“属性”图标来折叠面板。

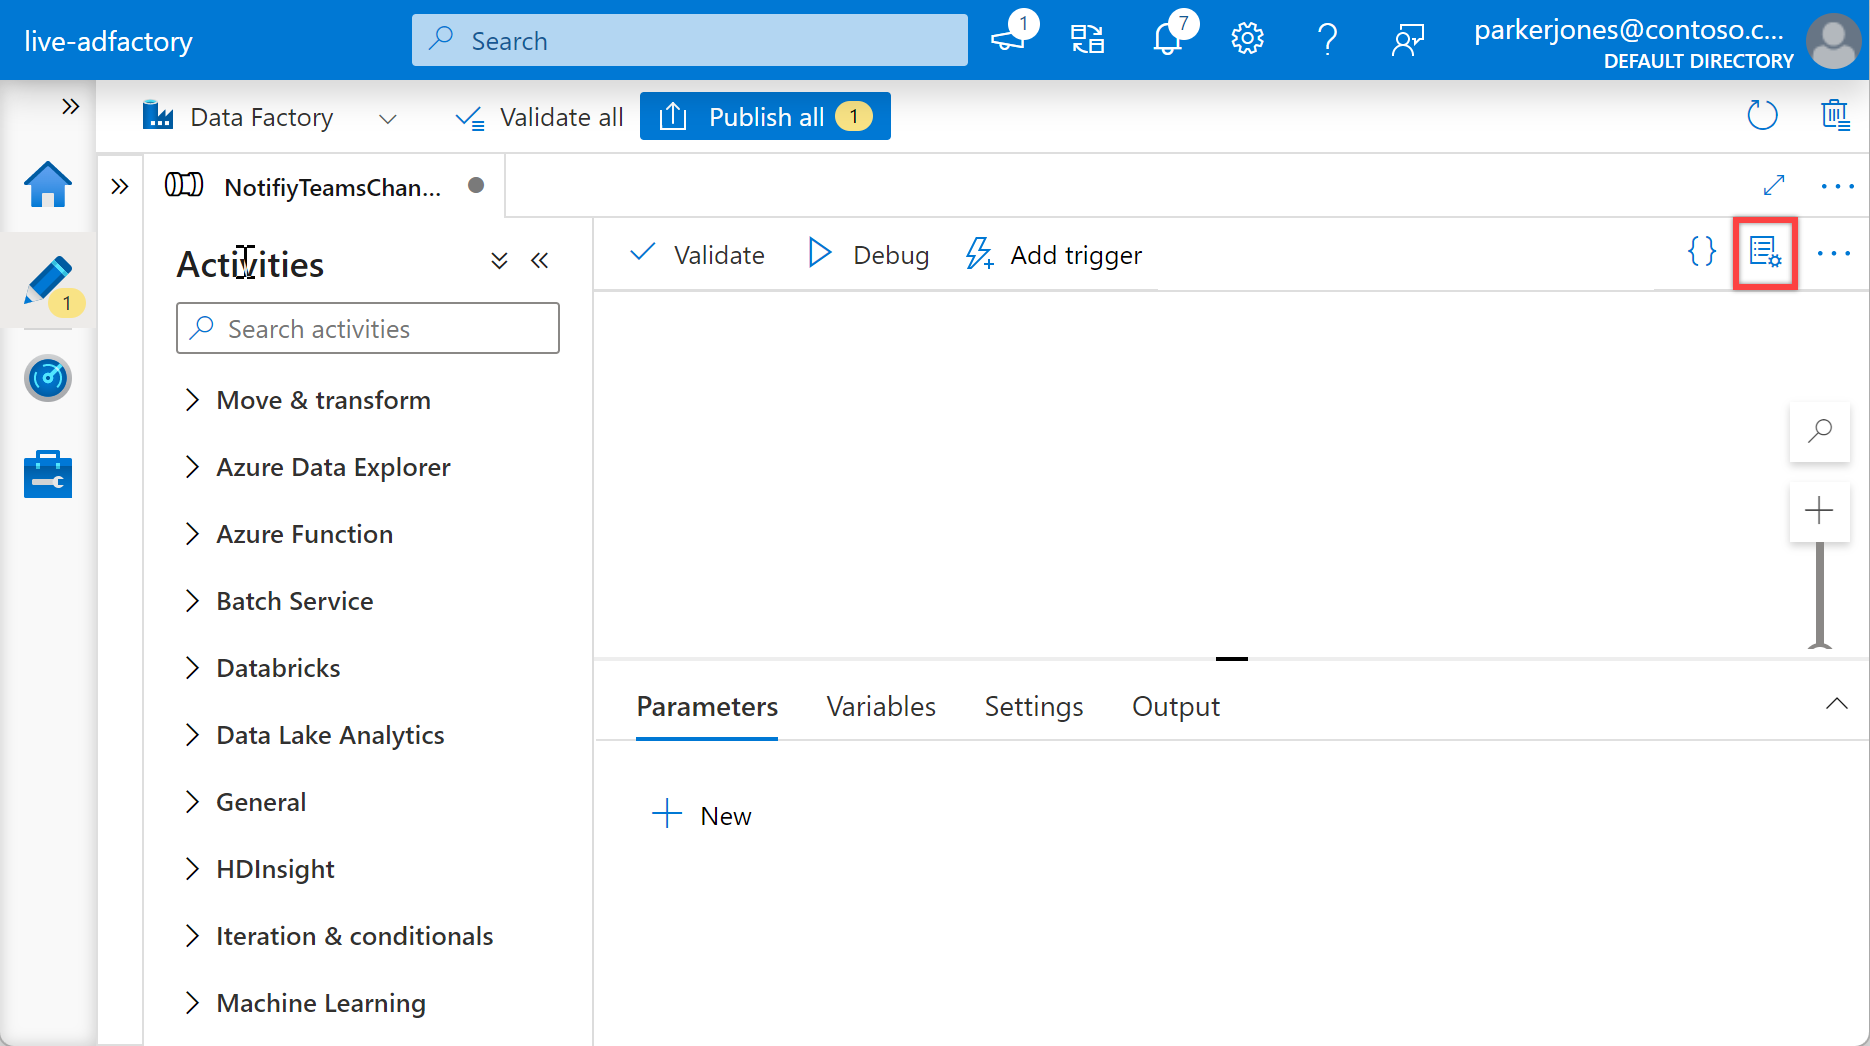
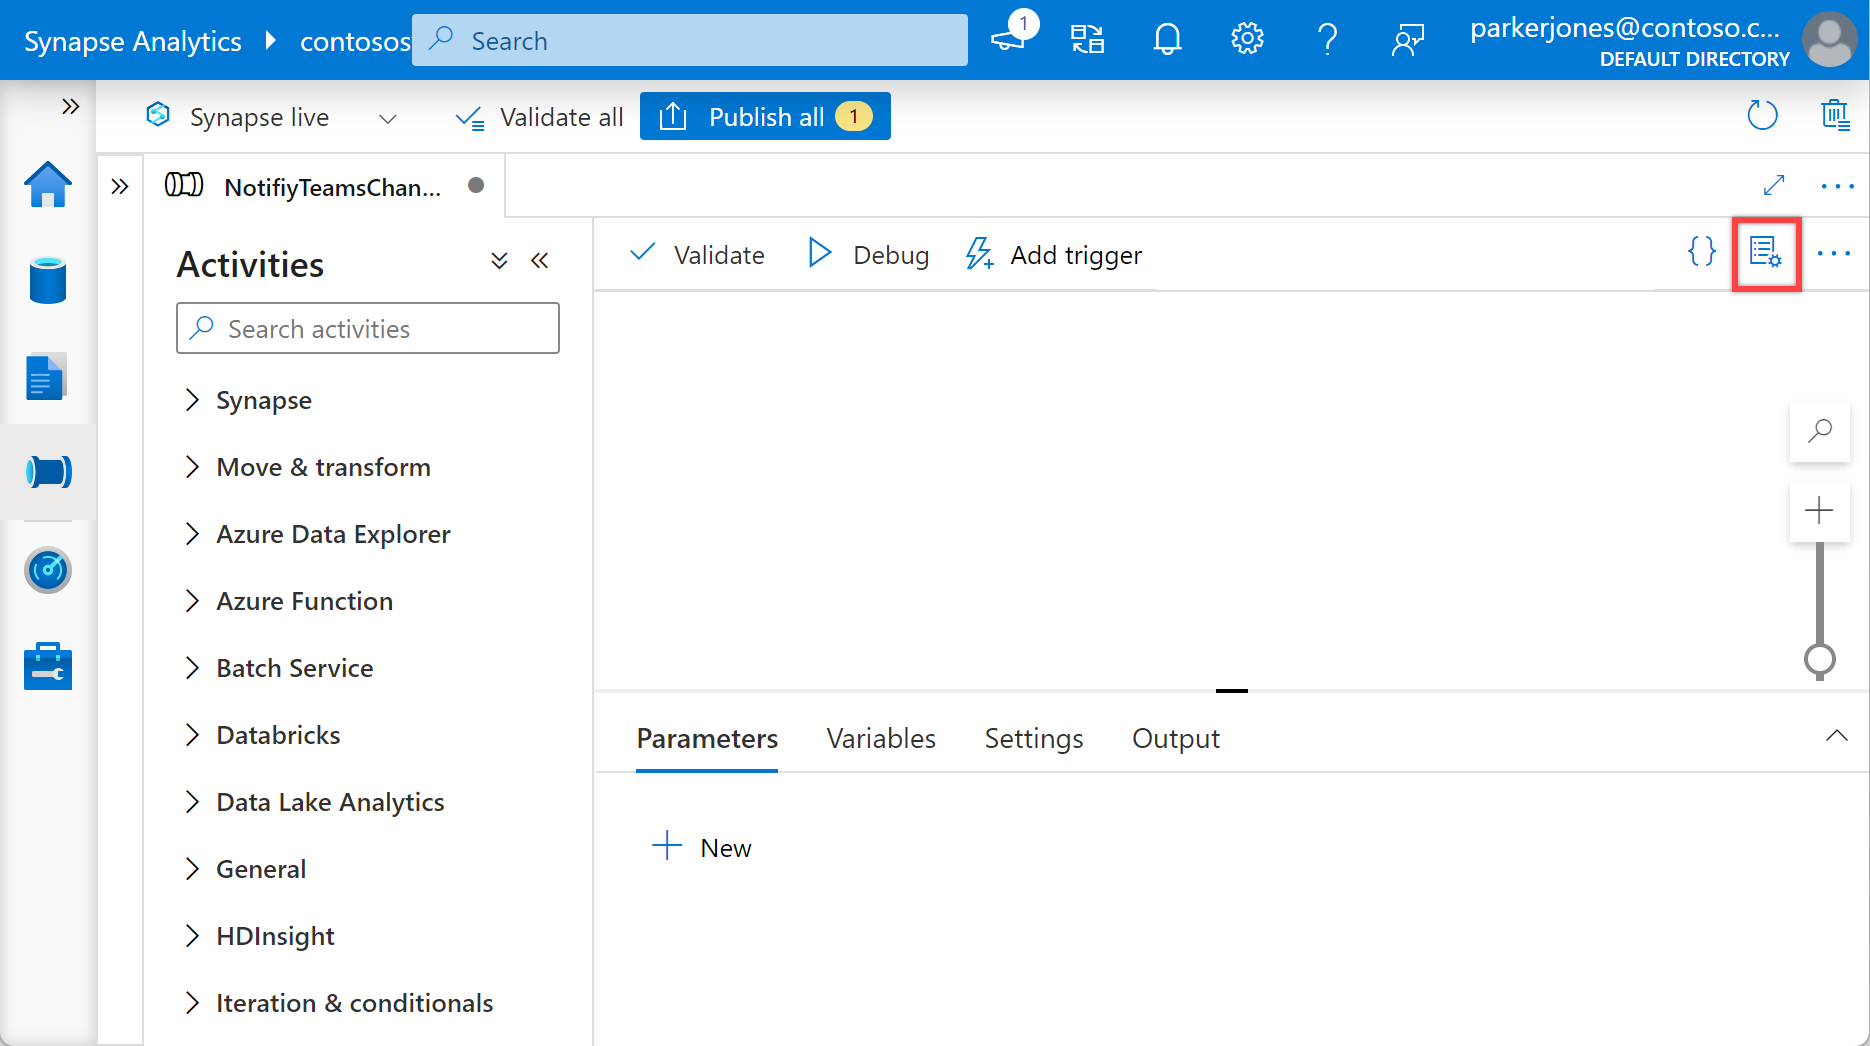
在“配置”窗格中选择“参数”,然后选择“+ 新建”按钮为管道定义以下参数。
名称 类型 默认值 订阅 StringSpecify subscription id for the pipelineresourceGroup StringSpecify resource group name for the pipelinerunId String@activity('Specify name of the calling pipeline').output['pipelineRunId']name String@activity('Specify name of the calling pipeline').output['pipelineName']triggerTime String@activity('Specify name of the calling pipeline').ExecutionStartTimestatus String@activity('Specify name of the calling pipeline').Statusmessage String@activity('Specify name of the calling pipeline').Error['message']executionEndTime String@activity('Specify name of the calling pipeline').ExecutionEndTimerunDuration String@activity('Specify name of the calling pipeline').DurationteamWebhookUrl StringSpecify Team Webhook URL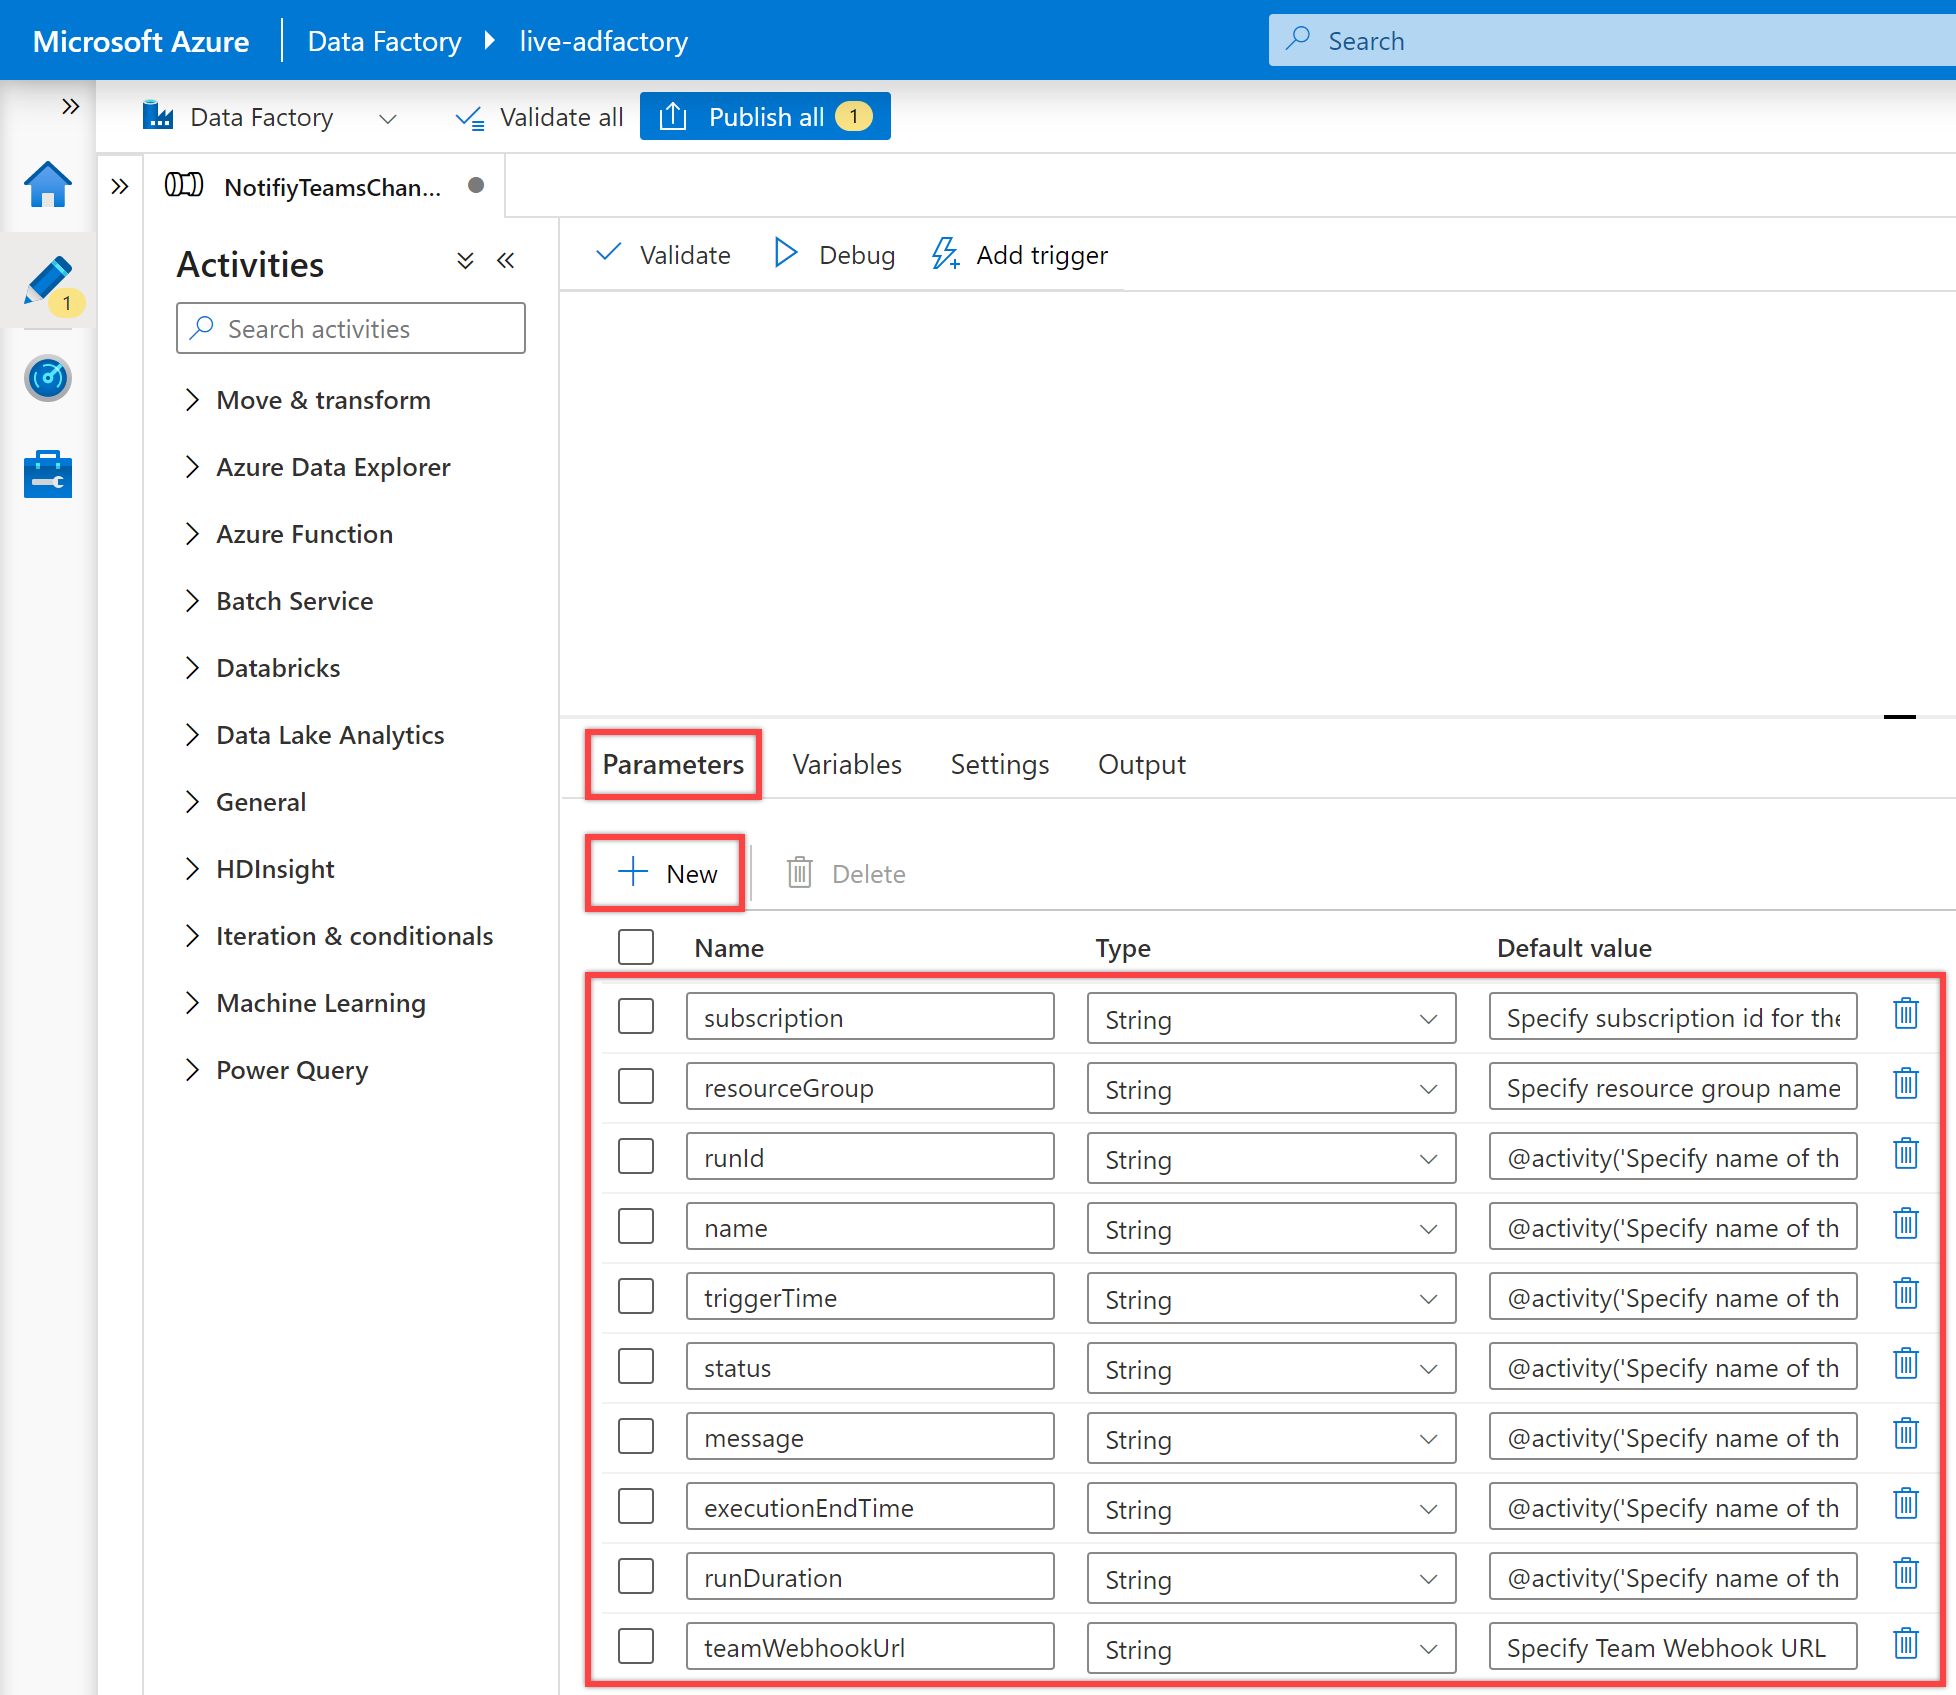
注意
这些参数用于构造监视 URL。 假设未提供(管道所属的同一数据工厂的)有效的订阅和资源组。 在这种情况下,通知将不包含有效的管道监视 URL,但消息仍可正常工作。 此外,添加这些参数有助于防止需要始终从另一管道传递这些值。 如果要通过元数据驱动方法控制这些值,则应相应地对其进行修改。
提示
我们建议为相关参数的默认值添加当前的数据工厂订阅 ID、资源组和 Teams Webhook URL(请参阅先决条件) 。
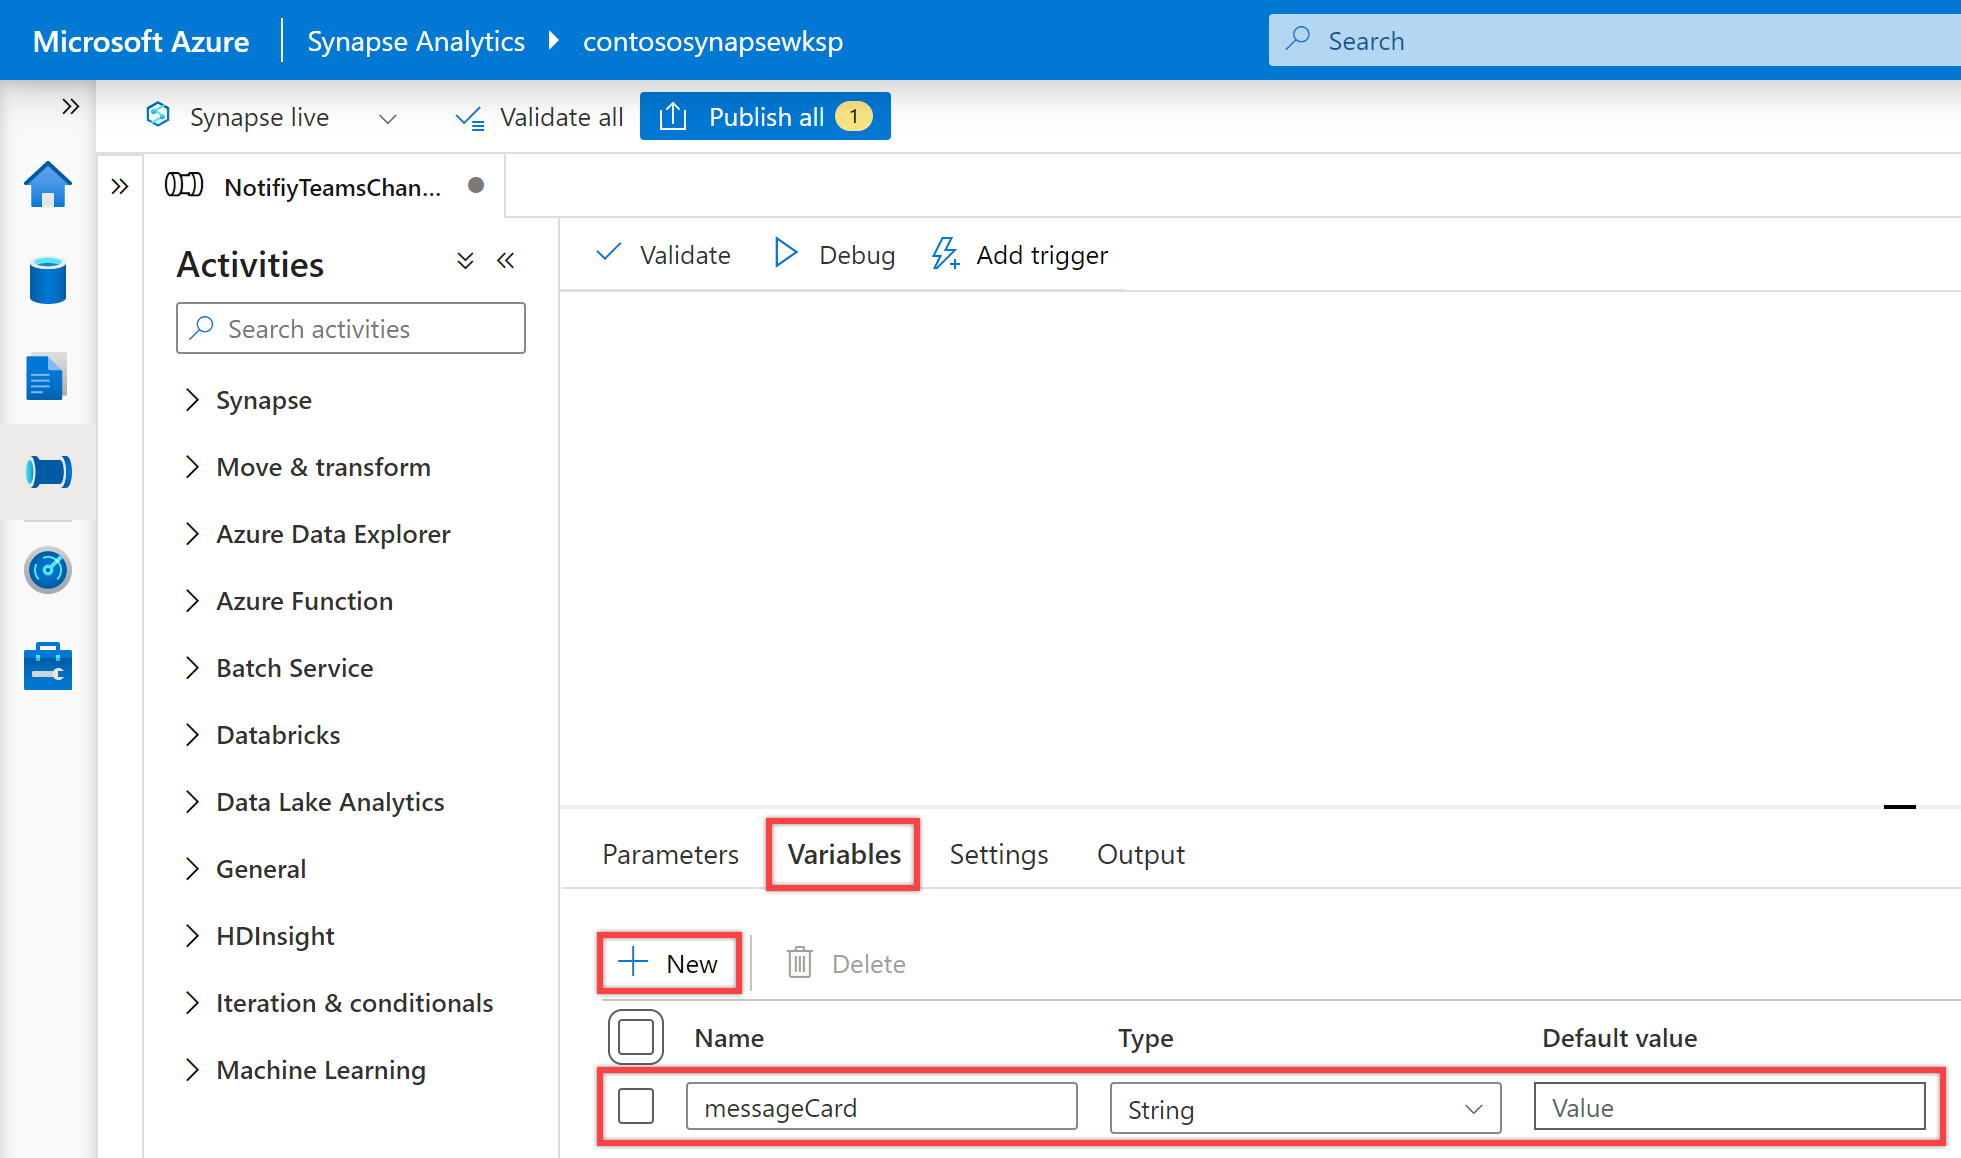
在“配置”窗格中选择“变量”,然后选择“+ 新建”按钮为管道定义以下变量。
名称 类型 默认值 messageCard String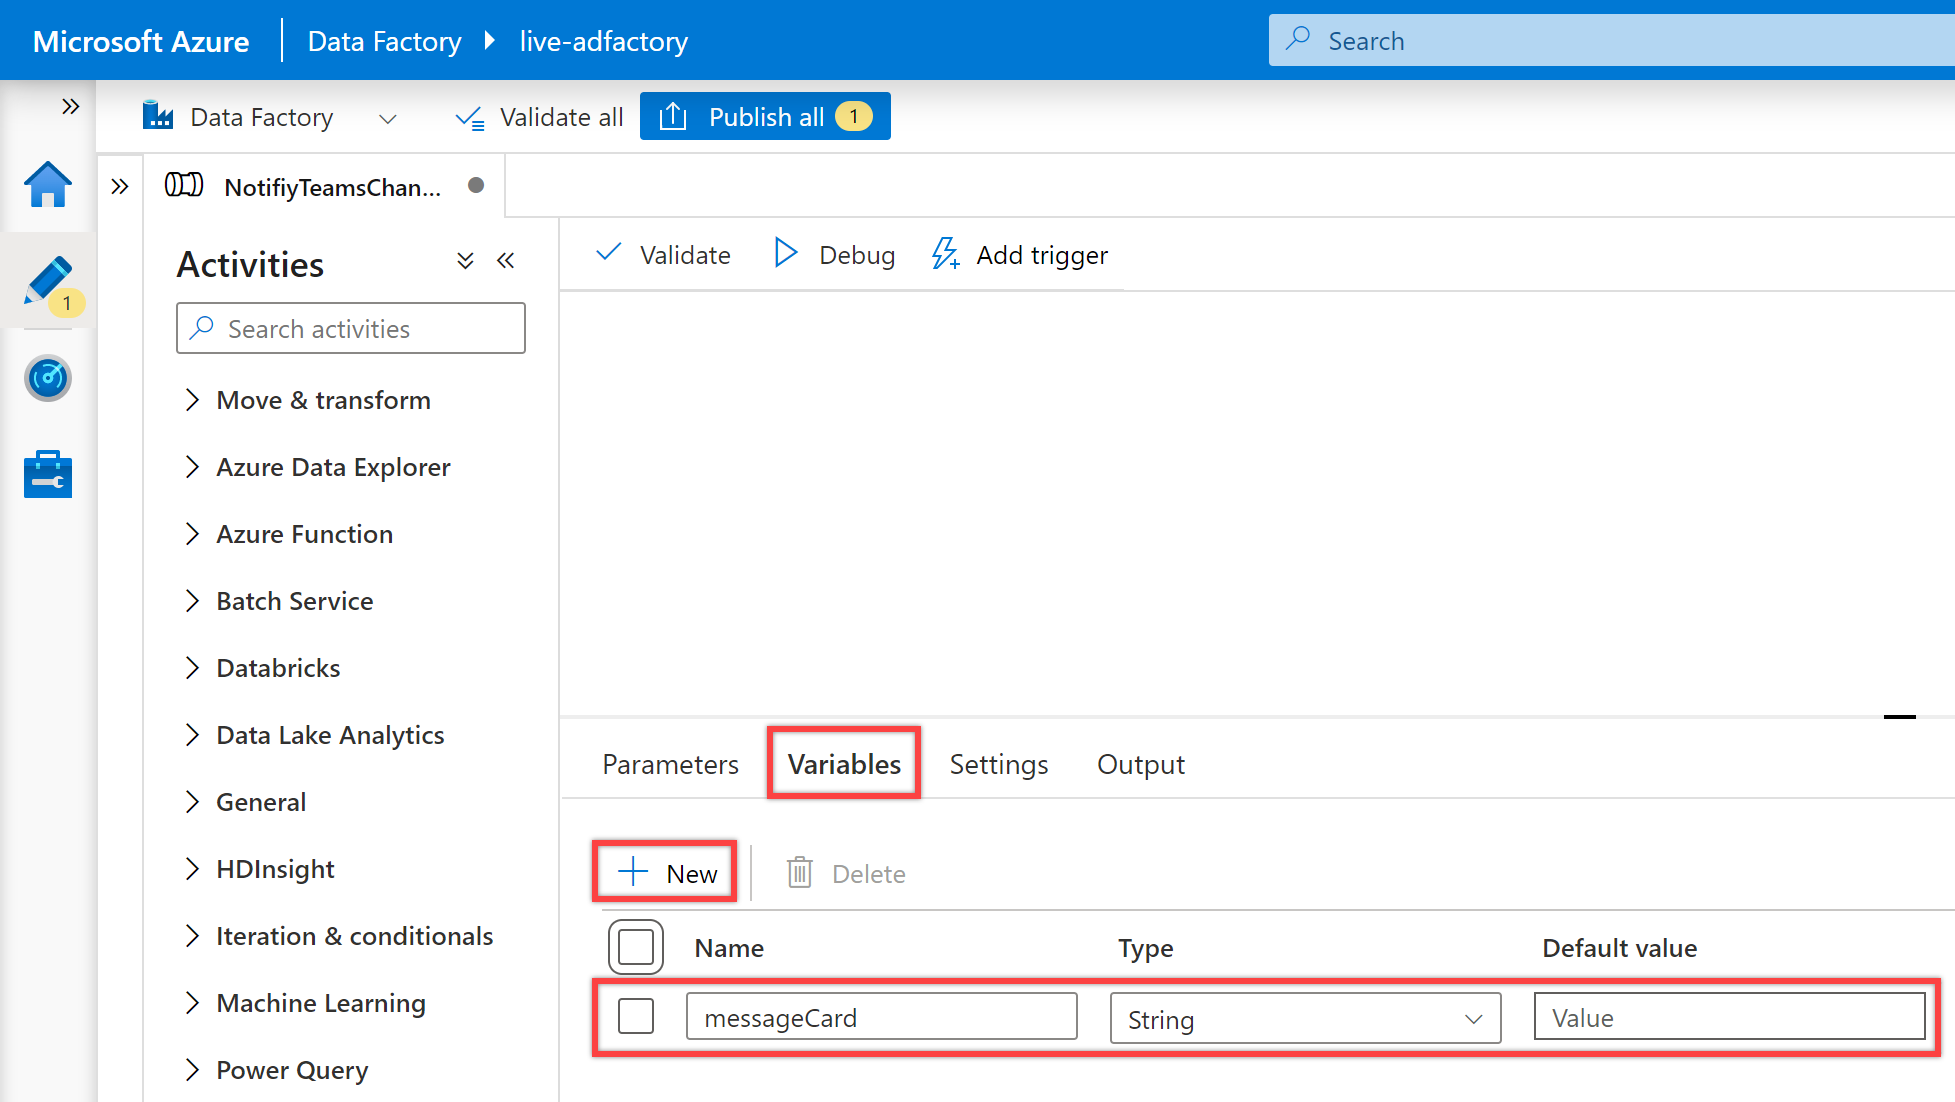
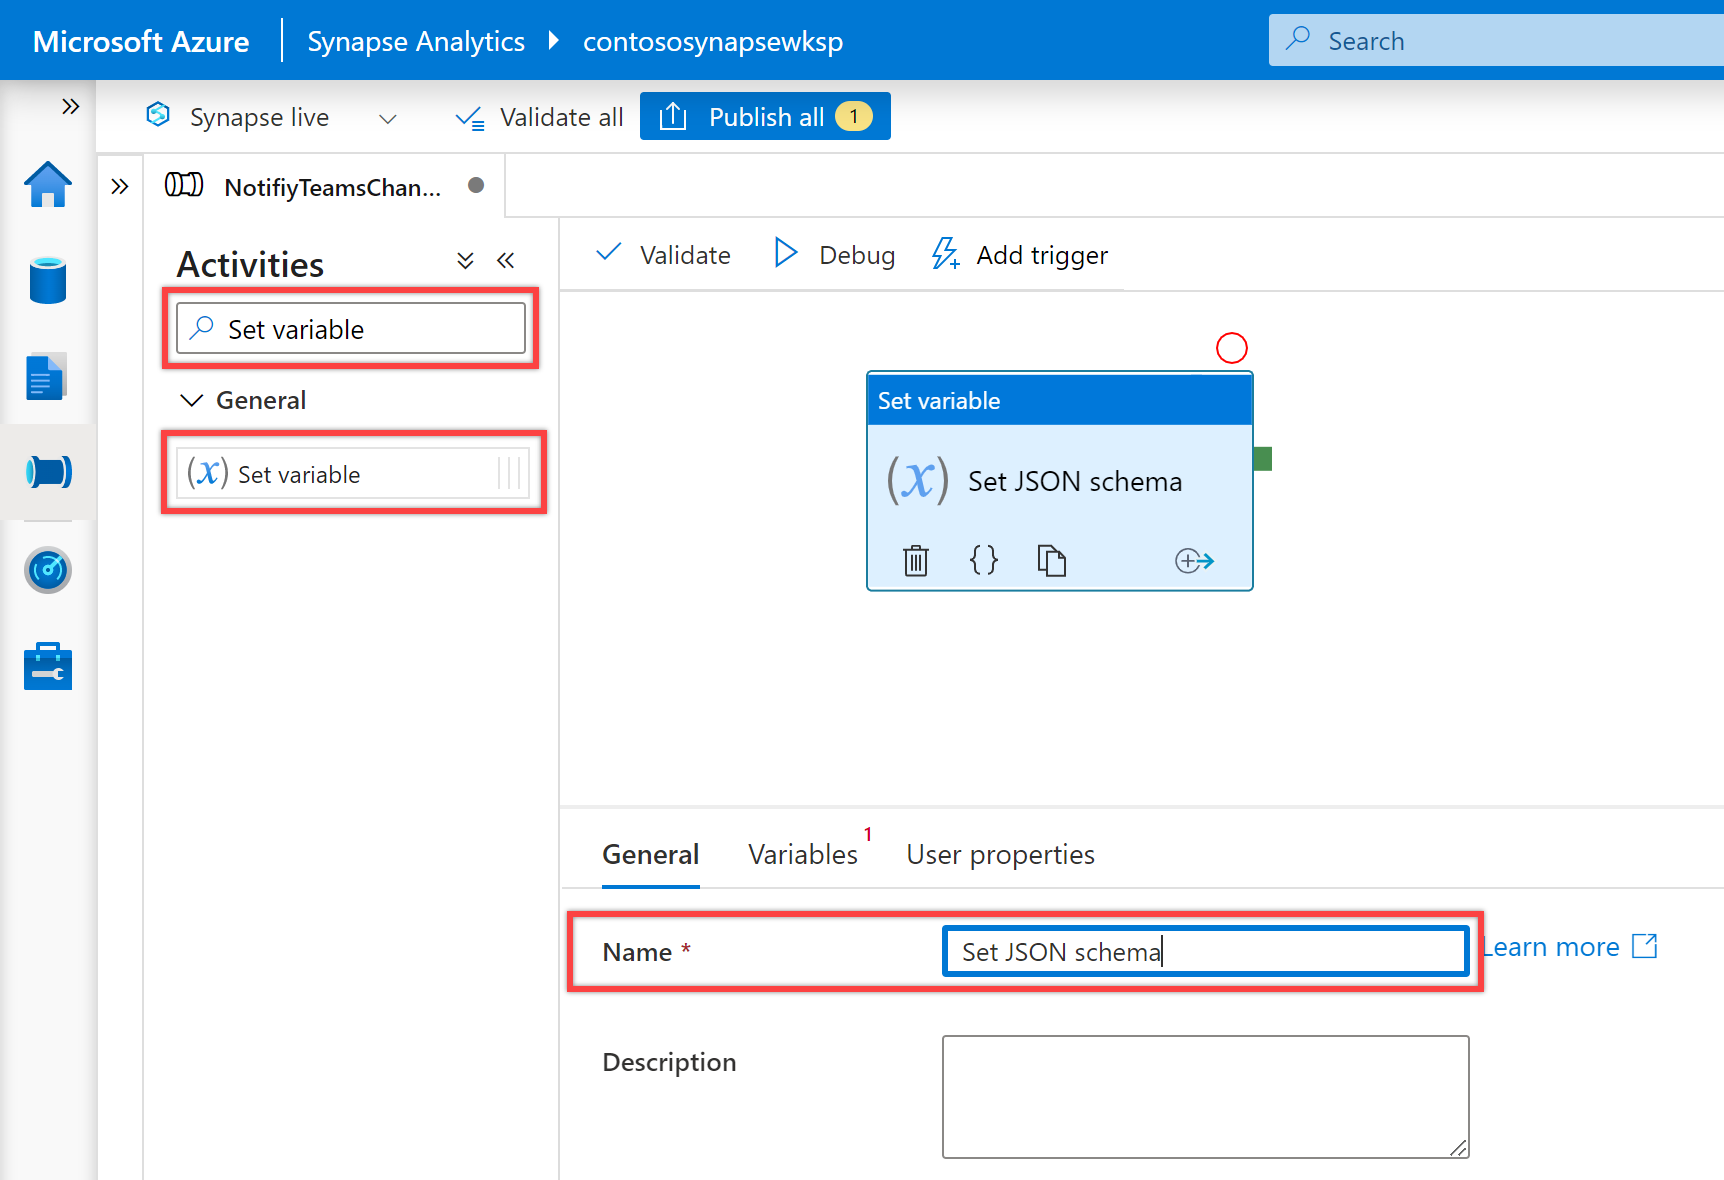
在管道的“活动”窗格中搜索“设置变量”,然后将“设置变量”活动拖放到管道画布中。
在画布上选择“设置变量”活动(如果尚未选择)及其“常规”选项卡,以编辑其详细信息。
在“常规”选项卡中,为“设置变量”活动的“名称”指定“设置 JSON 架构”。

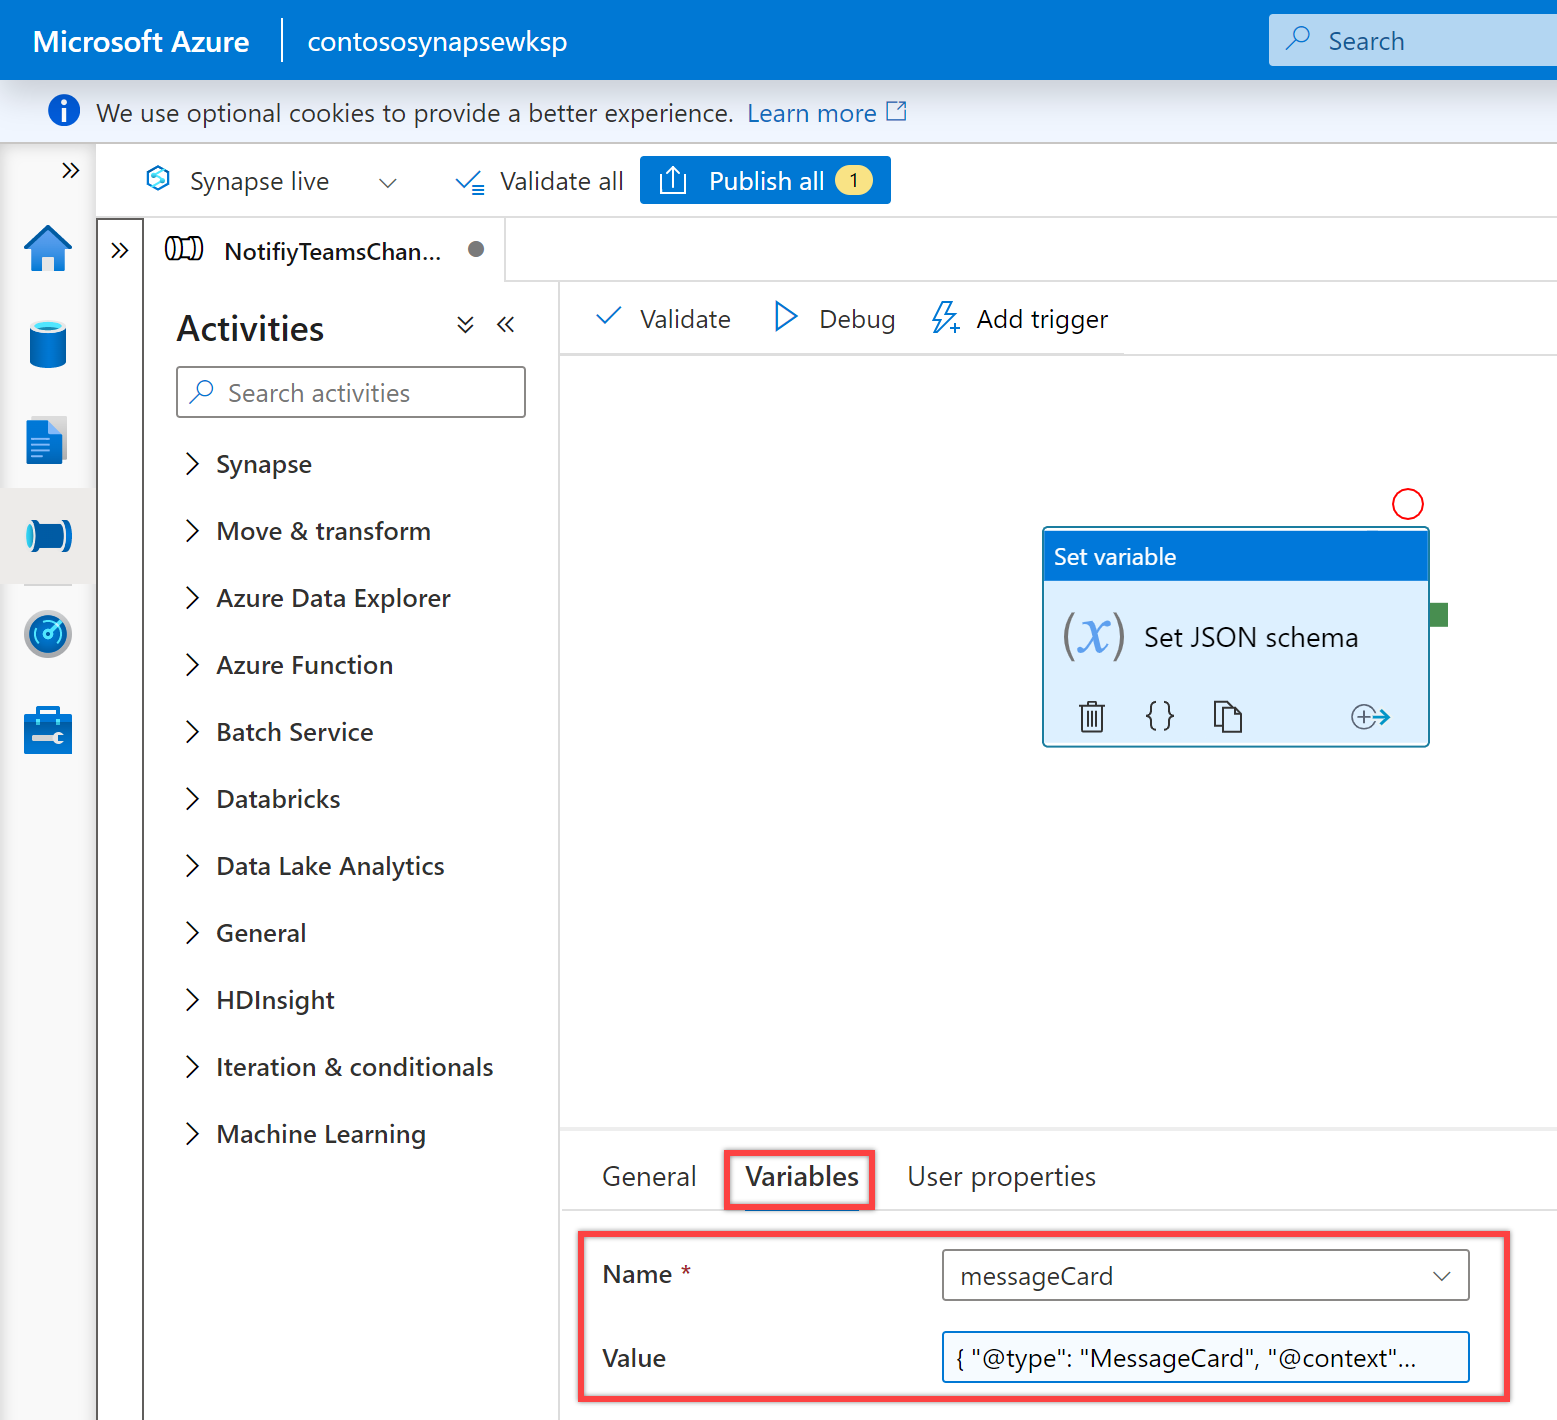
在“变量”选项卡中,选择“名称”属性的“messageCard”变量,并为其“值”属性输入以下 JSON:
{ "@type": "MessageCard", "@context": "http://schema.org/extensions", "themeColor": "0076D7", "summary": "Pipeline status alert message", "sections": [ { "activityTitle": "Pipeline execution alert", "facts": [ { "name": "Subscription Id:", "value": "@{pipeline().parameters.subscription}" }, { "name": "Resource Group:", "value": "@{pipeline().parameters.resourceGroup}" }, { "name": "Data Factory Name:", "value": "@{pipeline().DataFactory}" }, { "name": "Pipeline RunId:", "value": "@{pipeline().parameters.runId}" }, { "name": "Pipeline Name:", "value": "@{pipeline().Pipeline}" }, { "name": "Pipeline Status:", "value": "@{pipeline().parameters.status}" }, { "name": "Execution Start Time (UTC):", "value": "@{pipeline().parameters.triggerTime}" }, { "name": "Execution Finish Time (UTC):", "value": "@{pipeline().parameters.executionEndTime}" }, { "name": "Execution Duration (s):", "value": "@{pipeline().parameters.runDuration}" }, { "name": "Message:", "value": "@{pipeline().parameters.message}" }, { "name": "Notification Time (UTC):", "value": "@{utcnow()}" } ], "markdown": true } ], "potentialAction": [ { "@type": "OpenUri", "name": "View pipeline run", "targets": [ { "os": "default", "uri": "@{concat('https://synapse.azure.cn/monitoring/pipelineruns/',pipeline().parameters.runId,'?factory=/subscriptions/',pipeline().parameters.subscription,'/resourceGroups/',pipeline().parameters.resourceGroup,'/providers/Microsoft.DataFactory/factories/',pipeline().DataFactory)}" } ] } ] }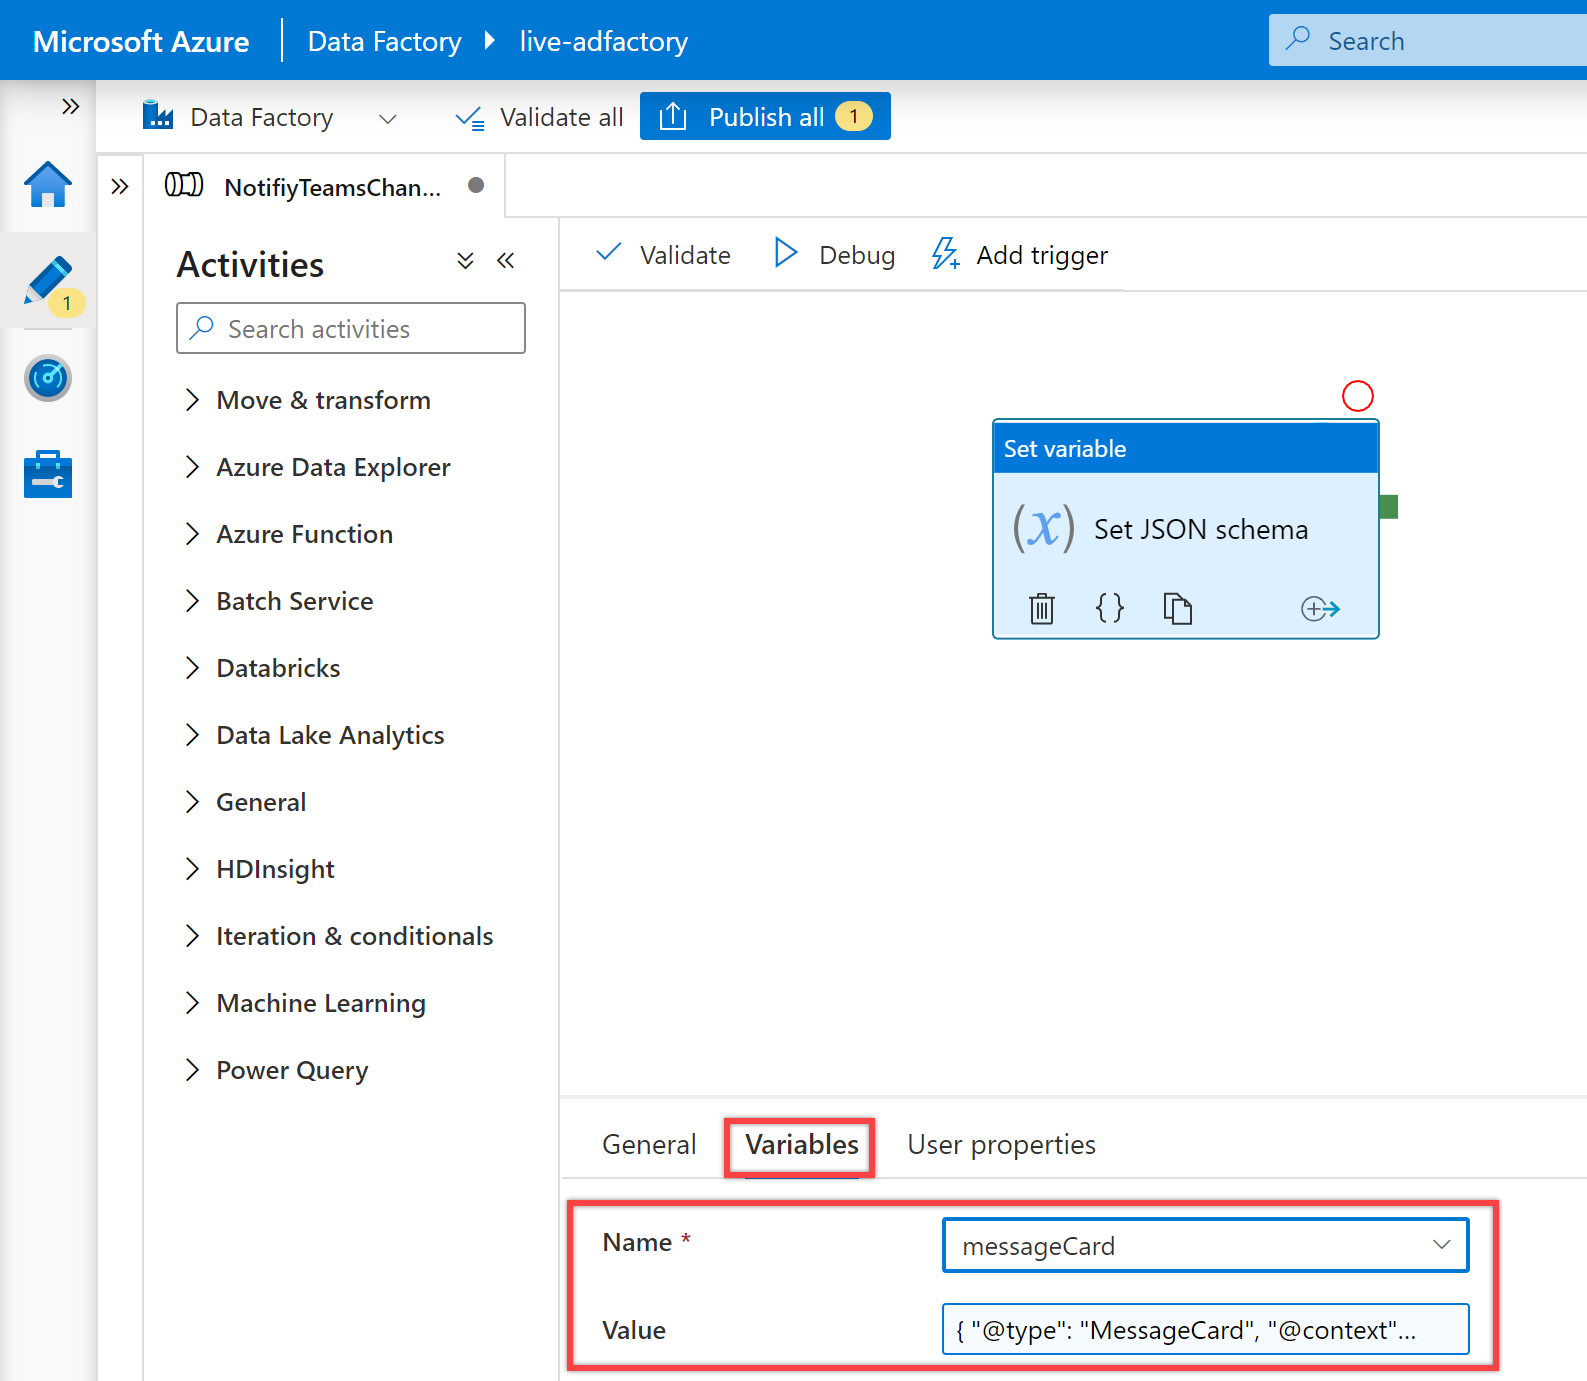
在管道“活动”窗格中搜索“Web”,然后将 Web 活动拖放到管道画布中。
为“Web”活动创建依赖条件,使其仅在“设置变量”活动成功时运行。 若要创建此依赖项,请选择“设置变量”活动右侧的绿色控点,将其拖动并连接到“Web”活动。
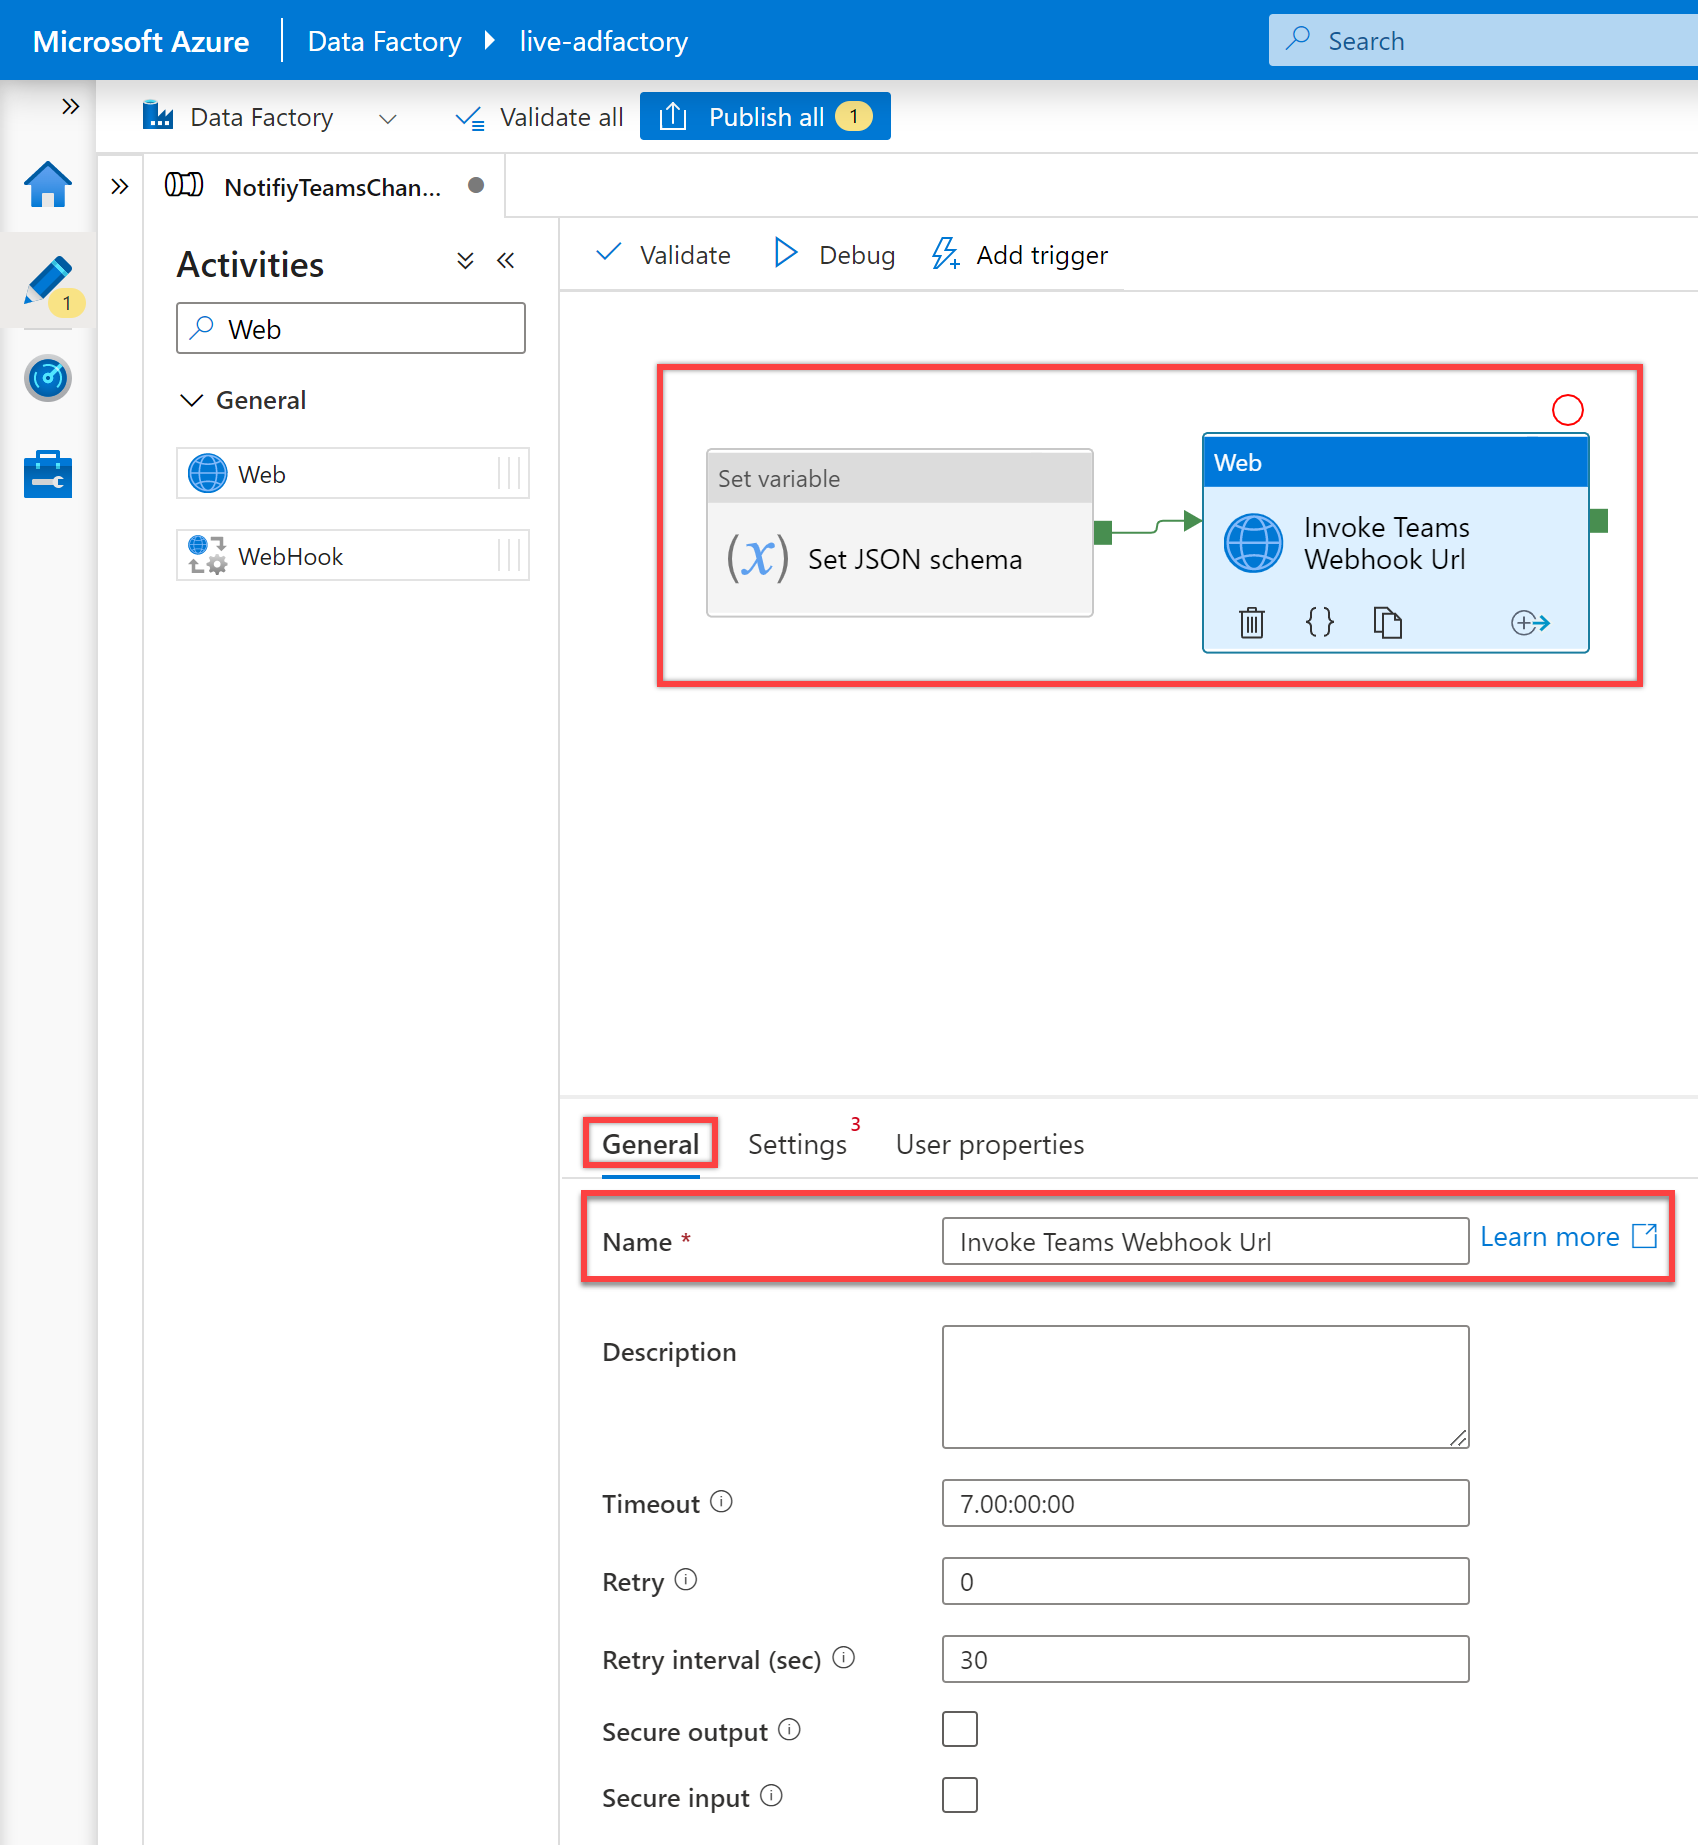
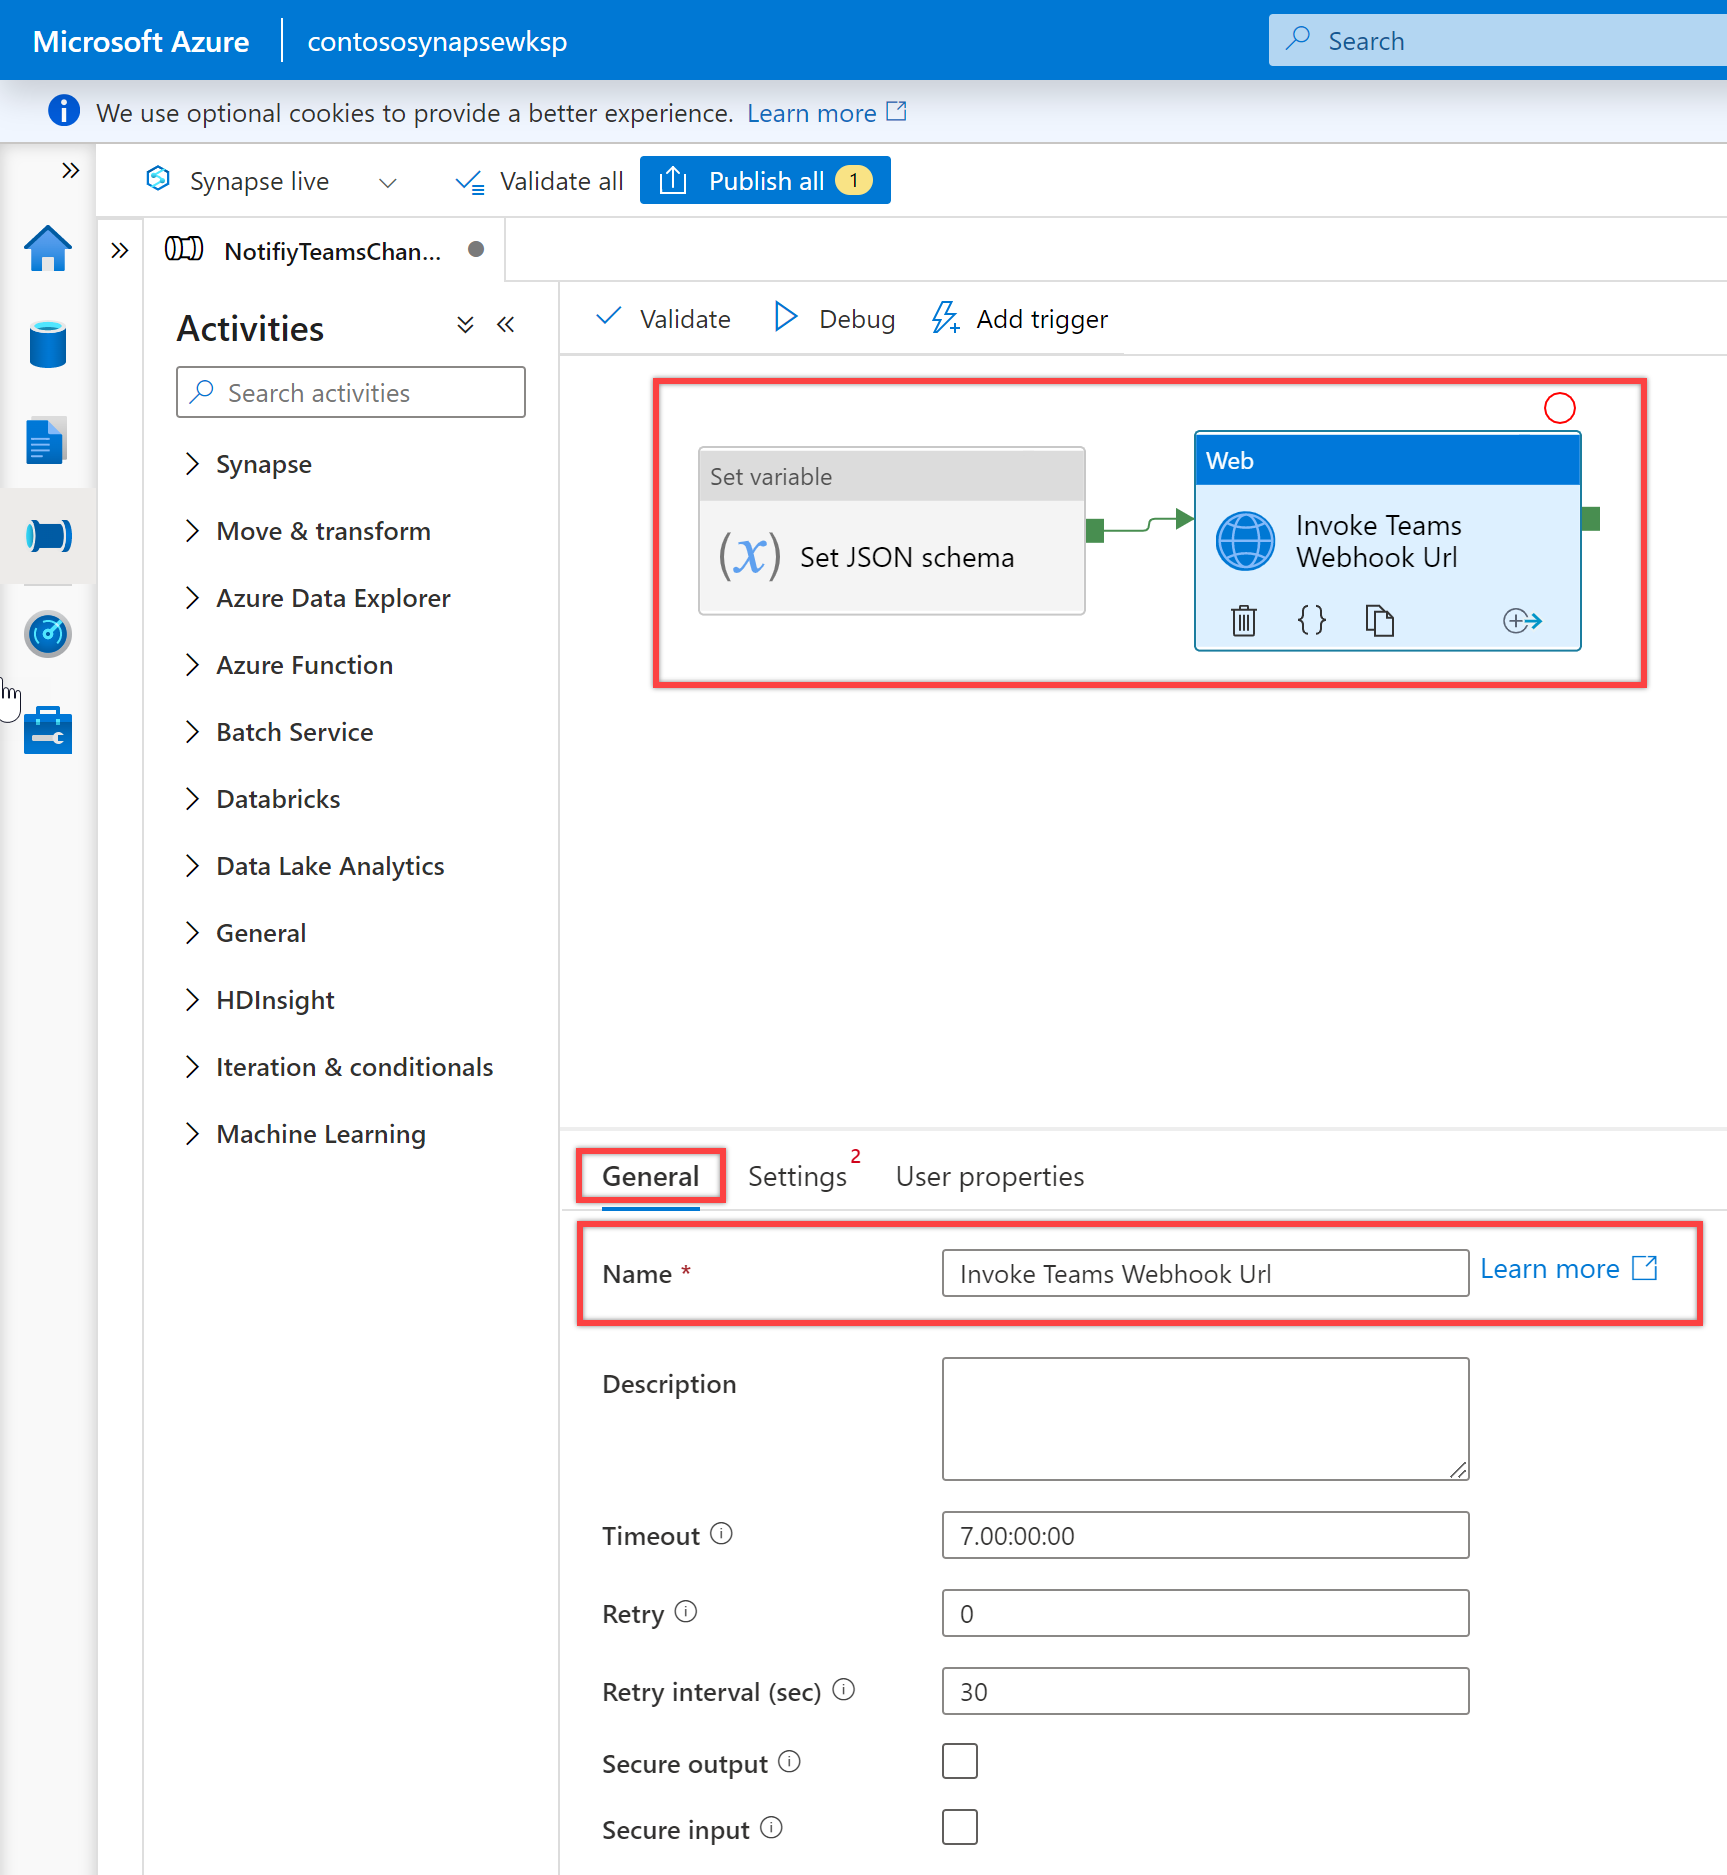
在画布上选择新的“Web”活动(如果尚未选择)及其“常规”选项卡,以编辑其详细信息。
在“常规”窗格中,为“Web”活动的“名称”指定“调用 Teams Webhook URL”。
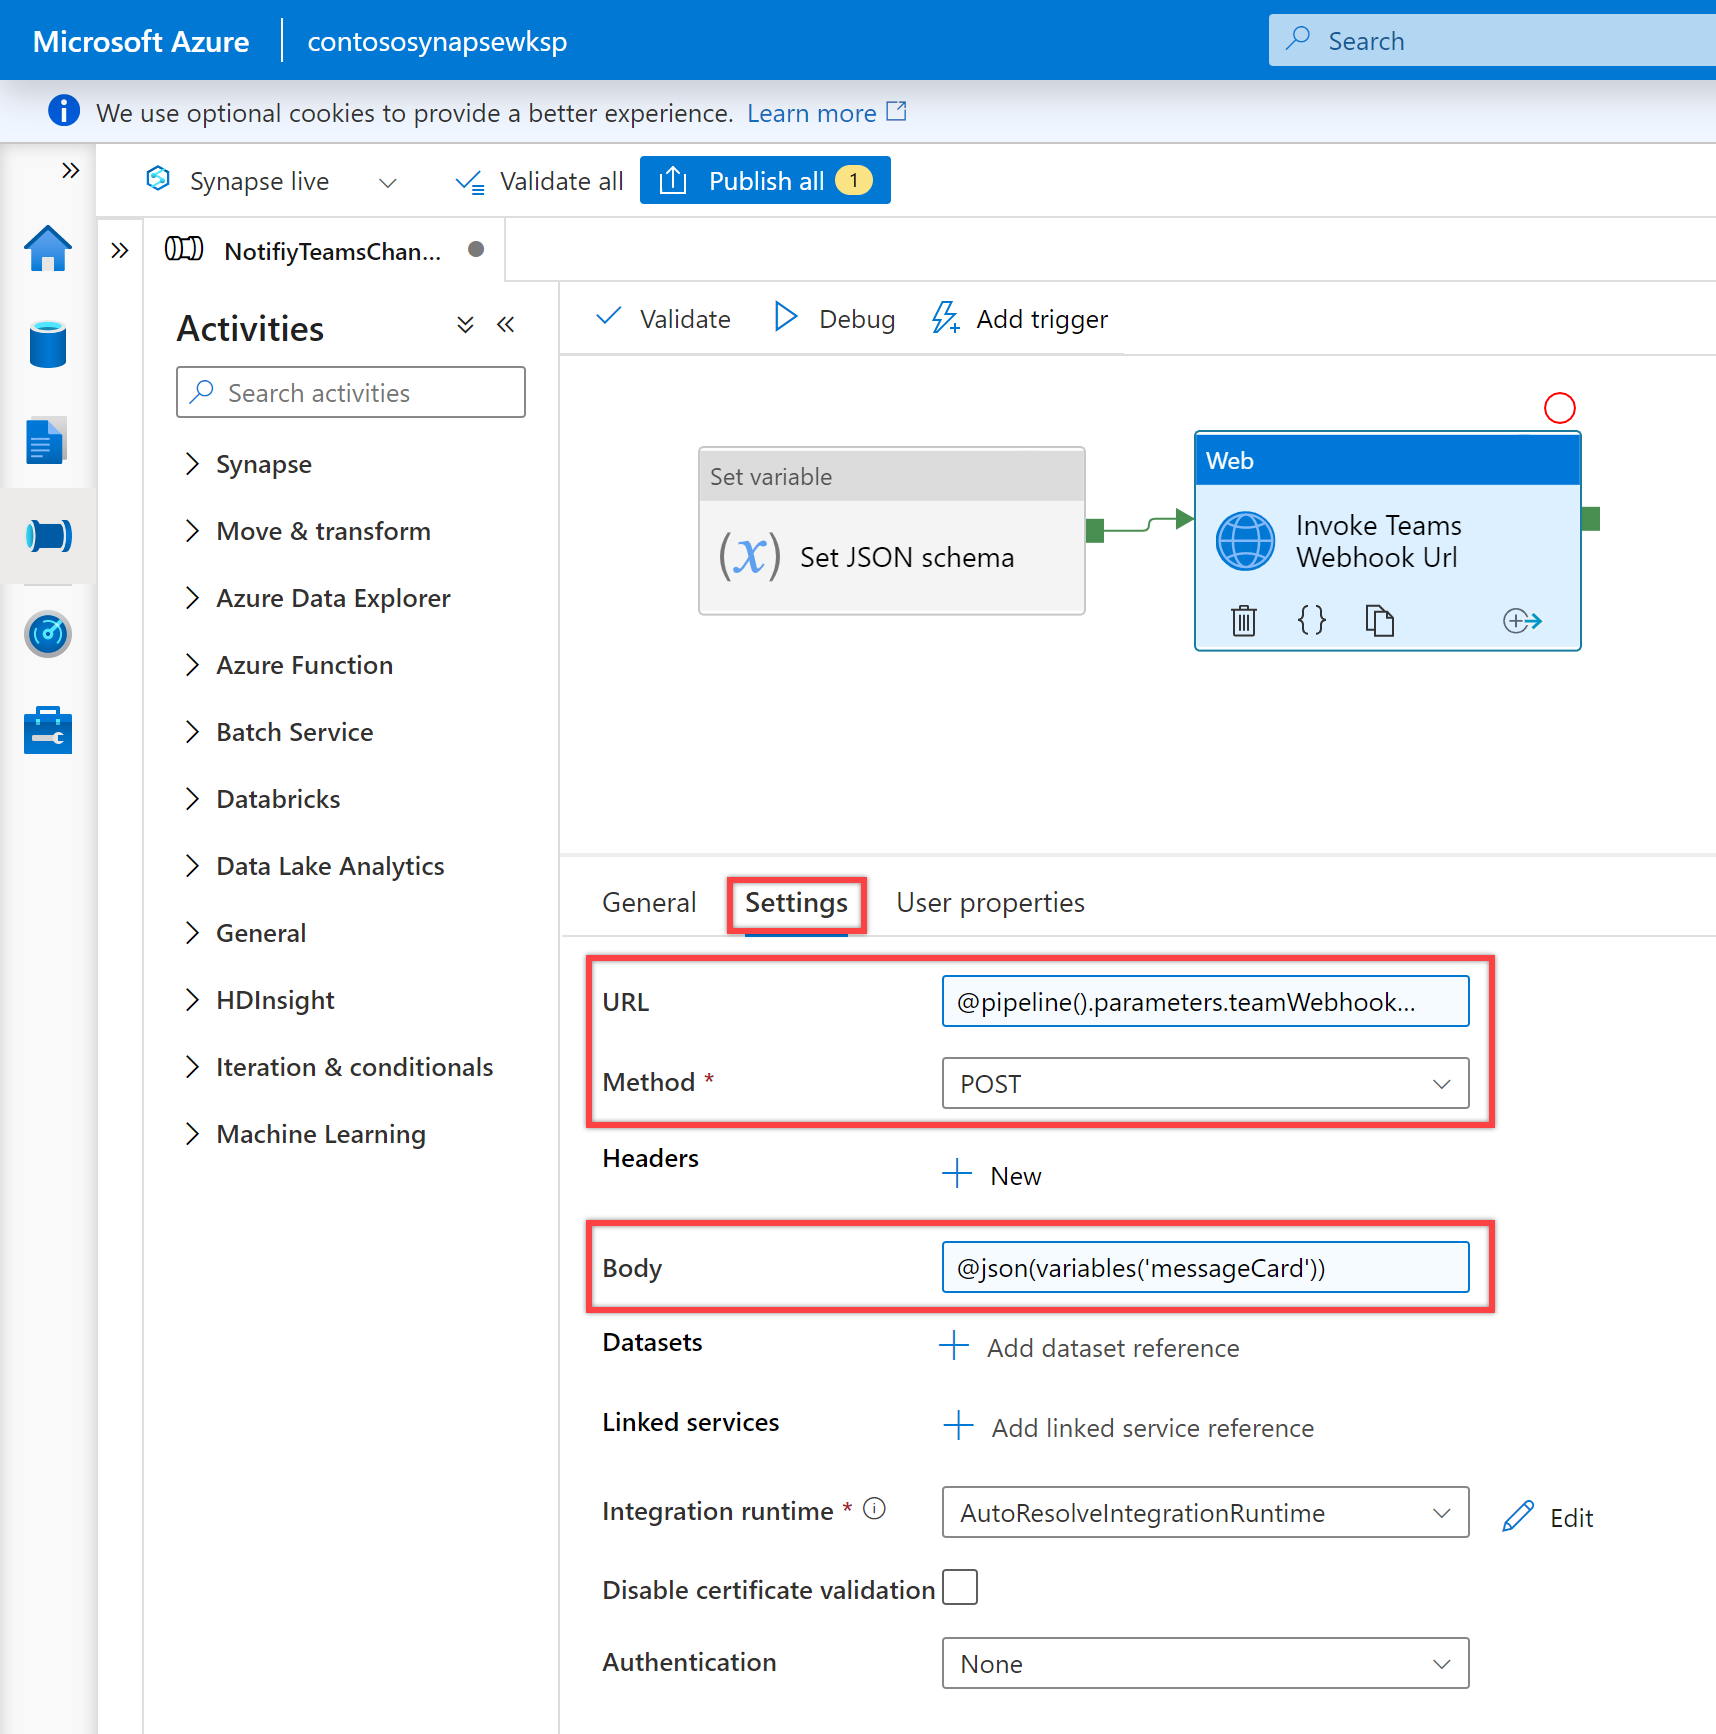
在“设置”窗格中,按如下所述设置以下属性:
属性 值 URL @pipeline().parameters.teamWebhookUrl方法 POST正文 @json(variables('messageCard'))
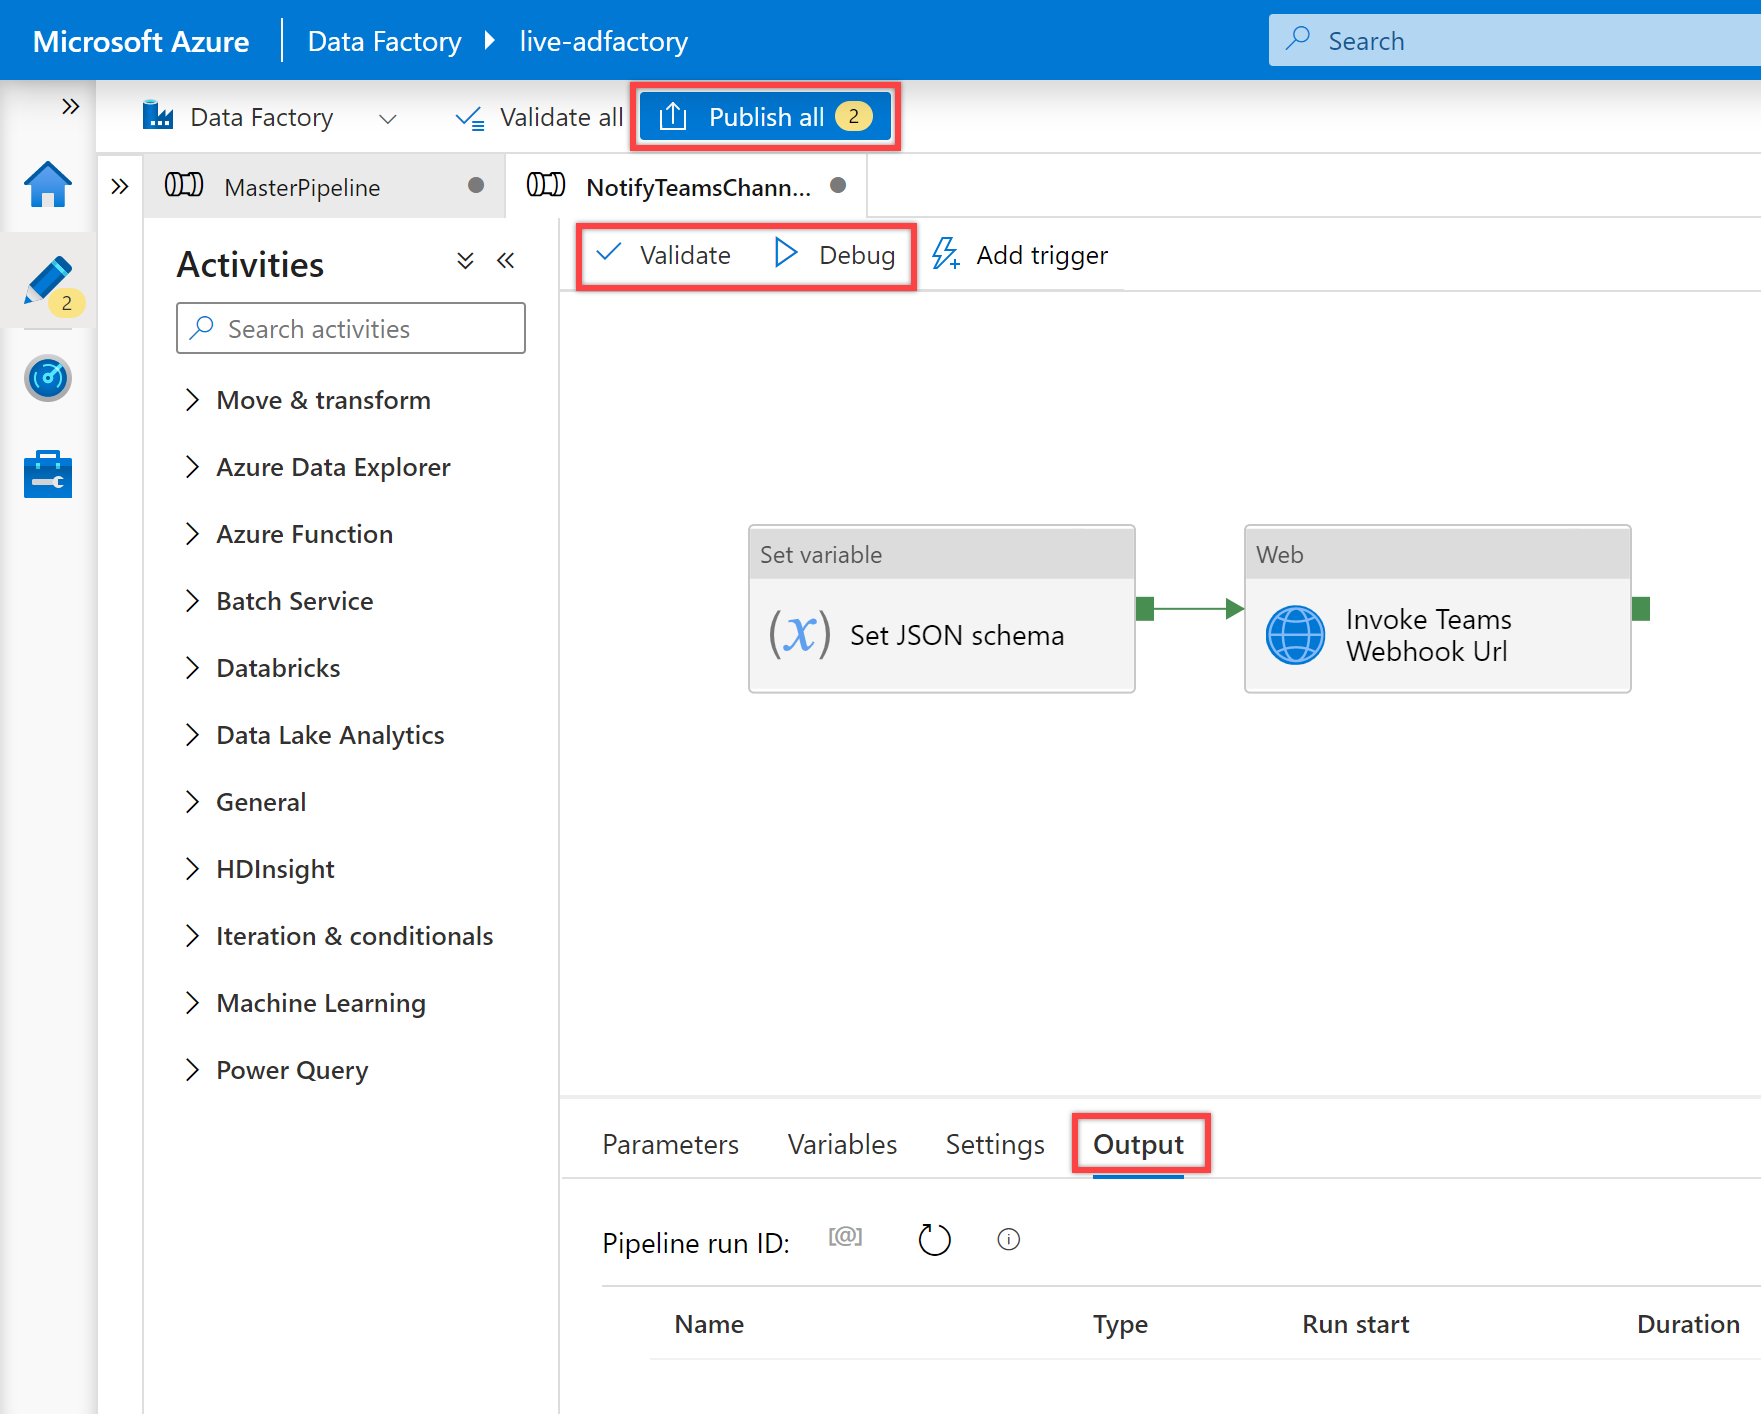
现已完成所有设置,接下来可以验证、调试并发布 NotifyTeamsChannelPipeline 管道。
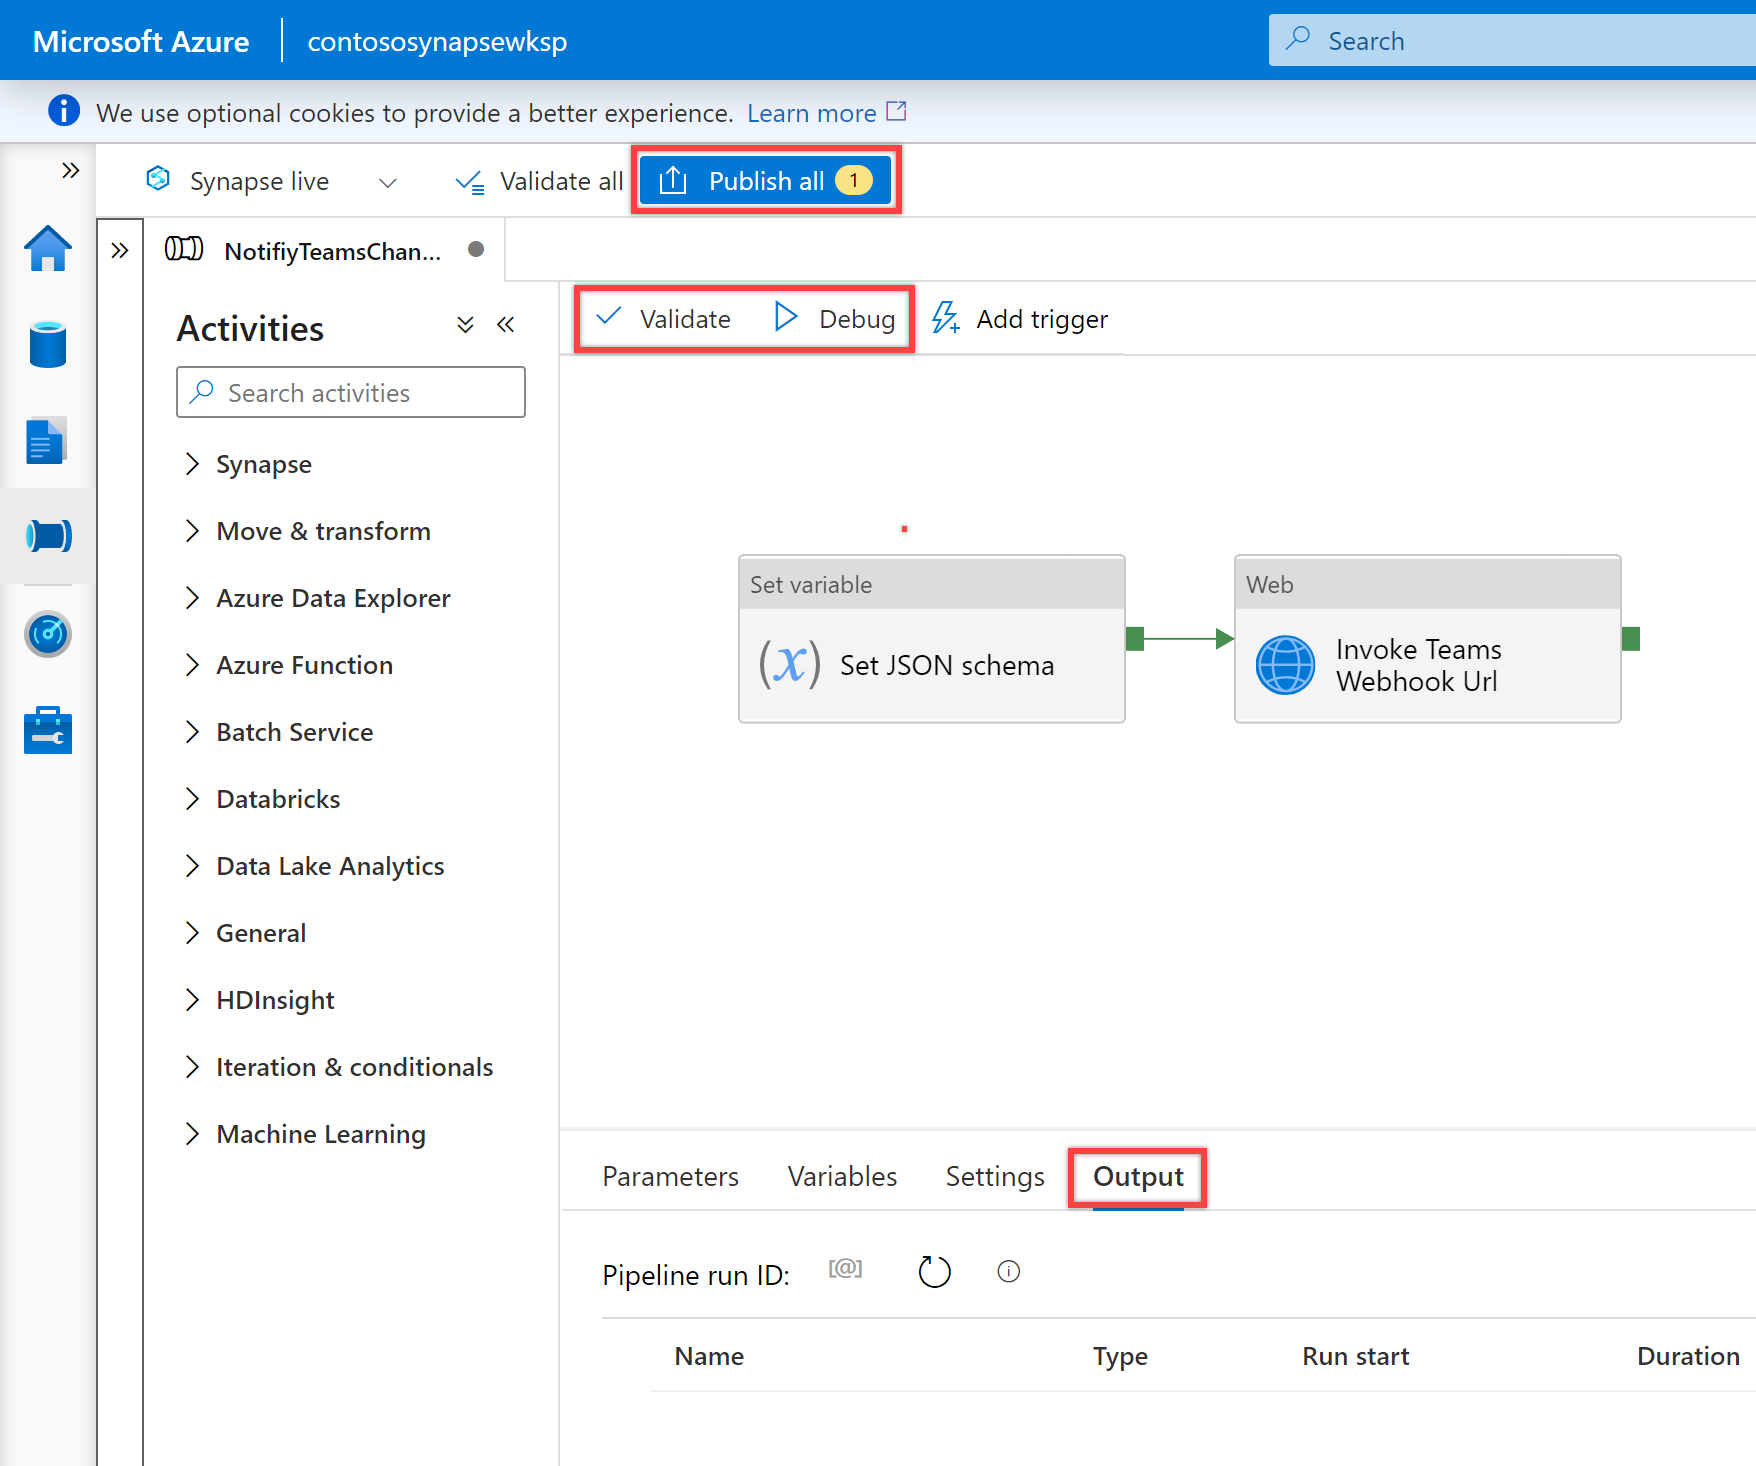
- 若要验证管道,请从工具栏中选择“验证” 。
- 若要调试管道,请在工具栏上选择“调试”。 可以在窗口底部的“输出”选项卡中看到管道运行的状态。
- 在管道可以成功运行后,在顶部工具栏中选择“全部发布”。 此操作将创建的实体发布到数据工厂。 等待“已成功发布”消息出现。

示例用法
在此示例使用方案中,我们将创建包含三个“执行管道”活动的主管道。 第一个“执行管道”活动将调用我们的 ETL 管道,其余两个“执行管道”活动将调用“NotifyTeamsChannelPipeline”管道,以根据 ETL 管道的执行状态向 Teams 通道发送成功或失败通知。
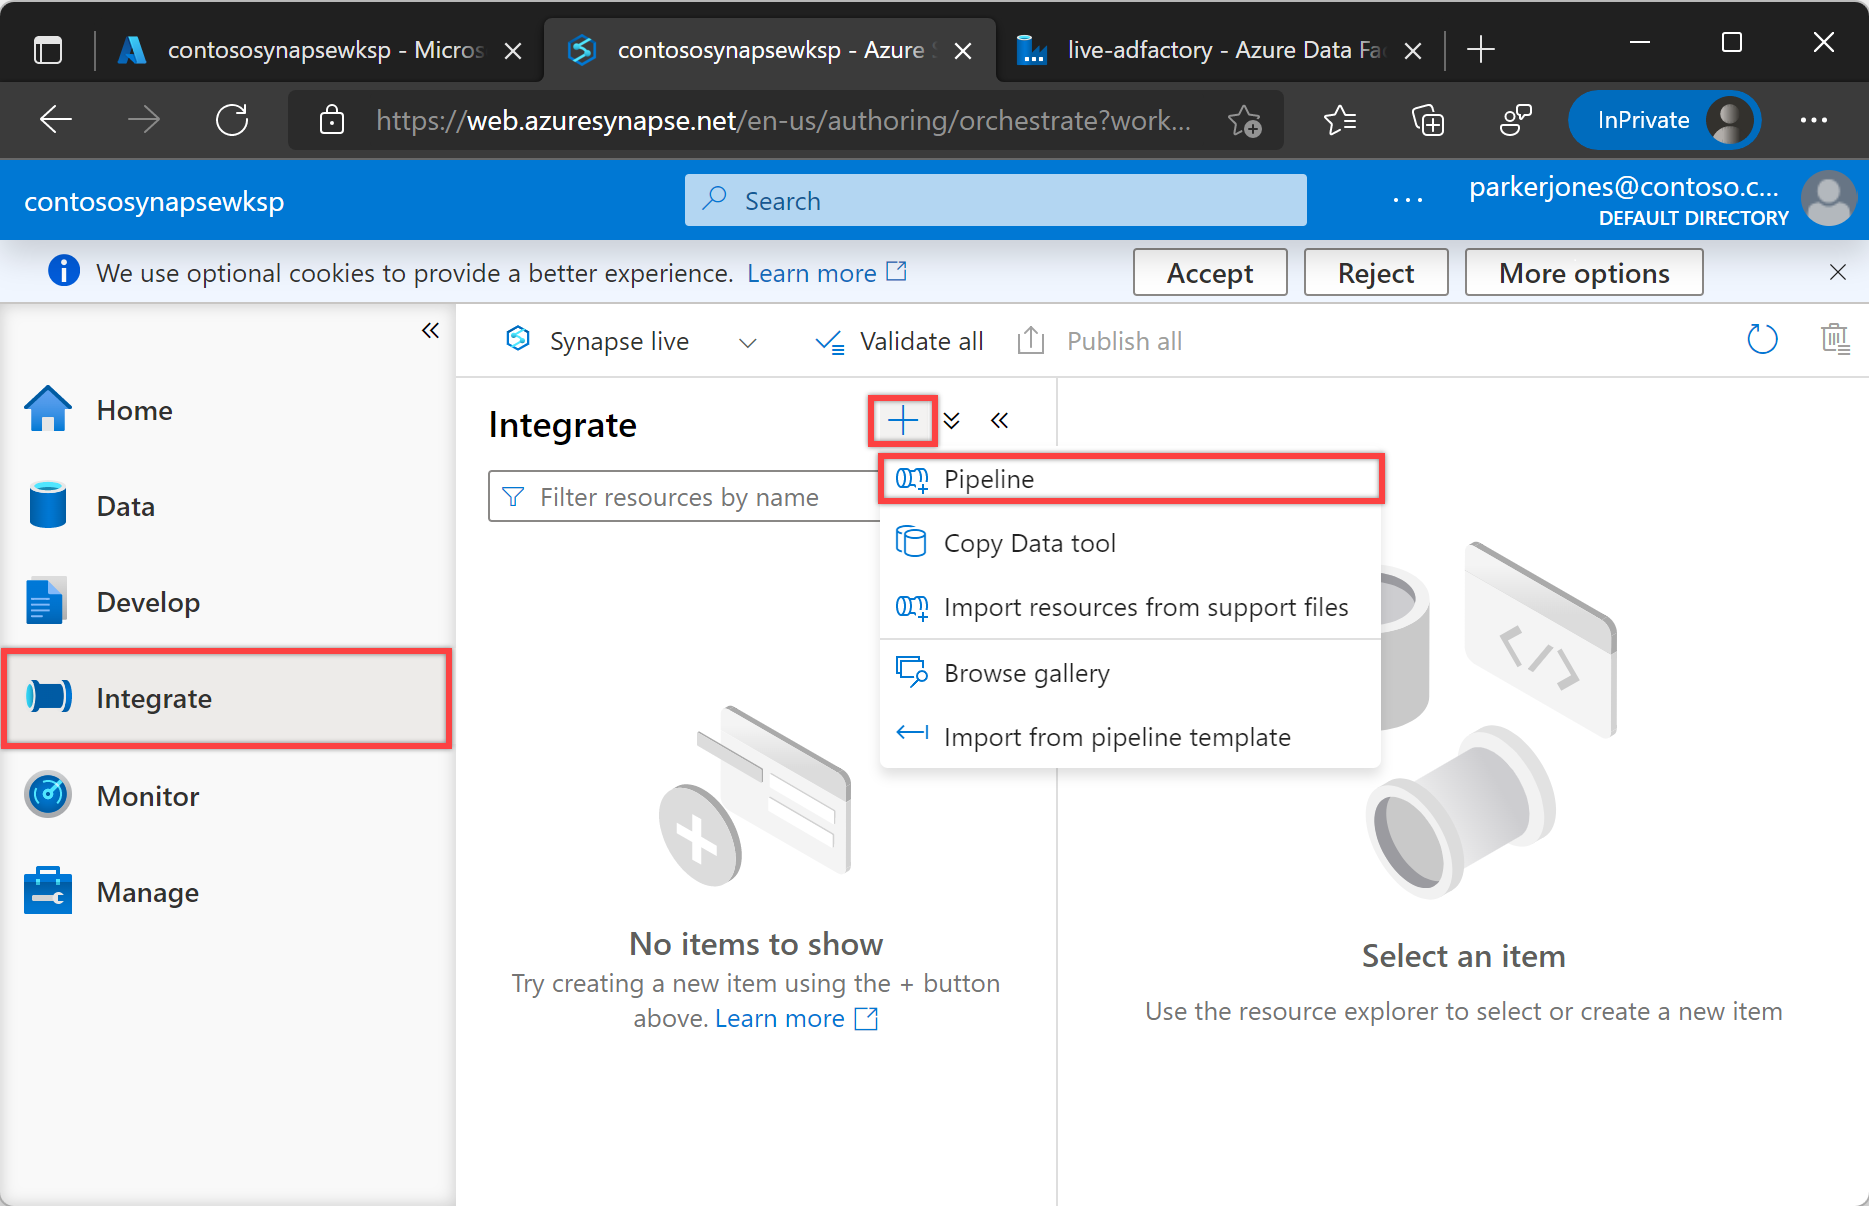
在“数据工厂”的左侧窗格中选择“创作”选项卡,或者在“Synapse Studio”的左侧窗格中选择“集成”选项卡。 接下来,选择“+”(加号)按钮,然后选择“管道”以创建新管道。
在“常规”面板中的“属性”下,为“名称”指定“MasterPipeline”。 然后单击右上角的“属性”图标来折叠面板。
在管道的“活动”窗格中搜索“管道”,然后将三个“执行管道”活动拖放到管道画布中。
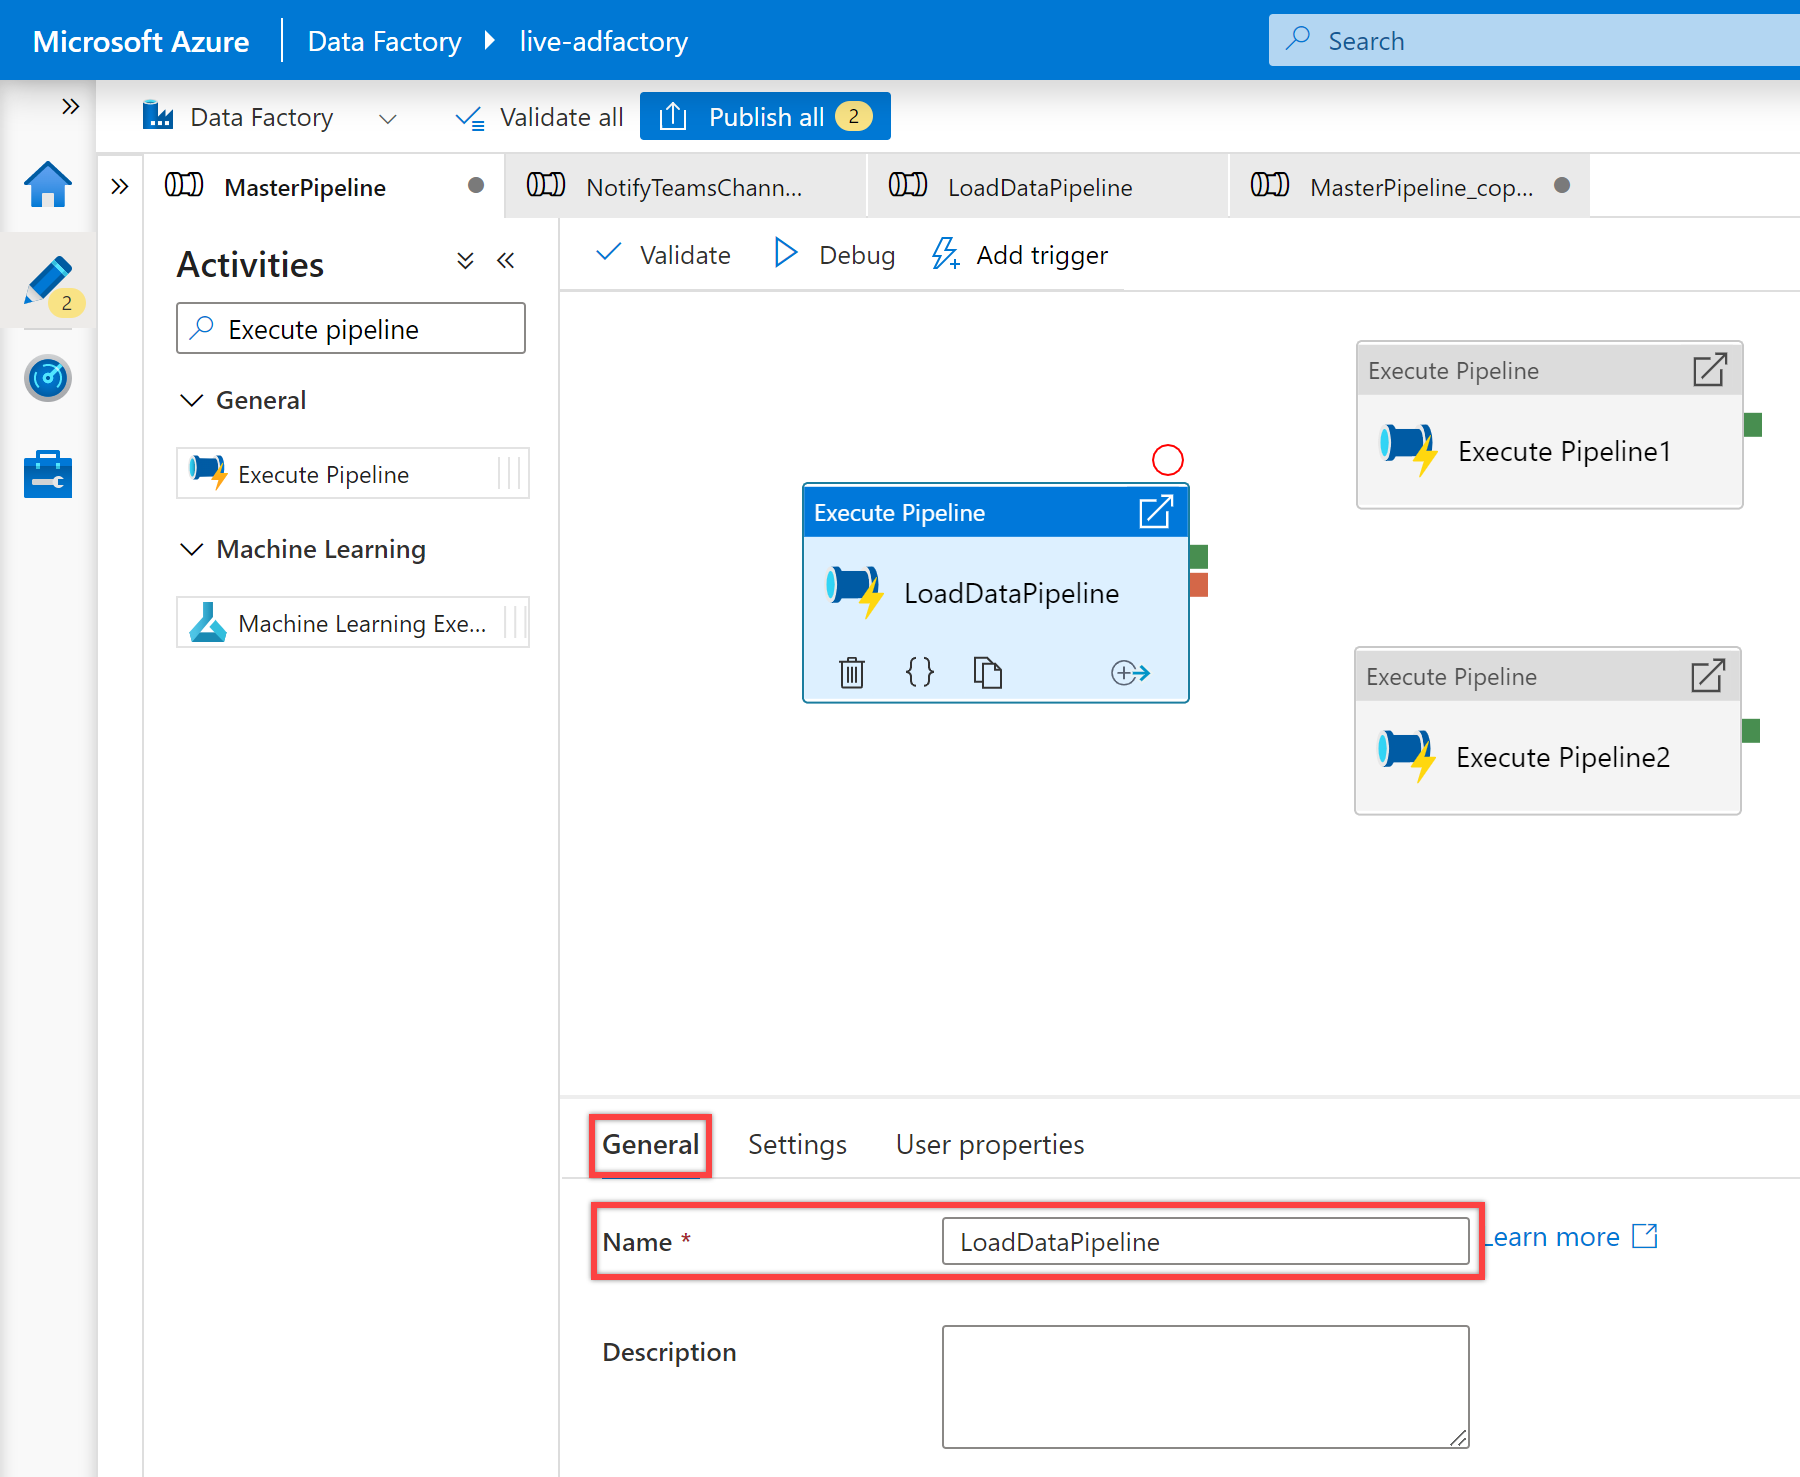
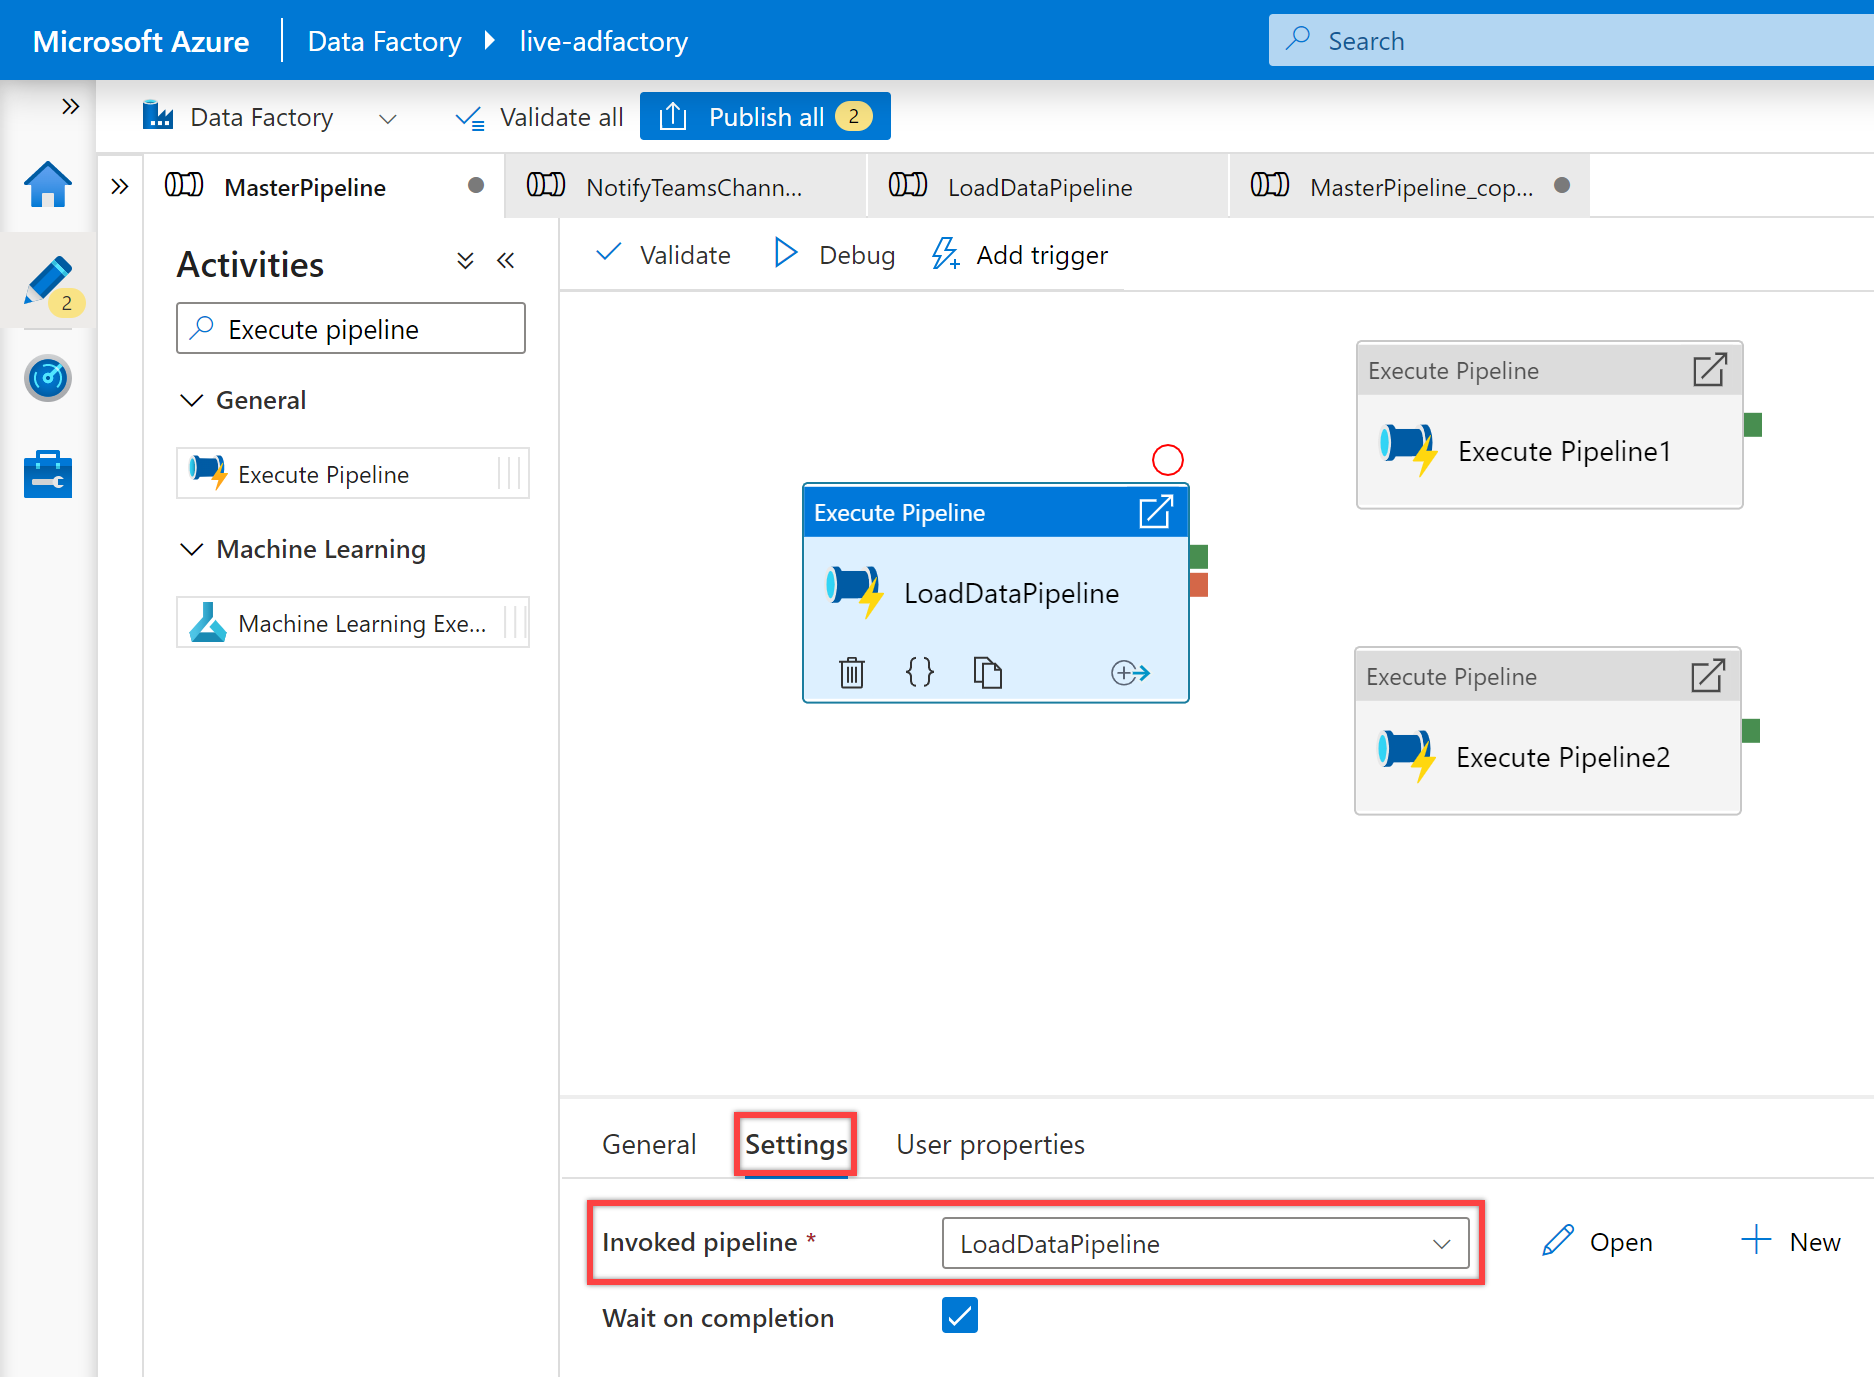
在画布上选择第一个“执行管道”活动(如果尚未选择)及其“常规”窗格,以编辑其详细信息。
- 对于“执行管道”活动的“名称”属性,我们建议使用要为其发送通知的已调用 ETL 管道的名称。 例如,我们使用了“LoadDataPipeline”作为“执行管道”活动的名称,因为它是调用的管道的名称。
- 在“设置”窗格中,选择现有的管道,或使用“调用的管道”属性对应的“+ 新建”按钮创建一个新管道。 例如,在本例中,我们为“调用的管道”属性选择了“LoadDataPipeline”管道。 选择其他选项,并根据需要为管道配置任何参数,以完成配置。
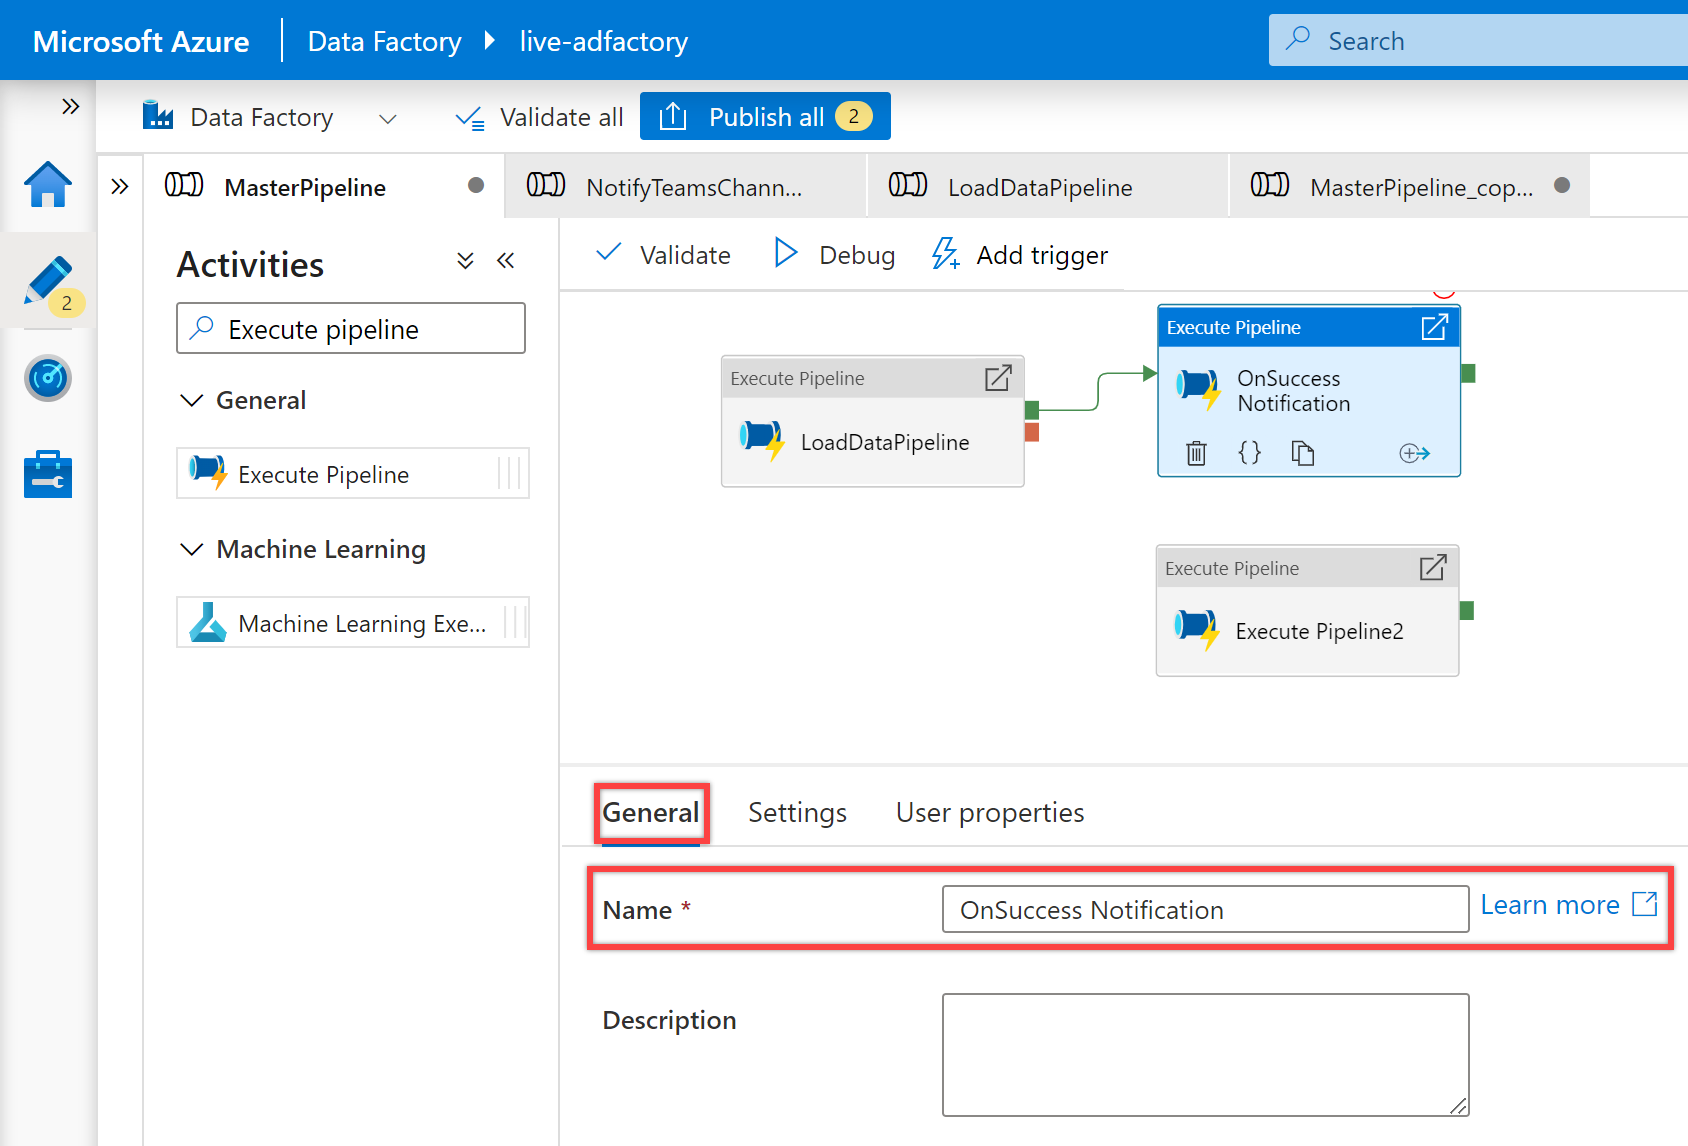
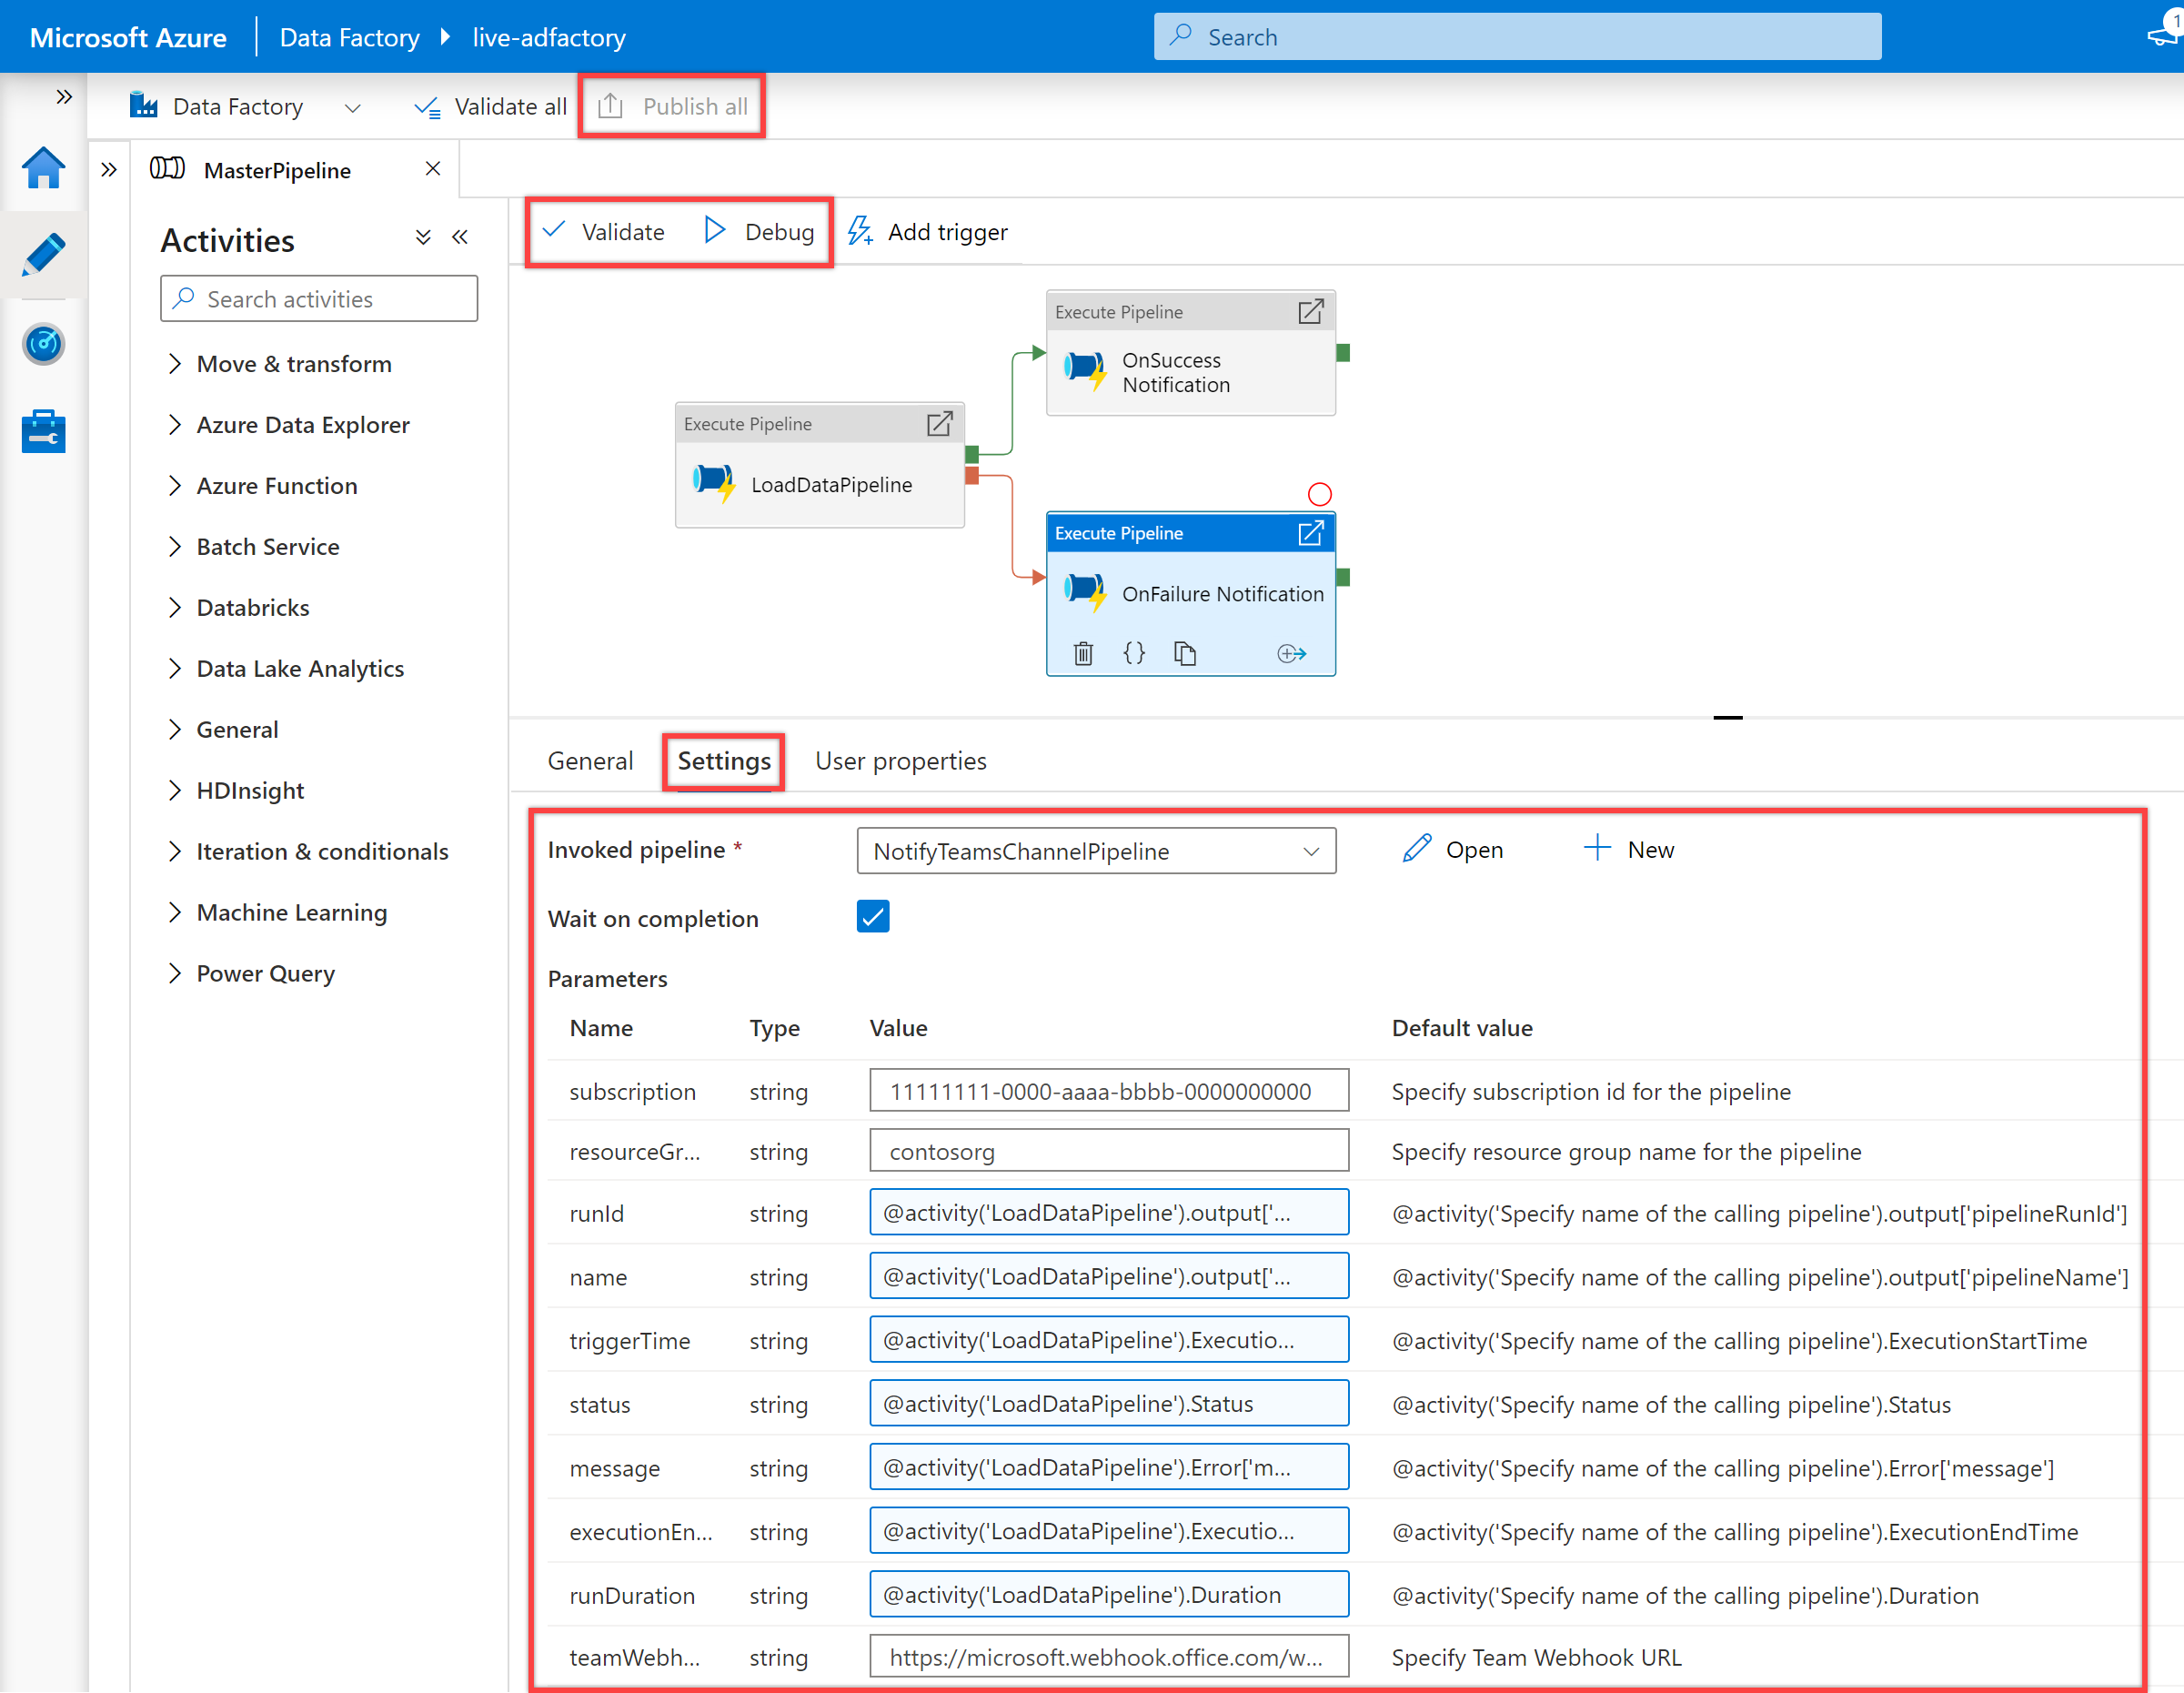
在画布上选择第二个“执行管道”活动及其“常规”窗格,以编辑其详细信息。
为“执行管道”活动的“名称”指定“OnSuccess Notification”。
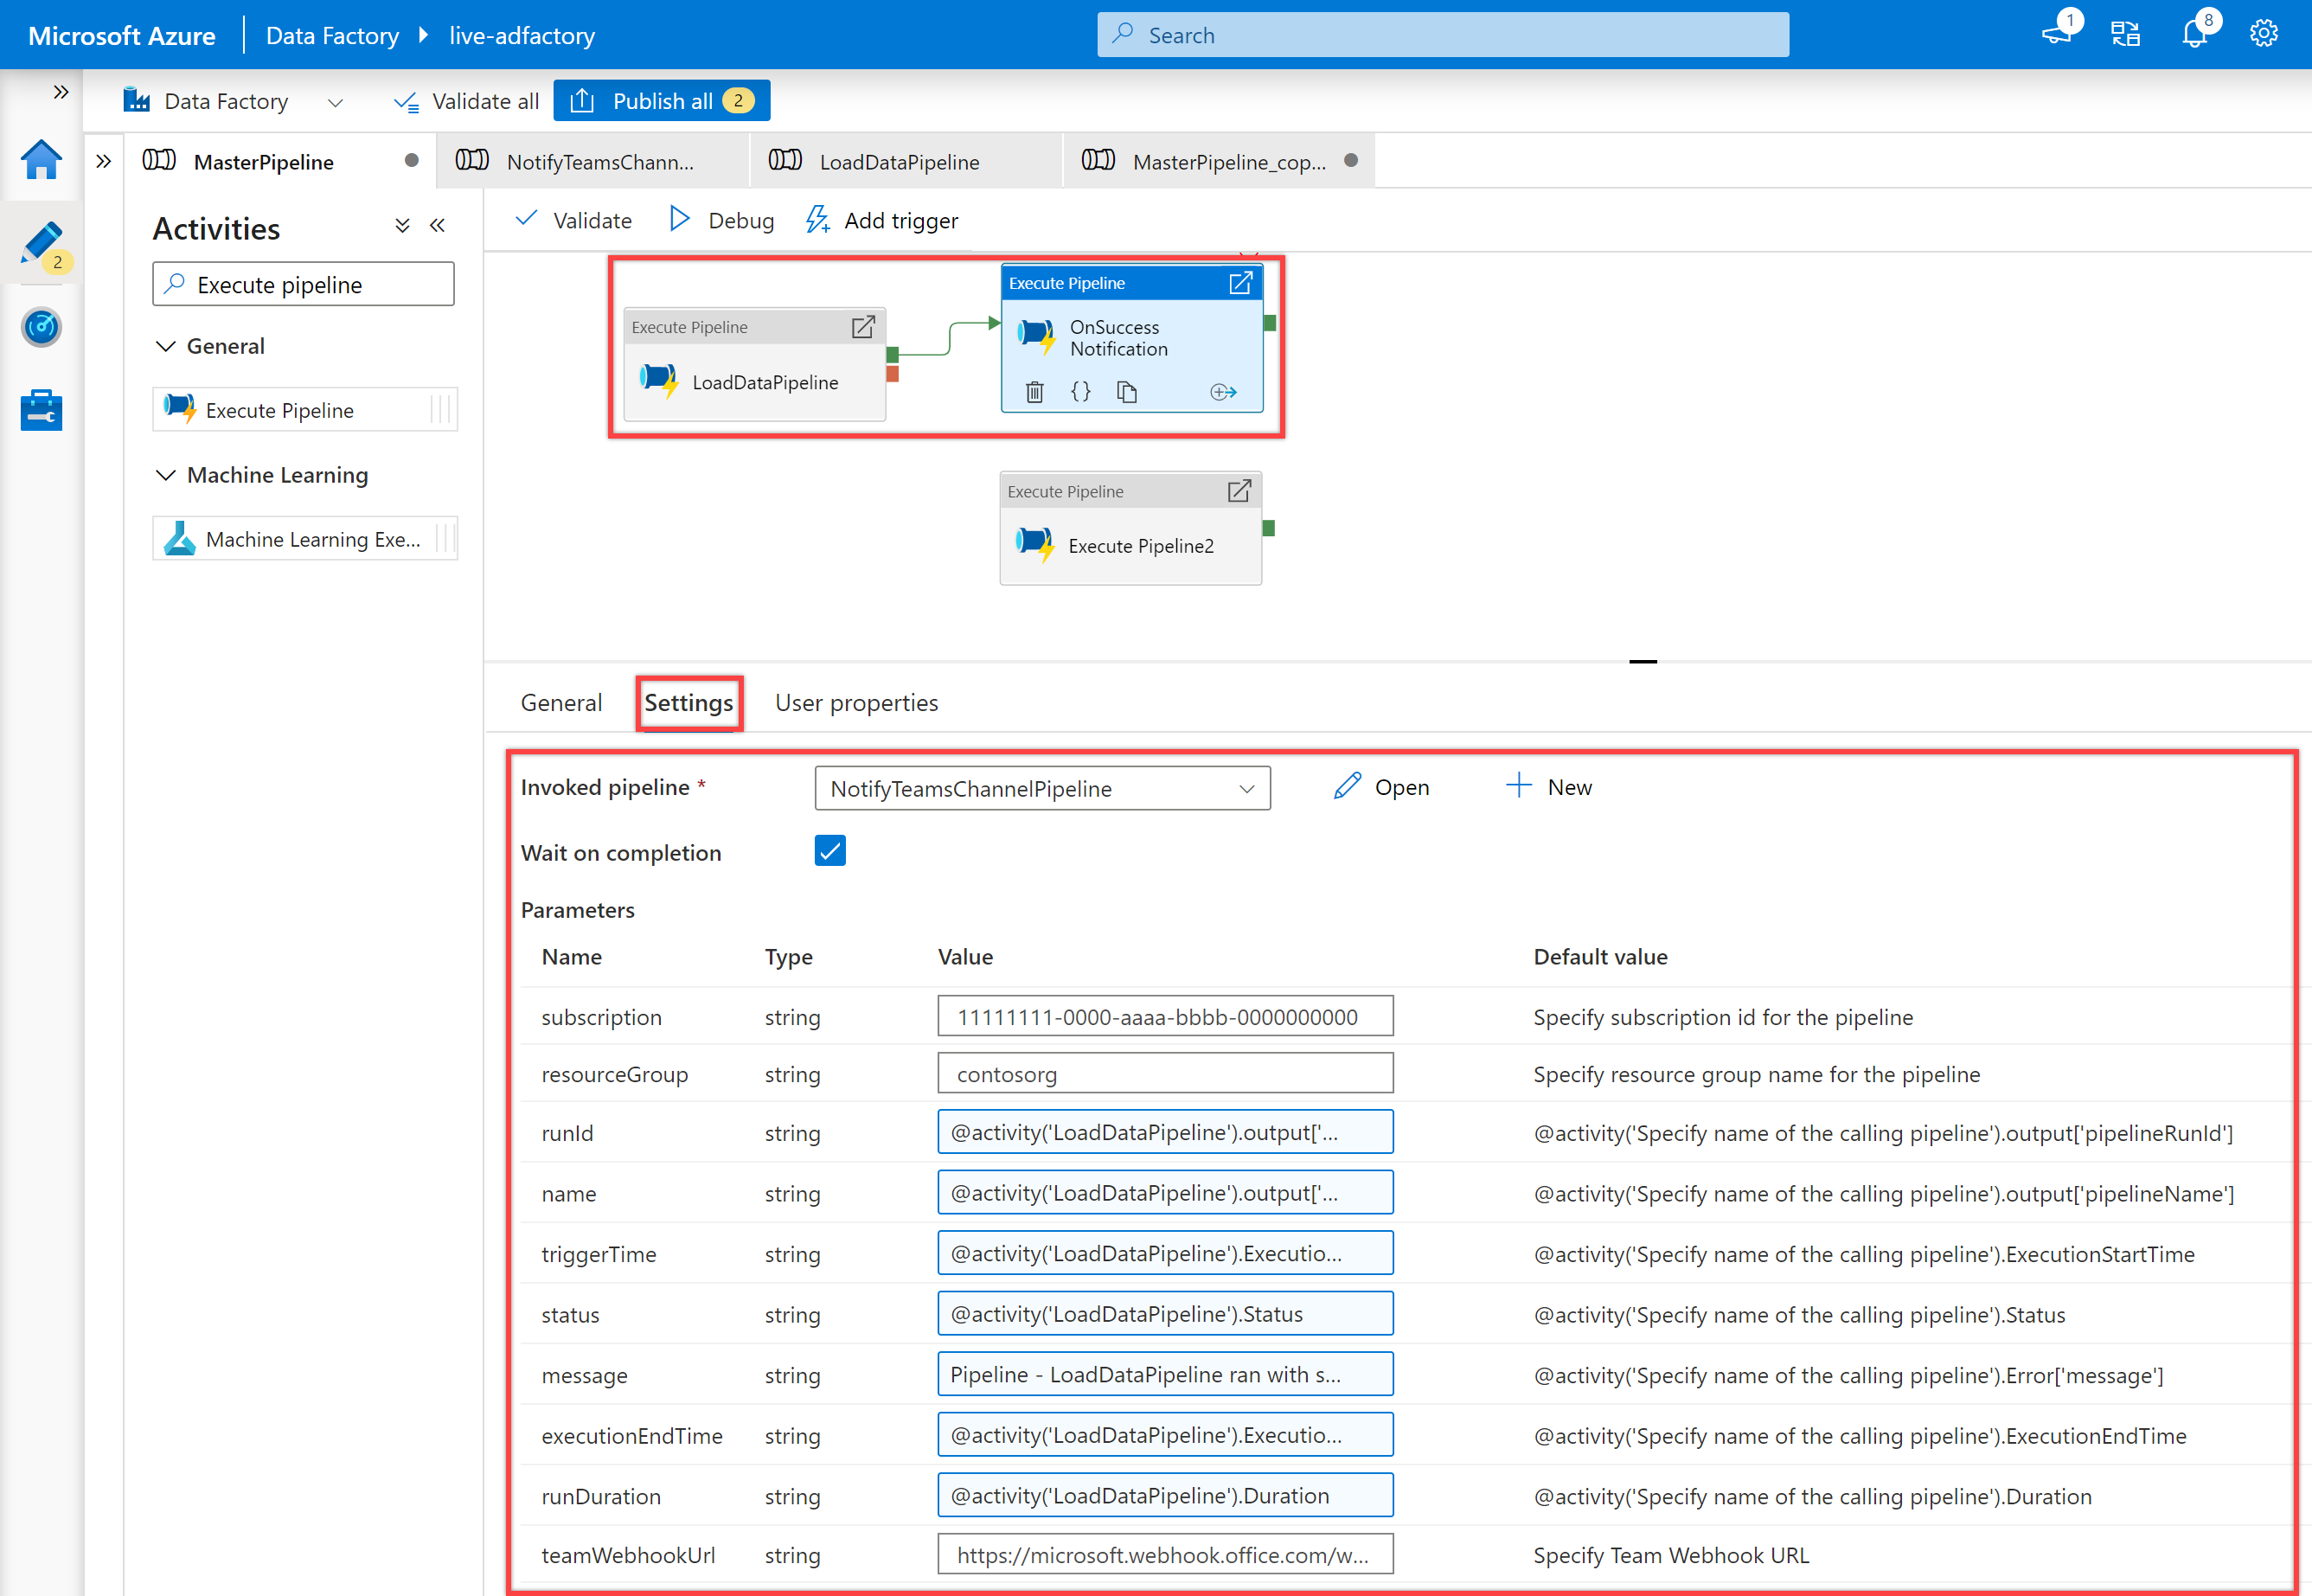
在“设置”窗格中,为“调用的管道”属性选择前面创建的“NotifyTeamsChannelPipeline”管道。 根据活动类型按需要自定义参数。 例如,我按如下所示自定义了参数:
名称 值 订阅 11111111-0000-aaaa-bbbb-0000000000resourceGroup contosorgrunId @activity('LoadDataPipeline').output['pipelineRunId']name @activity('LoadDataPipeline').output['pipelineName']triggerTime @activity('LoadDataPipeline').ExecutionStartTimestatus @activity('LoadDataPipeline').Statusmessage Pipeline - LoadDataPipeline ran with success.executionEndTime @activity('LoadDataPipeline').ExecutionEndTimerunDuration @activity('LoadDataPipeline').DurationteamWebhookUrl https://microsoft.webhook.office.com/webhookb2/1234abcd-1x11-2ff1-ab2c-1234d0699a9e@72f988bf-32b1-41af-91ab-2d7cd011db47/IncomingWebhook/8212f66ad80040ab83cf68b554d9232a/17d524d0-ed5c-44ed-98a0-35c12dd89a6d为第二个“执行管道”活动创建依赖条件,使其仅在第一个“执行管道”活动成功时才运行。 若要创建此依赖项,请选择第一个“执行管道”活动右侧的绿色控点,将其拖动并连接到第二个“执行管道”活动。
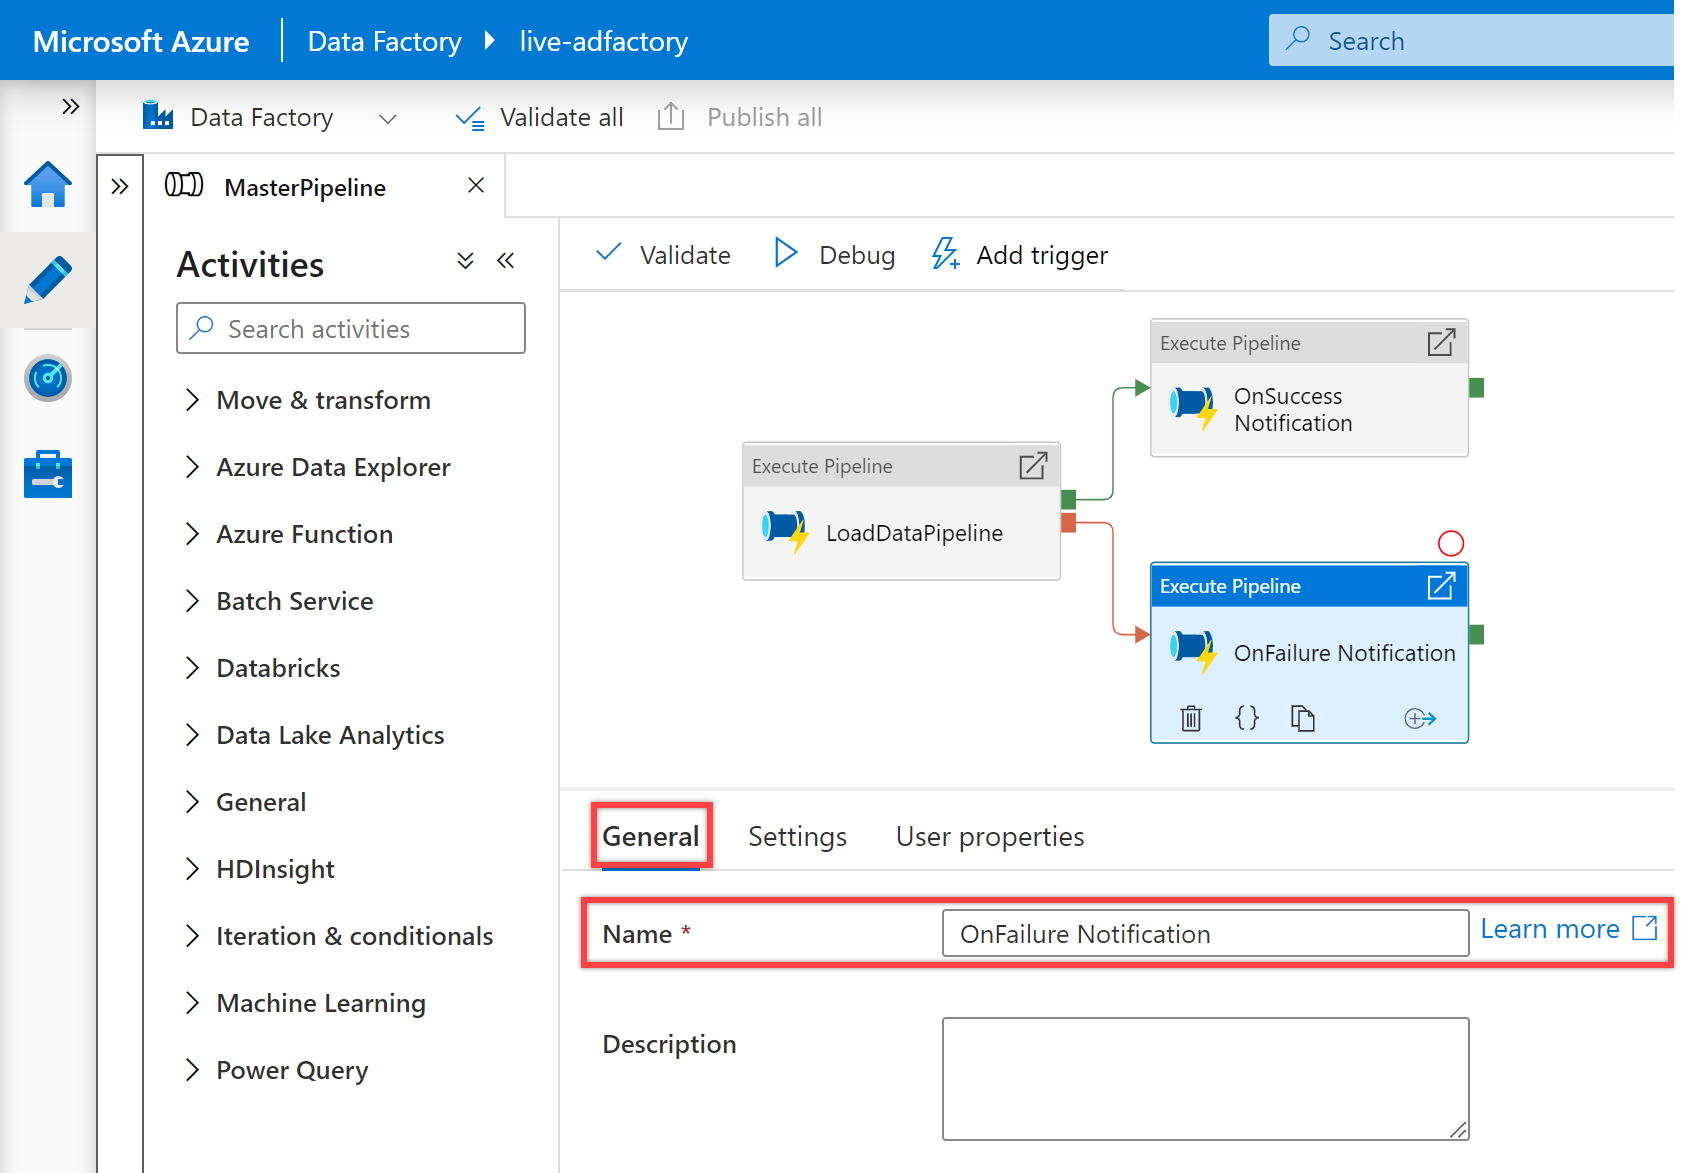
在画布上选择第三个“执行管道”活动及其“常规”窗格,以编辑其详细信息。
为“执行管道”活动的“名称”指定“OnFailure Notification”。
在“设置”窗格中,为“调用的管道”属性选择“NotifyTeamsChannelPipeline”管道。 根据活动类型按需要自定义参数。 例如,这一次我按如下所示自定义了参数:
名称 值 订阅 11111111-0000-aaaa-bbbb-0000000000resourceGroup contosorgrunId @activity('LoadDataPipeline').output['pipelineRunId']name @activity('LoadDataPipeline').output['pipelineName']triggerTime @activity('LoadDataPipeline').ExecutionStartTimestatus @activity('LoadDataPipeline').Statusmessage @activity('LoadDataPipeline').Error['message']executionEndTime @activity('LoadDataPipeline').ExecutionEndTimerunDuration @activity('LoadDataPipeline').DurationteamWebhookUrl https://microsoft.webhook.office.com/webhookb2/1234abcd-1x11-2ff1-ab2c-1234d0699a9e@72f988bf-32b1-41af-91ab-2d7cd011db47/IncomingWebhook/8212f66ad80040ab83cf68b554d9232a/17d524d0-ed5c-44ed-98a0-35c12dd89a6d为第三个“执行管道”活动创建依赖条件,使其仅在第一个“执行管道”活动失败时才运行。 若要创建此依赖项,请选择第一个“执行管道”活动右侧的红色控点,将其拖动并连接到第三个“执行管道”活动。
验证、调试并发布 MasterPipeline 管道。
运行管道以在 Teams 中接收通知。 例如,下面是我的管道成功运行和失败时收到的示例通知。
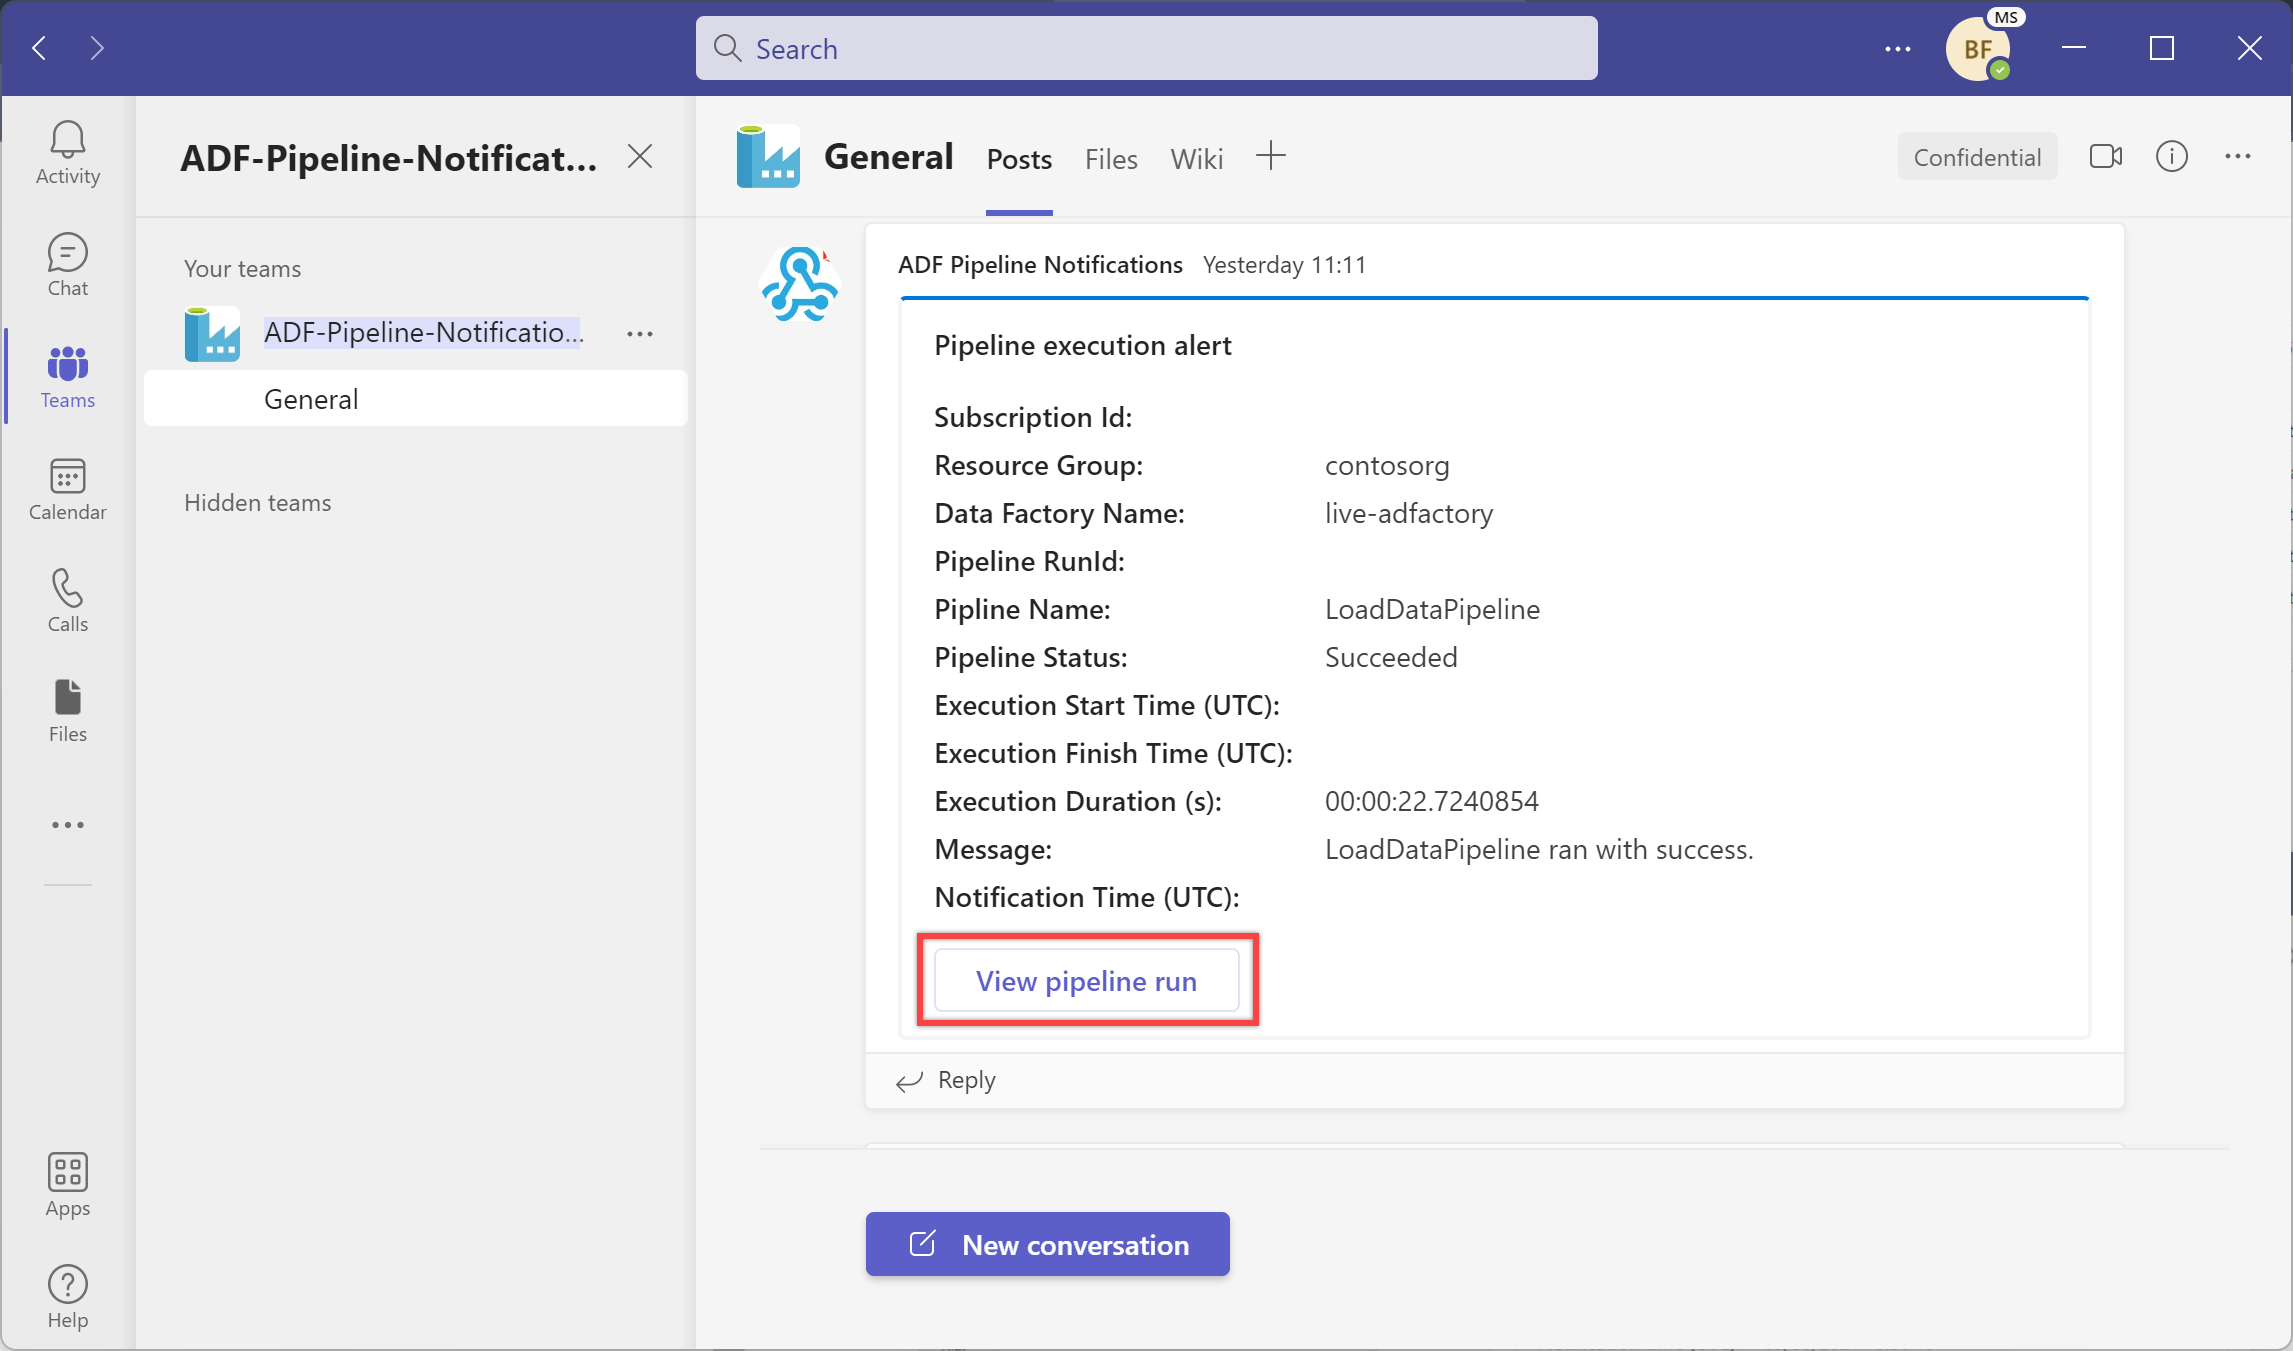
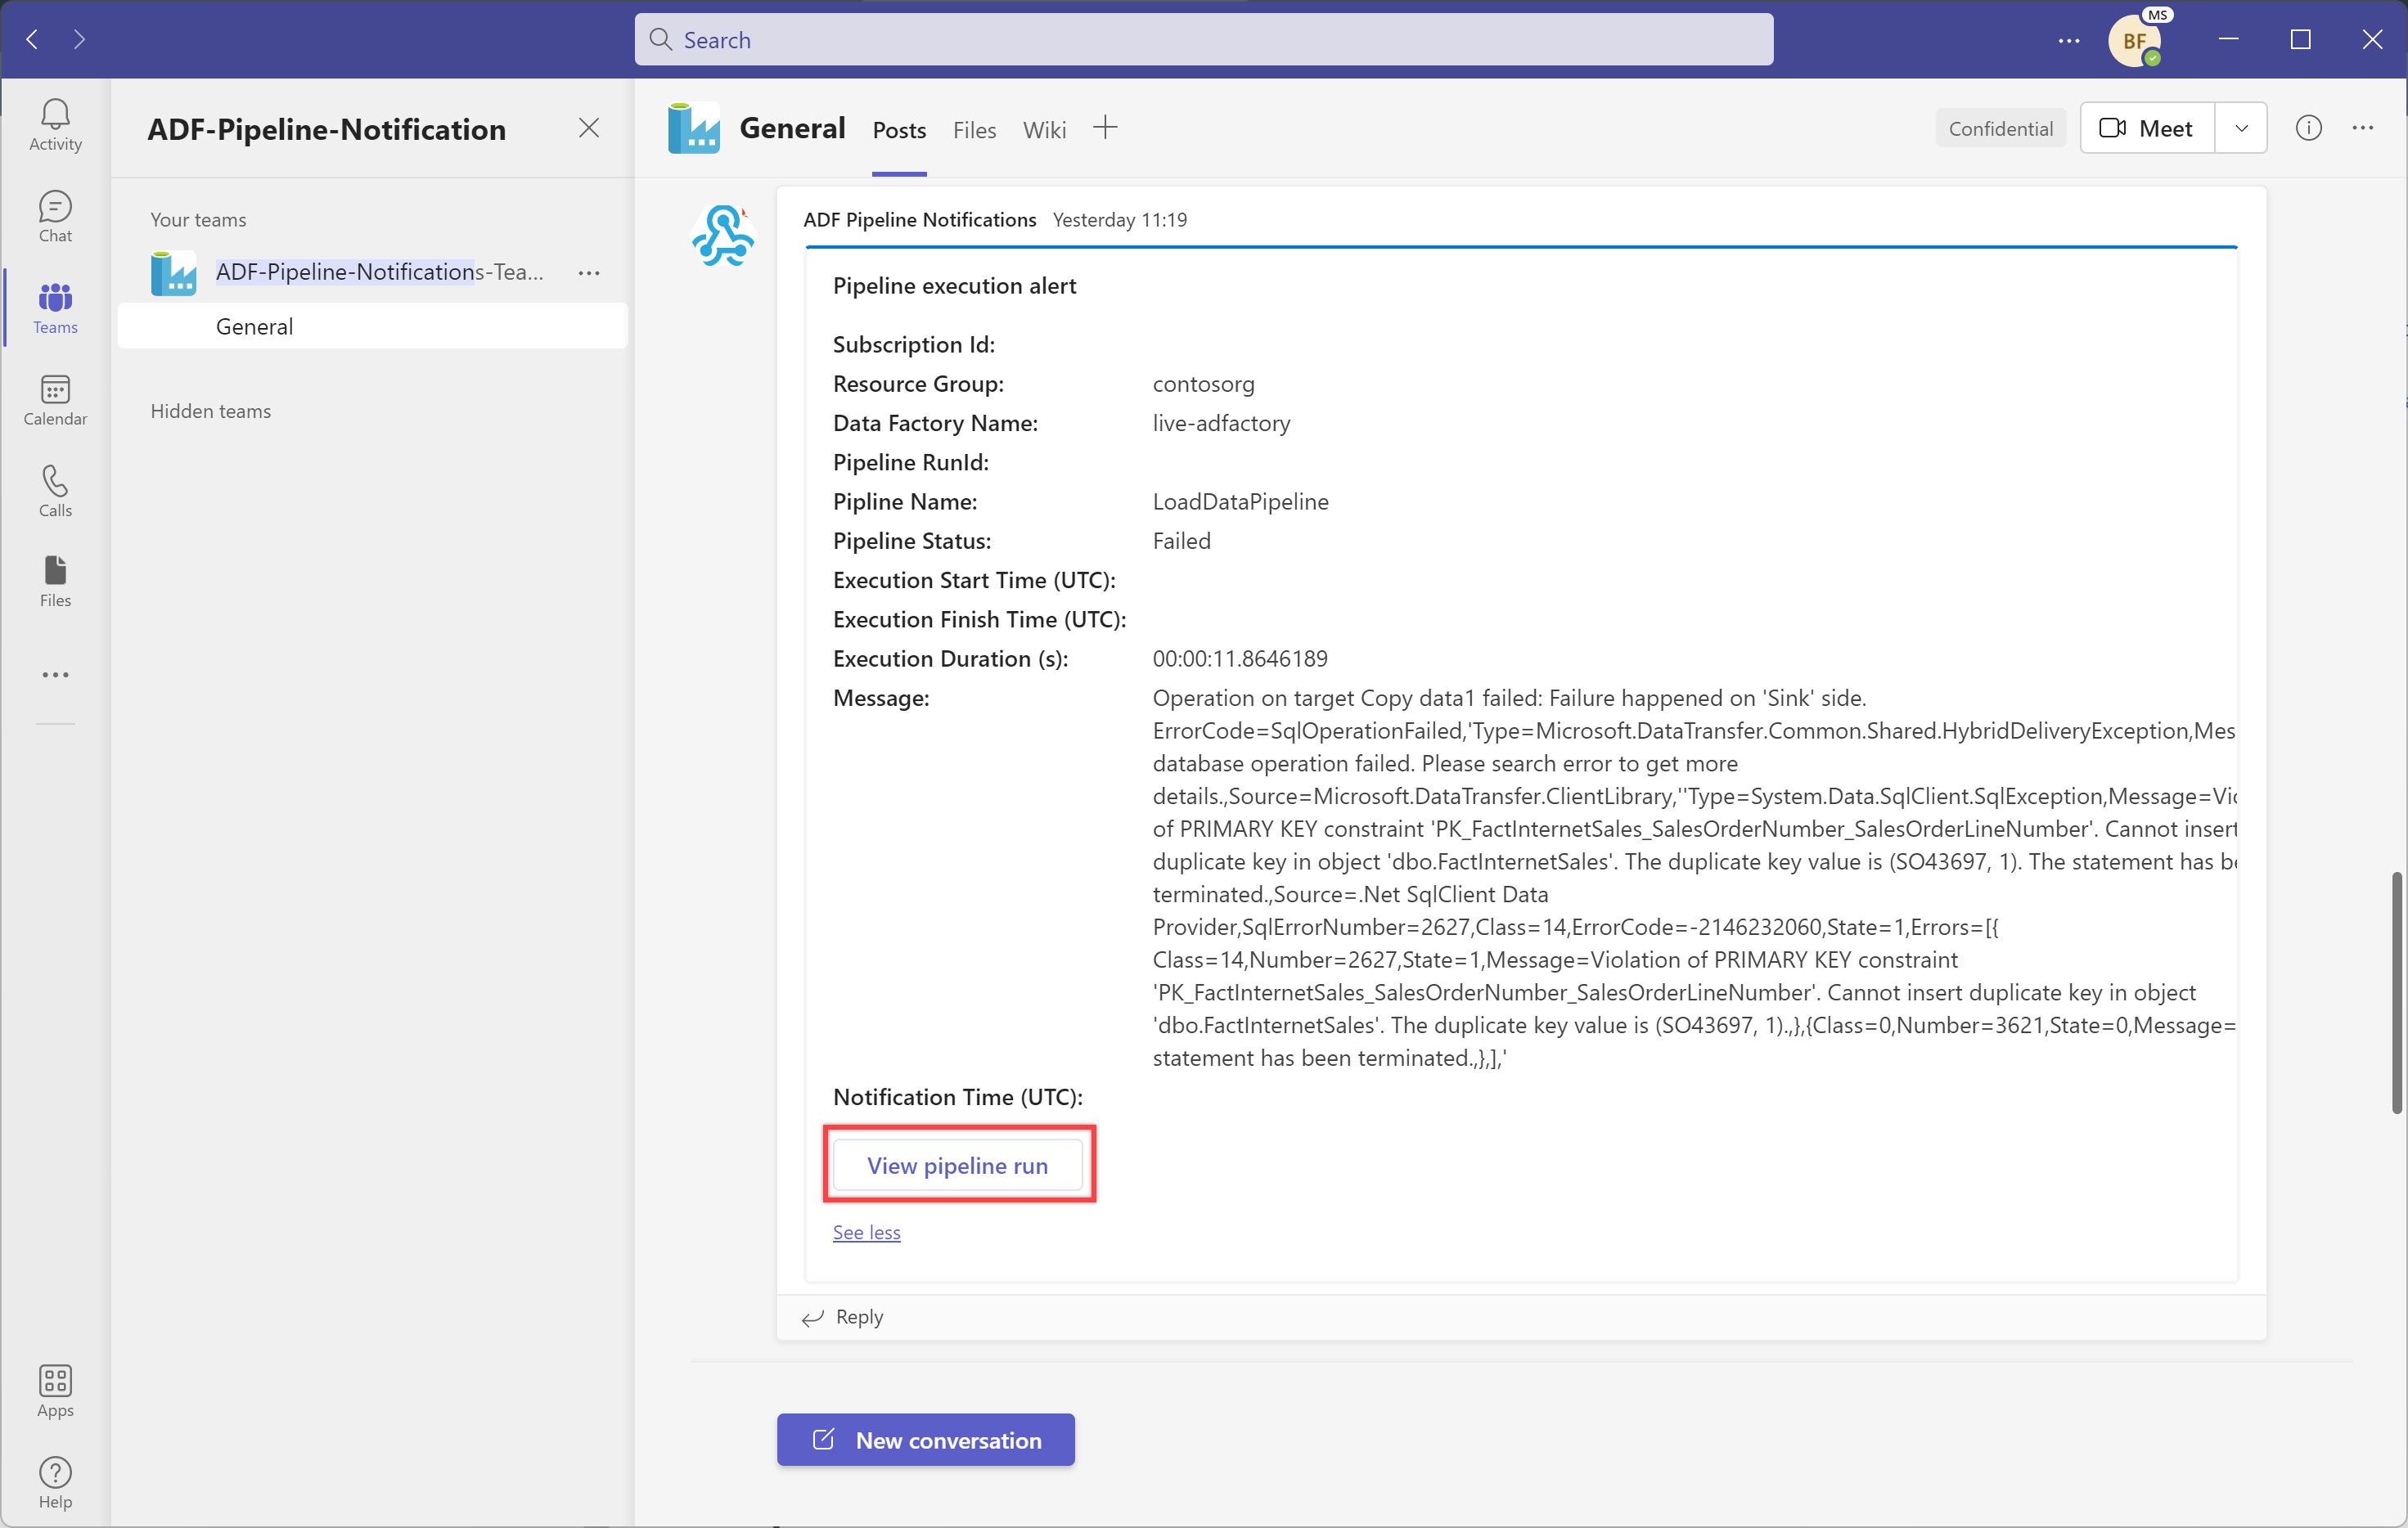
选择“查看管道运行”按钮以查看管道运行。
使用系统变量和表达式添加动态消息
@activity("CopyData").output.errors[0].Message@activity("DataFlow").error.Message
上述表达式将根据失败返回相关错误消息,这些错误消息可在 Teams 通道上作为通知发送出去。 有关此主题的详细信息,请参阅复制活动输出属性一文。
我们还鼓励你查看 Microsoft Teams 支持的通知有效负载架构,并根据需要进一步自定义上述模板。