本教程介绍如何使用 Azure 通知中心和必应空间数据来传送基于位置的推送通知。
在本教程中,我们将执行以下步骤:
- 设置数据源
- 设置 UWP 应用程序
- 设置后端
- 在通用 Windows 平台 (UWP) 应用中测试推送通知
先决条件
- Azure 订阅。 如果没有 Azure 订阅,请在开始前创建试用版 Azure 订阅。
- Visual Studio 2015 Update 1 或更高版本 (Community Edition)。
- 最新版本的 Azure SDK。
- 必应地图开发人员中心帐户(你可以免费创建一个帐户并将此帐户与 Azure 帐户相关联)。
设置数据源
登录到必应地图开发人员中心。
在顶部导航栏中选择“数据源”,然后选择“管理数据源”。

如果你没有数据源,会看到用于创建数据源的链接。 选择“将数据作为数据源上传”。 也可以使用“数据源”>“上传数据”菜单。
在硬盘驱动器上创建包含以下内容的文件
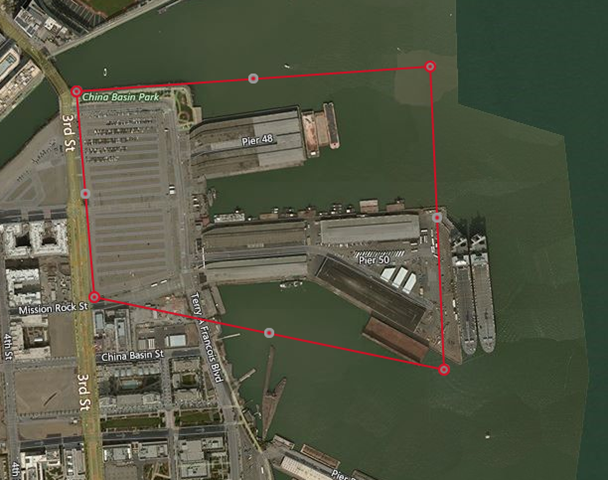
NotificationHubsGeofence.pipe:本教程使用基于管道的示例文件框住旧金山海滨区域:Bing Spatial Data Services, 1.0, TestBoundaries EntityID(Edm.String,primaryKey)|Name(Edm.String)|Longitude(Edm.Double)|Latitude(Edm.Double)|Boundary(Edm.Geography) 1|SanFranciscoPier|||POLYGON ((-122.389825 37.776598,-122.389438 37.773087,-122.381885 37.771849,-122.382186 37.777022,-122.389825 37.776598))管道文件表示以下实体:
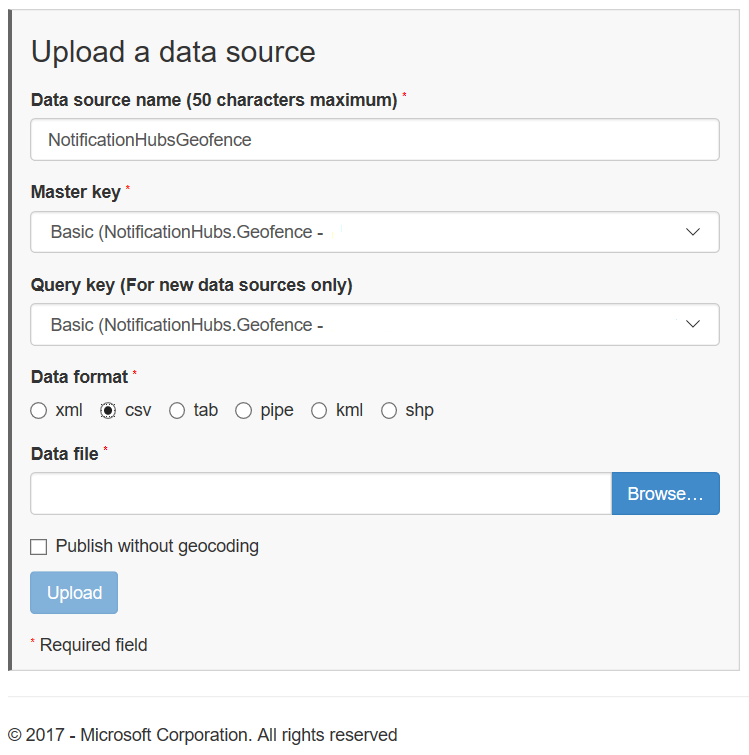
在“上传数据源”页中执行以下操作:
为“数据格式”选择“管道”。
浏览到在上一步骤中创建的
NotificationHubGeofence.pipe文件并将其选中。选择“上传”按钮。
注意
系统可能会提示为“主密钥”指定不同于“查询密钥”的新密钥。 只需通过仪表板创建新密钥,并刷新数据源上载页。
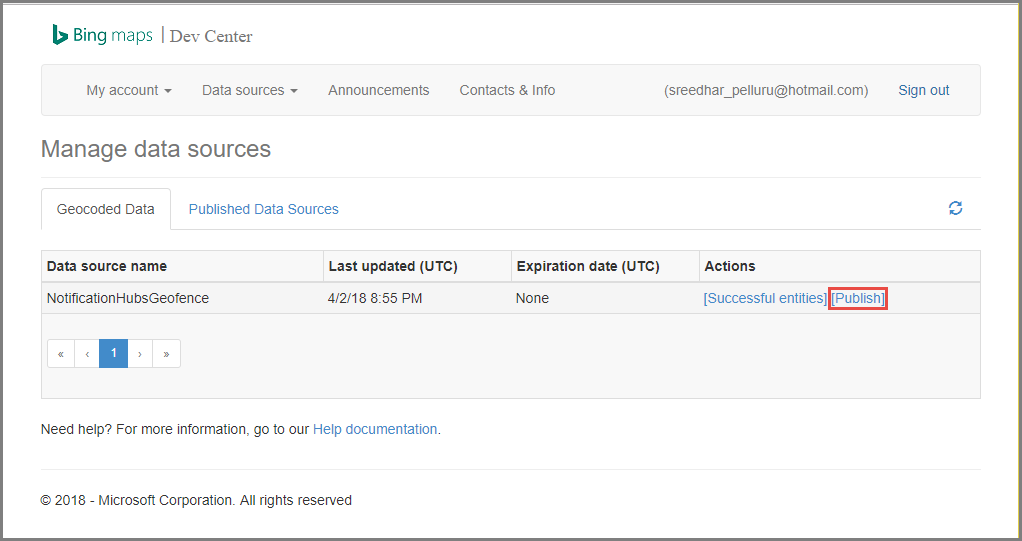
上传数据文件后,需确保发布数据源。 像前面一样,选择“数据源”->“管理数据源”。
在列表中选择自己的数据源,然后在“操作”列中选择“发布”。
切换到“发布数据源”选项卡,确认列表中显示了该数据源。
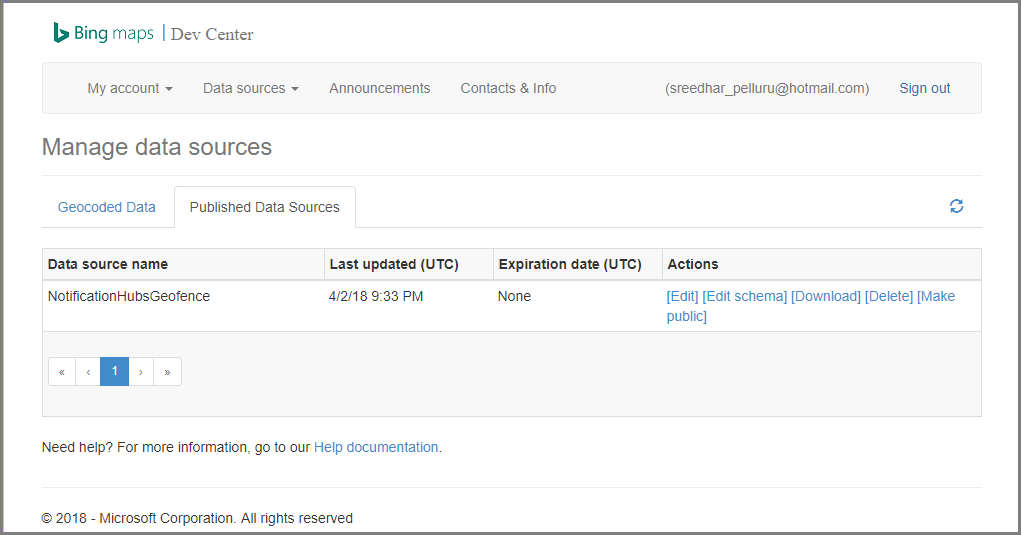
选择“编辑”。 随后会看到数据中引入的位置(概览)。
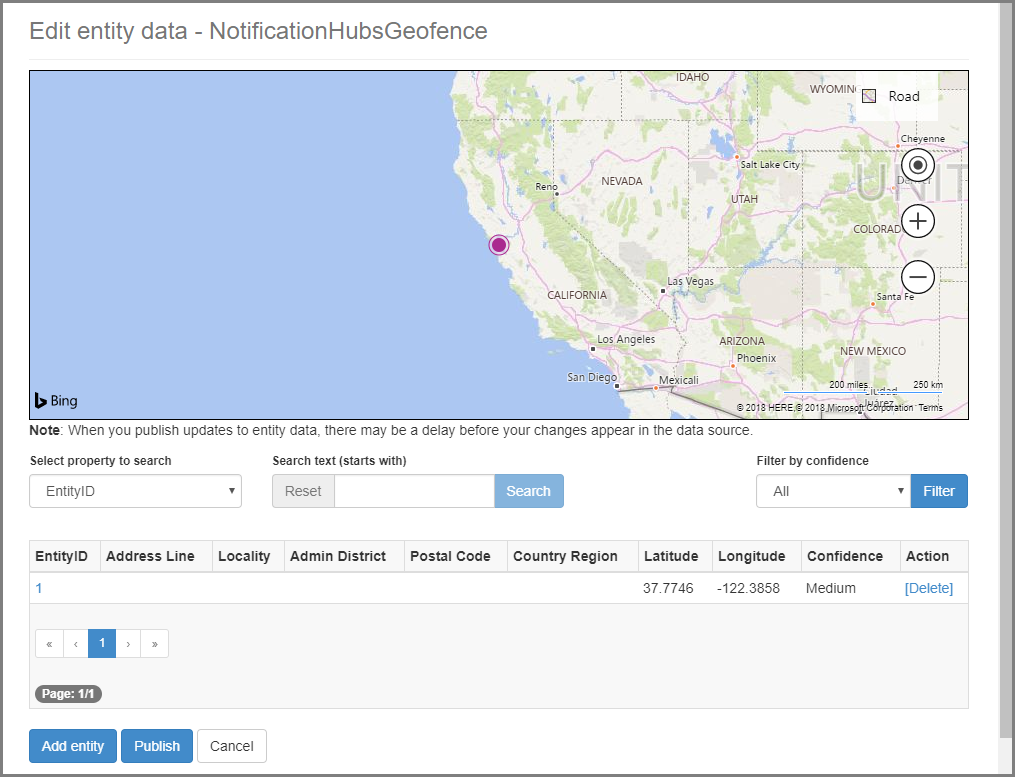
此时,门户并未显示所创建的地理围栏的边界 - 你只需确认指定的位置位于适当的邻近范围内。
现在已满足数据源的所有要求。 要获取有关 API 调用的请求 URL 的详细信息,请在必应地图开发人员中心内依次选择“数据源”、“数据源信息”。
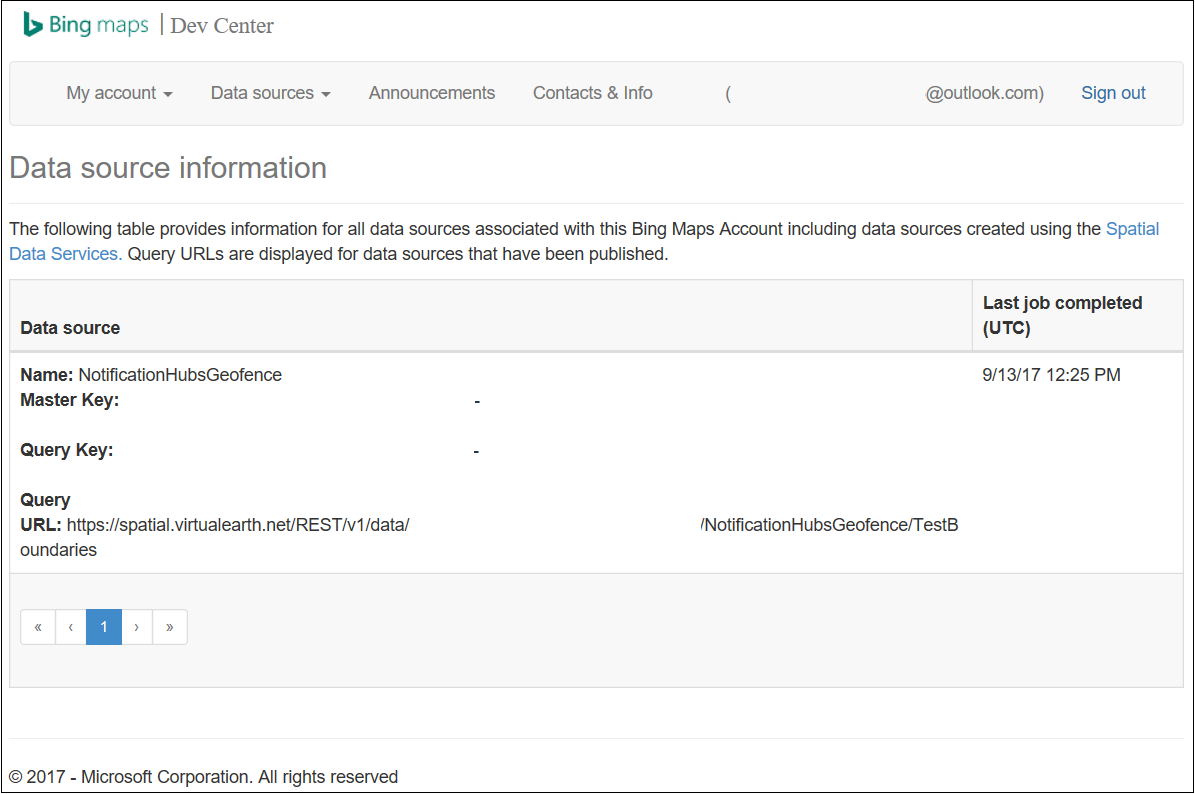
“查询 URL”是可对其执行查询的终结点,用于检查设备目前是否在某个位置的边界内。 若要执行此检查,只需针对查询 URL 执行 GET 调用并追加以下参数:
?spatialFilter=intersects(%27POINT%20LONGITUDE%20LATITUDE)%27)&$format=json&key=QUERY_KEY必应地图自动执行计算,以确定设备是否位于地域隔离区内。 通过浏览器(或 cURL)执行请求后,将收到标准 JSON 响应:
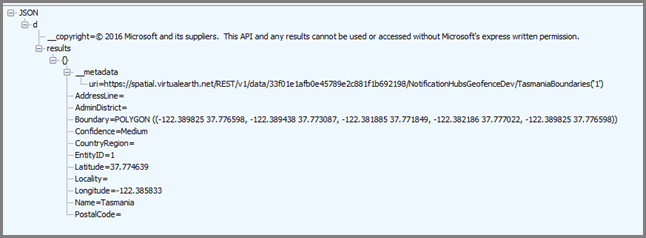
仅当位置点确实位于指定边界内时,才出现此响应。 如果不在边界内,将收到空白的 results 桶:

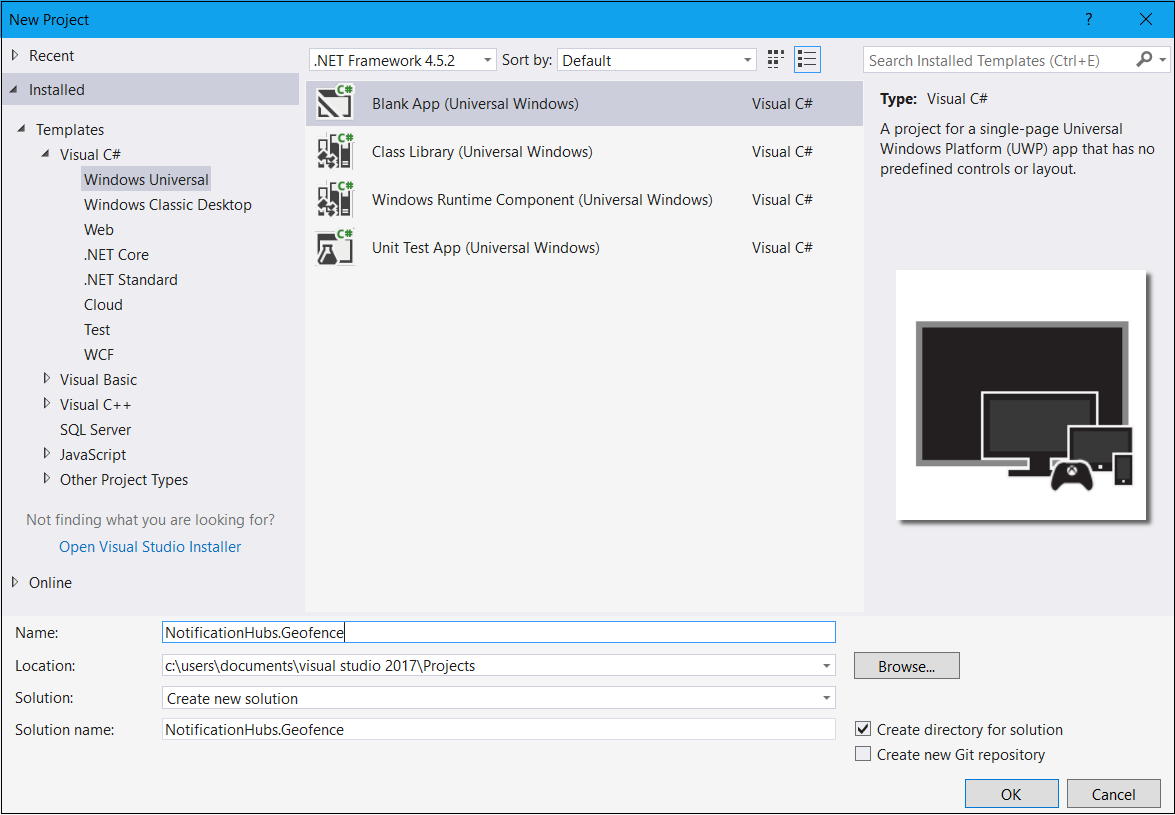
设置 UWP 应用程序
在 Visual Studio 中,启动“空白应用(通用 Windows)”类型的新项目。
完成创建项目之后,应该可以控制应用本身。 现在让我们完成地域隔离基础结构所需的各项设置。 由于我们要使用必应服务来运行此解决方案,因此可以使用公共 REST API 终结点来查询特定的位置框架:
http://spatial.virtualearth.net/REST/v1/data/指定以下参数,使终结点正常工作:
数据源 ID 和数据源名称 – 在必应地图 API 中,数据源包含各种分门别类的元数据,例如营业地点和营业时间。
实体名称 - 要用作通知引用点的实体。
必应地图 API 密钥 - 前面在创建必应开发人员中心帐户时获取的密钥。
现在我们已准备好数据源,接下来可以开始操作 UWP 应用程序。
启用应用程序的位置服务。 在“解决方案资源管理器”中打开
Package.appxmanifest文件。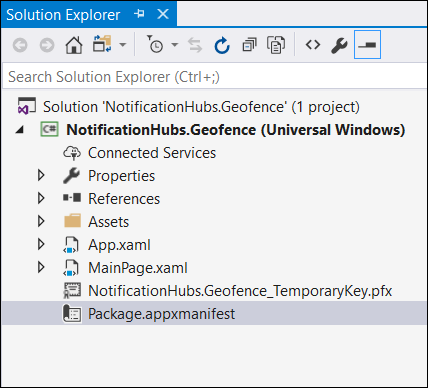
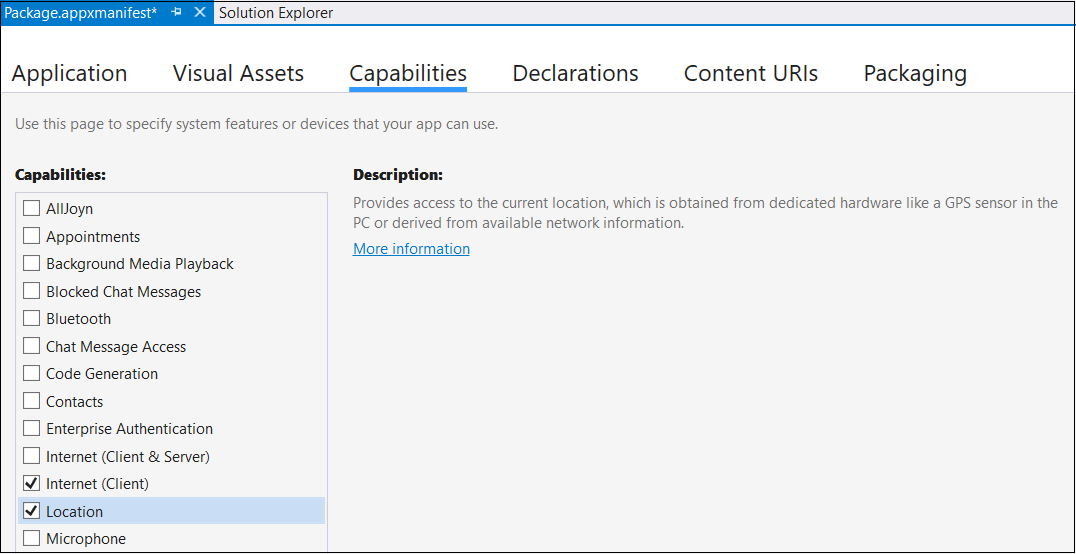
在刚刚打开的“包属性”选项卡中切换到“功能”选项卡,然后选择“位置”。
在解决方案中创建名为
Core的新文件夹,并在其中添加名为LocationHelper.cs的新文件: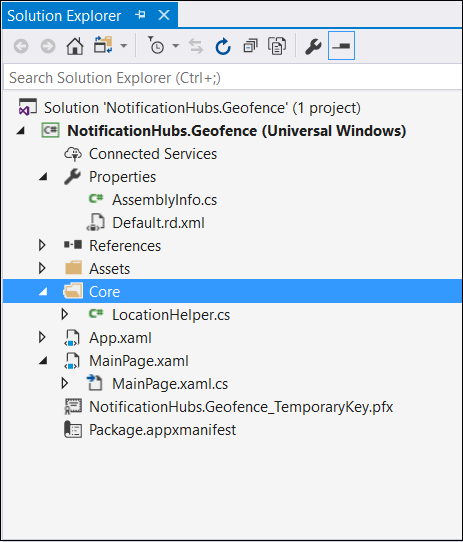
LocationHelper类包含用于通过系统 API 获取用户位置的代码:using System; using System.Threading.Tasks; using Windows.Devices.Geolocation; namespace NotificationHubs.Geofence.Core { public class LocationHelper { private static readonly uint AppDesiredAccuracyInMeters = 10; public async static Task<Geoposition> GetCurrentLocation() { var accessStatus = await Geolocator.RequestAccessAsync(); switch (accessStatus) { case GeolocationAccessStatus.Allowed: { Geolocator geolocator = new Geolocator { DesiredAccuracyInMeters = AppDesiredAccuracyInMeters }; return await geolocator.GetGeopositionAsync(); } default: { return null; } } } } }要详细了解如何在 UWP 应用中获取用户的位置,请参阅获取用户的位置。
若要检查是否确实能够获取位置,请打开主页的代码端 (
MainPage.xaml.cs)。 在Loaded构造函数中为MainPage事件创建新的事件处理程序。public MainPage() { this.InitializeComponent(); this.Loaded += MainPage_Loaded; }该事件处理程序的实现如下:
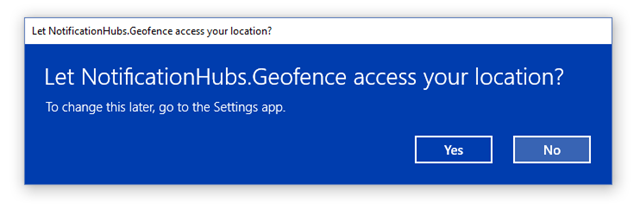
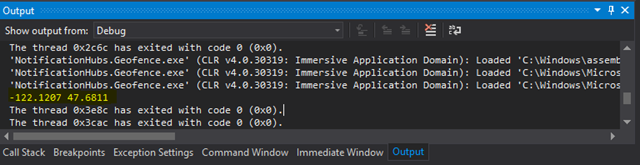
private async void MainPage_Loaded(object sender, RoutedEventArgs e)
{
    var location = await LocationHelper.GetCurrentLocation();

    if (location != null)
    {
        Debug.WriteLine(string.Concat(location.Coordinate.Longitude,
            " ", location.Coordinate.Latitude));
    }
}
运行应用程序,并允许它访问你的位置。
启动应用程序后,应该可以在“输出”窗口中看到坐标:
现在你已知道能够获取位置,如果你愿意,可以删除 Loaded 事件处理程序,因为你将不再使用它。
下一步是捕获位置更改。 在
LocationHelper类中,添加PositionChanged的事件处理程序:geolocator.PositionChanged += Geolocator_PositionChanged;实现会在“输出”窗口中显示位置坐标:
private static async void Geolocator_PositionChanged(Geolocator sender, PositionChangedEventArgs args)
{
    await CoreApplication.MainView.CoreWindow.Dispatcher.RunAsync(CoreDispatcherPriority.Normal, () =>
    {
        Debug.WriteLine(string.Concat(args.Position.Coordinate.Longitude, " ", args.Position.Coordinate.Latitude));
    });
}
设置后端
下载完成后,打开
NotifyUsers文件夹,然后在 Visual Studio 中打开NotifyUsers.sln文件。将
AppBackend项目设置为“启始项目”并将它启动。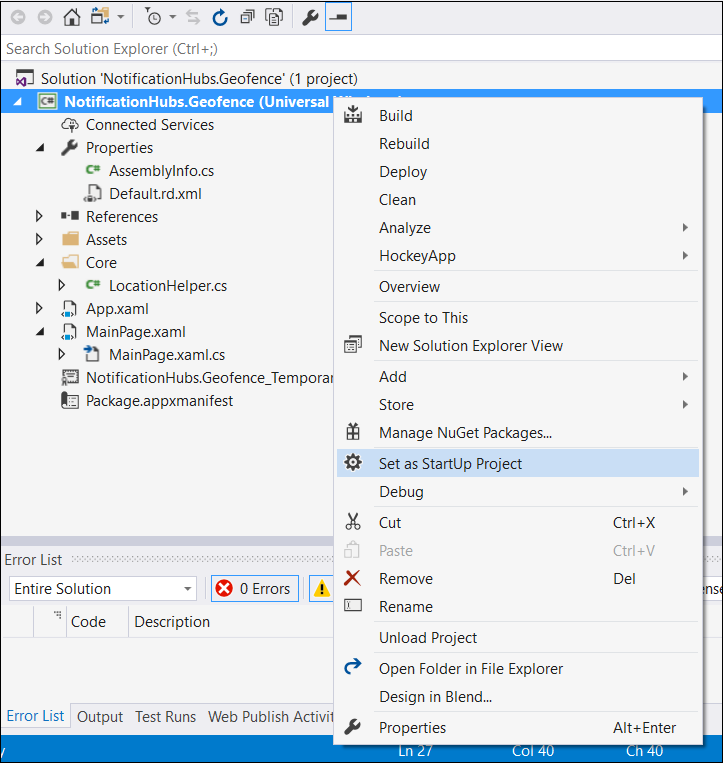
项目已配置为将推送通知发送到目标设备,因此你只需做两件事 - 指定通知中心的适当连接字符串并添加边界标识,仅当用户位于地理围栏内时才发送通知。
若要配置连接字符串,请打开
Models文件夹中的Notifications.cs。NotificationHubClient.CreateClientFromConnectionString函数应该包含可在 Azure 门户中获取的通知中心的相关信息(查看“设置”中的“访问策略”页)。 保存更新的配置文件。为必应地图 API 结果创建模型。 执行此操作的最简单方法是打开
Models文件夹,并选择“添加”>“类”。 将它命名为GeofenceBoundary.cs。 完成后,从第一部分获取的 API 响应中复制 JSON。 在 Visual Studio 中使用“编辑”>“选择性粘贴”>“将 JSON 粘贴为类”。这样,就能确保对象完全按预期反序列化。 生成的类集应类似于以下类:
namespace AppBackend.Models
{
    public class Rootobject
    {
        public D d { get; set; }
    }

    public class D
    {
        public string __copyright { get; set; }
        public Result[] results { get; set; }
    }

    public class Result
    {
        public __Metadata __metadata { get; set; }
        public string EntityID { get; set; }
        public string Name { get; set; }
        public float Longitude { get; set; }
        public float Latitude { get; set; }
        public string Boundary { get; set; }
        public string Confidence { get; set; }
        public string Locality { get; set; }
        public string AddressLine { get; set; }
        public string AdminDistrict { get; set; }
        public string CountryRegion { get; set; }
        public string PostalCode { get; set; }
    }

    public class __Metadata
    {
        public string uri { get; set; }
    }
}
接下来,打开
Controllers>NotificationsController.cs。 更新 Post 调用以考虑目标经度和纬度。 为此,只需将以下两个字符串添加到函数签名:latitude和longitude。public async Task<HttpResponseMessage> Post(string pns, [FromBody]string message, string to_tag, string latitude, string longitude)在名为
ApiHelper.cs的项目中创建一个新类 - 使用它连接到必应,以检查位置点边界的交叉点。 如以下代码中所示实现IsPointWithinBounds函数:public class ApiHelper { public static readonly string ApiEndpoint = "{YOUR_QUERY_ENDPOINT}?spatialFilter=intersects(%27POINT%20({0}%20{1})%27)&$format=json&key={2}"; public static readonly string ApiKey = "{YOUR_API_KEY}"; public static bool IsPointWithinBounds(string longitude,string latitude) { var json = new WebClient().DownloadString(string.Format(ApiEndpoint, longitude, latitude, ApiKey)); var result = JsonConvert.DeserializeObject<Rootobject>(json); if (result.d.results != null && result.d.results.Count() > 0) { return true; } else { return false; } } }重要
请务必将 API 终结点替换为前面从必应开发人员中心获取的查询 URL(这一点同样适用于 API 密钥)。
如果查询返回了结果,则表示指定位置点位于地域隔离边界内,因此函数返回了
true。 如果未返回结果,必应将告知位置点位于查找框架外部,因此函数返回了false。在
NotificationsController.cs中的 switch 语句前面创建检查:if (ApiHelper.IsPointWithinBounds(longitude, latitude)) { switch (pns.ToLower()) { case "wns": //// Windows 8.1 / Windows Phone 8.1 var toast = @"<toast><visual><binding template=""ToastText01""><text id=""1"">" + "From " + user + ": " + message + "</text></binding></visual></toast>"; outcome = await Notifications.Instance.Hub.SendWindowsNativeNotificationAsync(toast, userTag); // Windows 10 specific Action Center support toast = @"<toast><visual><binding template=""ToastGeneric""><text id=""1"">" + "From " + user + ": " + message + "</text></binding></visual></toast>"; outcome = await Notifications.Instance.Hub.SendWindowsNativeNotificationAsync(toast, userTag); break; } }
在 UWP 应用中测试推送通知
在 UWP 应用中,现在应该可以测试通知。 在
LocationHelper类中创建一个新函数 -SendLocationToBackend:public static async Task SendLocationToBackend(string pns, string userTag, string message, string latitude, string longitude) { var POST_URL = "http://localhost:8741/api/notifications?pns=" + pns + "&to_tag=" + userTag + "&latitude=" + latitude + "&longitude=" + longitude; using (var httpClient = new HttpClient()) { try { await httpClient.PostAsync(POST_URL, new StringContent("\"" + message + "\"", System.Text.Encoding.UTF8, "application/json")); } catch (Exception ex) { Debug.WriteLine(ex.Message); } } }注意
将
POST_URL设置为已部署的 Web 应用程序的位置。 现在,可以在本地运行该应用,但是在部署公共版本时,需要使用外部提供程序托管它。为推送通知注册 UWP 应用。 在 Visual Studio 中,选择“项目”>“应用商店”>“将应用与应用商店关联”。
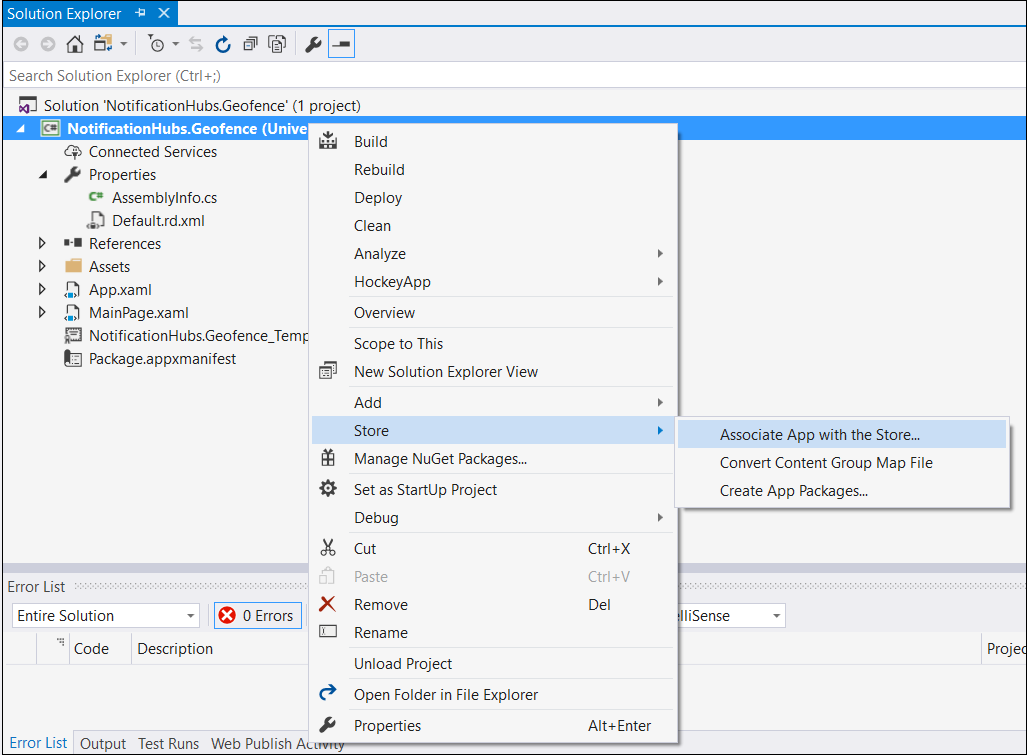
登录到开发人员帐户后,请务必选择现有应用或创建新应用,并让包与它相关联。
转到开发人员中心,打开创建的应用。 选择“服务”“推送通知”>“Live 服务站点”。
记下站点上的“应用程序密钥”和“包 SID”。 在 Azure 门户中需要用到这两项信息 - 打开通知中心,选择“设置”>“Notification Services”>“Windows (WNS)”,并在必填字段中输入信息。
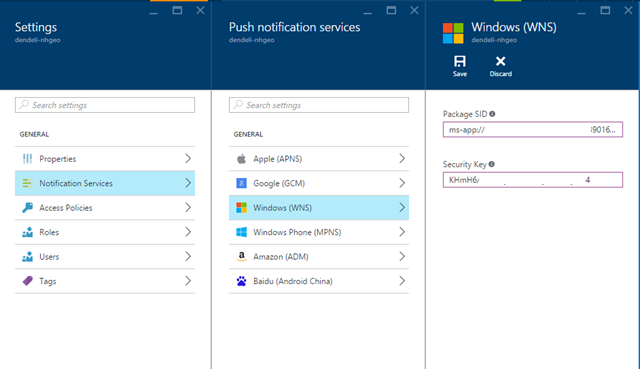
选择“保存”。
在“解决方案资源管理器”中打开“引用”,并选择“管理 NuGet 包”。 添加对 Azure 服务总线托管库的引用 - 只需搜索
WindowsAzure.Messaging.Managed并将它添加到项目即可。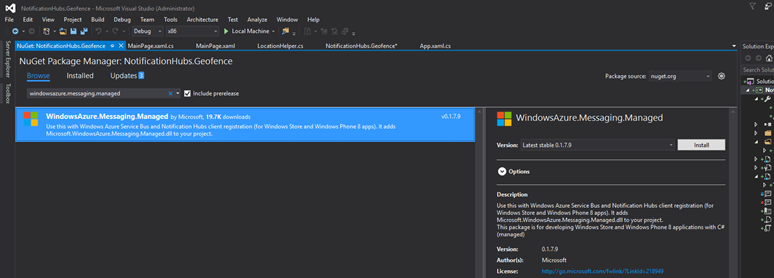
为了进行测试,可以再次创建
MainPage_Loaded事件处理程序,并在其中添加以下代码片段:var channel = await PushNotificationChannelManager.CreatePushNotificationChannelForApplicationAsync(); var hub = new NotificationHub("HUB_NAME", "HUB_LISTEN_CONNECTION_STRING"); var result = await hub.RegisterNativeAsync(channel.Uri); // Displays the registration ID so you know it was successful if (result.RegistrationId != null) { Debug.WriteLine("Reg successful."); }该代码会将应用注册到通知中心。 一切准备就绪!
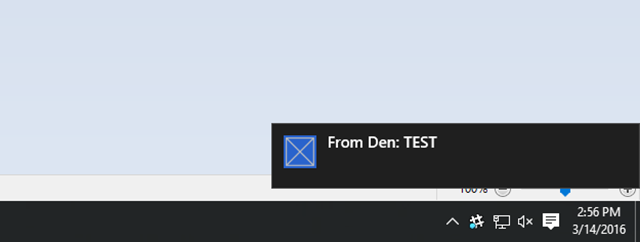
在
LocationHelper的Geolocator_PositionChanged处理程序中,可以添加一段测试代码以强制将位置放入地域隔离区:await LocationHelper.SendLocationToBackend("wns", "TEST_USER", "TEST", "37.7746", "-122.3858");由于我们未传递实际坐标(目前这可能不在边界内),并且使用的是预定义测试值,因此更新时会看到显示的通知:
后续步骤
可能还需要执行几个步骤才能使解决方案可用于生产。
- 首先,需要确保地域隔离区是动态的。 需要对必应 API 进行一些额外的处理,才能在现有数据源内上传新边界。 有关详细信息,请参阅必应空间数据服务 API 文档。
- 其次,由于要确保向正确的参与者执行传送,因此可以通过 标记锁定这些人。
本教程中所示的解决方案描述了一种场景,其中可能有各种不同的目标平台,因此未限制只有系统特定的功能才能使用地域隔离。 也就是说,通用 Windows 平台可以提供现成的 地域隔离区检测功能。