适用于: ✔️ Linux VM ✔️ Windows VM
Azure 虚拟机会通过升级到受信任启动安全类型,支持在现有Azure 第 2 代虚拟机上启用受信任启动。
受信任的启动是一种在 Azure 第 2 代 VM 上启用基础计算安全性的方法并防止启动工具包和 rootkit 等高级和持久性攻击技术。 它通过将安全启动、虚拟受信任的平台模块 (vTPM) 和 VM 上的启动完整性监视等基础结构技术结合在一起来实现这一点。
先决条件
Azure 虚拟机配置了:
最佳做法
- 在第 2 代的测试 VM 上启用受信任启动,并确定是否需要进行任何更改以满足先决条件,然后再在与生产工作负载相关联的第 2 代 VM 上启用受信任启动。
-
创建还原点,以便在启用受信任的启动安全类型之前为与生产工作负荷关联的 Azure第 2 代 VM 创建还原点。 可以使用还原点以之前的已知状态重新创建磁盘和第 2 代 VM。
-
对于 Linux VM,请使用
SBInfo 工具验证安全启动兼容性。 有关基于发行版的安装命令,请参阅 Linux 受信任的启动安全启动验证。
在现有 VM 上启用受信任启动
使用支持受信任启动的映像时,以下步骤适用于 x64 和 Arm64 架构的第 2 代 VM。
注意
- 这些步骤同样适用于 x64 和 Arm64 Gen2 VM。
- 默认情况下 vTPM 处于启用状态。
- 默认情况下未启用安全启动。 强烈建议在不使用自定义未签名内核或驱动程序的情况下启用安全启动。 安全启动可保留启动完整性,并为 VM 实现基础安全性。
使用 Azure 门户在现有的 Azure 第 2 代 VM 上启用可信启动。
登录到 Azure portal。
确认 VM 代系为 V2,并为 VM 选择“停止”。
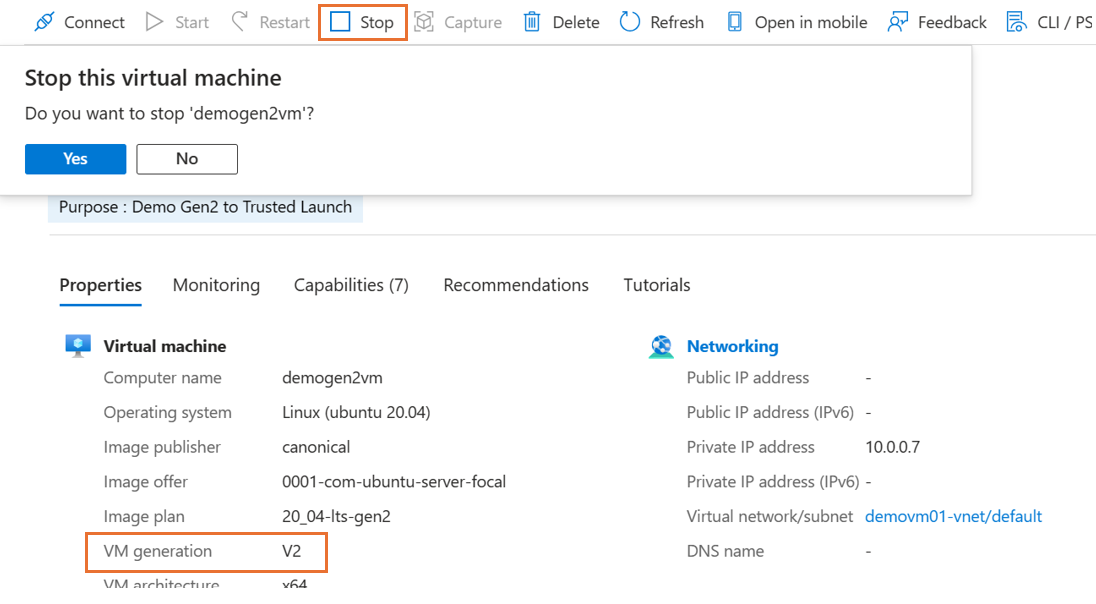
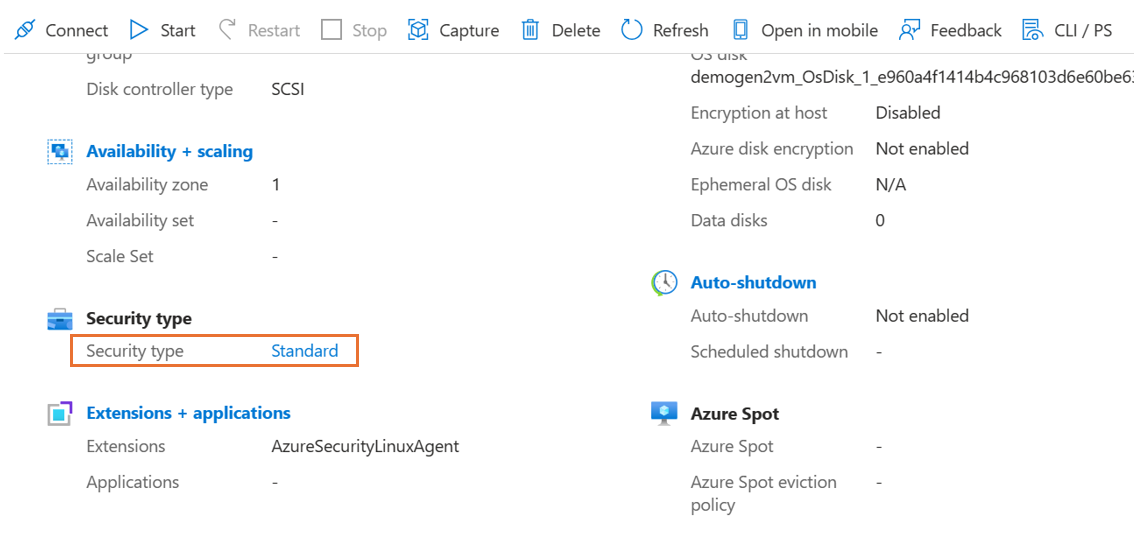
在 VM 属性中“概述”页上的“安全类型”下,选择“标准”。 VM 的“配置”页随即打开。
在“配置”页上的“安全类型”部分下,选择“安全类型”下拉列表。
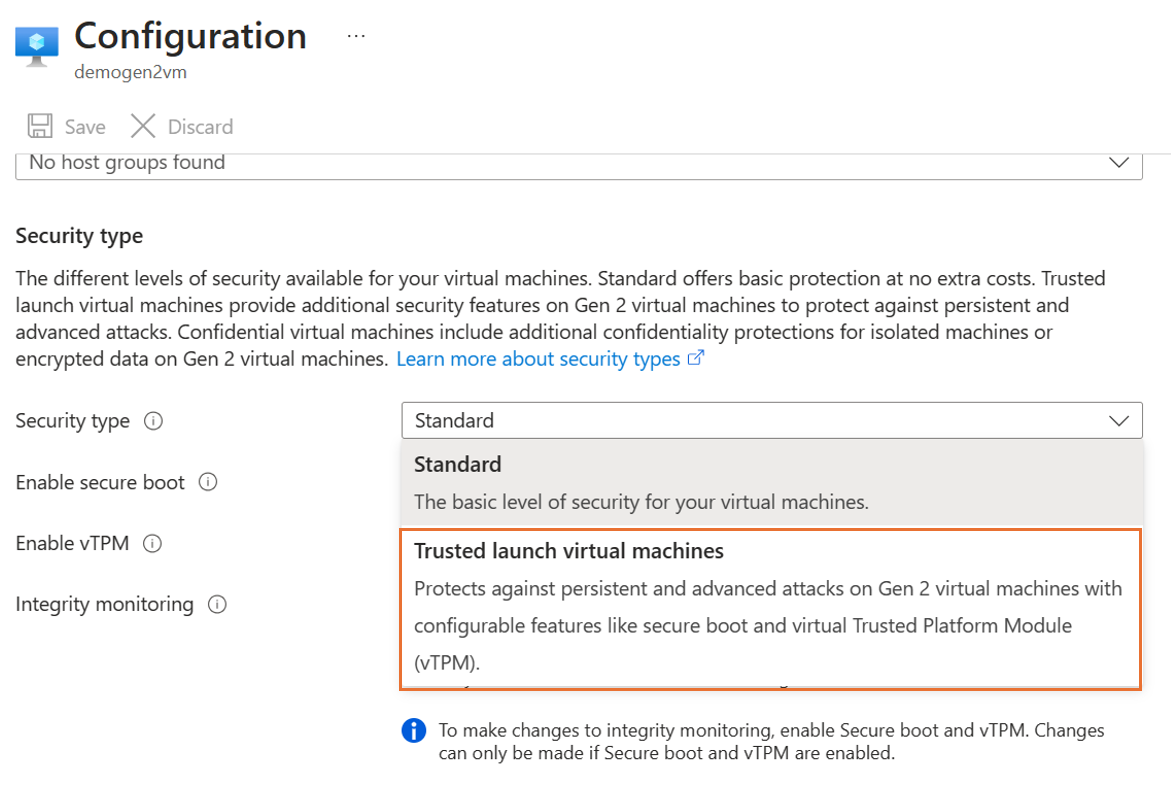
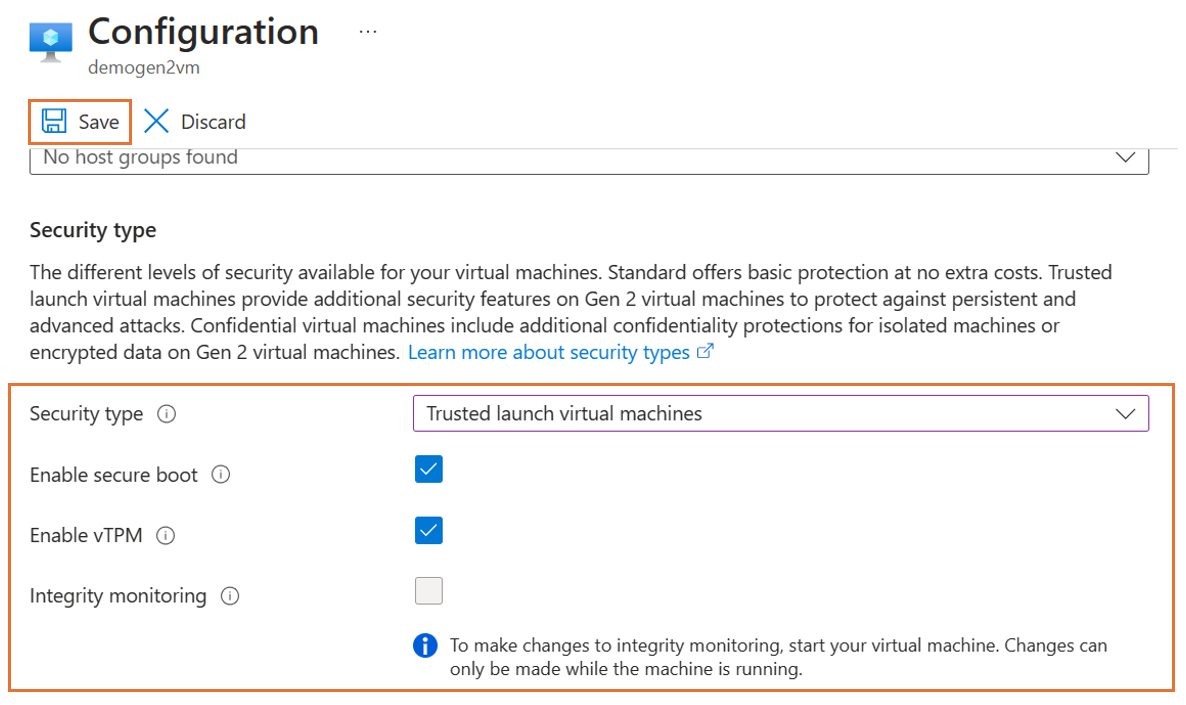
在下拉列表中选择受信任启动。 选中相应复选框以启用“安全启动”和“vTPM”。 完成更改后,选择“保存”。
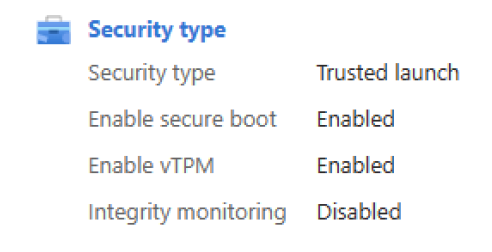
更新成功完成后,关闭“配置”页。 在 VM 属性中的“概述”页上确认“安全类型”设置。

启动已升级的 Trusted launch VM。 使用适用于 Windows VM 的 远程桌面 协议(RDP)或 Linux VM 的安全外壳协议(SSH)来验证是否可以登录到 VM。
按照步骤使用 Azure CLI 在现有 Azure 第 2 代 VM 上启用受信任的启动。
请确保安装最新的 Azure CLI,并使用 az login1 登录到 Azure 帐户。
登录到 VM Azure订阅。
az cloud set -n AzureChinaCloud
az login

az account set --subscription 00000000-0000-0000-0000-000000000000
解除分配 VM。
az vm deallocate \
   --resource-group myResourceGroup --name myVm
通过将 --security-type 设置为 TrustedLaunch 启用受信任启动。
az vm update \
    --resource-group myResourceGroup --name myVm \
    --security-type TrustedLaunch \
    --enable-secure-boot true --enable-vtpm true
验证上一个命令的输出。 确保 securityProfile 配置随命令输出返回。
{
  "securityProfile": {
    "securityType": "TrustedLaunch",
    "uefiSettings": {
      "secureBootEnabled": true,
      "vTpmEnabled": true
    }
  }
}
启动 VM。
az vm start \
    --resource-group myResourceGroup --name myVm
启动已升级的 Trusted launch VM。 验证是否可以使用 RDP(对于 Windows VM)或 SSH(对于 Linux VM)登录到 VM。
按照步骤使用 Azure PowerShell 在现有 Azure 第 2 代 VM 上启用受信任的启动。
请确保安装最新的 Azure PowerShell,并使用 Connect-AzAccount1 登录到 Azure 帐户。
登录到 VM Azure订阅。
Connect-AzAccount -Environment AzureChinaCloud -SubscriptionId 00000000-0000-0000-0000-000000000000
解除分配 VM。
Stop-AzVM -ResourceGroupName myResourceGroup -Name myVm
通过将 -SecurityType 设置为 TrustedLaunch 启用受信任启动。
Get-AzVM -ResourceGroupName myResourceGroup -VMName myVm `
    | Update-AzVM -SecurityType TrustedLaunch `
        -EnableSecureBoot $true -EnableVtpm $true
在更新的 VM 配置中验证 securityProfile。
# Following command output should be `TrustedLaunch`

(Get-AzVM -ResourceGroupName myResourceGroup -VMName myVm `
    | Select-Object -Property SecurityProfile `
        -ExpandProperty SecurityProfile).SecurityProfile.SecurityType

# Following command output should return `SecureBoot` and `vTPM` settings
(Get-AzVM -ResourceGroupName myResourceGroup -VMName myVm `
    | Select-Object -Property SecurityProfile `
        -ExpandProperty SecurityProfile).SecurityProfile.Uefisettings
启动 VM。
Start-AzVM -ResourceGroupName myResourceGroup -Name myVm
启动已升级的 Trusted launch VM。 验证是否可以使用 RDP(对于 Windows VM)或 SSH(对于 Linux VM)登录到 VM。
按照步骤使用 ARM 模板在现有 Azure 第 2 代 VM 上启用受信任的启动。
Azure 资源管理器 模板是一个 JavaScript 对象表示法(JSON)文件,用于定义project的基础结构和配置。 模板使用声明性语法。 你可以在不编写用于创建部署的编程命令序列的情况下,描述预期部署。
查看模板。
{
    "$schema": "https://schema.management.azure.com/schemas/2019-04-01/deploymentTemplate.json#",
    "contentVersion": "1.0.0.0",
    "parameters": {
        "vmsToUpgrade": {
            "type": "object",
            "metadata": {
                "description": "Specifies the list of Azure virtual machines to be upgraded to Trusted launch."
            }
        },
        "vTpmEnabled": {
            "type": "bool",
            "defaultValue": true,
            "metadata": {
                "description": "Specifies whether vTPM should be enabled on the virtual machine."
            }
        }
    },
    "resources": [
        {
            "type": "Microsoft.Compute/virtualMachines",
            "apiVersion": "2022-11-01",
            "name": "[parameters('vmsToUpgrade').virtualMachines[copyIndex()].vmName]",
            "location": "[parameters('vmsToUpgrade').virtualMachines[copyIndex()].location]",
            "properties": {
                "securityProfile": {
                    "uefiSettings": {
                        "secureBootEnabled": "[parameters('vmsToUpgrade').virtualMachines[copyIndex()].secureBootEnabled]",
                        "vTpmEnabled": "[parameters('vTpmEnabled')]"
                    },
                    "securityType": "TrustedLaunch"
                }
            },
            "copy": {
                "name": "vmCopy",
                "count": "[length(parameters('vmsToUpgrade').virtualMachines)]"
            }
        }
    ]
}
编辑 parameters JSON 文件,其中包含要更新为 TrustedLaunch 安全类型的 VM。
{
    "$schema": "https://schema.management.azure.com/schemas/2019-04-01/deploymentParameters.json#",
    "contentVersion": "1.0.0.0",
    "parameters": {
        "vmsToUpgrade": {
            "value": {
                "virtualMachines": [
                    {
                        "vmName": "myVm01",
                        "location": "chinanorth2",
                        "secureBootEnabled": true
                    },
                    {
                        "vmName": "myVm02",
                        "location": "chinanorth2",
                        "secureBootEnabled": true
                    }
                ]
            }
        }
    }
}
参数文件定义
| 属性 |
属性的描述 |
示例模板值 |
| vmName |
Azure 第 2 代 VM 的名称。 |
myVm |
| 位置 |
Azure 第 2 代 VM 的位置。 |
chinanorth2 |
| secureBootEnabled(安全启动已启用) |
使用“受信任启动”安全类型启用安全启动。 |
true |
释放所有需要更新的 Azure 第 2 代 VM。
Stop-AzVM -ResourceGroupName myResourceGroup -Name myVm01
运行 ARM 模板部署。
$resourceGroupName = "myResourceGroup"
$parameterFile = "folderPathToFile\parameters.json"
$templateFile = "folderPathToFile\template.json"

New-AzResourceGroupDeployment `
    -ResourceGroupName $resourceGroupName `
    -TemplateFile $templateFile -TemplateParameterFile $parameterFile
启动已升级的 Trusted launch VM。 验证是否可以使用 RDP(对于 Windows VM)或 SSH(对于 Linux VM)登录到 VM。
回滚
若要将“受信任的启动”中的更改回滚到以前的 Gen2 已知的良好配置,您需要将 VM 的securityType设置为“标准”。
重要
将受信任的启动回滚到 Gen2(非受信任启动)配置是一种单向操作。 回滚到 Gen2(非受信任的启动)配置后,无法在同一 VM 上重新启用受信任启动。
Azure portal目前不支持将受信任的启动回滚到 Gen2(非受信任的启动)配置。
若要将“受信任启动”中的更改回滚到以前的已知良好配置,请设置为securityProfile“标准”,如用于执行受信任启动升级的示例模板所示。
注意
使用 Microsoft.Compute API 版本 2025-11-01+ 将配置从受信任启动回退到 Gen2(非受信任启动)。
"securityProfile": {
    "securityType": "Standard",
    "uefiSettings": "[null()]"
}
按照步骤使用 Azure CLI 在现有 Azure 第 2 代 VM 上禁用受信任的启动。
请确保安装最新的 Azure CLI,并使用 az login1 登录到 Azure 帐户。
注意
使用 Azure CLI 2.86.0 或更高版本,将配置从“受信任启动”回退到 Gen2(非受信任启动)。
登录到 VM Azure订阅。
az cloud set -n AzureChinaCloud
az login

az account set --subscription 00000000-0000-0000-0000-000000000000
解除分配 VM。
az vm deallocate \
   --resource-group myResourceGroup --name myVm
通过将 --security-type 设置为 Standard,禁用受信任的启动。
az vm update \
    --resource-group myResourceGroup --name myVm \
    --security-type Standard
验证上一个命令的输出。 确保 securityProfile 配置随命令输出返回。
{
  "securityProfile": {
    "securityType": null,
    "uefiSettings": null
  }
}
启动 VM。
az vm start \
    --resource-group myResourceGroup --name myVm
若要将受信任的启动更改回滚到以前的已知良好配置,请将-SecurityType设置为Standard,如下所示。
注意
使用 Azure PowerShell 15.6.1 或更高版本,将配置从“受信任启动”回退到 Gen2(非受信任启动)。
登录到 VM Azure订阅。
Connect-AzAccount -Environment AzureChinaCloud -SubscriptionId 00000000-0000-0000-0000-000000000000
解除分配 VM。
Stop-AzVM -ResourceGroupName myResourceGroup -Name myVm
通过将 -SecurityType 设置为 Standard,禁用受信任的启动。
Get-AzVM -ResourceGroupName myResourceGroup -VMName myVm `
    | Update-AzVM -SecurityType Standard
在更新的 VM 配置中验证 securityProfile。
# Following command output should be `null`

(Get-AzVM -ResourceGroupName myVm -VMName myResourceGroup `
    | Select-Object -Property SecurityProfile `
        -ExpandProperty SecurityProfile).SecurityProfile.SecurityType
启动 VM。
Start-AzVM -ResourceGroupName myResourceGroup -Name myVm
Azure 顾问 建议
Azure 顾问 为现有的 Generation 2 虚拟机提供了一项操作建议,建议您启用具有基础卓越性和现代安全特点的 Trusted launch。这将为 Azure 虚拟机提供更高的安全状态,并且无需支付额外费用。 确保第 2 代虚拟机具备迁移到受信任启动的所有先决条件,遵循所有最佳做法,包括验证 OS 映像、VM 大小和创建还原点。 若要使 Advisor 推荐被视为已完成,请遵循在现有 VM 上启用受信任启动的步骤,以升级虚拟机的安全类型并启用受信任启动。
如果第 2 代 VM 不符合受信任启动的先决条件,该怎么办?
对于不符合升级到受信任启动的 先决条件 的第 2 代 VM,请查看如何满足先决条件。 例如,如果使用不支持的虚拟机大小,请查找支持可信启动的对等可信启动大小。
注意
如果 Gen2 虚拟机配置为当前不受受信任启动支持的 VM 大小系列(如 MSv2 系列),则忽略该建议。
相关内容