Note
Access to this page requires authorization. You can try signing in or changing directories.
Access to this page requires authorization. You can try changing directories.
APPLIES TO: All API Management tiers
This article shows how to use the Azure portal to import an Azure web app as an API into Azure API Management and test the imported API.
In this article, you learn how to:
- Import a web app, which is hosted in Azure App Service, as an API
- Test the API in the Azure portal
Expose a web app by using API Management
Azure App Service is an HTTP-based service for hosting web applications, REST APIs, and mobile backends. API developers can use their preferred technology stacks and pipelines to develop APIs and publish their API backends as web apps in a secure, scalable environment. They can then use API Management to expose the web apps, manage and protect the APIs throughout their lifecycle, and publish them to consumers.
Using API Management to expose a Web Apps-hosted API provides these benefits:
- Decouple managing and securing the front end that's exposed to API consumers from managing and monitoring the backend web app.
- Manage web APIs hosted as web apps in the same environment as your other APIs.
- Apply policies to change API behavior, such as call-rate limiting.
- Direct API consumers to the customizable API Management developer portal so they can discover and learn about your APIs, request access, and try APIs.
For more information, see What is Azure API Management?
OpenAPI definition vs. wildcard operations
API Management supports the import of web apps hosted in App Service that include an OpenAPI definition (a Swagger definition). However, an OpenAPI definition isn't required.
If the web app is configured with an OpenAPI definition, API Management detects that. Alternatively, you can manually import the definition to API Management. API Management then creates API operations that map directly to the definition, including required paths, parameters, and response types.
Having an OpenAPI definition is recommended, because the API is imported to API Management with high fidelity, giving you the flexibility to validate, manage, secure, and update configurations for each operation separately.
If an OpenAPI definition isn't provided, API Management generates wildcard operations for the common HTTP verbs (GET, PUT, and so on). Append a required path or parameters to a wildcard operation to pass an API request through to the backend API.
With wildcard operations, you can still take advantage of the same API Management features, but operations aren't defined at the same level of detail by default. In either case, you can edit or add operations to the imported API.
Example
Your backend web app might support two GET operations:
https://<app-service>.chinacloudsites.cn/customer/<id>https://<app-service>.chinacloudsites.cn/customers
You import the web app to your API Management service at a path like https://<api>.azureapi.net/store. The following table shows the operations that are imported to API Management, with or without an OpenAPI specification:
| Type | Imported operations | Sample requests |
|---|---|---|
| OpenAPI specification | GET /customer/<id>GET /customers |
GET https://<api>.azureapi.net/store/customer/1GET https://<api>.azureapi.net/store/customers |
| Wildcard | GET /* |
GET https://<api>.azureapi.net/store/customer/1GET https://<api>.azureapi.net/store/customers |
The wildcard operation allows the same requests to the backend service as the operations in the OpenAPI specification. However, the OpenAPI-specified operations can be managed separately in API Management.
Prerequisites
Create an Azure API Management instance.
Make sure there's an app service in your subscription. For more information, see App Service documentation.
For information about creating an example web API and publishing it as an Azure web app, see:
Import and publish a backend API
Tip
In the following steps, you start the import by using API Management in the Azure portal. You can also link to API Management directly from your web app by selecting API Management in the app's API menu.
Navigate to your API Management service in the Azure portal.
In the sidebar menu, under APIs, select APIs, and then select + Add API.
Select the App Service tile:

Select Browse to see the list of app services in your subscription.
Select an app service and then choose the Select button. If an OpenAPI definition is associated with the selected web app, API Management fetches it and imports it.
If an OpenAPI definition isn't found, API Management exposes the API by generating wildcard operations for common HTTP verbs.
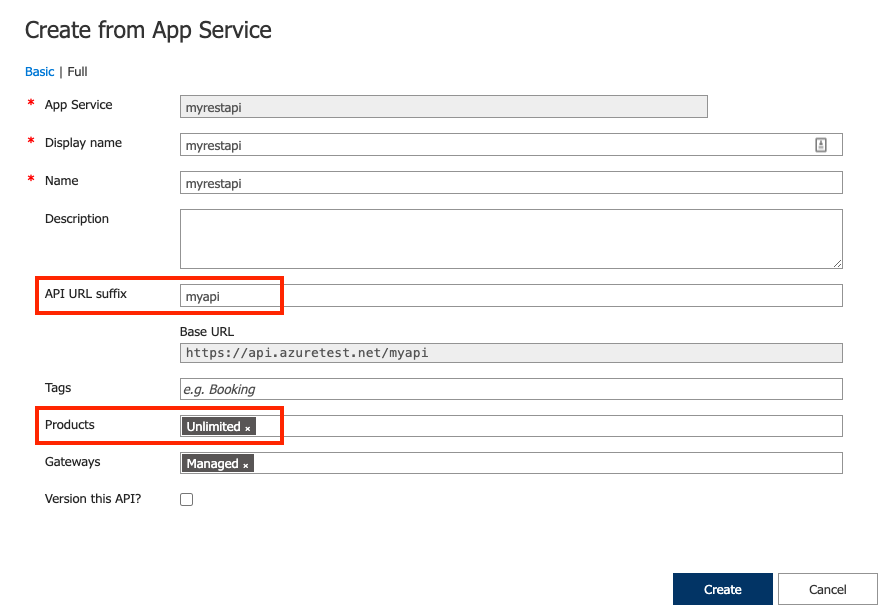
Add an API URL suffix. The suffix is a name that identifies the API in the API Management instance. It has to be unique in the API Management instance.
If you want the API to be published and available to developers, switch to the Full view, and then associate the API with a Product. This example uses the Unlimited product. You can add your API to a product when you create it or later via the Settings tab.
Note
Products are associations of one or more APIs offered to developers via the developer portal. First, developers must subscribe to a product to get access to the API. After they subscribe, they get a subscription key for any API in the product. As creator of the API Management instance, you're an administrator and are subscribed to every product by default.
In certain tiers, each API Management instance comes with two default sample products:
- Starter
- Unlimited
Enter other API settings. You can set these values when you create the API or configure them later by going to the Settings tab. The settings are explained in the Import and publish your first API tutorial.
Select Create.

Test the new API in the Azure portal
You can call operations directly from the Azure portal. This method provides a convenient way to view and test the operations of an API. You can also test the API in the developer portal or by using your own REST client tools.
Select the API you created in the previous step.
On the Test tab, select an operation.
The page displays fields for query parameters and fields for the headers. One of the headers is
Ocp-Apim-Subscription-Key. This header is for the subscription key of the product that's associated with the API. If you created the API Management instance, you're an administrator already, so the key is filled in automatically.Press Send.
When the test is successful, the backend responds with 200 OK and some data.
Test a wildcard operation in the portal
When wildcard operations are generated, the operations might not map directly to the backend API. For example, a wildcard GET operation imported in API Management uses the path / by default. However, your backend API might support a GET operation at the path /api/todoItems.
To test the path /api/todoItems:
Select the API that you created, and then select an operation.
On the Test tab, under Template parameters, update the value next to the wildcard (*) name. For example, enter api/todoItems. This value gets appended to the path
/for the wildcard operation.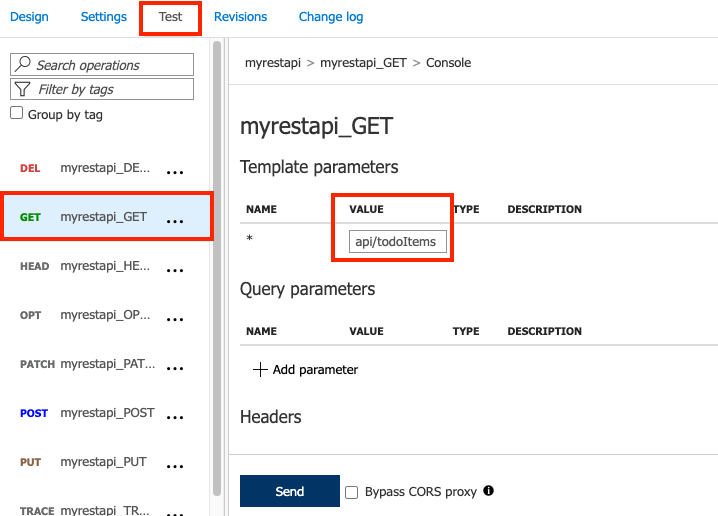
Select Send.

Append other APIs
You can compose an API out of APIs that are exposed by different services, including:
- An OpenAPI specification
- A SOAP API
- A GraphQL API
- A Web App that's hosted in Azure App Service
- Azure Functions
- Azure Logic Apps
- Azure Service Fabric
Note
When you import an API, the operations are appended to your current API.
To append an API to an existing API:
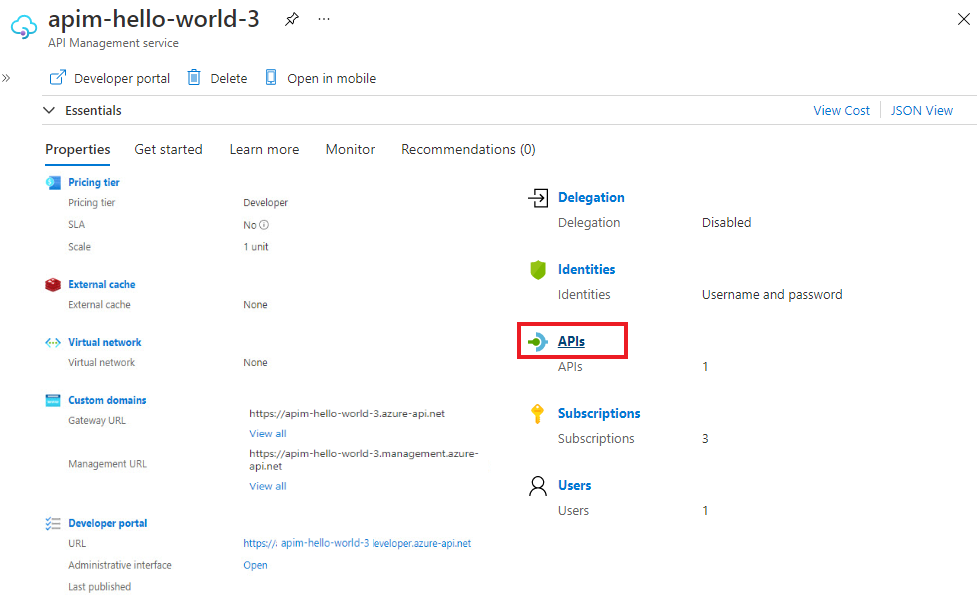
Go to your Azure API Management instance in the Azure portal:
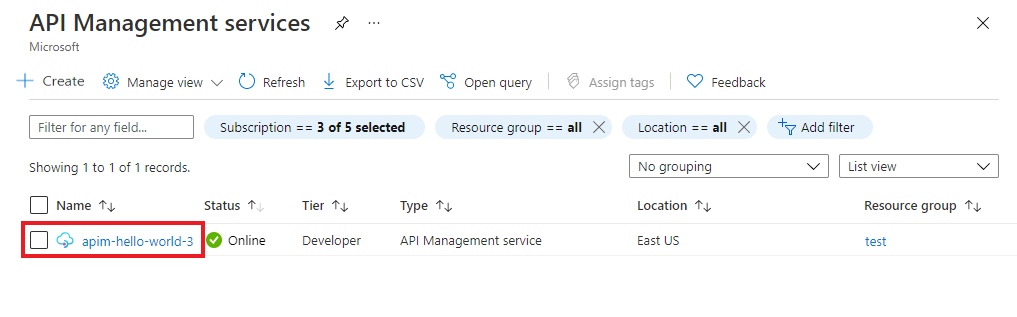
Select APIs on the Overview page or select APIs > APIs in the menu on the left.
Select the ellipsis (...) next to the API that you want to append another API to.
Select Import from the drop-down menu:
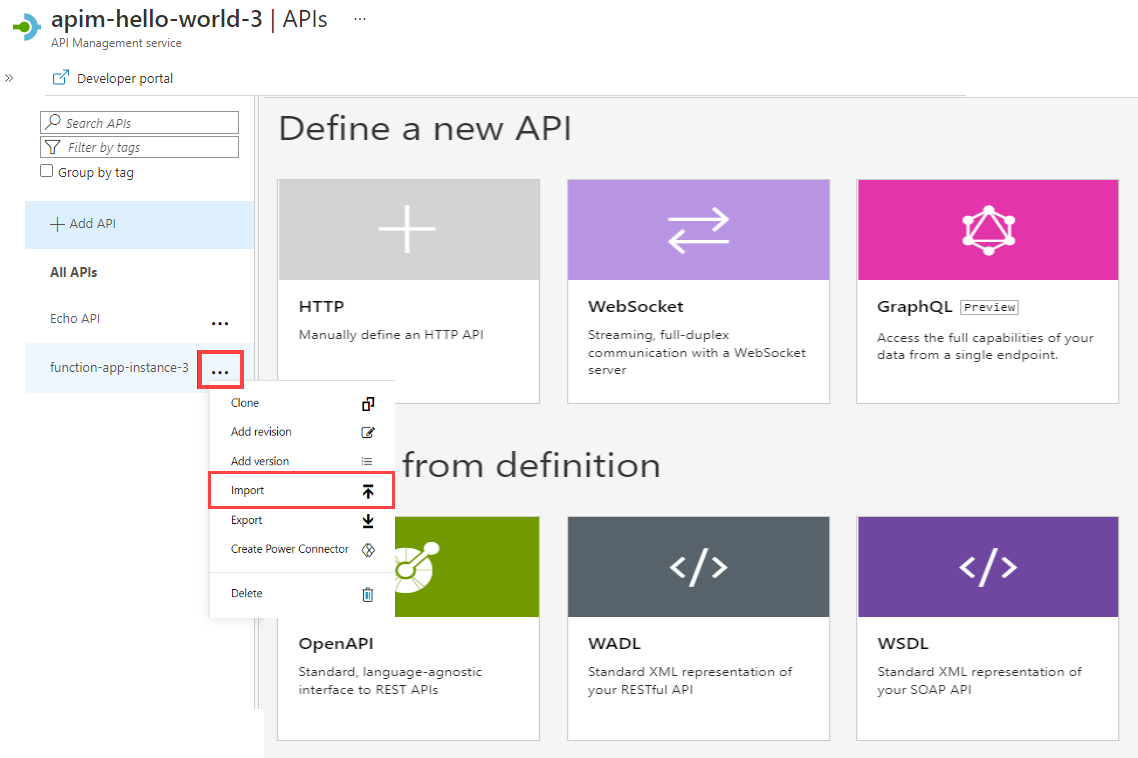
Select a service from which to import an API.


Related content
- API import limitations
- Import an OpenAPI specification
- Import a SOAP API
- Import a SOAP API and convert it to REST
- Import an App Service API
- Import a WebSocket API
- Import a GraphQL API
- Import a function app API
- Import a logic app API
- Import a Service Fabric service
- Import SAP OData metadata
- Edit an API