Note
Access to this page requires authorization. You can try signing in or changing directories.
Access to this page requires authorization. You can try changing directories.
Applies to: ![]() Azure SQL Managed Instance
Azure SQL Managed Instance
This article describes how to configure a SQL managed instance to support Windows Authentication for principals in Microsoft Entra ID (formerly Azure Active Directory). The steps to set up Azure SQL Managed Instance are the same for both the Incoming trust-based authentication flow and the Modern interactive authentication flow.
Prerequisites
The following prerequisites are required to configure a SQL managed instance for Windows Authentication for Microsoft Entra principals:
| Prerequisite | Description |
|---|---|
| Az.Sql PowerShell module | This PowerShell module provides management cmdlets for Azure SQL resources. Install this module by running the following PowerShell command: Install-Module -Name Az.Sql |
| Microsoft Graph PowerShell Module | This module provides management cmdlets for Microsoft Entra administrative tasks such as user and service principal management. Install this module by running the following PowerShell command: Install-Module -Name Microsoft.Graph |
| A SQL managed instance | You might Create a new SQL managed instance or use an existing SQL managed instance. You must Enable Microsoft Entra authentication on the SQL managed instance. |
Configure Microsoft Entra authentication for Azure SQL Managed Instance
To enable Windows Authentication for Microsoft Entra principals, you need to enable a system-assigned service principal on each SQL managed instance. The system-assigned service principal allows SQL managed instance users to authenticate using the Kerberos protocol. You also need to grant admin consent to each service principal.
Enable a system assigned service principal
To enable a system assigned service principal for a SQL managed instance:
- Sign in to the Azure portal.
- Navigate to your SQL managed instance.
- Select Identity.
- Set System assigned service principal to On.
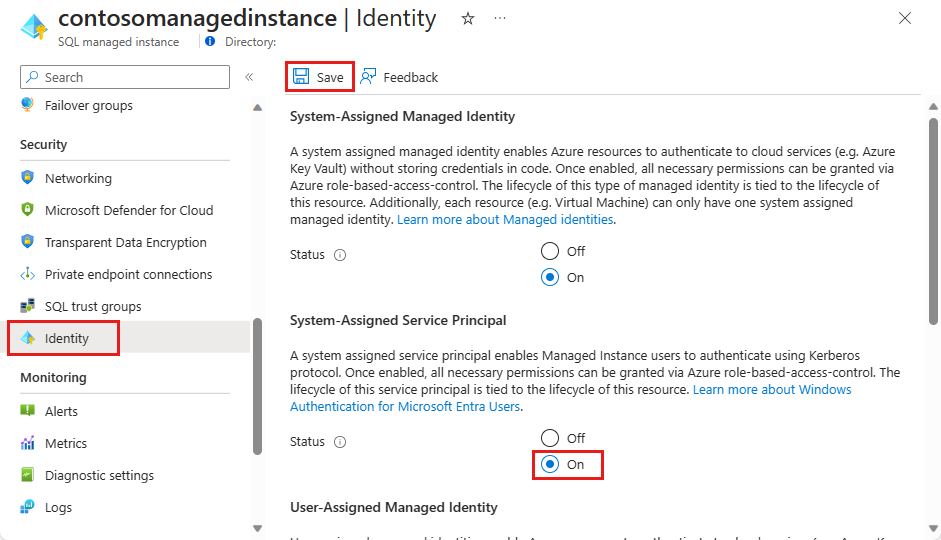
- Select Save.

Grant admin consent to a system assigned service principal
Sign in to the Azure portal.
Open Microsoft Entra ID.
Select App registrations.
Select All applications.
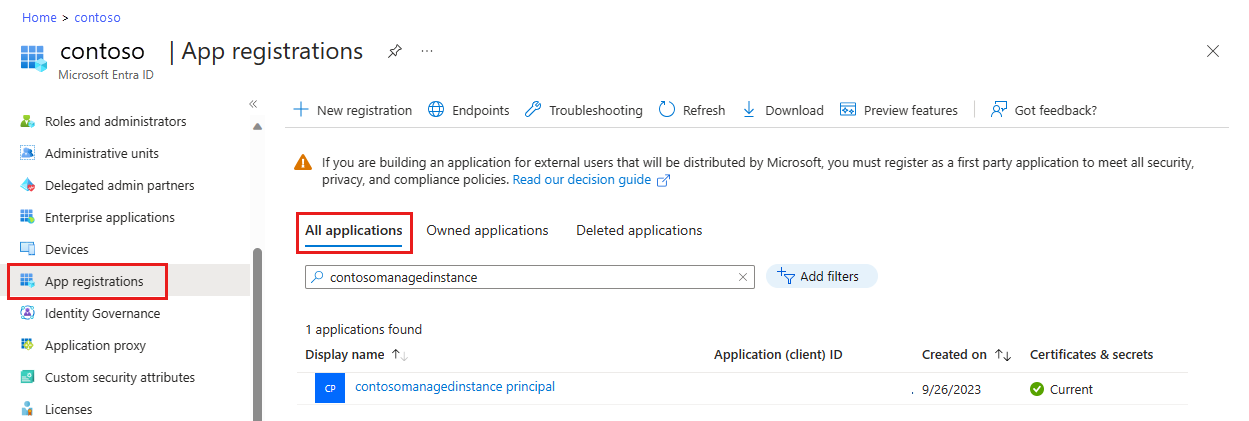
Select the application with the display name matching your SQL managed instance. The name will be in the format:
<managedinstancename> principal.Select API permissions.
Select Grant admin consent.
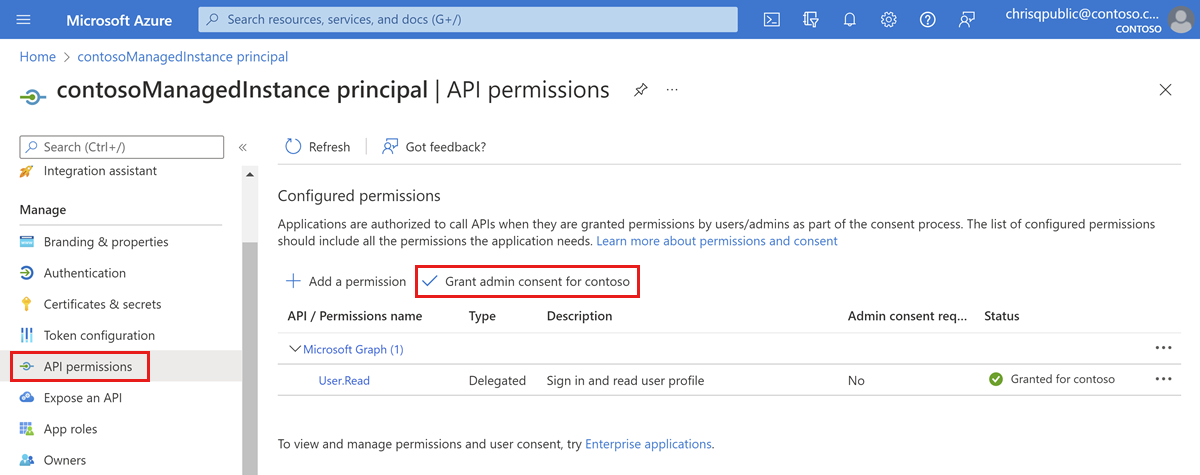
Select Yes on the prompt to Grant admin consent confirmation.


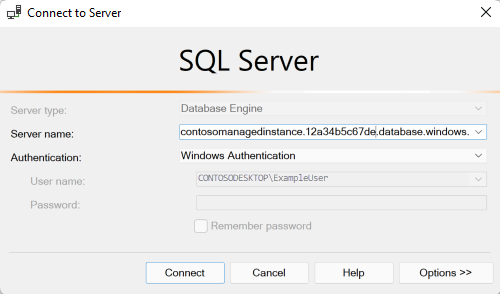
Connect to the SQL managed instance with Windows Authentication
If you have already implemented either the incoming Trust-based authentication flow or the Modern interactive authentication flow, depending on the version of your client, you can now test connecting to your SQL managed instance with Windows Authentication.
To test the connection with SQL Server Management Studio (SSMS), follow the steps in Quickstart: Use SSMS to connect to and query Azure SQL Database or Azure SQL Managed Instance. Select Windows Authentication as your authentication type.