Note
Access to this page requires authorization. You can try signing in or changing directories.
Access to this page requires authorization. You can try changing directories.
Applies to: Azure Logic Apps (Consumption + Standard)
Set up a managed identity when you want to authenticate connections from logic app workflows to Microsoft Entra-protected Azure resources. This identity accesses protected resources on your logic app's behalf and removes the need to store and manage credentials, secrets, or access tokens. Due to this behavior, a managed identity is recommended for authentication. Azure manages this identity to help keep your authentication details secure.
In Azure Logic Apps, many connectors support both managed identity types:
- System-assigned identity
- User-assigned identity
This guide shows how to complete the following tasks:
- Set up the system-assigned identity on your logic app resource.
- Create and set up a user-assigned identity on your logic app resource.
This guide provides steps for the Azure portal and Azure Resource Manager template (ARM template). For Azure PowerShell, Azure CLI, and Azure REST API, see:
| Tool | Documentation |
|---|---|
| Azure PowerShell | - System-assigned - User-assigned |
| Azure CLI | - System-assigned - User-assigned |
| Azure REST API | - System-assigned - User-assigned |
For more information, see:
- What are managed identities
- Managed identity types
- Connectors that support managed identities
- Azure resources that support managed identities
Prerequisites
An Azure account and subscription. Get a Azure account.
You must use the same Azure subscription for your logic app resource, managed identity, and target Azure resource that you want to access.
The logic app resource and workflow where you want to use the managed identity.
For more information, see:
The target Azure resource that you want to access.
Microsoft Entra administrator permissions.
Later in this guide, you must assign an Azure role to the managed identity with the required access on the target resource. For this task, you need permissions that let you assign Azure roles to identities in a Microsoft Entra tenant.
Considerations for using managed identities
Before you set up and use a managed identity with a logic app, review the following considerations:
Your logic app resource has only one unique system-assigned identity.
By default, Standard logic apps automatically enable the system-assigned identity.
Your logic app resource can have the system-assigned identity and one or more user-assigned identities enabled at the same time.
Your logic app can use either the system-assigned or a user-assigned identity, but not both at the same time.
Your logic app can use only one user-assigned identity at a time.
Your logic app resource can share the same user-assigned identity across other logic app resources.
You can use a managed identity at the logic app resource level and connection level.
For more information, see:
Connectors that support managed identities
For built-in and managed connector operations in Azure Logic Apps to support managed identity authentication, they must support OAuth with Microsoft Entra.
The following tables show sample connectors that support managed identity authentication, based on the logic app type.
| Connector type | Supported connectors |
|---|---|
| Built-in | - Azure API Management - Azure App Services - Azure Functions - HTTP - HTTP + Webhook Note: HTTP operations can authenticate connections to Azure Storage accounts behind Azure firewalls by using the system-assigned identity. However, HTTP operations don't support the user-assigned identity for authenticating the same connections. |
| Managed | - Azure App Service - Azure Automation - Azure Blob Storage - Azure Container Instance - Azure Cosmos DB - Azure Data Explorer - Azure Data Factory - Azure Data Lake - Azure Digital Twins - Azure Event Grid - Azure Event Hubs - Azure IoT Central V2 - Azure Key Vault -Azure Monitor Logs - Azure Queues - Azure Resource Manager - Azure Service Bus - Azure Sentinel - Azure Table Storage - Azure VM - SQL Server |
For a more complete list, see:
- Authentication types for triggers and actions that support authentication
- Azure services that support managed identities for Azure resources
Enable system-assigned identity (portal)
Based on your logic app type, follow the corresponding steps for the Azure portal:
On a Consumption logic app resource, manually enable the system-assigned identity.
In the Azure portal, open your Consumption logic app resource.
On the logic app sidebar, under Settings, select Identity.
On the Identity page, under System assigned, select On, and then select Save. To confirm, select Yes.
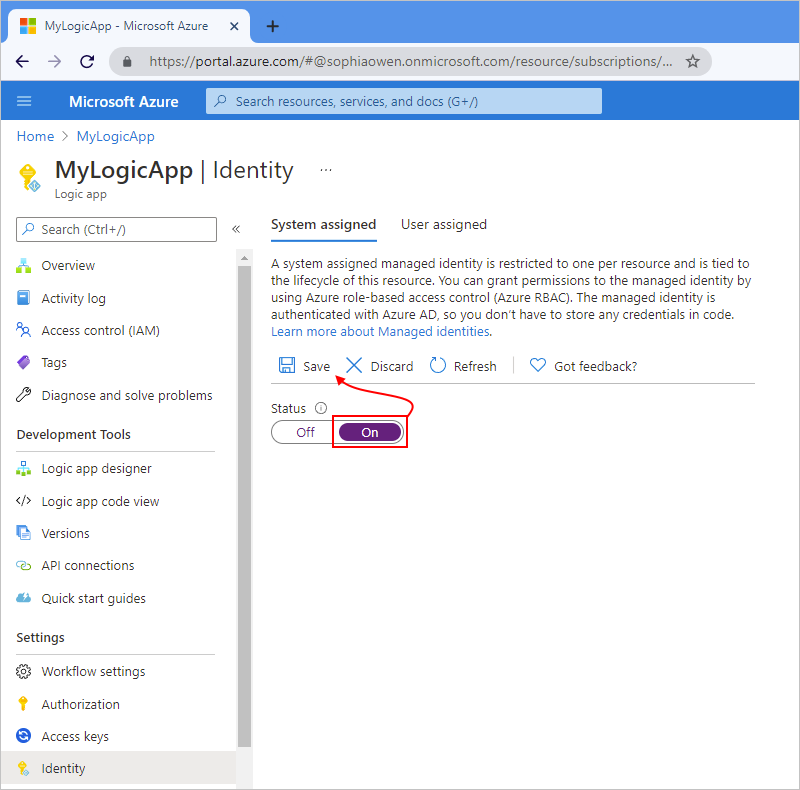
Your logic app resource can now use the system-assigned identity. This identity is registered with Microsoft Entra ID and is represented by an object ID.
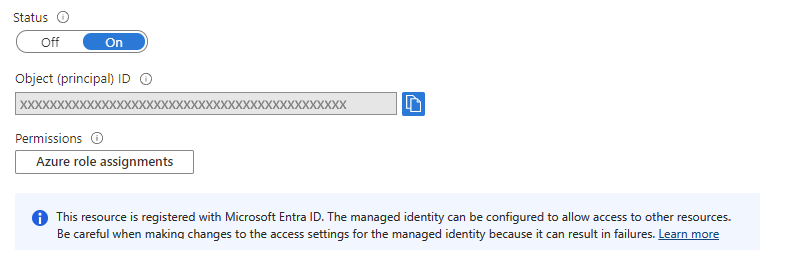
Property Value Description Object (principal) ID <identity-resource-ID> A Globally Unique Identifier (GUID) that represents the system-assigned identity for your logic app in a Microsoft Entra tenant.


Enable system-assigned identity (ARM template)
To automate creating and deploying logic app resources, use an ARM template.
In your template, at the root level, your logic app resource definition requires an identity object with the type property set to SystemAssigned, for example:
{
   "apiVersion": "2016-06-01",
   "type": "Microsoft.logic/workflows",
   "name": "[variables('logicappName')]",
   "location": "[resourceGroup().location]",
   "identity": {
      "type": "SystemAssigned"
   },
   "properties": {},
   <...>
}
When Azure creates your logic app resource definition, the identity object gets the following principalId and tenantId properties:
"identity": {
   "type": "SystemAssigned",
   "principalId": "<principal-ID>",
   "tenantId": "<Entra-tenant-ID>"
}
| Property (JSON) | Value | Description |
|---|---|---|
principalId |
<principal-ID> | The Globally Unique Identifier (GUID) that Microsoft Entra uses to manage the service principal object for your managed identity in the Microsoft Entra tenant. This GUID sometimes appears as an "object ID" or objectID. |
tenantId |
<Microsoft-Entra-tenant-ID> | The Globally Unique Identifier (GUID) that represents the Microsoft Entra tenant where the logic app is now a member. Inside the Microsoft Entra tenant, the service principal has the same name as the logic app instance. |
Create user-assigned identity (portal)
You need to create the identity as a separate Azure resource before you can enable the user-assigned identity on a Consumption or Standard logic app resource.
In the Azure portal search box, enter
managed identities. From the results list, select Managed Identities.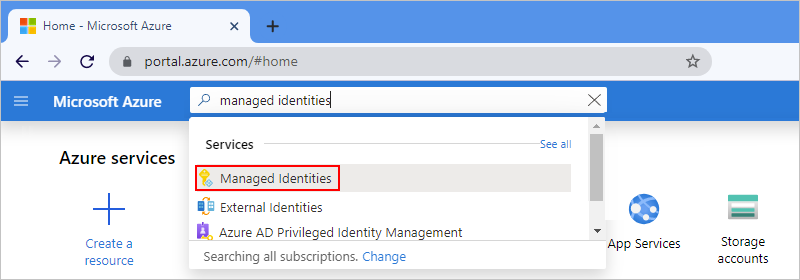
On the Managed Identities page toolbar, select Create.
Enter the managed identity information, for example:
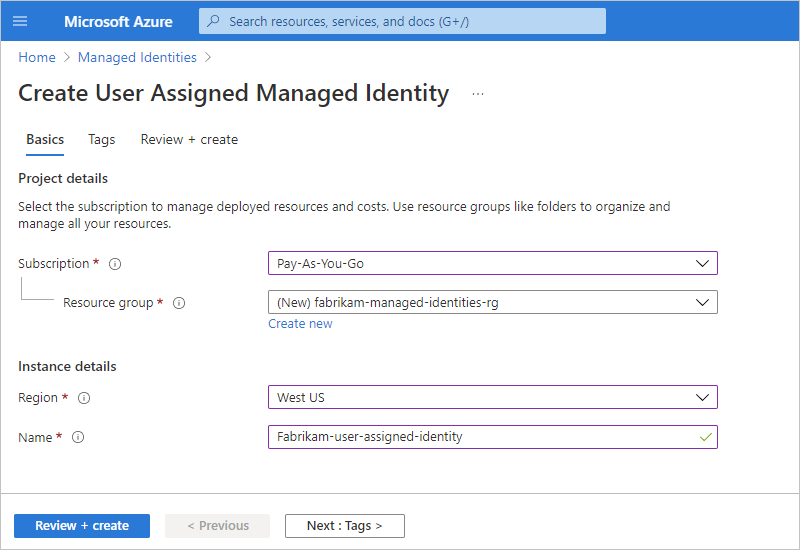
Property Required Value Description Subscription Yes <Azure-subscription-name> The Azure subscription name. Resource group Yes <Azure-resource-group-name> The Azure resource group name. Create a new group, or select an existing group. This example creates a new group named fabrikam-managed-identities-RG.Region Yes <Azure-region> The Azure region where to store information about your resource. This example uses China North 3.Name Yes <user-assigned-identity-name> The name to give your user-assigned identity. This example uses Fabrikam-user-assigned-identity.When you finish, select Review + create.
After Azure validates the information, Azure creates your managed identity. Now you can add the user-assigned identity to your logic app resource.


Add user-assigned identity to logic app (portal)
After you create the user-assigned identity, add the identity to your Consumption or Standard logic app resource.
In the Azure portal, open your Consumption logic app resource.
On the logic app sidebar, under Settings, select Identity.
On the Identity page, select User assigned, and then select Add.
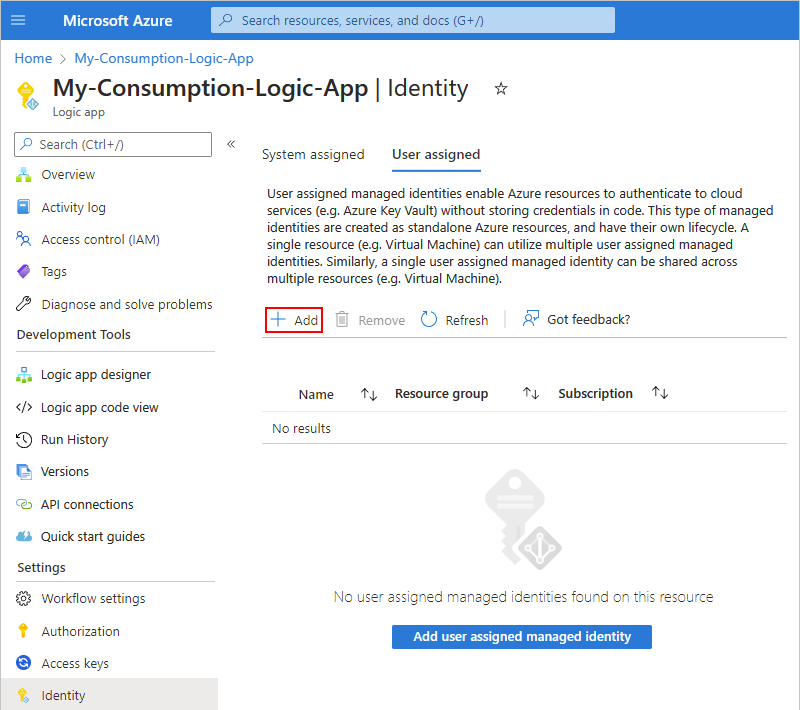
On the Add user assigned managed identity pane, follow these steps:
From the Select a subscription list, select your Azure subscription.
From the managed identities list, select the user-assigned identity you want.
To filter the list, in the User assigned managed identities search box, enter the name for the identity or resource group, for example:
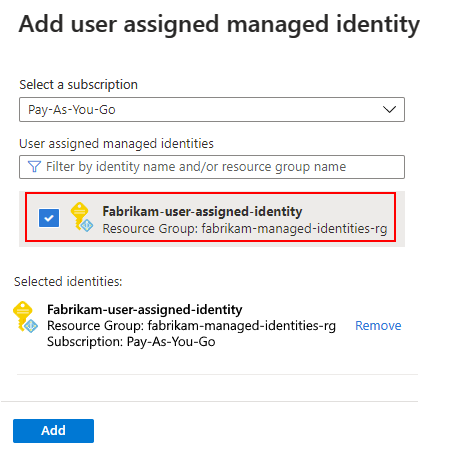
When you finish, select Add.
Your logic app is now associated with the user-assigned identity.


Create user-assigned identity (ARM template)
To automate creating and deploying logic app resources, use an ARM template. These templates support user-assigned identities for authentication.
In your template's resources section, your logic app resource definition requires the following items:
- An
identityobject with thetypeproperty set toUserAssigned. - A child
userAssignedIdentitiesobject that specifies the user-assigned resource and name.
The following example shows a Consumption logic app resource and workflow definition for an HTTP PUT request with a nonparameterized identity object. The response to the PUT request and subsequent GET operation also includes this identity object.
A Consumption logic app resource can enable and have both the system-assigned identity and multiple user-assigned identities defined.
{
   "$schema": "https://schema.management.azure.com/schemas/2015-01-01/deploymentTemplate.json#",
   "contentVersion": "1.0.0.0",
   "parameters": {<template-parameters>},
   "resources": [
      {
         "apiVersion": "2016-06-01",
         "type": "Microsoft.logic/workflows",
         "name": "[variables('logicappName')]",
         "location": "[resourceGroup().location]",
         "identity": {
            "type": "UserAssigned",
            "userAssignedIdentities": {
               "/subscriptions/<Azure-subscription-ID>/resourceGroups/<Azure-resource-group-name>/providers/Microsoft.ManagedIdentity/userAssignedIdentities/<user-assigned-identity-name>": {}
            }
         },
         "properties": {
            "definition": {<logic-app-workflow-definition>}
         },
         "parameters": {},
         "dependsOn": []
      },
   ],
   "outputs": {}
}
If your template includes the managed identity's resource definition, you can parameterize the identity object. The following example shows how the userAssignedIdentities child object references a userAssignedIdentityName variable that you define in your template's variables section. This variable references the resource ID for your user-assigned identity.
{
   "$schema": "https://schema.management.azure.com/schemas/2015-01-01/deploymentTemplate.json#",
   "contentVersion": "1.0.0.0",
   "parameters": {
      "Template_LogicAppName": {
         "type": "string"
      },
      "Template_UserAssignedIdentityName": {
         "type": "securestring"
      }
   },
   "variables": {
      "logicAppName": "[parameters('Template_LogicAppName')]",
      "userAssignedIdentityName": "[parameters('Template_UserAssignedIdentityName')]"
   },
   "resources": [
      {
         "apiVersion": "2016-06-01",
         "type": "Microsoft.logic/workflows",
         "name": "[variables('logicAppName')]",
         "location": "[resourceGroup().location]",
         "identity": {
            "type": "UserAssigned",
            "userAssignedIdentities": {
               "[resourceId('Microsoft.ManagedIdentity/userAssignedIdentities/', variables('userAssignedIdentityName'))]": {}
            }
         },
         "properties": {
            "definition": {<logic-app-workflow-definition>}
         },
         "parameters": {},
         "dependsOn": [
            "[resourceId('Microsoft.ManagedIdentity/userAssignedIdentities/', variables('userAssignedIdentityName'))]"
         ]
      },
      {
         "apiVersion": "2018-11-30",
         "type": "Microsoft.ManagedIdentity/userAssignedIdentities",
         "name": "[parameters('Template_UserAssignedIdentityName')]",
         "location": "[resourceGroup().location]",
         "properties": {}
      }
  ]
}
When the template creates your logic app resource definition, the identity object includes the following principalId and clientId properties:
"identity": {
    "type": "UserAssigned",
    "userAssignedIdentities": {
        "<resource-ID>": {
            "principalId": "<principal-ID>",
            "clientId": "<client-ID>"
        }
    }
}
| Property (JSON) | Value | Description |
|---|---|---|
principalId |
<principal-ID> | The Globally Unique Identifier (GUID) that Microsoft Entra uses to administrate the service principal object for your managed identity in the Microsoft Entra tenant. This GUID sometimes appears as an "object ID" or objectID. In the Microsoft Entra tenant, the service principal has the same name as the logic app instance. |
clientId |
<client-ID> | The Globally Unique Identifier (GUID) that represents the logic app's identity and specifies the identity to use during runtime calls. |
For more information about Azure Resource Manager templates and managed identities for Azure Functions, see ARM template - Azure Functions.
Give resource access to an identity
Before you can use the managed identity for authentication, you need to grant the identity access to the target protected Azure resource. The way that you set up access might differ based on the target resource, for example:
Azure role-based access control (RBAC)
Some Azure resources, such as storage accounts, require that you use RBAC to assign a role on the target resource with the necessary permissions for your identity.
For example, to give a managed identity access to a Blob storage account in Azure, you need to assign the necessary Azure role on the storage account resource to your identity.
This section shows how to assign a role by using the Azure portal and Azure Resource Manager template (ARM template).
For Azure PowerShell, Azure CLI, and Azure REST API, see:
Tool Documentation Azure PowerShell Add role assignment Azure CLI Add role assignment Azure REST API Add role assignment Access policy
Other Azure resources, such as key vaults, also let you create an access policy on the target resource with the necessary permissions for your identity.
For example, you can create an access policy on the key vault resource to assign the necessary permissions for your managed identity.
This section shows how to create an access policy by using the Azure portal.
For Resource Manager templates, Azure PowerShell, and Azure CLI, see:
Tool Documentation Azure Resource Manager template (ARM template) Key Vault access policy resource definition Azure PowerShell Assign a Key Vault access policy Azure CLI Assign a Key Vault access policy
Managed identity access to higher-level resources
If a managed identity has access to a resource in the same subscription, the identity can access only that resource, not other resources in that resource's parent hierarchy. In the workflow designer, some triggers and actions require you to first select a subscription or resource group before you can select the target resource. If the identity lacks access to these higher-level resources, the designer doesn't show the target resource.
To fix this problem, give the identity access to each higher-level resource that you must first select.
In other cases, the identity also needs access to the resource where you enabled the identity. For example, suppose you have a workflow action that updates the application settings on the workflow's parent logic app. If the action uses a managed identity to access these settings, give the identity access to that parent logic app.
Assign role-based access to a managed identity (portal)
For Azure resources that require you to assign a role for your managed identity, follow these steps:
In the Azure portal, open the resource where the identity needs access.
This example uses a storage account as the target Azure resource.
On the resource sidebar, select Access control (IAM).
On the Access control (IAM) page toolbar, select Add > Add role assignment.
Note
If you can't select Add role assignment, you don't have the permissions to assign roles. You need Microsoft Entra administrator permissions so you can assign roles to managed identities.
To assign the required role to your managed identity, follow these steps:
On the Role tab, find and select the Microsoft Entra built-in role that gives your identity the required access to the current resource, and then select Next.
This example selects the role named Storage Blob Data Contributor. This role gives write access to blob content in an Azure storage container.
For more information, see Roles that access blob content in an Azure storage container.
On the Members tab, follow these steps to select the managed identity:
For Assign access to, select Managed identity.
For Add members, select + Select members.
On the Select managed identities pane, select your Azure subscription.
Based on your managed identity, select the Managed identity type, and then select your managed identity.
Managed identity type Description User-assigned managed identity View and select an enabled user-assigned managed identity on any Azure resource. All system-assigned managed identities View and select an enabled system-assigned managed identity on any Azure resource. Logic app View and select an enabled managed identity on logic app resources only. When you finish, select Select.
For more information, see:
Authenticate your trigger or action by using the managed identity.
Create an access policy in the Azure portal
For Azure resources where you want to create an access policy for your managed identity, follow these steps:
In the Azure portal, open the resource where the identity needs access.
This example uses a key vault as the target Azure resource.
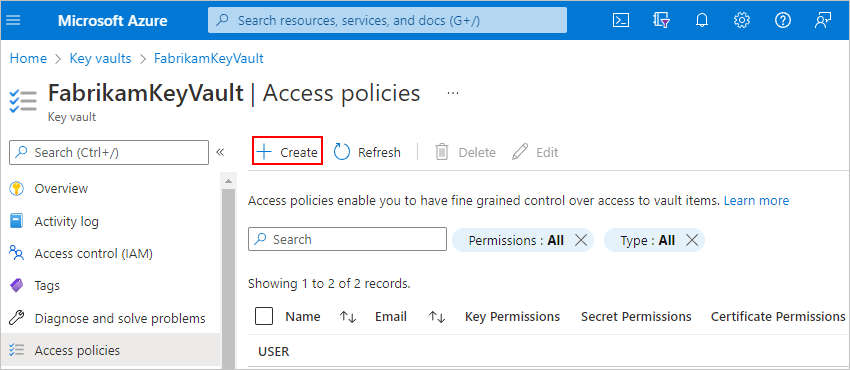
On the resource sidebar, select Access policies.
Note
If the resource doesn't have the Access policies option, assign a role instead.
On the page toolbar, select Create to open the Create an access policy pane.
On the Permissions tab, select the permissions that the identity needs for access to the target resource.
For example, to use the identity with the Azure Key Vault managed connector's List secrets action, the identity needs List permissions. So, in this scenario, in the Secret permissions column, select List.
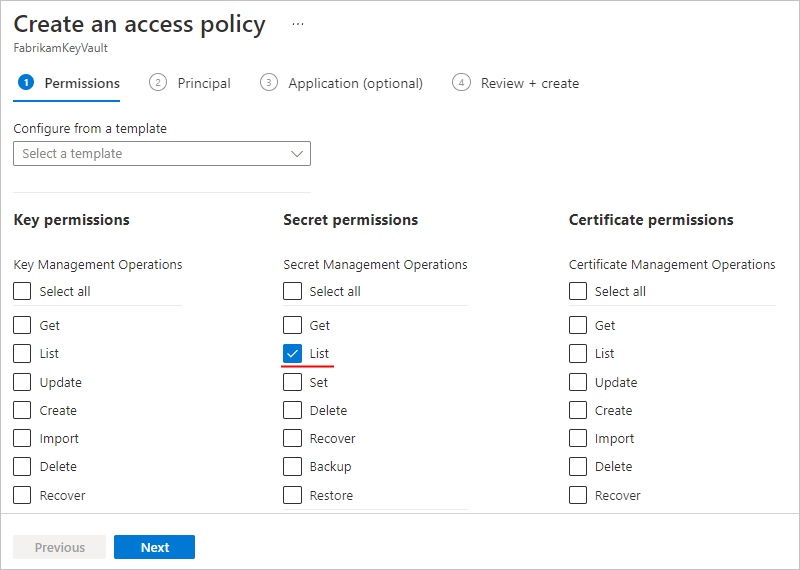
When you finish, select Next.
On the Principal tab, select the managed identity.
This example selects a user-assigned identity.
Skip the optional Application step, select Next, and finish creating the access policy.
Authenticate your trigger or action by using the managed identity.


Authenticate access by using the managed identity
This section shows how to use a managed identity to authenticate access for a workflow trigger or action that supports managed identity authentication. The example continues from where you set up access for a managed identity by using RBAC and an Azure storage account. Though your target Azure resource might differ, the general steps are mostly similar.
Important
If you have an Azure function where you want to use the system-assigned identity, first enable authentication for Azure Functions.
The following steps show how to use the managed identity by using the Azure portal. To use the managed identity in the underlying JSON definition by using the code editor, see Managed identity authentication.
In the Azure portal, open your Consumption logic app resource.
Add the trigger or action that supports managed identities, if you haven't already.
On the trigger or action, follow these steps:
Built-in operations
These steps use the HTTP action as an example.
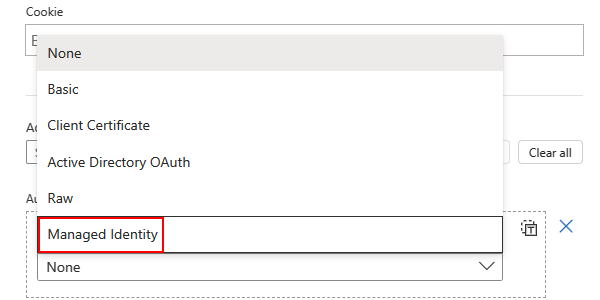
From the Advanced parameters list, select the Authentication parameter.
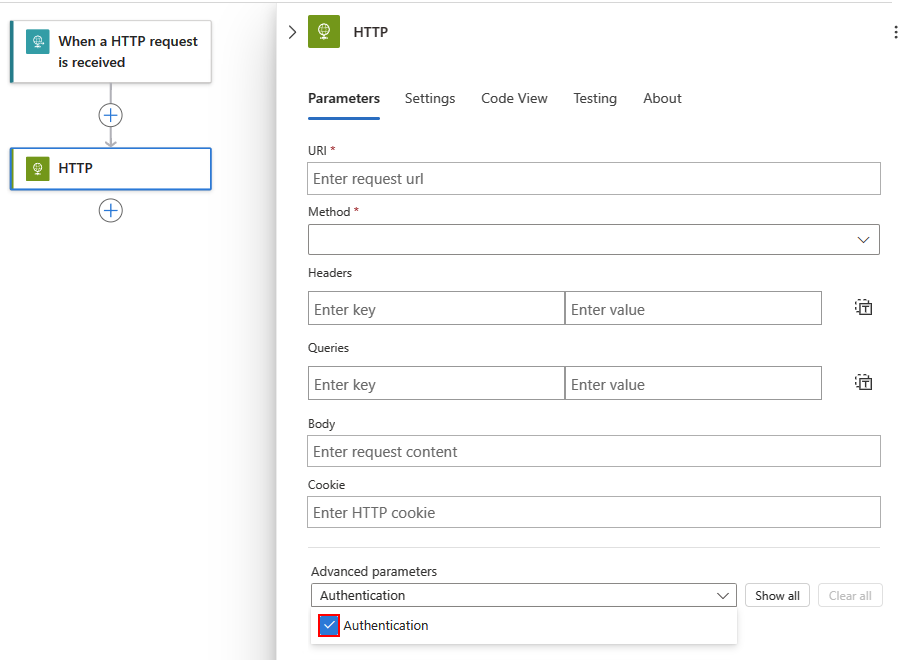
Both the Authentication parameter and the Authentication type list appear, for example:
From the Authentication type list, select Managed identity.
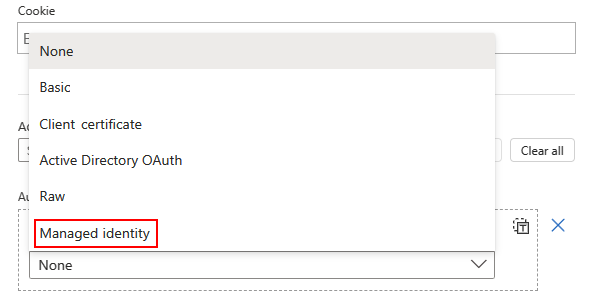
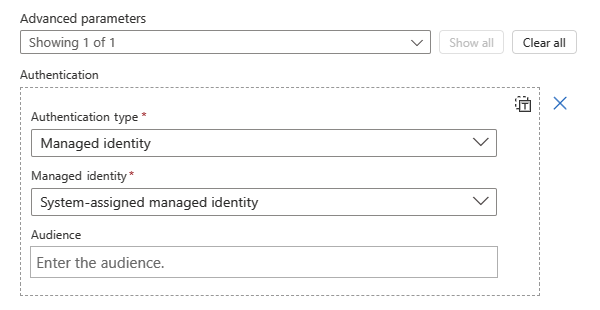
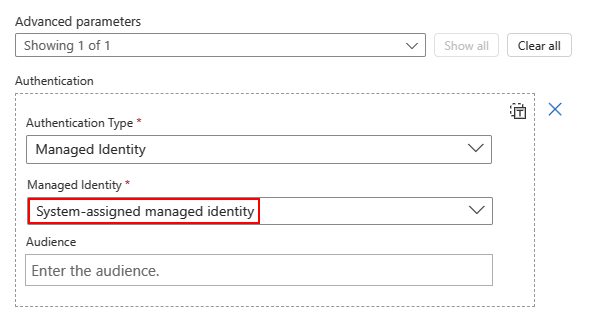
The Authentication section now shows the following options:
Parameter Description Managed identity The managed identity to use. Audience Appears on specific triggers and actions so you can set the resource ID for the Azure target resource or service.
By default, the Audience parameter uses thehttps://management.chinacloudapi.cn/resource ID, which is the resource ID for Azure Resource Manager.From the Managed identity list, select the identity you want, for example:
Note
By default, System-assigned managed identity is the selected option, even when you don't enable any managed identities. However, to successfully use the managed identity, you must first enable that identity on your logic app. Consumption logic apps don't automatically enable the system identity unlike Standard logic apps.
For more information, see Example: Authenticate built-in trigger or action with a managed identity.
Managed connector operations
On the Create connection pane, from the Authentication list, select Managed identity, for example:
On the next pane, for Connection Name, enter a name to use for the connection.
Based on your connector, choose one of the following options:
Single-authentication: These connectors support only one authentication type, which is the managed identity in this case.
The following steps use an Azure Resource action as an example:
From the Managed Identity list, select the currently enabled managed identity.
Select Create new.
Multi-authentication: These connectors support multiple authentication types, but you can select and use only one type at a time.
The following steps use an Azure Blob Storage action as an example:
From the Authentication Type list, select Logic Apps Managed Identity.
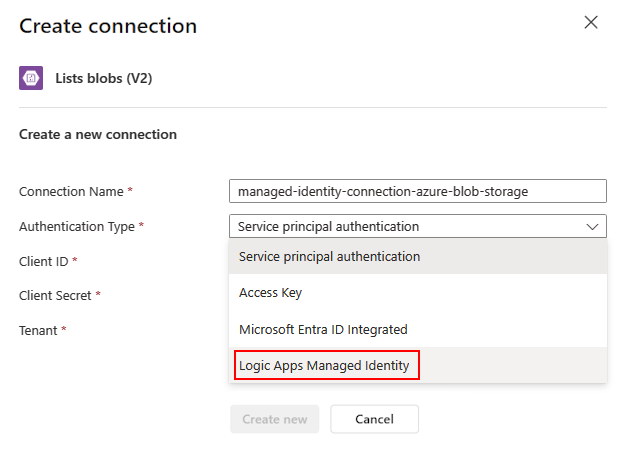
Select Create new.
For more information, see Example: Authenticate managed connector trigger or action with a managed identity.


Example: Authenticate built-in trigger or action with a managed identity
The built-in HTTP trigger or action can use the system-assigned identity that you enable on your logic app resource. In general, the HTTP trigger or action uses the following properties to specify the resource or entity that you want to access:
| Property | Required | Description |
|---|---|---|
| Method | Yes | The HTTP method for the operation that you want to run |
| URI | Yes | The endpoint URL for accessing the target Azure resource or entity. The URI syntax usually includes the resource ID for the target Azure resource or service. |
| Headers | No | Any header values that you need or want to include in the outgoing request, such as the content type |
| Queries | No | Any query parameters that you need or want to include in the request. For example, query parameters for a specific operation or for the API version of the operation that you want to run. |
| Authentication | Yes | The authentication type to use for authenticating access to the Azure target resource or service |
As a specific example, suppose that you want to run the Snapshot Blob operation on a blob in the Azure Storage account where you previously set up access for your identity. However, the Azure Blob Storage connector doesn't currently offer this operation. Instead, you can run this operation by using the HTTP action or another Blob Service REST API operation.
Important
To access Azure storage accounts behind firewalls by using the Azure Blob Storage connector and managed identities, make sure that you also set up your storage account with the exception that allows access by trusted Microsoft services.
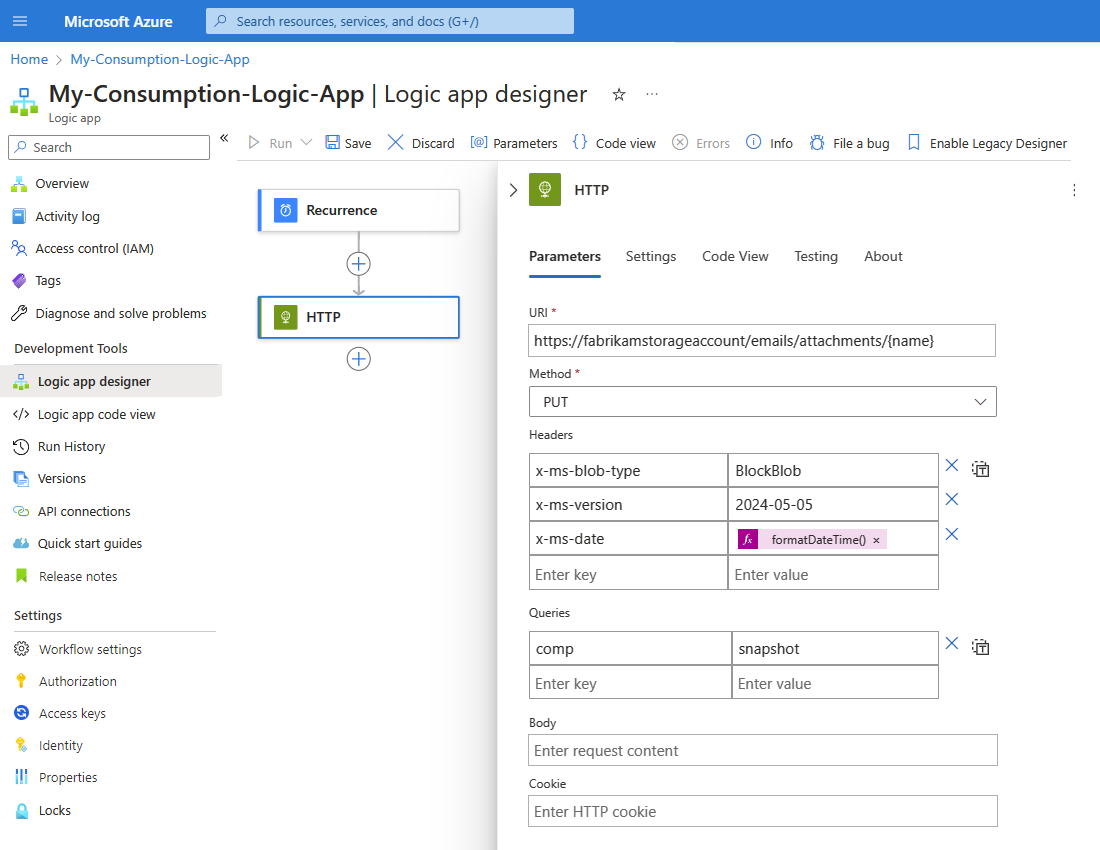
To run the Snapshot Blob operation, the HTTP action specifies the following properties:
| Property | Required | Example value | Description |
|---|---|---|---|
| Method | Yes | PUT |
The HTTP method that the Snapshot Blob operation uses. |
| Headers | For Azure Storage | x-ms-blob-type = BlockBlob x-ms-version = 2024-05-05 x-ms-date = formatDateTime(utcNow(),'r') |
The x-ms-blob-type, x-ms-version, and x-ms-date header values are required for Azure Storage operations. Important: In outgoing HTTP trigger and action requests for Azure Storage, the header requires the x-ms-version property and the API version for the operation that you want to run. The x-ms-date value must be the current date. Otherwise, your workflow fails with a 403 FORBIDDEN error. To get the current date in the required format, you can use the expression in the example value. For more information, see: - Request headers - Snapshot Blob - Versioning for Azure Storage services |
| Queries | Only for the Snapshot Blob operation | comp = snapshot |
The query parameter name and value for the operation. |
On the workflow designer, add any trigger you want, and then add the HTTP action.
The following example shows a sample HTTP action with all the previously described property values to use for the Snapshot Blob operation:
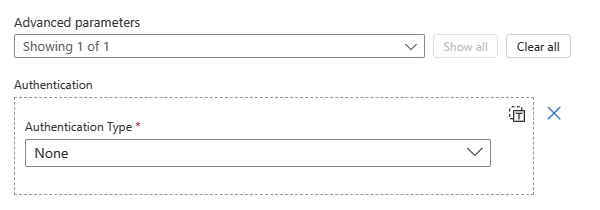
In the HTTP action, from the Advanced parameters list, select Authentication.
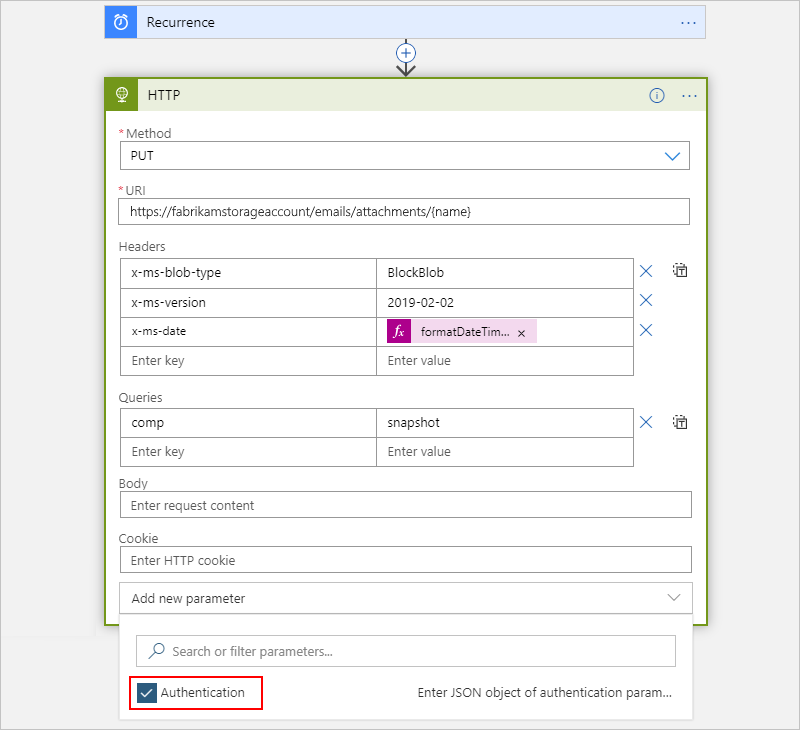
The Authentication section appears in your HTTP action.
From the Authentication type list, select Managed identity.
From the Managed identity list, select from the available options based on your scenario.
If you set up the system-assigned identity, select System-assigned managed identity.
If you set up the user-assigned identity, select that identity.
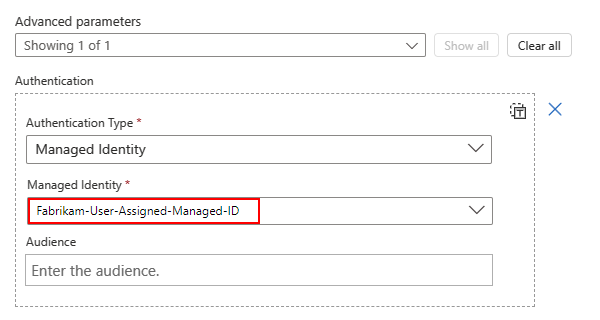
This example continues with the System-assigned managed identity.
Some triggers and actions show the Audience parameter so you can enter the resource ID for the target Azure resource or service.
For example, to authenticate access to a Key Vault resource in the global Azure cloud, set the Audience parameter to exactly the following resource ID:
https://vault.azure.cnOtherwise, by default, the Audience parameter uses the
https://management.chinacloudapi.cn/resource ID, which is the resource ID for Azure Resource Manager.Important
The target resource ID must exactly match the value that Microsoft Entra ID expects. Otherwise, you might get either a 400 Bad Request error or a 401 Unauthorized error. If the resource ID includes any trailing slashes, include them. If not, don't include them.
For example, the resource ID for all Azure Blob Storage accounts requires a trailing slash. However, the resource ID for a specific storage account doesn't require a trailing slash. Check the resource IDs for the Azure services that support Microsoft Entra ID.
The following example sets the Audience parameter to
https://storage.azure.com/. This value means that the access tokens for authentication are valid for all storage accounts. For a specific storage account, specify the root service URL,https://<your-storage-account>.blob.core.chinacloudapi.cn.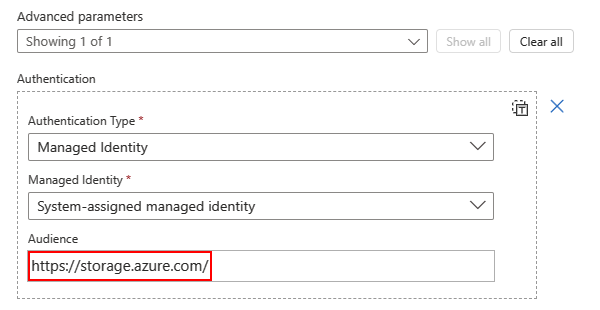
For more information, see:
Continue building the workflow based on your scenario.


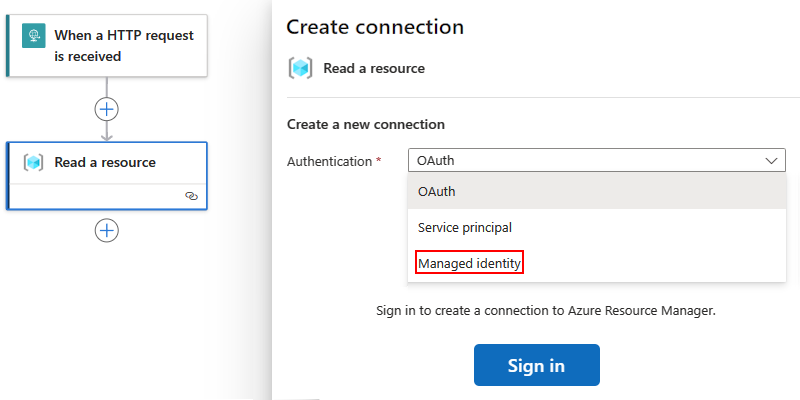
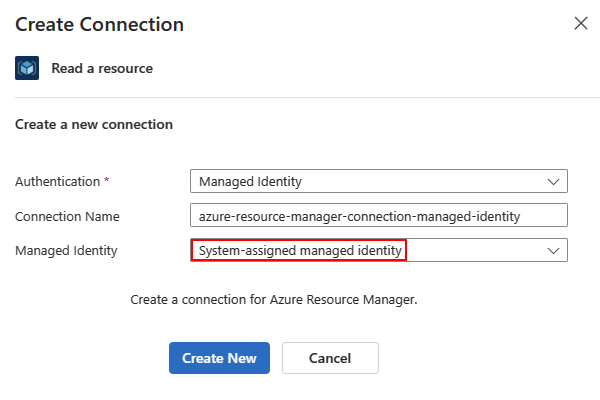
Example: Authenticate managed connector trigger or action by using a managed identity
The Azure Resource Manager managed connector has an action named Read a resource that can use the managed identity you enable on your logic app resource. This example shows how to use the system-assigned managed identity with a managed connector.
On the workflow designer, add the Azure Resource Manager action named Read a resource.
On the Create connection pane, from the Authentication list, select Managed identity, and then select Sign in.
Note
In some connectors, the Authentication Type list shows Logic Apps Managed Identity instead. If your scenario shows this option, select this option.
Enter a name for the connection, and select the managed identity you want.
If you enabled the system-assigned identity, the Managed identity list automatically selects System-assigned managed identity. If you enabled a user-assigned identity instead, the list automatically selects the user-assigned identity.
In this example, System-assigned managed identity is the only selection available.
Note
If you don't enable the managed identity when you try to create or change the connection, or if you remove the managed identity while a managed identity-enabled connection still exists, you get an error that says you must enable the identity and grant access to the target resource.
When you finish, select Create new.
After you create the connection, the designer can fetch any dynamic values, content, or schema by using managed identity authentication.
Continue building the workflow based on your scenario.


Connections with managed identities in logic app resource definitions
A managed identity authenticated connection type is a special connection type that works only with a managed identity. At workflow runtime, the connection uses the managed identity enabled on the logic app resource. Azure Logic Apps checks whether any managed connector operations in the workflow use the managed identity and whether all the required permissions exist to use the managed identity for accessing the corresponding target resources. If this check passes successfully, Azure Logic Apps gets the Microsoft Entra token associated with the managed identity, uses that identity to authenticate access to the target Azure resources, and performs the corresponding operations in the workflow.
In a Consumption logic app resource, you save the connection configuration in the resource definition's parameters object. This object contains the $connections object that includes pointers to the connection's resource ID along with the managed identity's resource ID when you enable the user-assigned identity.
The following example shows the parameters object when the system-assigned identity is enabled on a logic app:
"parameters": {
   "$connections": {
      "value": {
         "<action-name>": {
            "connectionId": "/subscriptions/<Azure-subscription-ID>/resourceGroups/<resource-group-name>/providers/Microsoft.Web/connections/<connector-name>",
            "connectionName": "<connector-name>",
            "connectionProperties": {
               "authentication": {
                  "type": "ManagedServiceIdentity"
               }
            },
            "id": "/subscriptions/<Azure-subscription-ID>/providers/Microsoft.Web/locations/<Azure-region>/managedApis/<managed-connector-type>"
         }
      }
   }
}
The following example shows the parameters object when the user-assigned managed identity is enabled on a logic app:
"parameters": {
   "$connections": {
      "value": {
         "<action-name>": {
            "connectionId": "/subscriptions/<Azure-subscription-ID>/resourceGroups/<resource-group-name>/providers/Microsoft.Web/connections/<connector-name>",
            "connectionName": "<connector-name>",
            "connectionProperties": {
               "authentication": {
                  "type": "ManagedServiceIdentity",
                  "identity": "/subscriptions/<Azure-subscription-ID>/resourceGroups/<resource-group-name>/providers/microsoft.managedidentity/userassignedidentities/<managed-identity-name>"
               }
            },
            "id": "/subscriptions/<Azure-subscription-ID>/providers/Microsoft.Web/locations/<Azure-region>/managedApis/<managed-connector-type>"
         }
      }
   }
}
ARM template for API connections and managed identities
If you use an ARM template to automate deployment, and your workflow includes an API connection created by a managed connector and uses a managed identity, you need to take an extra step.
In an ARM template, the underlying connector resource definition differs based on whether you use a Consumption or Standard logic app resource and whether the connector shows single-authentication or multi-authentication options.
The following examples apply to Consumption logic app resources. They show how the underlying connector resource definition differs between a single-authentication connector and a multiauthentication connector.
Single-authentication
This example shows the underlying connection resource definition for a connector action that supports only one authentication type and uses a managed identity in a Consumption logic app workflow. The definition includes the following attributes:
The
kindproperty is set toV1for a Consumption workflow.The
parameterValueTypeproperty is set toAlternative.
{
    "type": "Microsoft.Web/connections",
    "apiVersion": "[providers('Microsoft.Web','connections').apiVersions[0]]",
    "name": "[variables('connections_<connector-name>_name')]",
    "location": "[parameters('location')]",
    "kind": "V1",
    "properties": {
        "alternativeParameterValues": {},
        "api": {
            "id": "[subscriptionResourceId('Microsoft.Web/locations/managedApis', parameters('location'), '<connector-name>')]"
        },
        "authenticatedUser": {},
        "connectionState": "Enabled",
        "customParameterValues": {},
        "displayName": "[variables('connections_<connector-name>_name')]",
        "parameterValueSet": {},
        "parameterValueType": "Alternative"
    }
},
Multiple authentication methods
This example shows the underlying connection resource definition for a connector action that supports multiple authentication types and uses a managed identity in a Consumption logic app workflow. The definition includes the following attributes:
The
kindproperty is set toV1for a Consumption workflow.The
parameterValueSetobject includes anameproperty that's set tomanagedIdentityAuthand avaluesproperty that's set to an empty object.
{
    "type": "Microsoft.Web/connections",
    "apiVersion": "[providers('Microsoft.Web','connections').apiVersions[0]]",
    "name": "[variables('connections_<connector-name>_name')]",
    "location": "[parameters('location')]",
    "kind": "V1",
    "properties": {
        "alternativeParameterValues": {},
        "api": {
            "id": "[subscriptionResourceId('Microsoft.Web/locations/managedApis', parameters('location'), '<connector-name>')]"
        },
        "authenticatedUser": {},
        "connectionState": "Enabled",
        "customParameterValues": {},
        "displayName": "[variables('connections_<connector-name>_name')]",
        "parameterValueSet": {
            "name": "managedIdentityAuth",
            "values": {}
        }
    }
}
Set up advanced control for API connection authentication
When your Standard logic app workflow uses an API connection that a managed connector creates, Azure Logic Apps uses two connections to communicate with the target resource, such as your email account or key vault:

Connection #1 is set up with authentication for the internal token store.
Connection #2 is set up with authentication for the target resource.
However, when a Consumption logic app workflow uses an API connection, you can't view or set up connection #1. If you use a Standard logic app resource, you gain more control over your logic app and workflows. By default, connection #1 uses the system-assigned identity.
If your scenario requires finer control over authenticating API connections, change the authentication for connection #1 from the default system-assigned identity to any user-assigned identity that you add to your logic app. This authentication applies to each API connection, so you can mix system-assigned and user-assigned identities across different connections to the same target resource.
In your Standard logic app's connections.json file, which stores information about each API connection, each connection definition has two authentication objects, for example:
"keyvault": {
   "api": {
      "id": "/subscriptions/<Azure-subscription-ID>/providers/Microsoft.Web/locations/<Azure-region>/managedApis/keyvault"
   },
   "authentication": {
      "type": "ManagedServiceIdentity",
   },
   "connection": {
      "id": "/subscriptions/<Azure-subscription-ID>/resourceGroups/<resource-group-name>/providers/Microsoft.Web/connections/<connector-name>"
   },
   "connectionProperties": {
      "authentication": {
         "audience": "https://vault.azure.cn",
         "type": "ManagedServiceIdentity"
      }
   },
   "connectionRuntimeUrl": "<connection-runtime-URL>"
}
The first
authenticationobject maps to connection #1.This object describes the authentication used for communicating with the internal token store. In the past, the
typeproperty was always set toManagedServiceIdentityfor an app that deploys to Azure and had no configurable options.The second
authenticationobject maps to connection #2.This object describes the authentication used for communicating with the target resource and can vary, based on the authentication type that you select for that connection.
Why change the authentication for the token store?
In some scenarios, you might want to share and use the same API connection across multiple logic app resources, but you don't want to add the system-assigned identity for each logic app resource to the target resource's access policy.
In other scenarios, you might not want to set up the system-assigned identity on your logic app. To use a user-assigned identity instead, you can change the authentication to a user-assigned identity and disable the system-assigned identity completely.
Change the authentication for the token store
In the Azure portal, open your Standard logic app resource.
On the resource sidebar, under Workflows, select Connections.
On the Connections pane, select JSON View.
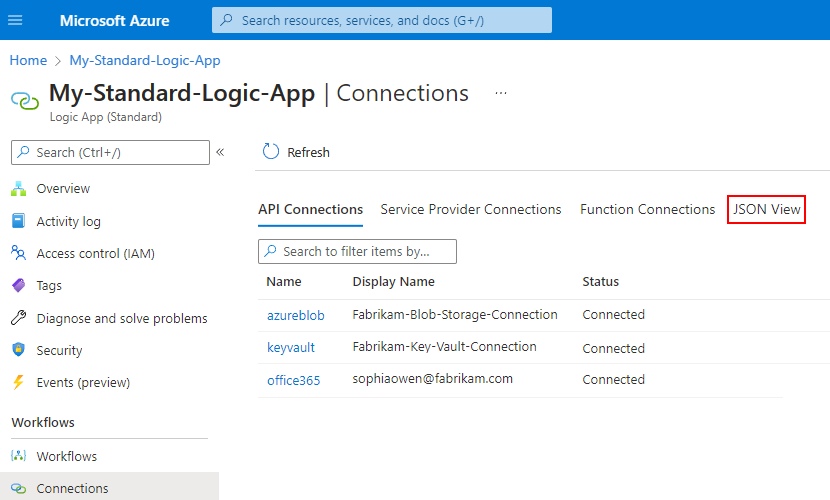
In the JSON editor, find the
managedApiConnectionsobject. This object contains the API connections across all workflows in your logic app resource.Find the connection where you want to add a user-assigned managed identity.
For example, suppose your workflow has an Azure Key Vault connection:
"keyvault": {
   "api": {
      "id": "/subscriptions/<Azure-subscription-ID>/providers/Microsoft.Web/locations/<Azure-region>/managedApis/keyvault"
   },
   "authentication": {
      "type": "ManagedServiceIdentity"
   },
   "connection": {
      "id": "/subscriptions/<Azure-subscription-ID>/resourceGroups/<resource-group-name>/providers/Microsoft.Web/connections/<connector-name>"
   },
   "connectionProperties": {
      "authentication": {
         "audience": "https://vault.azure.cn",
         "type": "ManagedServiceIdentity"
      }
   },
   "connectionRuntimeUrl": "<connection-runtime-URL>"
}
In the connection definition, follow these steps:
Find the first
authenticationobject. If noidentityproperty exists in thisauthenticationobject, the logic app implicitly uses the system-assigned identity.Add an
identityproperty by using the example in this step.Set the property value to the resource ID for the user-assigned identity.
"keyvault": {
   "api": {
      "id": "/subscriptions/<Azure-subscription-ID>/providers/Microsoft.Web/locations/<Azure-region>/managedApis/keyvault"
   },
   "authentication": {
      "type": "ManagedServiceIdentity",
      // Add "identity" property here
      "identity": "/subscriptions/<Azure-subscription-ID>/resourcegroups/<resource-group-name>/providers/Microsoft.ManagedIdentity/userAssignedIdentities/<identity-resource-ID>"
   },
   "connection": {
      "id": "/subscriptions/<Azure-subscription-ID>/resourceGroups/<resource-group-name>/providers/Microsoft.Web/connections/<connector-name>"
   },
   "connectionProperties": {
      "authentication": {
         "audience": "https://vault.azure.cn",
         "type": "ManagedServiceIdentity"
      }
   },
   "connectionRuntimeUrl": "<connection-runtime-URL>"
}
In the Azure portal, go to the target resource, and give access to the user-assigned managed identity, based on the target resource's needs.
For example, for Azure Key Vault, add the identity to the key vault's access policies. For Azure Blob Storage, assign the necessary role for the identity to the storage account.

Disable managed identity
To stop using the managed identity for authentication, follow these steps:
On your logic app resource, disable the system-assigned identity or remove the user-assigned identity.
When you turn off the managed identity on your logic app resource, you remove the capability for that identity to request access to Azure resources where the identity had access.
Note
If you disable the system-assigned identity, all the connections that use the identity in the logic app's workflows stop working at runtime, even if you immediately enable the identity again.
This behavior happens because disabling the identity deletes its object ID. Each time that you enable the identity, Azure generates the identity with a different and unique object ID. To fix this problem, recreate the connections so they use the current object ID for the current system-assigned identity.
Avoid disabling the system-assigned identity as much as possible. To remove the identity's access to Azure resources, remove the identity's role assignment from the target resource. If you delete your logic app resource, Azure automatically removes the managed identity from Microsoft Entra ID.
The following sections show how to disable the managed identity by using the Azure portal and Azure Resource Manager template (ARM template). For Azure PowerShell, Azure CLI, and Azure REST API, see:
| Tool | Documentation |
|---|---|
| Azure PowerShell | 1. Remove role assignment. 2. Delete user-assigned identity. |
| Azure CLI | 1. Remove role assignment. 2. Delete user-assigned identity. |
| Azure REST API | 1. Remove role assignment. 2. Delete user-assigned identity. |
For more information, see Remove Azure role assignments.
Disable managed identity in the Azure portal
To remove access for the managed identity, remove the identity's role assignment from the target resource, and then disable the managed identity.
Remove role assignment
The following steps remove access to the target resource from the managed identity:
In the Azure portal, go to the target Azure resource where you want to remove access for the managed identity.
From the target resource sidebar, select Access control (IAM). Under the toolbar, select Role assignments.
In the roles list, select the managed identities that you want to remove. On the toolbar, select Remove.
Note
If the Remove option is disabled, you most likely don't have permissions. For more information about the permissions that let you manage roles for resources, see Administrator role permissions in Microsoft Entra ID.
Disable managed identity on logic app resource
In the Azure portal, open your logic app resource.
On the logic app resource sidebar, under Settings, select Identity, and then follow the steps for your identity:
Select System assigned > Off > Save. When Azure prompts you to confirm, select Yes.
Select User assigned and the managed identity, and then select Remove. When Azure prompts you to confirm, select Yes.
Disable managed identity in an ARM template
If you created the logic app's managed identity by using an ARM template, set the identity object's type child property to None.
"identity": {
   "type": "None"
}