可通过 Azure PowerShell 使用 TLS/SSL 终端的证书创建使用虚拟机规模集作为后端服务器的应用程序网关。 在此示例中,规模集包含两个添加到应用程序网关的默认后端池的虚拟机实例。
在本文中,学习如何:
- 创建自签名证书
- 设置网络
- 使用证书创建应用程序网关
- 使用默认后端池创建虚拟机规模集
如果没有 Azure 订阅,可在开始前创建一个试用帐户。
注意
建议使用 Azure Az PowerShell 模块与 Azure 交互。 若要开始,请参阅安装 Azure PowerShell。 若要了解如何迁移到 Az PowerShell 模块,请参阅 将 Azure PowerShell 从 AzureRM 迁移到 Az。
本文需要 Azure PowerShell 模块 1.0.0 或更高版本。 运行 Get-Module -ListAvailable Az 即可查找版本。 如果需要进行升级,请参阅 Install Azure PowerShell module(安装 Azure PowerShell 模块)。 如果在本地运行 PowerShell,则还需运行 Connect-AzAccount -Environment AzureChinaCloud 以创建与 Azure 的连接。
创建自签名证书
为供生产使用,应导入由受信任的提供程序签名的有效证书。 对于本文,请使用 New-SelfSignedCertificate 创建自签名证书。 可以结合返回的指纹使用 Export-PfxCertificate,从证书导出 pfx 文件。
New-SelfSignedCertificate `
  -certstorelocation cert:\localmachine\my `
  -dnsname www.contoso.com
应会显示如下结果所示的内容:
PSParentPath: Microsoft.PowerShell.Security\Certificate::LocalMachine\my

Thumbprint                                Subject
----------                                -------
E1E81C23B3AD33F9B4D1717B20AB65DBB91AC630  CN=www.contoso.com
使用指纹创建 pfx 文件:
$pwd = ConvertTo-SecureString -String "Azure123456!" -Force -AsPlainText

Export-PfxCertificate `
  -cert cert:\localMachine\my\E1E81C23B3AD33F9B4D1717B20AB65DBB91AC630 `
  -FilePath c:\appgwcert.pfx `
  -Password $pwd
创建资源组
资源组是在其中部署和管理 Azure 资源的逻辑容器。 使用 New-AzResourceGroup 创建名为 myResourceGroupAG 的 Azure 资源组。
New-AzResourceGroup -Name myResourceGroupAG -Location chinanorth2
创建网络资源
使用 New-AzVirtualNetworkSubnetConfig 配置名为 myBackendSubnet 和 myAGSubnet 的子网。 使用 New-AzVirtualNetwork 和子网配置创建名为 myVNet 的虚拟网络。 最后使用 New-AzPublicIpAddress 创建名为 myAGPublicIPAddress 的公共 IP 地址。 这些资源用于提供与应用程序网关及其关联资源的网络连接。
$backendSubnetConfig = New-AzVirtualNetworkSubnetConfig `
  -Name myBackendSubnet `
  -AddressPrefix 10.0.1.0/24

$agSubnetConfig = New-AzVirtualNetworkSubnetConfig `
  -Name myAGSubnet `
  -AddressPrefix 10.0.2.0/24

$vnet = New-AzVirtualNetwork `
  -ResourceGroupName myResourceGroupAG `
  -Location chinanorth2 `
  -Name myVNet `
  -AddressPrefix 10.0.0.0/16 `
  -Subnet $backendSubnetConfig, $agSubnetConfig

$pip = New-AzPublicIpAddress `
  -ResourceGroupName myResourceGroupAG `
  -Location chinanorth2 `
  -Name myAGPublicIPAddress `
  -AllocationMethod Static `
  -Sku Standard
创建应用程序网关
创建 IP 配置和前端端口
使用 New-AzApplicationGatewayIPConfiguration 将前面创建的 myAGSubnet 关联到应用程序网关。 使用 New-AzApplicationGatewayFrontendIPConfig 将 myAGPublicIPAddress 分配给应用程序网关。
$vnet = Get-AzVirtualNetwork `
  -ResourceGroupName myResourceGroupAG `
  -Name myVNet

$subnet=$vnet.Subnets[0]

$gipconfig = New-AzApplicationGatewayIPConfiguration `
  -Name myAGIPConfig `
  -Subnet $subnet

$fipconfig = New-AzApplicationGatewayFrontendIPConfig `
  -Name myAGFrontendIPConfig `
  -PublicIPAddress $pip

$frontendport = New-AzApplicationGatewayFrontendPort `
  -Name myFrontendPort `
  -Port 443
创建后端池和设置
使用 New-AzApplicationGatewayBackendAddressPool 为应用程序网关创建名为 appGatewayBackendPool 的后端池。 使用 New-AzApplicationGatewayBackendHttpSettings 配置后端池的设置。
$defaultPool = New-AzApplicationGatewayBackendAddressPool `
  -Name appGatewayBackendPool

$poolSettings = New-AzApplicationGatewayBackendHttpSettings `
  -Name myPoolSettings `
  -Port 80 `
  -Protocol Http `
  -CookieBasedAffinity Enabled `
  -RequestTimeout 120
创建默认侦听器和规则
应用程序网关需要侦听器才能适当地将流量路由到后端池。 在此示例中,将一个创建基本侦听器以侦听根 URL 上的 HTTPS 流量。
使用 New-AzApplicationGatewaySslCertificate 创建证书对象,然后结合前端配置、前端端口和前面创建的证书使用 New-AzApplicationGatewayHttpListener 创建名为 mydefaultListener 的侦听器。 侦听器需要使用规则来了解哪个后端池使用传入流量。 使用 New-AzApplicationGatewayRequestRoutingRule 创建一个名为 rule1 的基本规则。
$pwd = ConvertTo-SecureString `
  -String "Azure123456!" `
  -Force `
  -AsPlainText

$cert = New-AzApplicationGatewaySslCertificate `
  -Name "appgwcert" `
  -CertificateFile "c:\appgwcert.pfx" `
  -Password $pwd

$defaultlistener = New-AzApplicationGatewayHttpListener `
  -Name mydefaultListener `
  -Protocol Https `
  -FrontendIPConfiguration $fipconfig `
  -FrontendPort $frontendport `
  -SslCertificate $cert

$frontendRule = New-AzApplicationGatewayRequestRoutingRule `
  -Name rule1 `
  -RuleType Basic `
  -HttpListener $defaultlistener `
  -BackendAddressPool $defaultPool `
  -BackendHttpSettings $poolSettings `
  -priority 100
使用证书创建应用程序网关
现在已创建所需的支持资源,请使用 New-AzApplicationGatewaySku 为名为 myAppGateway 的应用程序网关指定参数,然后结合证书使用 New-AzApplicationGateway 创建网关。
创建应用程序网关
$sku = New-AzApplicationGatewaySku `
  -Name Standard_v2 `
  -Tier Standard_v2 `
  -Capacity 2

$appgw = New-AzApplicationGateway `
  -Name myAppGateway `
  -ResourceGroupName myResourceGroupAG `
  -Location chinanorth2 `
  -BackendAddressPools $defaultPool `
  -BackendHttpSettingsCollection $poolSettings `
  -FrontendIpConfigurations $fipconfig `
  -GatewayIpConfigurations $gipconfig `
  -FrontendPorts $frontendport `
  -HttpListeners $defaultlistener `
  -RequestRoutingRules $frontendRule `
  -Sku $sku `
  -SslCertificates $cert
创建虚拟机规模集
在此示例中,将创建虚拟机规模集,以便为应用程序网关的后端池提供服务器。 配置 IP 设置时将规模集分配给后端池。
$vnet = Get-AzVirtualNetwork `
  -ResourceGroupName myResourceGroupAG `
  -Name myVNet

$appgw = Get-AzApplicationGateway `
  -ResourceGroupName myResourceGroupAG `
  -Name myAppGateway

$backendPool = Get-AzApplicationGatewayBackendAddressPool `
  -Name appGatewayBackendPool `
  -ApplicationGateway $appgw

$ipConfig = New-AzVmssIpConfig `
  -Name myVmssIPConfig `
  -SubnetId $vnet.Subnets[1].Id `
  -ApplicationGatewayBackendAddressPoolsId $backendPool.Id

$vmssConfig = New-AzVmssConfig `
  -Location chinanorth2 `
  -SkuCapacity 2 `
  -SkuName Standard_DS2 `
  -UpgradePolicyMode Automatic

Set-AzVmssStorageProfile $vmssConfig `
  -ImageReferencePublisher MicrosoftWindowsServer `
  -ImageReferenceOffer WindowsServer `
  -ImageReferenceSku 2016-Datacenter `
  -ImageReferenceVersion latest `
  -OsDiskCreateOption FromImage

Set-AzVmssOsProfile $vmssConfig `
  -AdminUsername azureuser `
  -AdminPassword "Azure123456!" `
  -ComputerNamePrefix myvmss

Add-AzVmssNetworkInterfaceConfiguration `
  -VirtualMachineScaleSet $vmssConfig `
  -Name myVmssNetConfig `
  -Primary $true `
  -IPConfiguration $ipConfig

New-AzVmss `
  -ResourceGroupName myResourceGroupAG `
  -Name myvmss `
  -VirtualMachineScaleSet $vmssConfig
安装 IIS
$publicSettings = @{ "fileUris" = (,"https://raw.githubusercontent.com/Azure/azure-docs-powershell-samples/master/application-gateway/iis/appgatewayurl.ps1");
  "commandToExecute" = "powershell -ExecutionPolicy Unrestricted -File appgatewayurl.ps1" }

$vmss = Get-AzVmss -ResourceGroupName myResourceGroupAG -VMScaleSetName myvmss

Add-AzVmssExtension -VirtualMachineScaleSet $vmss `
  -Name "customScript" `
  -Publisher "Microsoft.Compute" `
  -Type "CustomScriptExtension" `
  -TypeHandlerVersion 1.8 `
  -Setting $publicSettings

Update-AzVmss `
  -ResourceGroupName myResourceGroupAG `
  -Name myvmss `
  -VirtualMachineScaleSet $vmss
测试应用程序网关
可以使用 Get-AzPublicIPAddress 获取应用程序网关的公共 IP 地址。 复制该公共 IP 地址,并将其粘贴到浏览器的地址栏。
Get-AzPublicIPAddress -ResourceGroupName myResourceGroupAG -Name myAGPublicIPAddress
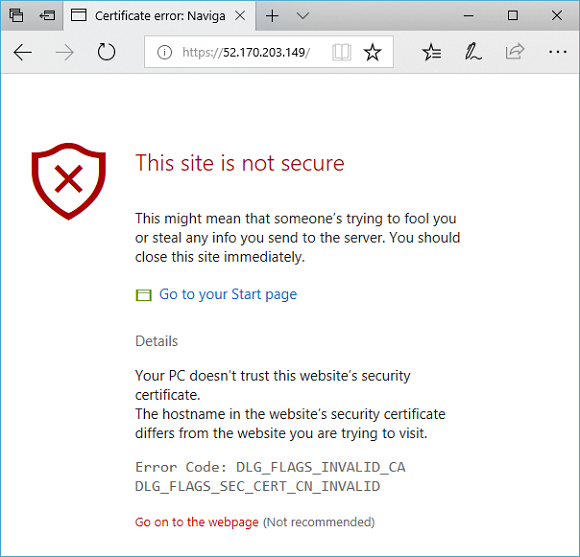
若要接受有关使用自签名证书的安全警告,请依次选择“详细信息”和“继续转到网页”。 随即显示受保护的 IIS 网站,如下例所示:

清理资源
如果不再需要资源组、应用程序网关和所有相关资源,可以使用 Remove-AzResourceGroup 将其删除。
Remove-AzResourceGroup -Name myResourceGroupAG